How to Fix Elephant Foot Issues in 3D Prints
Having First Layers Stretched Affects Dimensional Accuracy of the Print
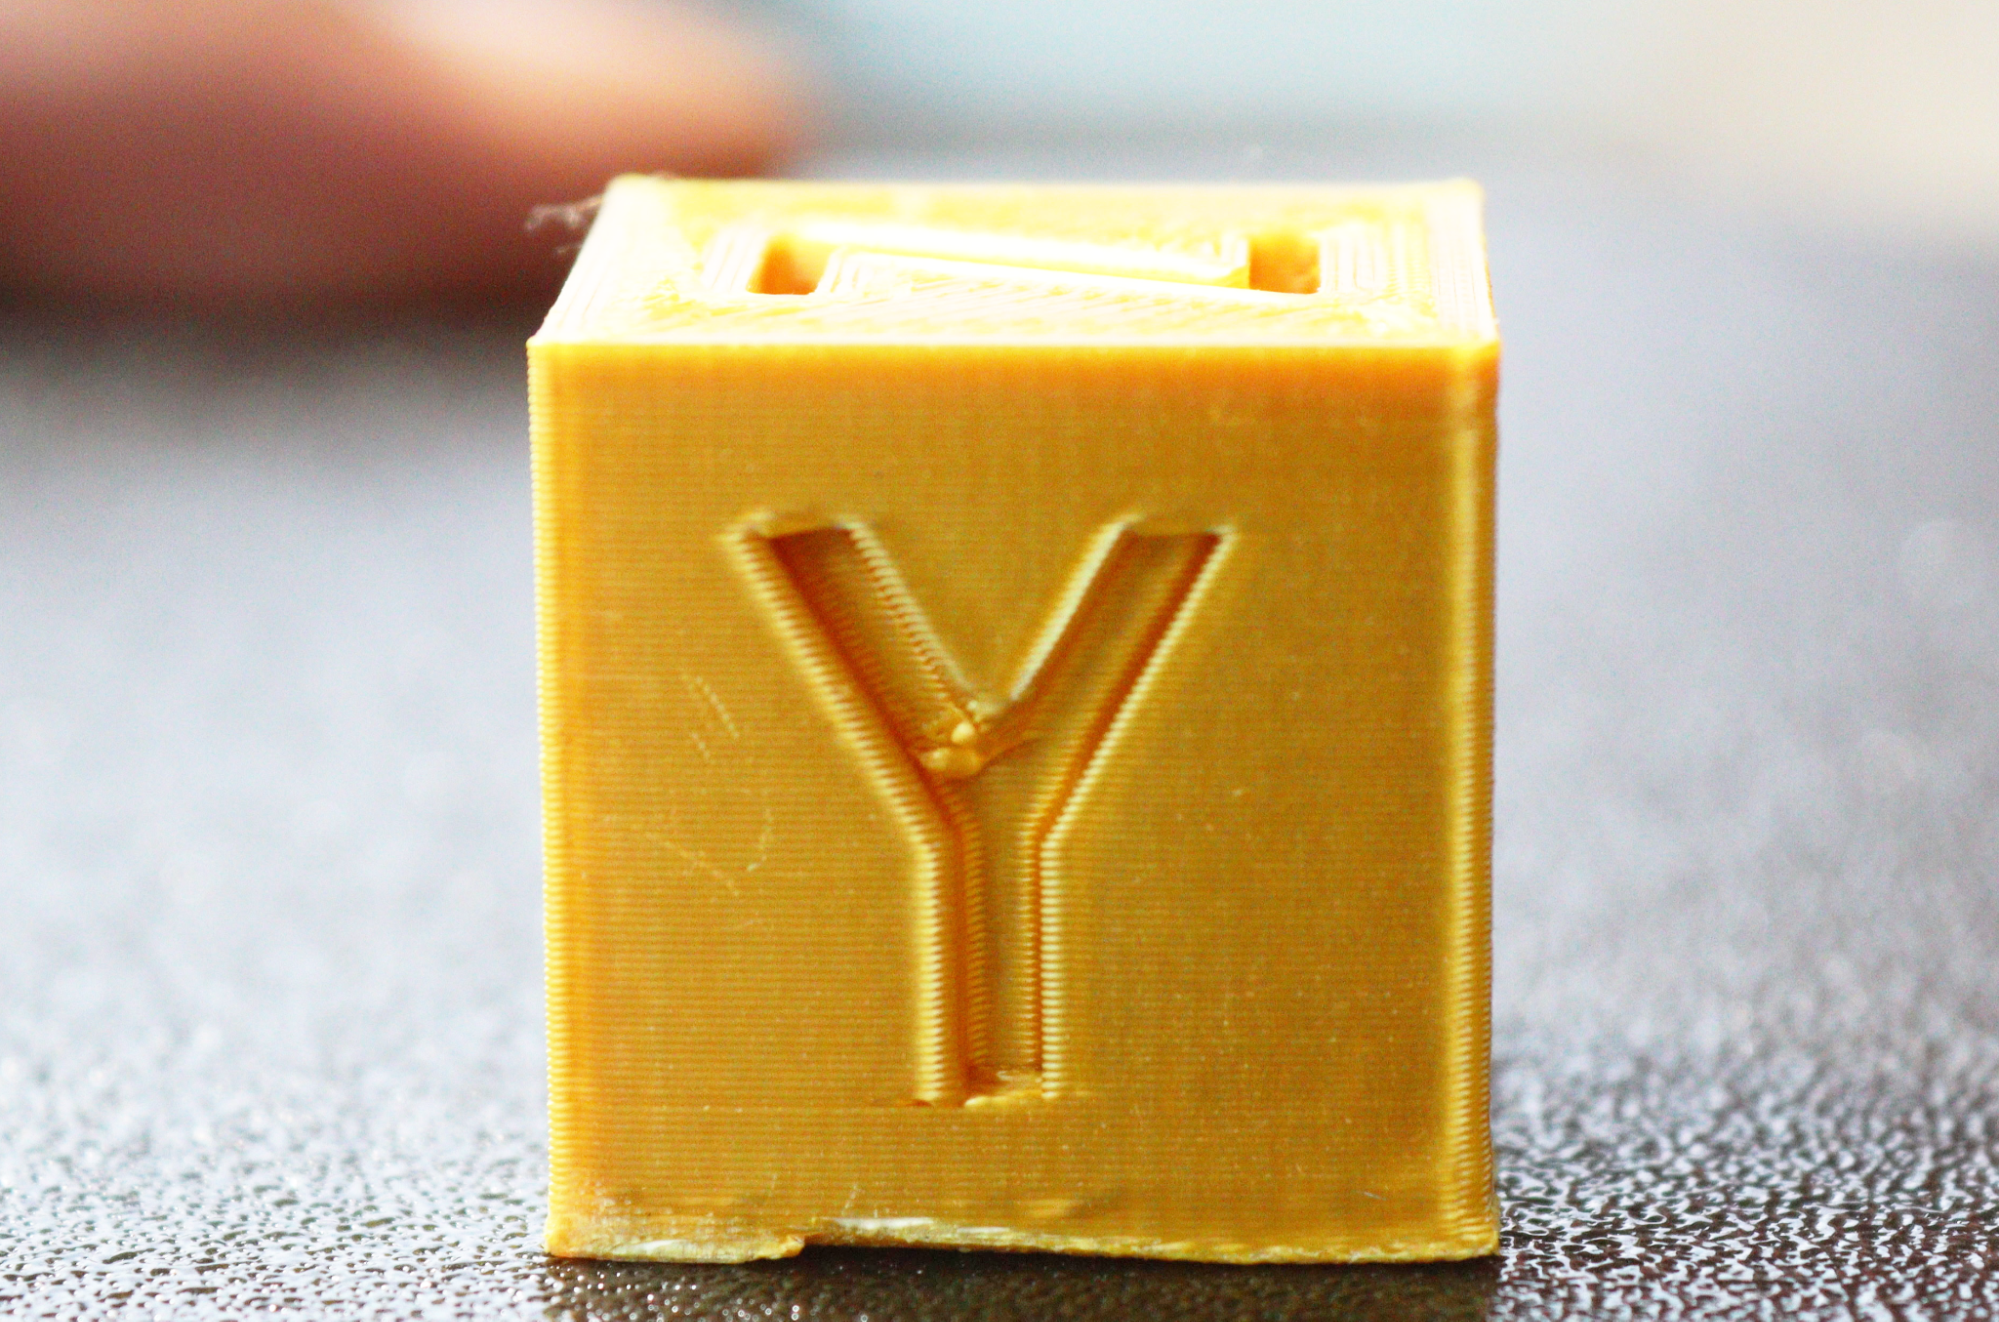
Elephant foot is a 3D printing problem where the first few layers of the print appear flattened or widened. This issue can affect the dimensional accuracy of the print, especially those designs in which fine details are key. Also, if the parts are meant to be assembled with others it can be difficult as the parts that are distorted may not align properly with the rest. Elephant foot issues can result from various factors like high bed temperatures or the print head being too close to the bed.
Even on the best 3D printers, improper bed leveling can also cause the problem as the distance of the nozzle from the bed may vary across different areas, and it can result in pressure being applied on the layers on the raised sections of the bed. But just like any other 3D printing issue, you can solve the elephant foot problem easily too if you follow the appropriate methods, as described below.
1. Properly Set the Z-Axis Offset
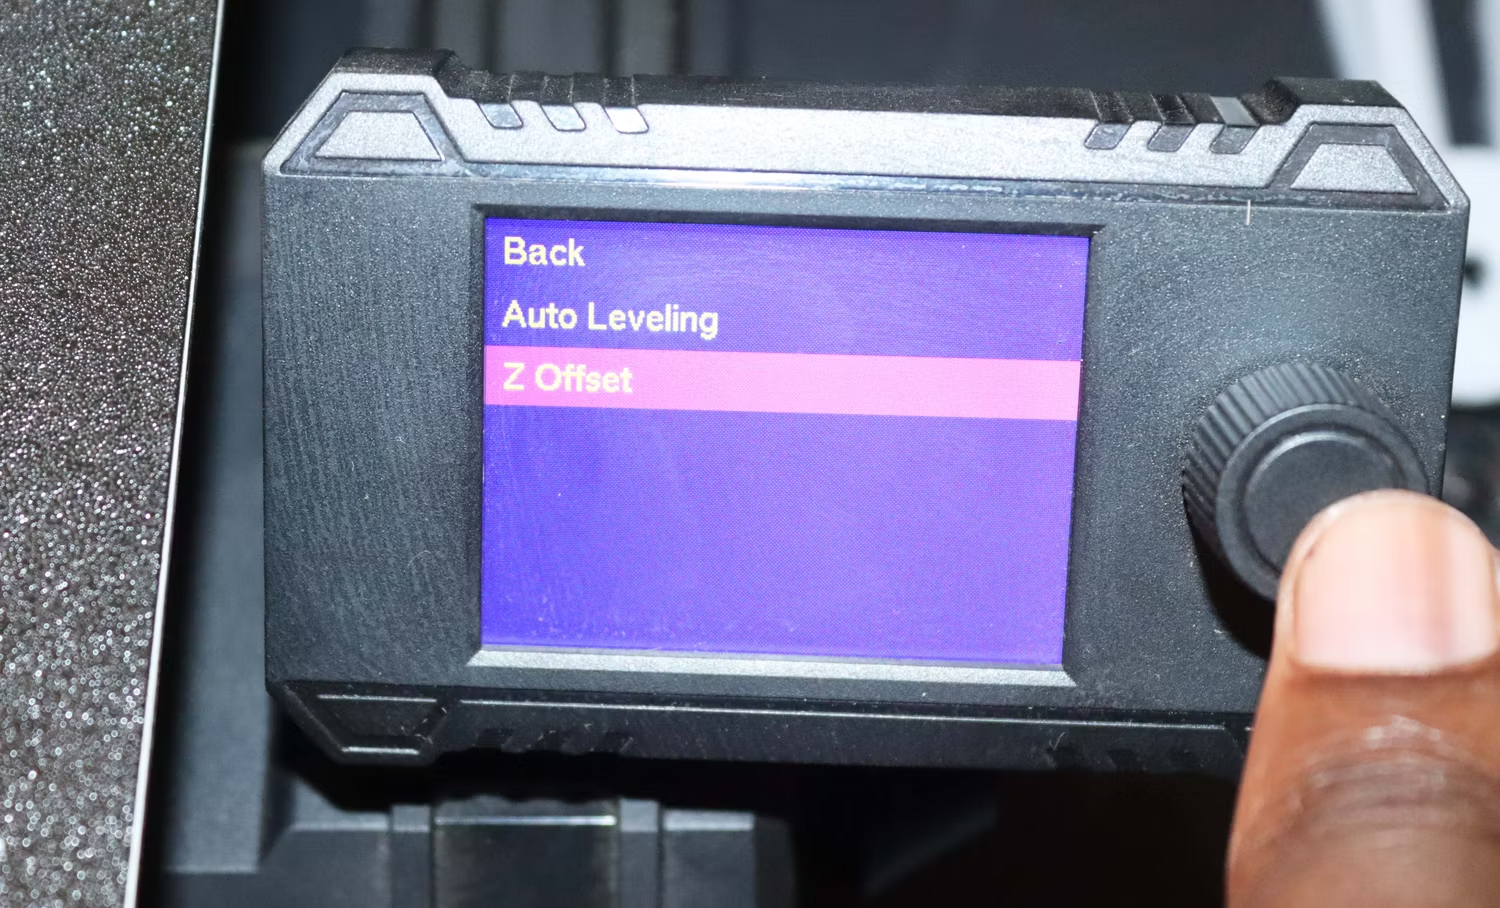
The Z offset determines the distance between the printer's nozzle and the bed during the first layer of a print. If the distance between the nozzle and the bed is too close, the filament will be firmly pressed and the excess material will spread wider than intended, causing the print's base to appear wider and flatter.
If the distance is too large, there will be layer adhesion issues, and it can result in print failure. Before adjusting the Z-offset, you need to ensure that the 3D printer bed is well-leveled. You can manually level your 3D printer bed or use the automatic option if your printer supports it. This is important as it ensures that the nozzle is at the same height at all the corners of the bed. You can adjust the Z offset either through the LCD screen (if your 3D printer has that option) or you can adjust it in the 3D printer slicer.
To adjust using the G-code, you can use the commands G0 Z0 and G92 Z-0.1. G0 Z0 instructs the 3D printer head to move to the zero position on the Z axis, and G92 Z-0.1 instructs it to interpret its current position as if it is lower than 0.1mm.
If you are using Cura slicer, you can adjust it by installing Z offset plugin. Most of the best 3D printers support adjusting the Z offset using the LCD screen. For example, in Anycubic Kobra 2, you can find the option in the Menu > Leveling > Z Offset section. To adjust, place a piece of paper on the print bed and then turn the knob to move the print head until it touches the paper. You can try to move the paper by hand and if it’s difficult to drag, save the settings by pressing the knob. In addition to adjusting the Z offset, you need to check the nuts on the Z axis and ensure they are too tight or loose.
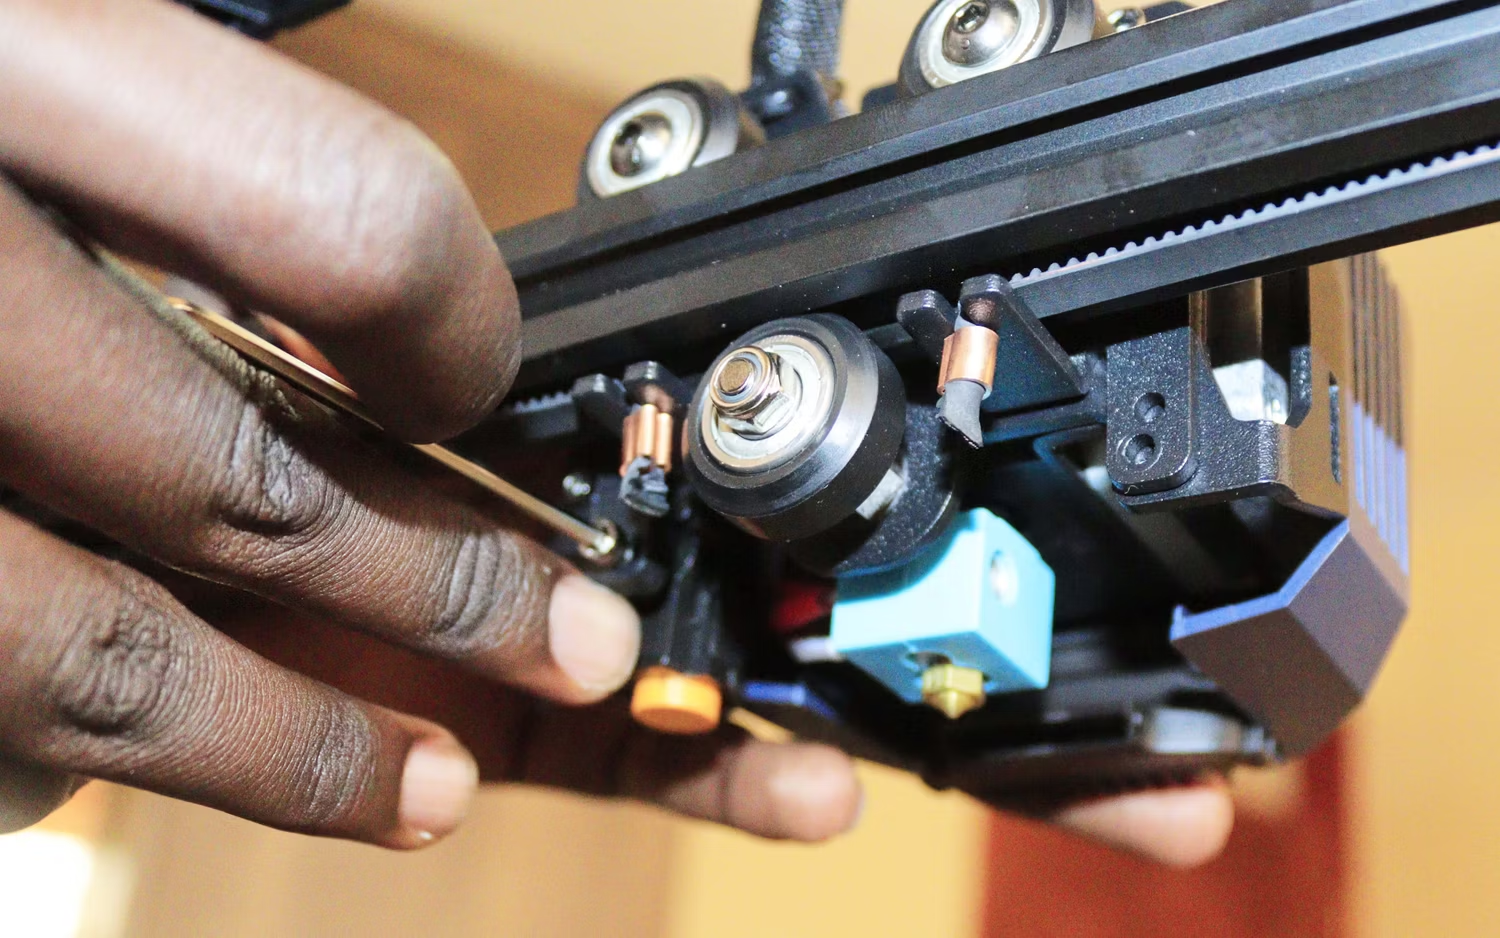
If the nuts on the Z-axis are too tight, it can cause resistance in the vertical movement, which will make the Z-axis struggle, causing layer misalignment. If they are too loose on the other hand, it can result in wobbling in the Z-axis movement.
Stay On the Cutting Edge: Get the Tom's Hardware Newsletter
Get Tom's Hardware's best news and in-depth reviews, straight to your inbox.
2. Adjust the Bed Temperature
If the bed temperature is too high, the initial layers of the material can become more fluid before the next layer is deposited and as the print head moves, it can spread outwards, resulting in a wider and flatter first layer. Also, the weight of the layers can cause build-up pressure on the bottom layers, causing them to bulge outside. You need to find the right balance for bed temperature for the specific filament you are using. You can adjust the temperature by 5 degrees until you get the appropriate temperature.
3. 3D Print With a Raft
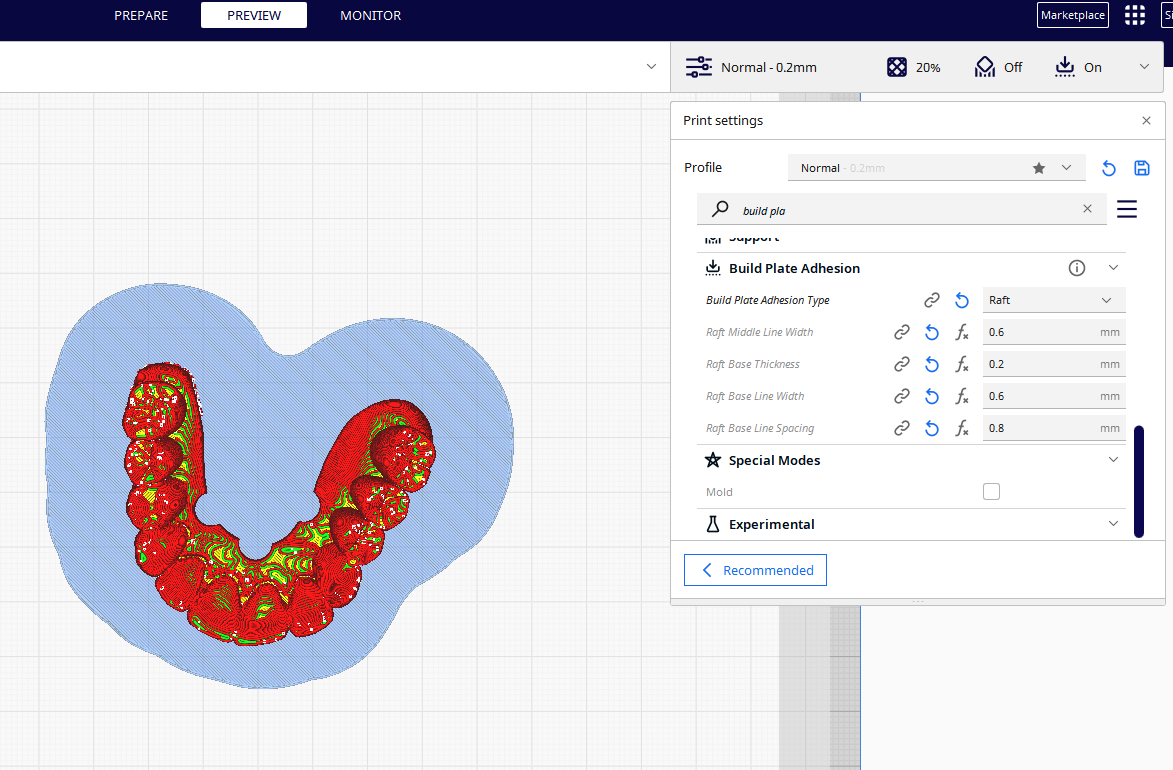
A raft is an additional supportive layer of material printed beneath the design to provide a stable foundation. The raft acts as a sacrificial layer, and it will absorb any irregularities in the surface of the bed instead of the design itself. You can enable it on the slicer. In Cura, you can find it in the Build Plate Adhesion section.
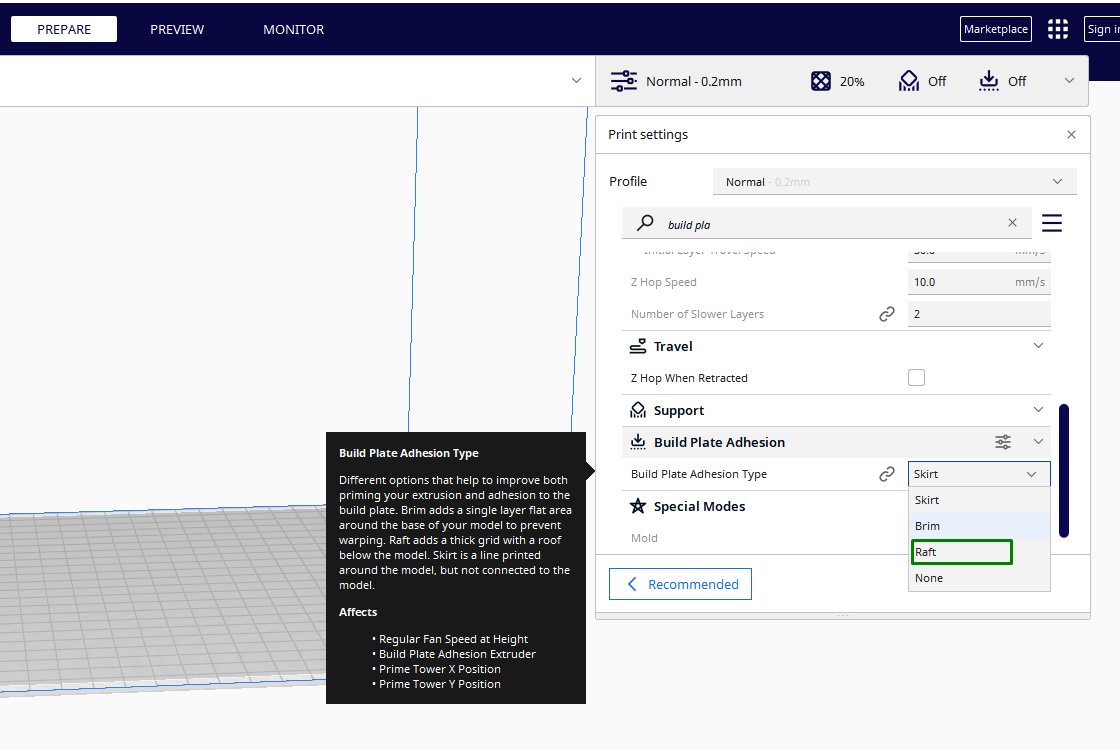
Once you select it, you will see an option to adjust various raft settings like width, thickness, and line spacing. You can adjust the parameters and optimize it based on the parts you are 3D printing. After 3D printing, you will need to remove the raft carefully.
4. Adjust Initial Layer Horizontal Expansion
The Initial Layer Horizontal Expansion in Cura is a setting that allows you to adjust the dimensions of the first layers in the horizontal section. You can find this setting in the Walls section.
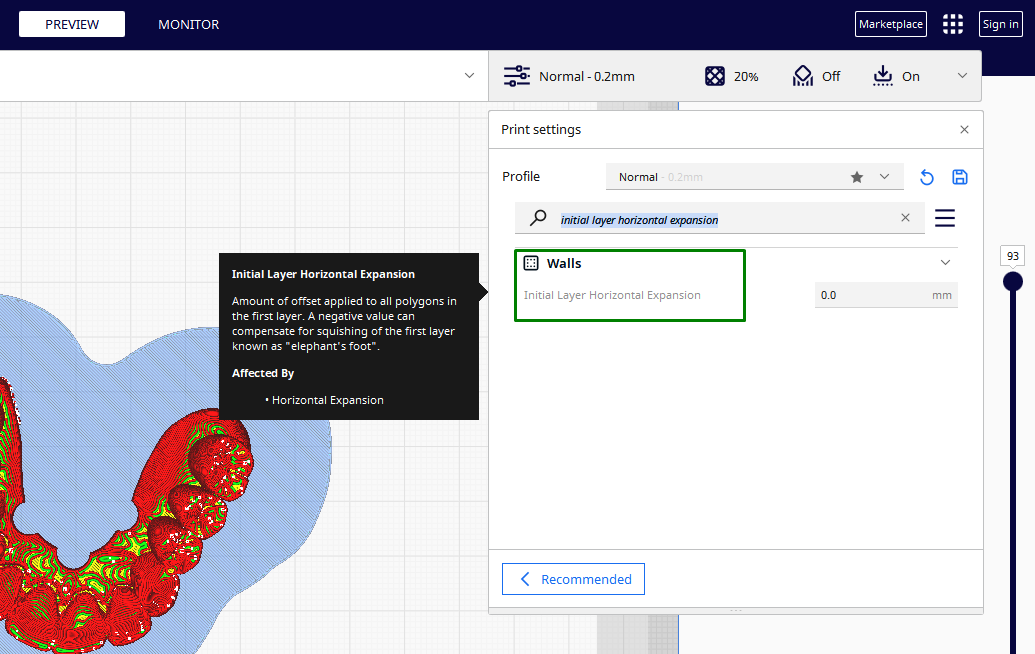
Positive values will increase the width of the initial layer, helping ensure that there is better adhesion; however, increasing too much can result in elephant foot issues. Negative values will reduce the width and help prevent excess material from spreading. You need to experiment until you find the optimal setting for your print.
5. Use Chamfers
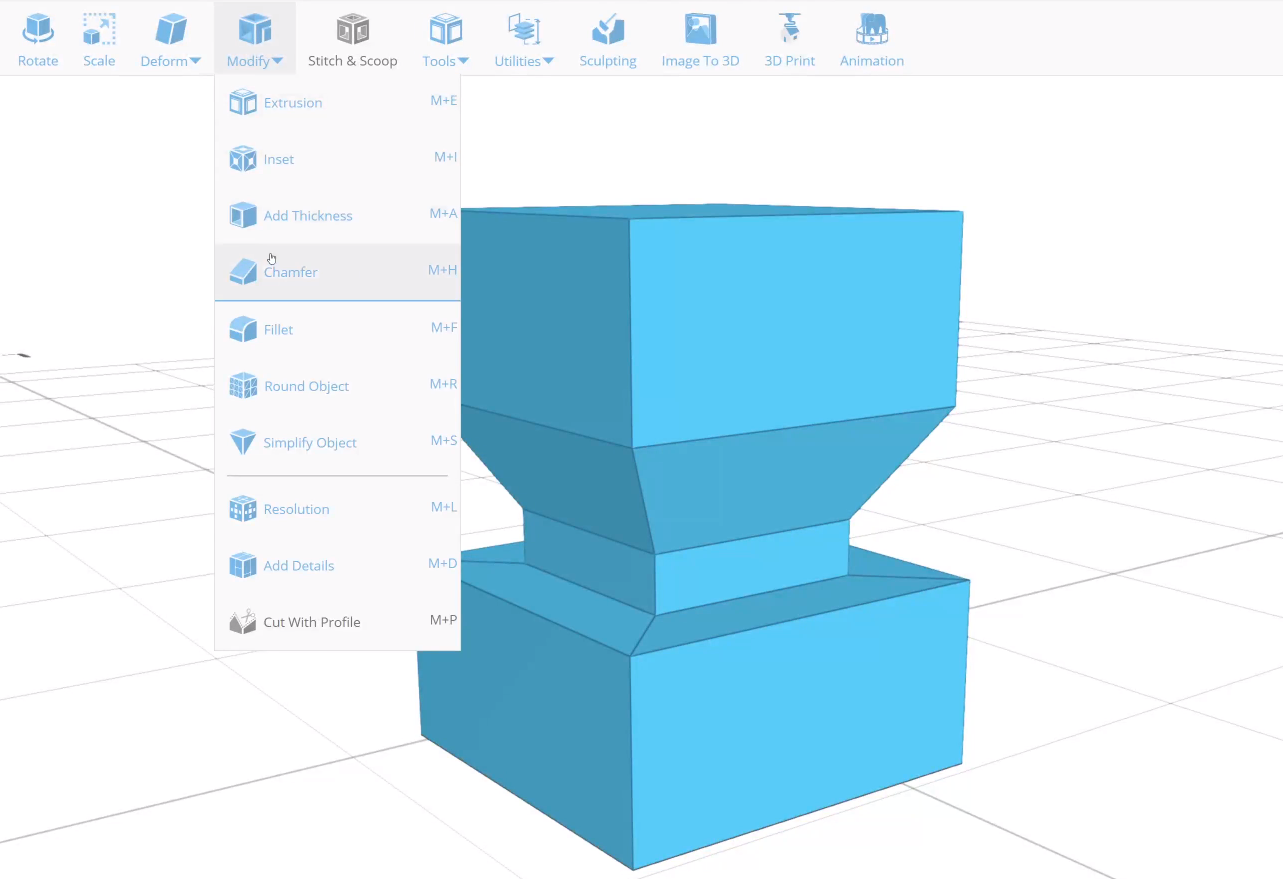
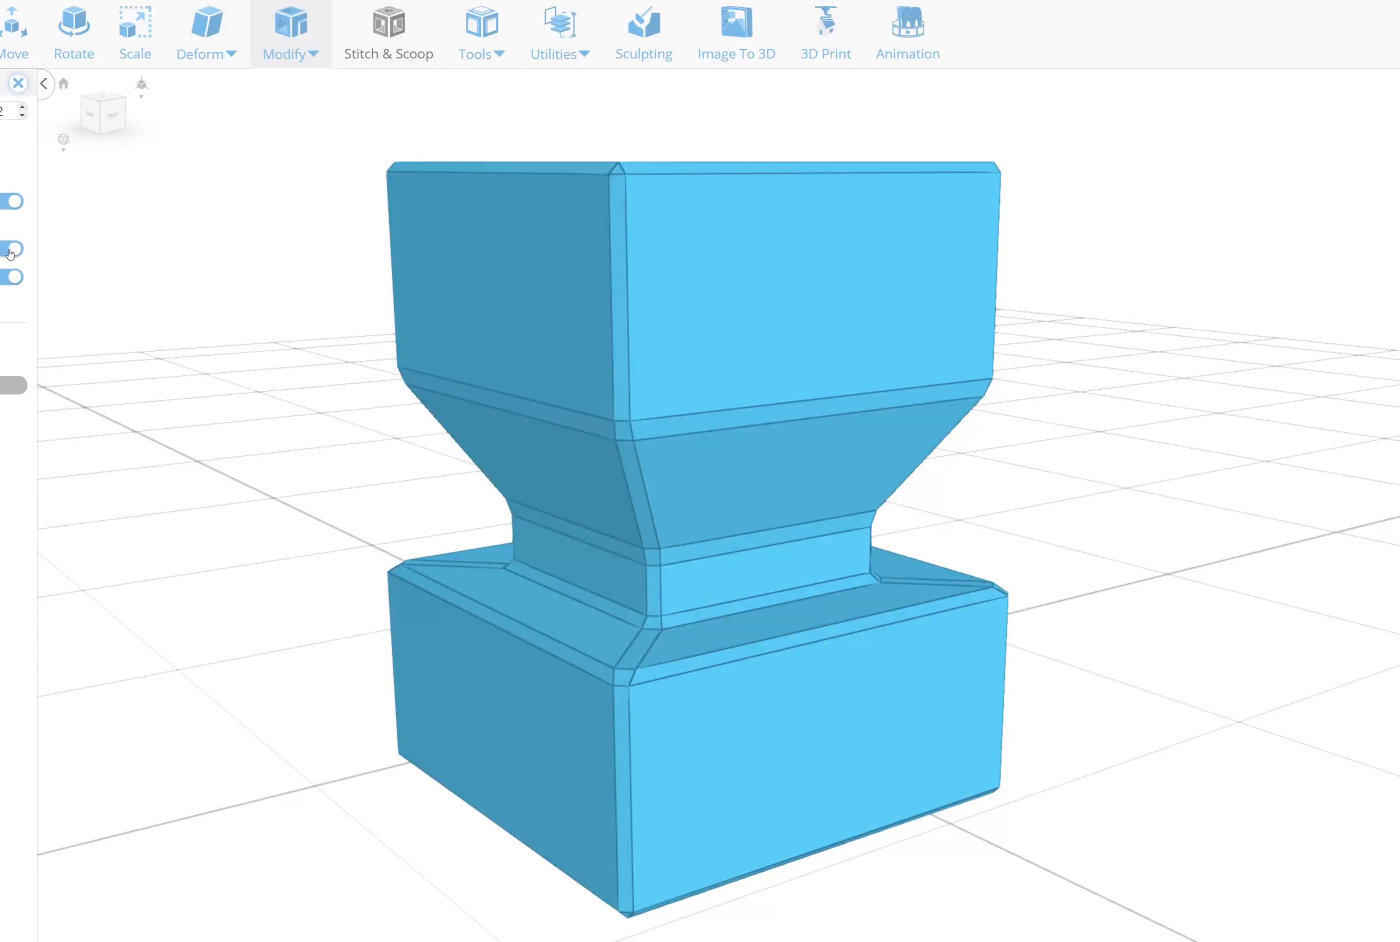
A chamfer is a geometric element that involves removing sharp edges or corners in the design and introducing sloped surfaces which provide a smooth transition, reducing stress concentrations at the corners during material deposition. Many CAD applications have that tool; you can import it to any of them and apply it before sending it to the slicer. Below is an example of a design with sharp corners and edges before applying chamfer.
After applying chamfer, you will realize that the sharp corners are now rounded and smooth instead.
6. Use Elephant Foot Compensation
If you are using Prusaslicer, you can avoid elephant foot issues by activating the Elephant Foot Compensation feature. Activating this feature will shrink or reduce the first layer. Also, it detects thin lines on the first first layers and it ensures that it does not over shrink them. You can find this setting on Print settings > Advanced > Elephant foot compensation.
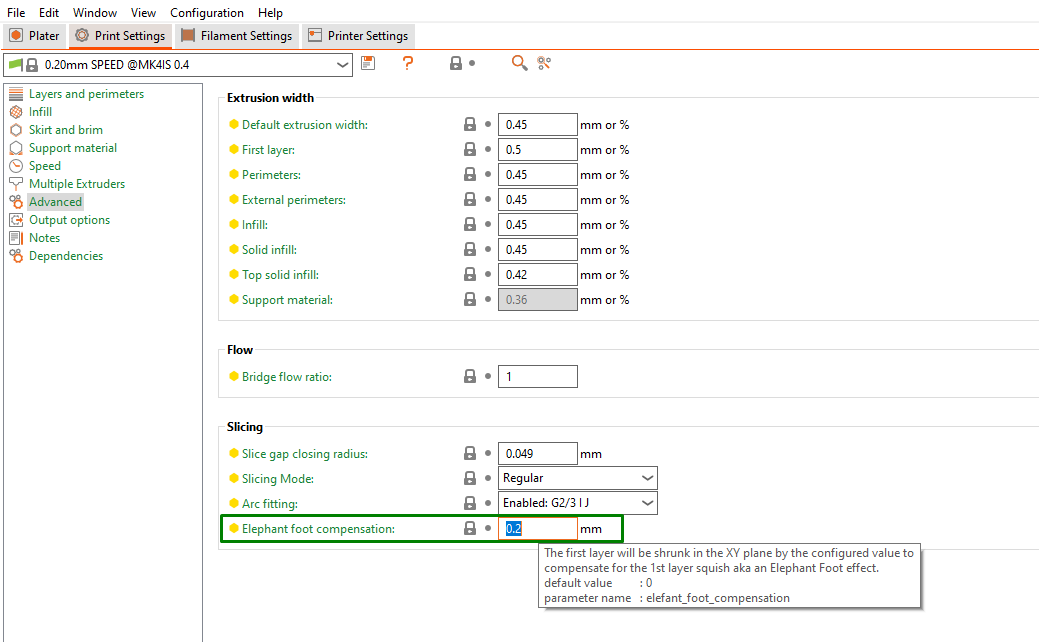
The above method will help you fix the elephant foot issues in your 3D prints. However, if it doesn’t, you need to address the problem by applying various post-processing activities like sanding to smooth out the bottom layers. You can also use a file for more prominent layers, especially those on large prints or the parts printed with tough materials.
More 3D Printing Tutorials
👉 5 Ways Fix Z Banding in 3D Printing
👉 How to Use FreeCAD for 3D Printing
👉 How to Convert OBJ Files to STL Files for 3D Printing
👉 How to Use PrusaSlicer: A Beginners Guide