How to Make Your First 3D Print: From STL to Printed Model
Excited to use your new 3D printer, but don’t know where to start? We’ve got you covered.
Preparing your first 3D model for 3D printing can be a daunting experience. Fortunately, you don’t need to design your own model as there are thousands of great designs available for free as STL files on sites such as Thingiverse. However, once you’ve chosen a model that you want to print, you still need to follow a few steps to turn that STL file in physical print.
Below, we’ll show you how to print a typical STL file on a typical FDM printer, though no matter what device you use, the basic steps should be similar. If you’ve never 3D printed before, this is a great way to get started. Check out our best budget 3D printers for beginner or entry-level recommendations.
Here’s what you need to 3D Print
- 3D Printer: We’re using the Creality Ender 3 Pro, a solid entry-level 3D printer. However, other filament-based (aka FDM) printers should work similarly. If you need to choose, see our list of best 3D printers.
- Filament: PLA is one of the most commonly used materials on the Ender 3, and in this article we’ll be using Begonova branded material.
- 3D Model: The 3D Benchy is an ideal first print for your 3D printer; it offers a calibration test and is a fun model in a single print. However you can also download STL files from sites such as Thingiverse.
- Slicing Software: In order to print your model, you’ll need to convert it from a solid 3D model to a series of slices that can be printed using an app called a slicer. We’ll be using Creality Slicer for this article, but most slicing apps offer similar features and the basic principles are the same.
- microSD Card: The Ender 3 Pro includes an 8GB microSD card for transferring files, but some printers include a USB drive. Most sliced gcode files will be between 5MB and 15MB, so anything over 1GB should work fine.
Getting Started
Before we get started, you’ll need to download both your 3D model as well as the slicer software for your 3D printer.
- Download the 3D Benchy model from Thingiverse, an online repository of 3D models that doesn’t require an account to download files.
- Download the slicer software for your 3D printer. We’ll be using Creality Slicer for the Creality Ender 3 Pro, but other common slicers include Cura, PrusaSlicer, and Simplify3D.
Picking a Model to 3D Print
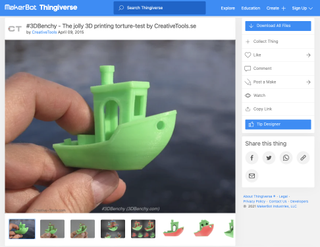
The 3D Benchy model by CreativeTools is a great first print that will help you dial in the settings on your 3D printer and also leave you with a fun tugboat model to show off! The Benchy model typically prints in about an hour and a half, and many of the features and details of the model can be used to identify and diagnose any mechanical issues on your printer such as loose belts, inadequate part cooling, and Z-offset calibration. However, these instructions should work for other STL files you find on Thingiverse, including Plunderbuss Pete, Aquaticus the Water Dragon and Adalinda the Singing Serpent, all of which are great models for your first 3D print.
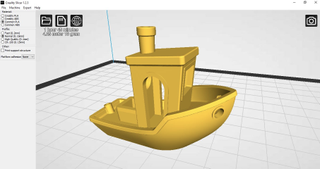
Creality Slicer accepts 3D models that use the .STL file extension, a common extension used for 3D models. Once you’ve downloaded the model, import it into Creality Slicer by opening the app and clicking File, Load Model File, and selecting the 3D Benchy model from the folder where you downloaded it. This will load the 3D model into Creality Slicer so it can be prepared for 3D printing.
Preparing the Model for 3D Printing
Once the model has been imported into the slicer app, we can convert the .STL file into a 3D printable file. A 3D printable file contains all of the instructions needed to turn the .STL 3D model into a printed part by controlling the XYZ motors, extruder, and heating systems of the printer.
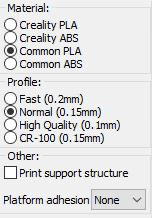
Creality Slicer offers two modes for slicing .STL files: Quickprint and Full. Quickprint allows you to choose a material, profile, platform adhesion aid and also toggle support material on and off. While the Full mode offers more granular control over the print settings, we’re going to use Quickprint for this article so we can cover all the basics. Here’s what to choose on the menu:
Stay On the Cutting Edge: Get the Tom's Hardware Newsletter
Get Tom's Hardware's best news and in-depth reviews, straight to your inbox.
- Material: This is the material being used for the print. Since we’re using PLA, we’ll select ‘Common PLA’ here.
- Profile: Selecting a profile automatically adjusts all of the settings used in making a print including layer height, print speed, travel speed, etc. While these settings are all individually adjustable in the Full mode, selecting a premade profile will get you printing quickly without much adjusting required. We’re going to use ‘Normal (0.15,mm)’, which strikes a good compromise between speed and quality.
- Other: The only option here is to toggle support material on and off. Because the 3D Benchy doesn’t require support material, we can leave this box unchecked.
- Platform Adhesion: Creality Slicer can automatically generate a brim or raft to aid adhesion when using high-temperature materials that tend to warp or curl during printing. Since we’re using PLA, we won’t need to select either of these options and can leave this drop-down menu set to ‘None’.
Toggling ‘Full’ mode on will reveal more adjustable parameters. By selecting the ‘Normal’ Quickprint setting, these settings will all be populated accordingly. While we’re not going to be adjusting any of these settings, it’s worth taking a minute to better understand what they all do.
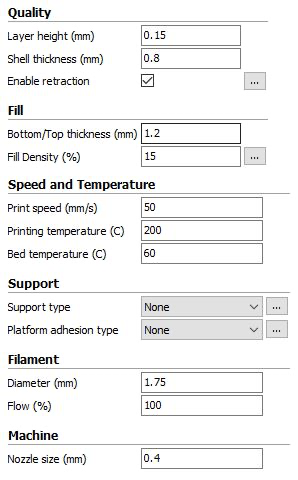
The default values in the above picture are a great place to start, but you can always adjust them in your slicer software if you want to make changes. Some of the terminology may change slightly in different slicer apps, but these settings are generally the same across most common apps.
Quality
- Layer Height: Thicker layers will print more quickly, but they won’t capture as much detail as thinner layers.
- Shell Thickness: Printing a model with a thicker shell will create additional contours on the outside of the model, which can look better on sloping surfaces but will take longer to print.
- Enable Retraction: By enabling retraction, the printer will pull the filament back into the nozzle when moving, preventing stringing or blobbing between travel moves. Too much retraction and the filament may be damaged by the drive gear, too little and the material may ooze during printing. Dialing in retraction can be a time-consuming process, and it may not be needed depending on the type of 3D printer you’re using.
Fill
- Bottom/Top Thickness: Adding additional layers to the top and bottom of the print can help to hide the internal fill pattern, but will also take longer to print.
- Fill Density: Also known as infill, this setting controls the amount of material printed inside the model. Adding infill can make a part stronger, but will take longer to print. The default setting of 15% is a good starting value if you’re looking to experiment.
Speed and Temperature
- Print Speed (mm/s): Increasing your print speed will lead to faster prints, but the overall quality of the model can suffer if this is increased too much.
- Printing Temperature: Most PLA material will extrude at 200C, but sometimes you may want to increase or decrease this value for best results. Too hot and the heat will creep up the filament and cause it to soften and deform, too cold and the material won’t have time to get up to temperature and extrude through the nozzle.
- Bed Temperature: When using a heated bed, enabling this setting will help the material stick to the bed without curling or warping during printing. Similar to the case with the nozzle temperature, setting this too low won’t provide any specific benefit but setting it too high may cause the filament to soften and deform on the lower layers.
Support
- Support Type: The three settings in this dropdown menu are None, Touching Build Plate, and Everywhere. None will print a model without generating any support material, Touching Build Plate will only generate support material that originates on the build plate (for instance, an upright letter T would be supported fully, but an upright letter E would not), and Everywhere will create support material everywhere on the print.
- Platform Adhesion Type: Selecting None will print the model flat on the build plate, Brim will add a few toolpaths of material around the base of the model to help keep it from curling, and Raft will add several layers of material under the model to compensate for an uneven platform.
Filament
- Diameter: PLA filament is typically sold with a 1.75mm diameter, so this setting shouldn’t be changed unless you are using non-standard material.
- Flow: This setting adjusts how much material is fed through the extruder, and typically shouldn’t be changed unless your printer hasn’t been calibrated correctly.
Machine
- Nozzle Size: The Creality Ender 3 Pro (and most desktop 3D printers) ship with a .4mm nozzle, so this setting shouldn’t be changed unless you have swapped out the nozzle for a smaller or larger one.
Checking the Toolpath for 3D Printing
You can see the difference in the three Quickprint profiles in the above pictures (Fast, Normal, and High Quality). A quick way to spot the difference is by looking at the roof of the Benchy, where the number of layers increases with each jump in quality. Thinner layers will capture more detail but the overall print time will increase as well. The Normal setting strikes a compromise between speed and quality, so that’s the setting we’ll choose.
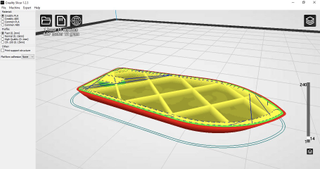
After you’ve chosen the settings for your model, the slicer software will generate a toolpath (instructions for the printer’s movement system) for your model. We can see this toolpath by selecting ‘Toolpath’ in the dropdown menu under the ‘View Mode’ button at the top right. This is a good time to check the file before printing, and make sure there are no areas that might cause problems later. Scrolling through the layers we can see the infill and outer shell, and determine that this model is ready for printing.
Preparing the 3D Printer
Once the model has been sliced and is ready for export, it’s time to make sure the printer is ready to print. There are two major components to this process: loading the PLA filament into the extruder and calibrating the build platform. Loading the filament gives the printer material to complete the print, and calibrating the build platform ensures that the nozzle is perpendicular to the build plate at all points and compensates for any warp or bowing present.
The steps here are for the Creality Ender 3 Pro, but any 3D printer with a Bowden extruder (remote drive) will use a similar process for loading filament and calibrating the build platform.
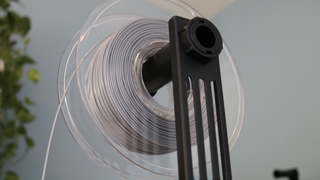
Loading the PLA filament
- Turn on your 3D printer.
- Select Preheat PLA on the printer menu to bring the nozzle up to the correct temperature.
- Place the spool of PLA material on the spool holder, taking care not to let the material get tangled on itself.
- Insert the filament into the extruder by pushing on the spring-loaded lever and push the filament until you see it coming out of the nozzle.


Calibrating the Build Platform
- Select Auto Home on the menu screen to automatically bring the printer to 0 on the X, Y, and Z axes.
- Once the printer has run the homing routine, select Disable Steppers to allow the gantry to be moved by hand.
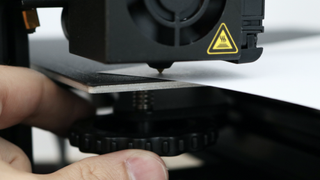
- Slide a standard piece of printer paper between the nozzle of the printer and the build platform.
- Bring the print head to the front right corner of the build platform and adjust the thumbscrew until you feel a slight resistance when moving the piece of paper between the nozzle and the build plate.
- Repeat Step 4 for the front left, back left, and back right corners.
- Once you feel a slight resistance across the build platform, remove the piece of paper and visually verify the small gap between the nozzle and the build platform at all points on the build plate.
Printing the 3D Model
Once the model has been sliced and the 3D printer has been prepared, the next step is export the sliced model as a .gcode file. The Creality Ender 3 Pro uses a microSD card for transferring .gcode files from your computer to the printer, and Creality Slicer will export the file directly to the card. This prepared file was 5.8MB, which fits easily on the 8GB microSD card which came with the Ender 3 Pro.
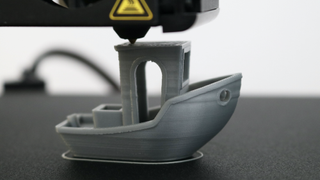
After calibrating the build platform and making sure the filament is properly loaded, we can insert the microSD card and get the print started. The Benchy print takes about one hour and 45 minutes to print using the Normal profile, and you should be left with a fun-looking boat that doubles as a calibration test. Once printed, you can remove the Benchy by removing the flexible build plate from the Ender 3 Pro and bending it, which will allow the printed model to pop right off.
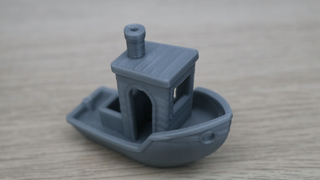
Some things to look for on your first print are curled edges on the base of the print (which could indicate a problem with print temperature or speed), a rough looking outer surface (which could indicate a too-thin shell), or stringing between the cabin walls (which could indicate an issue with temperature or retraction). Half the fun of owning a 3D printer is making adjustments and dialing in your print quality, so now you’re well on your way to converting .STL 3D models to 3D prints.
MORE: Best 3D Printers
MORE: Best Budget 3D Printers
MORE: Best Resin 3D Printers

Andrew Sink first used a 3D printer in 2012, and has been enthusiastically involved in the 3D printing industry ever since. Having printed everything from a scan of his own brain to a peanut butter and jelly sandwich, he continues to dive ever more deeply into the endless applications of additive technology. He is always working on new experiments, designs, and reviews and sharing his results on Tom's Hardware, YouTube, and more.
-
LolaGT I am really trying to talk myself out of wanting a printer, but I can't stop reading articles and watching videos.Reply
I would really like to print some RC airplanes and related things as that would tie it in to something useful for me instead of novelty pieces of junk. -
USAFRet Reply
Its addicting.LolaGT said:I am really trying to talk myself out of wanting a printer, but I can't stop reading articles and watching videos.
I would really like to print some RC airplanes and related things as that would tie it in to something useful for me instead of novelty pieces of junk.
After 2 false starts, I'm on my 3rd printer, a CraneQuad.
https://all3dp.com/1/m3d-crane-quad-review-full-color-3d-printer/
Right now, its spitting out custom Christmas ornaments for a small group of friends.
