Which Infill Pattern Should You Use for 3D Prints?
The purpose of your print will determine the infill pattern you should use.
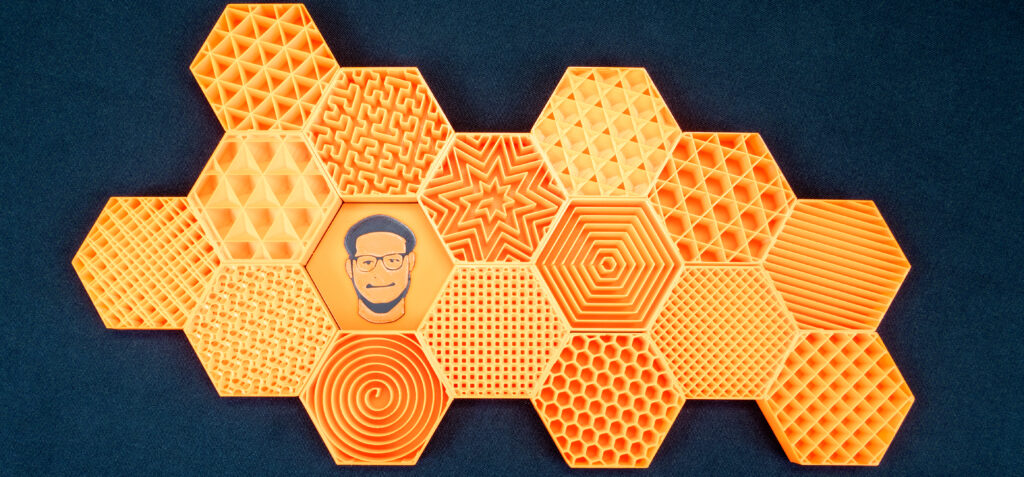
Before you send your design to your 3D printer and hit that “Print” button, there is a crucial decision that you need to make: should the object be printed as hollow or solid? The decision of whether to print it as hollow or solid is usually affected by several factors. One of them is the purpose of the design you are creating. A hollow design is generally preferred if you want the object to be lightweight and not subject to much stress. It helps you also conserve materials and reduce production costs.
On the other hand, if you need it to be strong, a solid design is usually better. Additionally, the size of your material matters in determining how the internal structure should look like. If you want to save on the cost of the material, consider printing hollow instead of solid, as it uses less material.
To adjust the internal structure of your design to create a hollow or solid object, you need to change the infill settings, like the density. The infill density determines the percentage of the internal material used inside the model. It allows you to control the amount of infill used in the print, ranging from 0 to 100%. When you set the infill density to 0%, the 3D printer creates a hollow print with no internal structure. Setting it to 100% means that the entire internal space of the 3D model will be filled with material, and the object will be solid and stronger, though it will use a lot of material. In-between values will generate an internal lattice structure, partially filling the space within the model.
In addition to the infill density, there is also the infill pattern setting, which we shall look at in detail in this article, and it’s one of the settings that determine the specific geometric arrangement of the material structure within the 3D-printed model. You adjust the infill settings of your designs in a slicer like Cura. We will use Cura to demonstrate this, as it’s one of the most popular 3D slicing programs available. Like other 3D printer slicers, it offers various infill patterns, each with its characteristics, strengths, and applications.
After importing your designs into the software, you can access the infill pattern settings by clicking on Infill in the print settings.
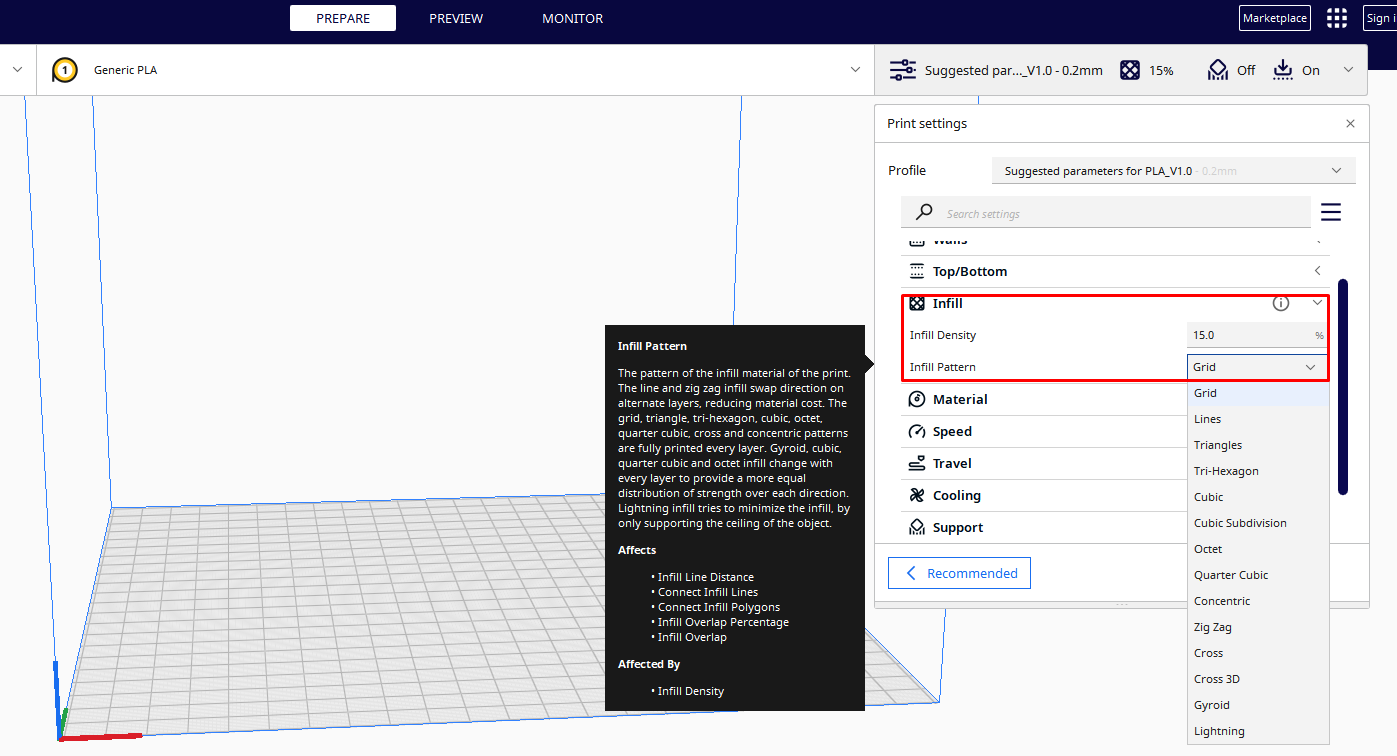
The table below summarizes the infill patterns available in Cura and their functions.
| No. | Infill Pattern | Best for |
|---|---|---|
| 1 | Grid infill pattern | Creating prototypes, small 3D prints, and generally fast prints |
| 2 | Lines pattern | Prototyping and simple 3D prints |
| 3 | Triangles Pattern | Prototyping and 3D prints that loads will be subjected perpendicular to the faces. |
| 4 | Tri-hexagon pattern | Prototyping and moderately strong parts |
| 5 | Cubic pattern | Strong, rigid, and functional parts |
| 6 | Cubic sub-division | Strong and large 3D Prints that don’t affect strength to weight ratio |
| 7 | Octet pattern | Strong and functional parts |
| 8 | Quarter Cubic | Strong and lightweight 3D prints |
| 9 | Concentric | Flexible 3D prints |
| 10 | Zig zag | Fast 3D Printing |
| 11 | Cross | Flexible 3D prints that can withstand bending |
| 12 | Cross 3D | Flexible and stiffer 3D prints |
| 13 | Gyroid | Strong and functional parts |
| 14 | Lightning | Fast 3D printing and it is good for designs requiring Internal Supports |
Below is a detailed description of each of the above infill patterns.
Stay On the Cutting Edge: Get the Tom's Hardware Newsletter
Get Tom's Hardware's best news and in-depth reviews, straight to your inbox.
1. Grid Infill Pattern (Good for Prototyping
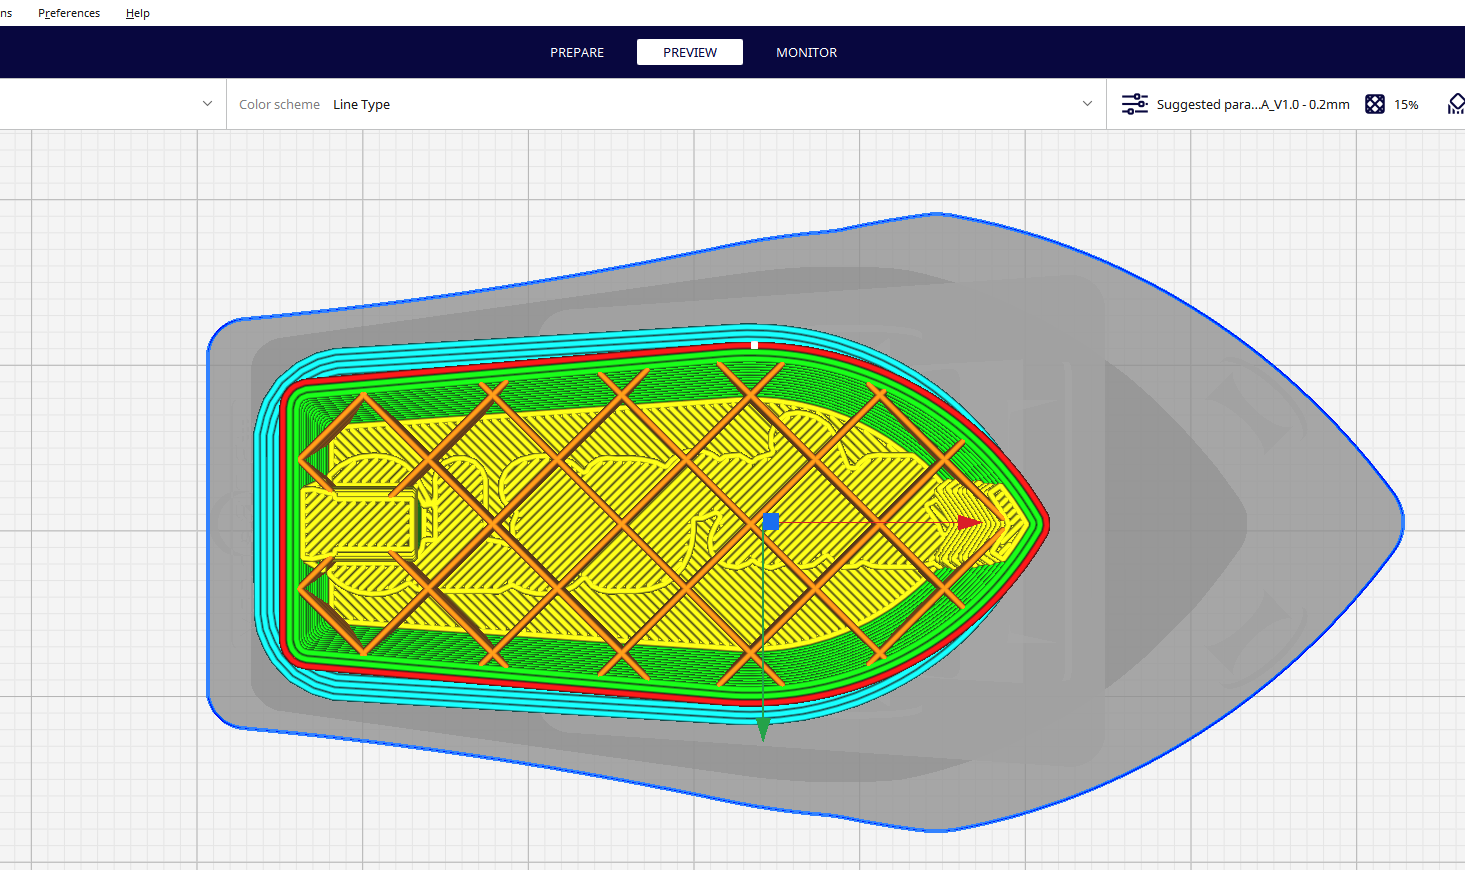
The grid infill pattern forms intersecting lines running perpendicular to each other, forming a grid. The pattern resembles a grid, with horizontal and vertical lines forming a crisscross pattern within the space of the print.
This pattern offers moderate strength while using a relatively small amount of material. It is famous for many 3D printing applications, like creating functional prototypes and objects requiring mild mechanical stress, and it’s suitable for faster 3D printing.
2. Lines Pattern (Simple 3D Prints and Prototypes)
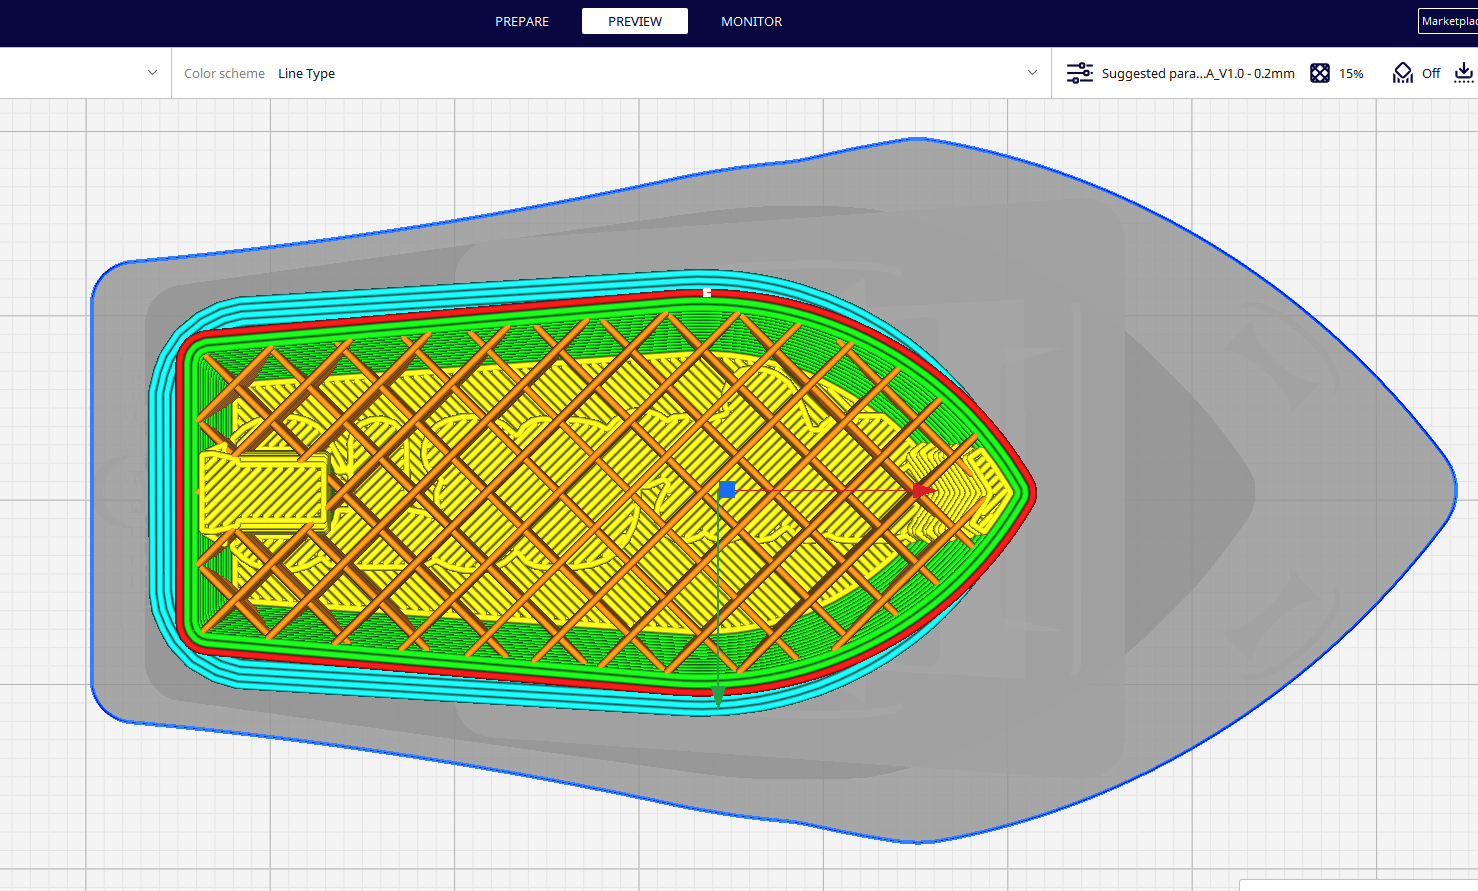
Immediately after the grid pattern is the line infill. This pattern uses continuous lines that run in a single direction to fill the interior of a 3D-printed object. It is a good choice for rapid prototyping or parts with less critical interior strength.
It is moderately fast to print and it is a good choice for prints that do not need to be very strong. This pattern also helps avoid 3D printing pillowing, the problem where the top surfaces of your print appear uneven, giving them a pillow-like appearance. Because the lines in lines infill pattern are parallel, they distribute the weight and stress of the upper layers more evenly across the print's interior, preventing concentrated pressure points that can cause issues on the top layers.
3. Triangles (Prototyping)
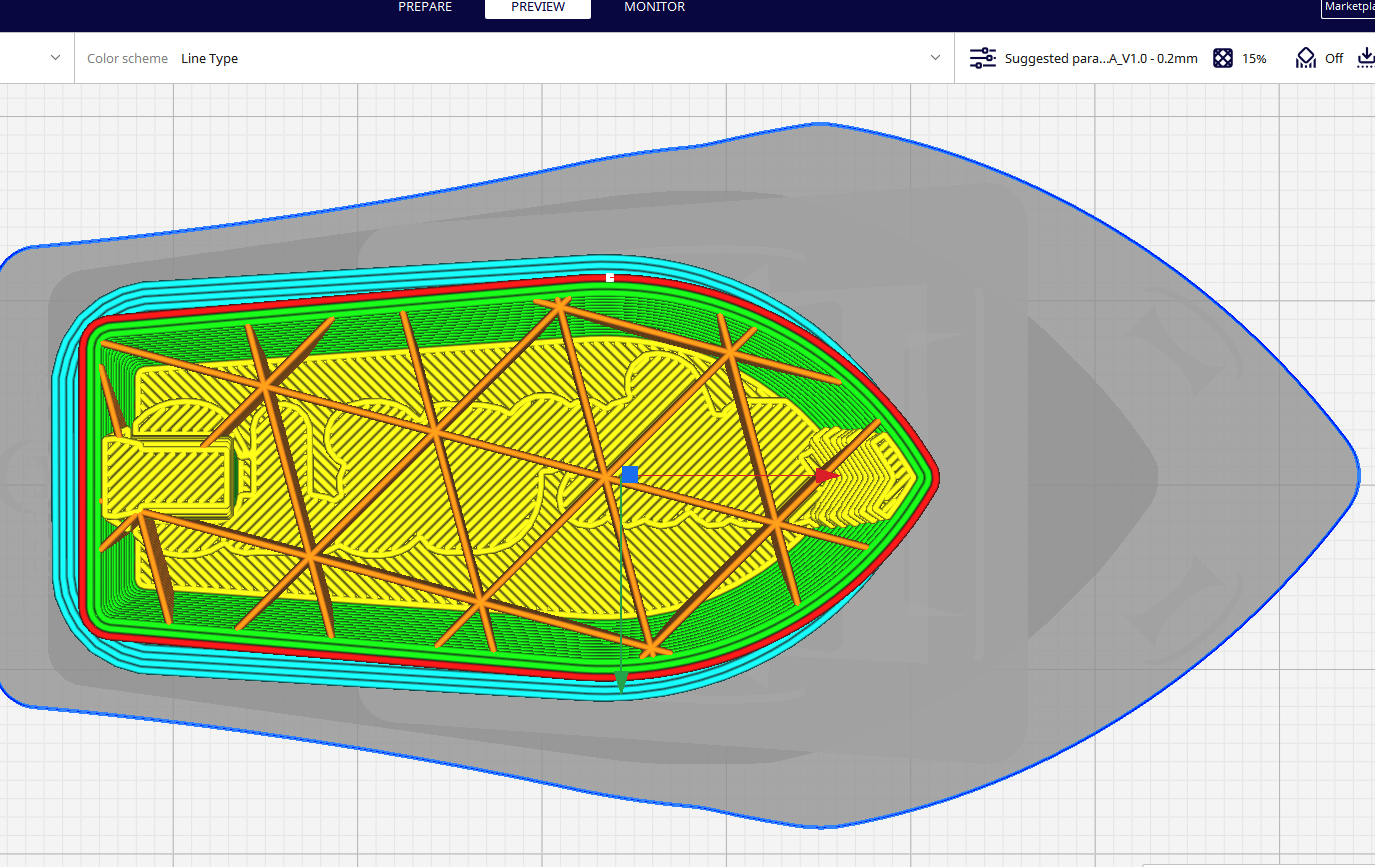
The triangles pattern contains interconnected triangles or hexagons that create a honeycomb-like structure inside the model. This pattern offers excellent structural integrity as the interlocking triangles distribute forces more evenly throughout the interior of the print, enhancing its overall strength. It is also helpful in creating prototypes which forces will be subjected perpendicular to the faces.
4. Tri-Hexagon Infill Pattern (Prototyping and Moderately Strong Parts)
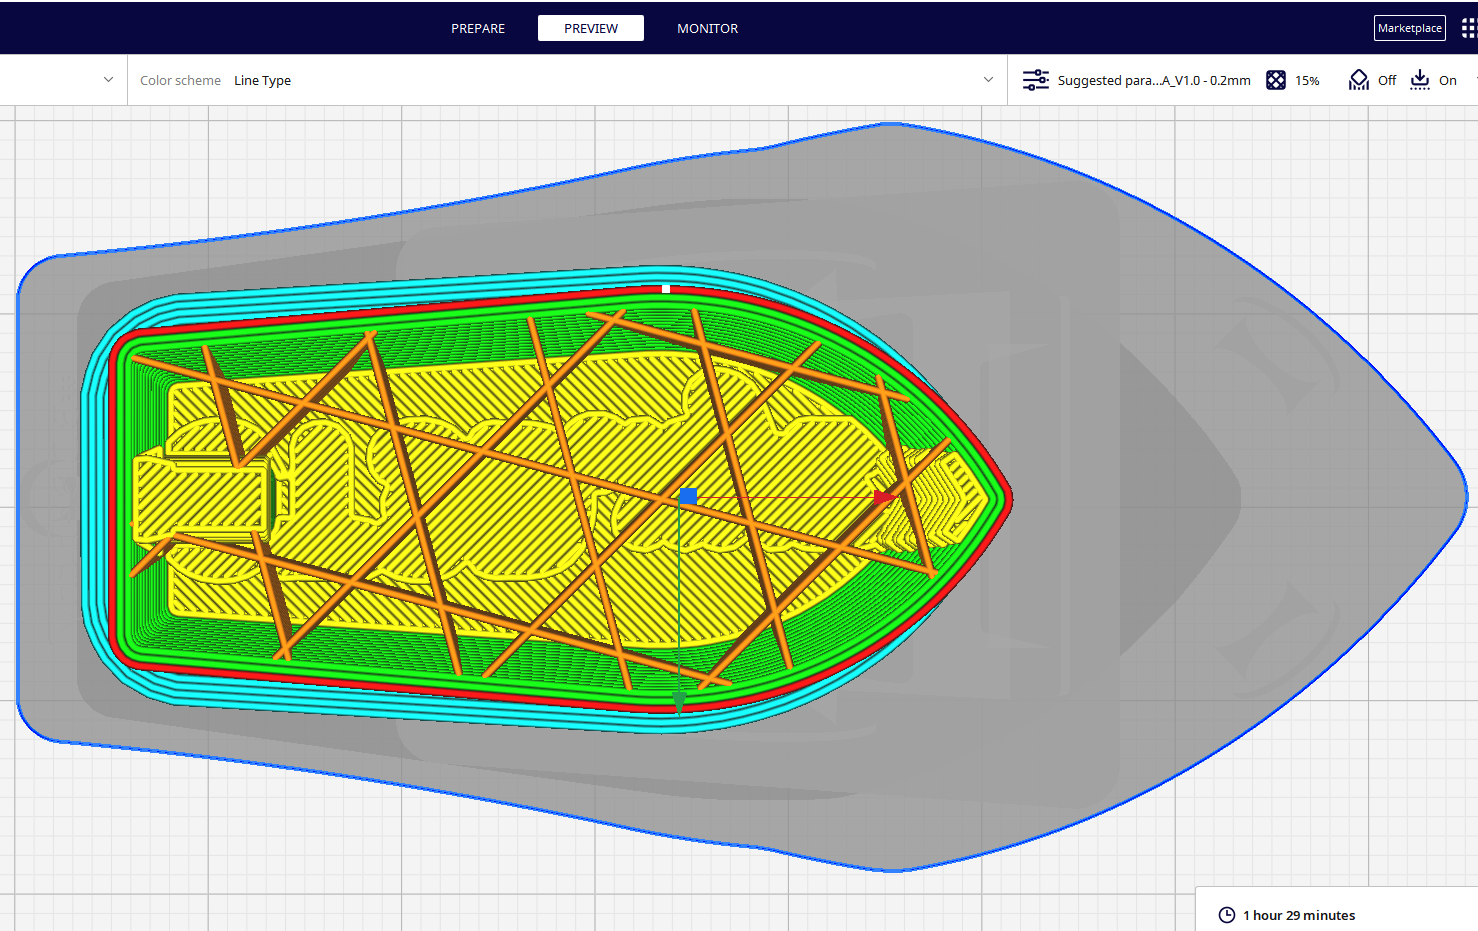
This is similar to a triangle infill pattern, but the difference is that It also contains hexagons. In this infill, the lines making up the triangles and hexagons run in three directions but don’t meet in the same position. Like triangles, the tri-hexagon is helpful for creating prototypes and parts requiring moderate mechanical strength.
5. Cubic (Strong, Rigid, and Functional Parts)
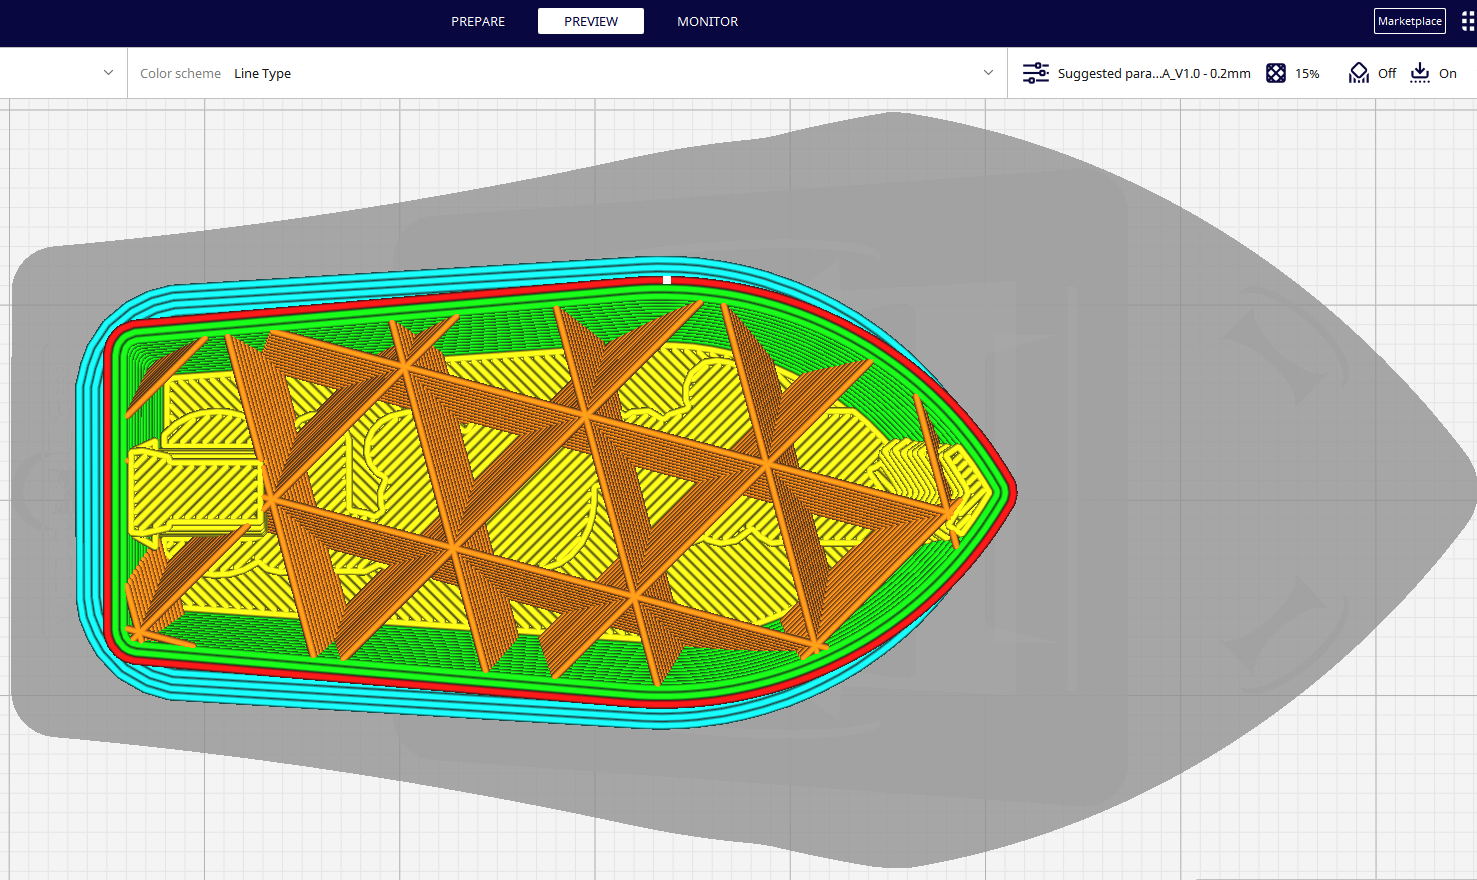
It uses a combination of cubes that are stacked on top of each other. Cubic infill patterns are created by interweaving parallel lines at around 45-degree angles. The lines are spaced evenly apart and connected in a grid-like structure.
When you increase the line spacing by reducing the infill percentage, you can create lighter parts with less material, while decreasing the line spacing will make the design stronger and more rigid. Cubic infill patterns are perfect for creating functional parts that need to withstand stresses.
6. Cubic Sub-Division (Large 3D Prints Without Affecting Strength to Weight Ratio)
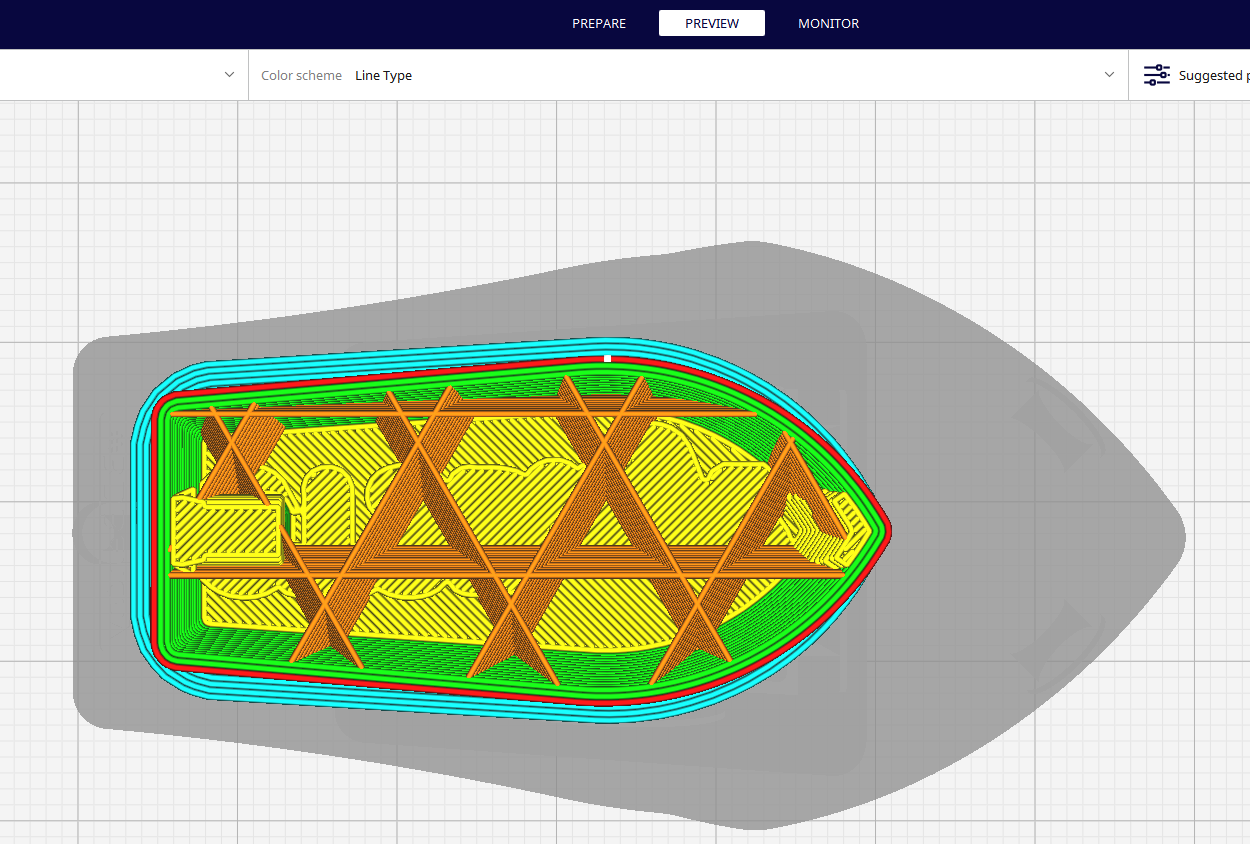
Cubic sub-division pattern is similar to Cubic, but the difference is that the middle section of your 3D prints is hollow. Compared to Cubic, this pattern saves material and time to 3D print the model, and it is ideal for large-volume 3D prints as it helps to improve strength-to-weight ratios. This is because the cubes are dense enough to provide support and strength, and it is light enough not to add too much weight.
7. Octect (Good for Functional 3D Prints)
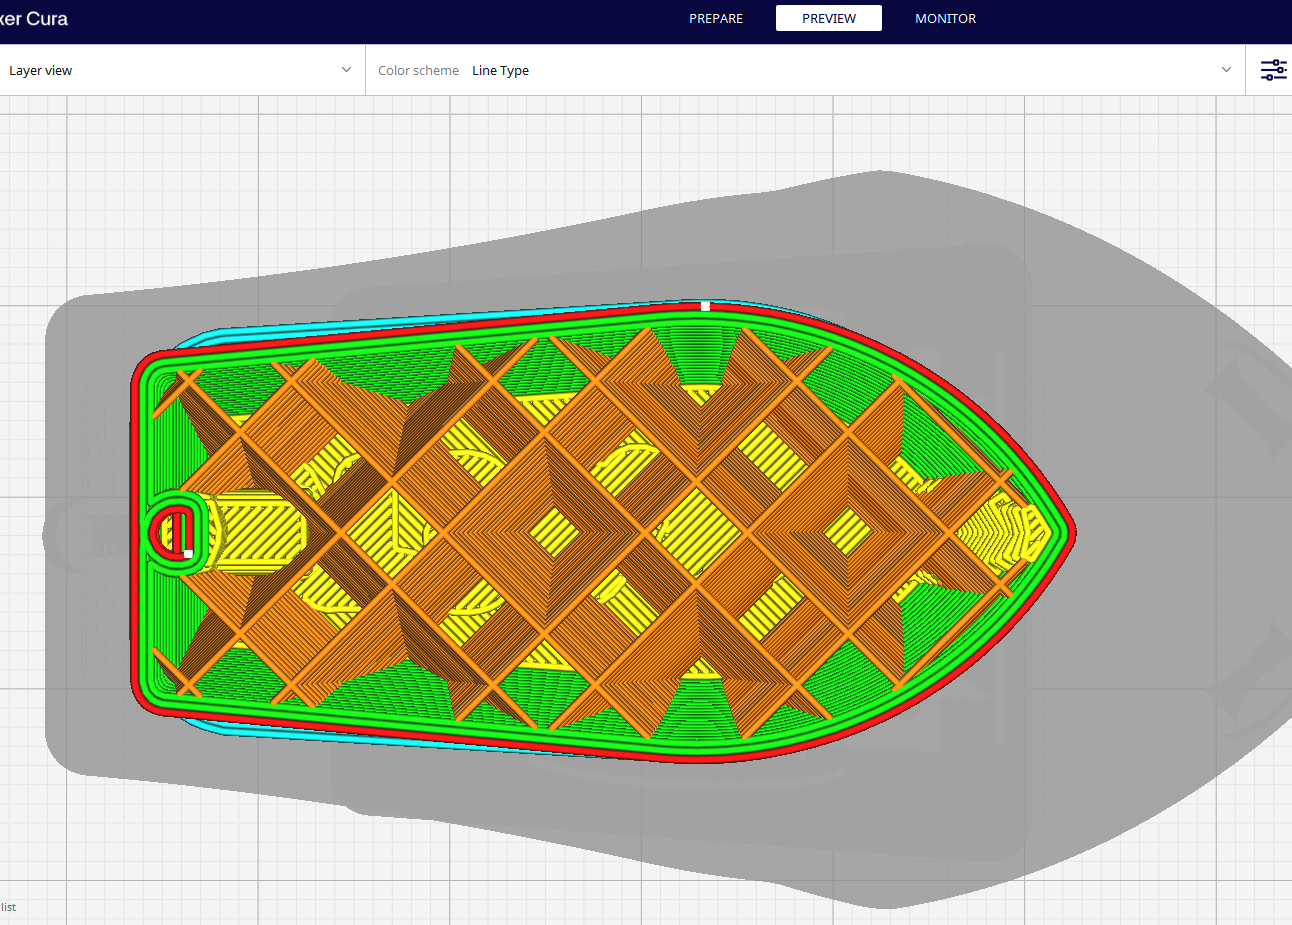
The Octet infill pattern has a cross-hatched pattern or interconnected octagons, creating a strong internal structure in the design. It is efficient with the amount of material used as there are spaces left on the design and the time it takes to print too. It is also great for 3D printing complex shapes, as you can adjust the infill to fit the object's shape.
8. Quarter Cubic (Strong and Lightweight)
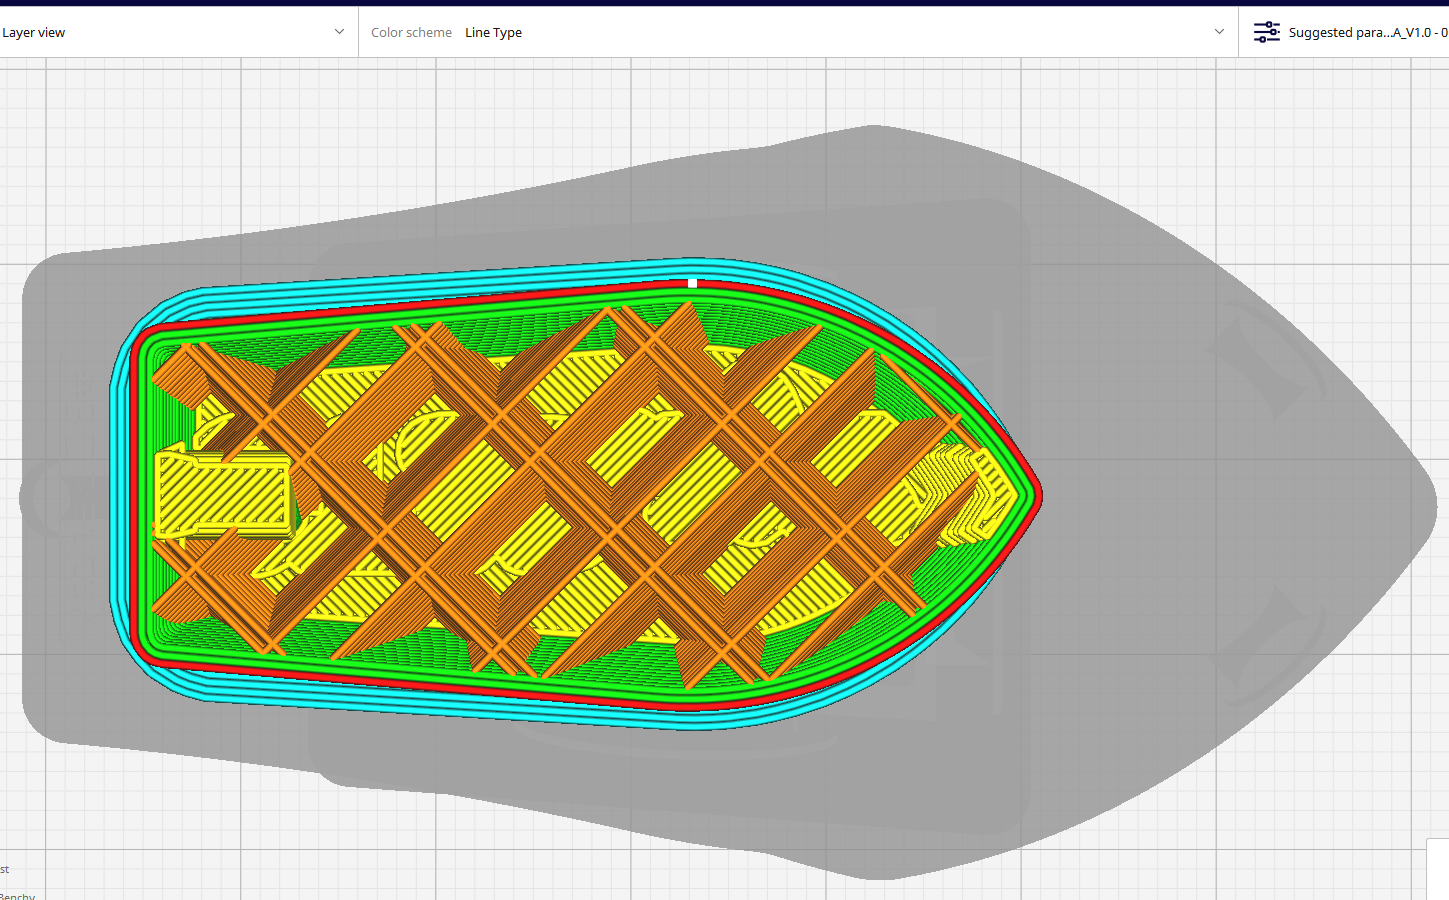
The quarter cubic infill pattern contains small cubes and rectangular shapes arranged in a grid, allowing for a higher density of material and better mechanical properties. It is excellent for parts that need to be strong and lightweight at the same time. Since the pattern comprises small cubes, it offers a high density and a uniform structure. The arrangement of the cubes in a grid-like manner makes the print look more aesthetically pleasing.
9. Concentric (Best for Flexible 3D Prints)
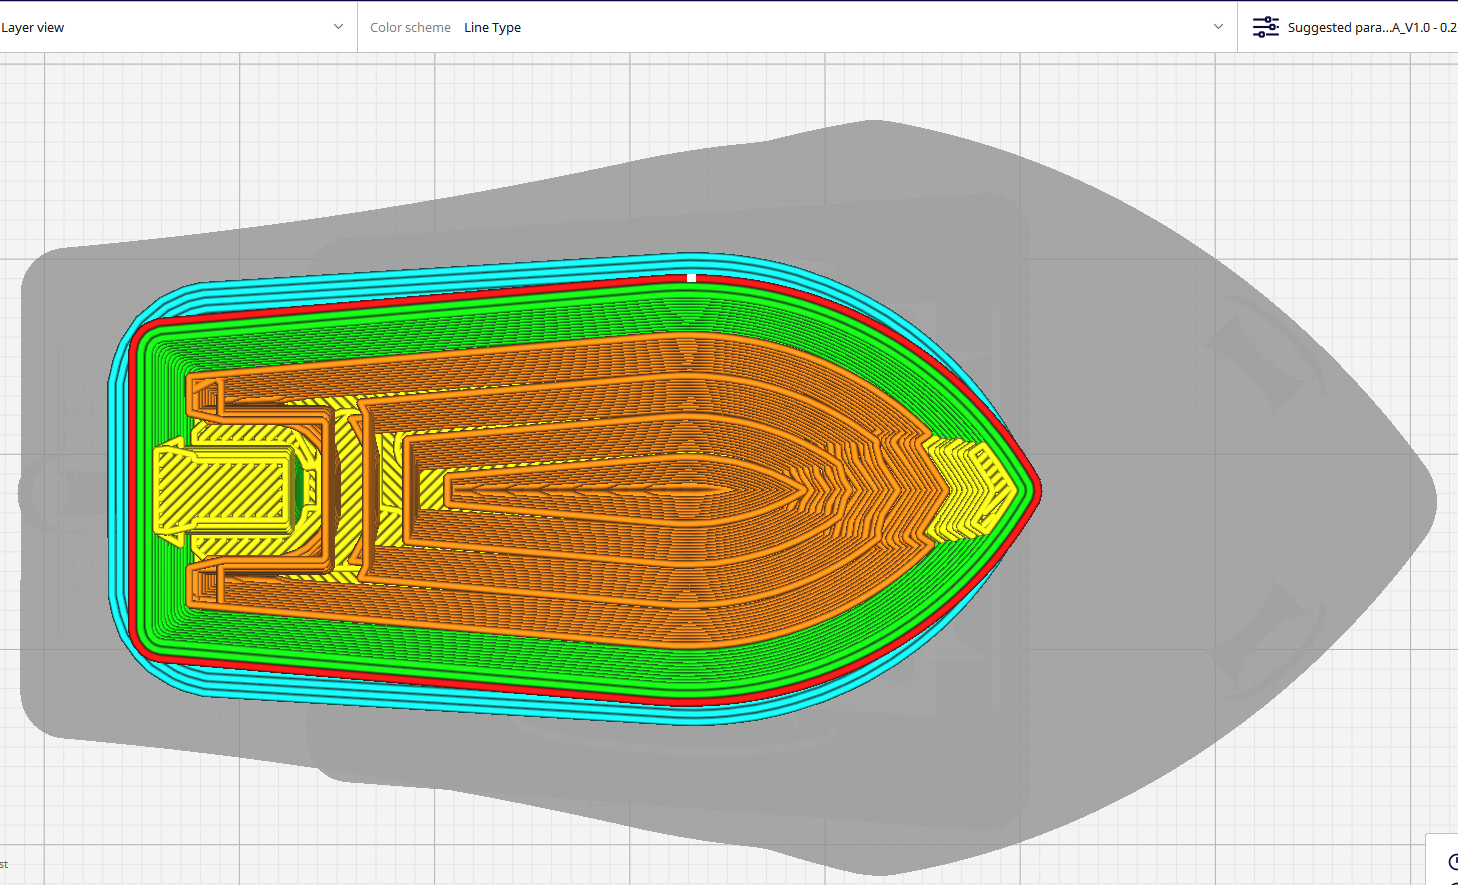
This pattern is generated by a series of concentric circles that radiate outward from the center of each layer. It creates a distinctive visual appearance on the inside of the print and offers some unique characteristics. The infill percentage determines the size of the spaces in the circles. If it’s higher, the spaces will be smaller, and when lower, the spacing will be larger.
Concentric pattern is great for 3D printing flexible 3D prints. It's also suitable for prints where the internal structure doesn't need to bear significant loads or mechanical stress. The arrangement of concentric circles creates an interesting visual effect that can be visible through translucent or semi-transparent materials, and this can add a decorative touch to your 3D prints.
Because the pattern generally involves a continuous movement in a circular direction, it prints at a faster speed when compared to those that require frequent changes in direction, such as triangular or grid patterns.
10. Zig zag (Good for Fast 3D Printing)
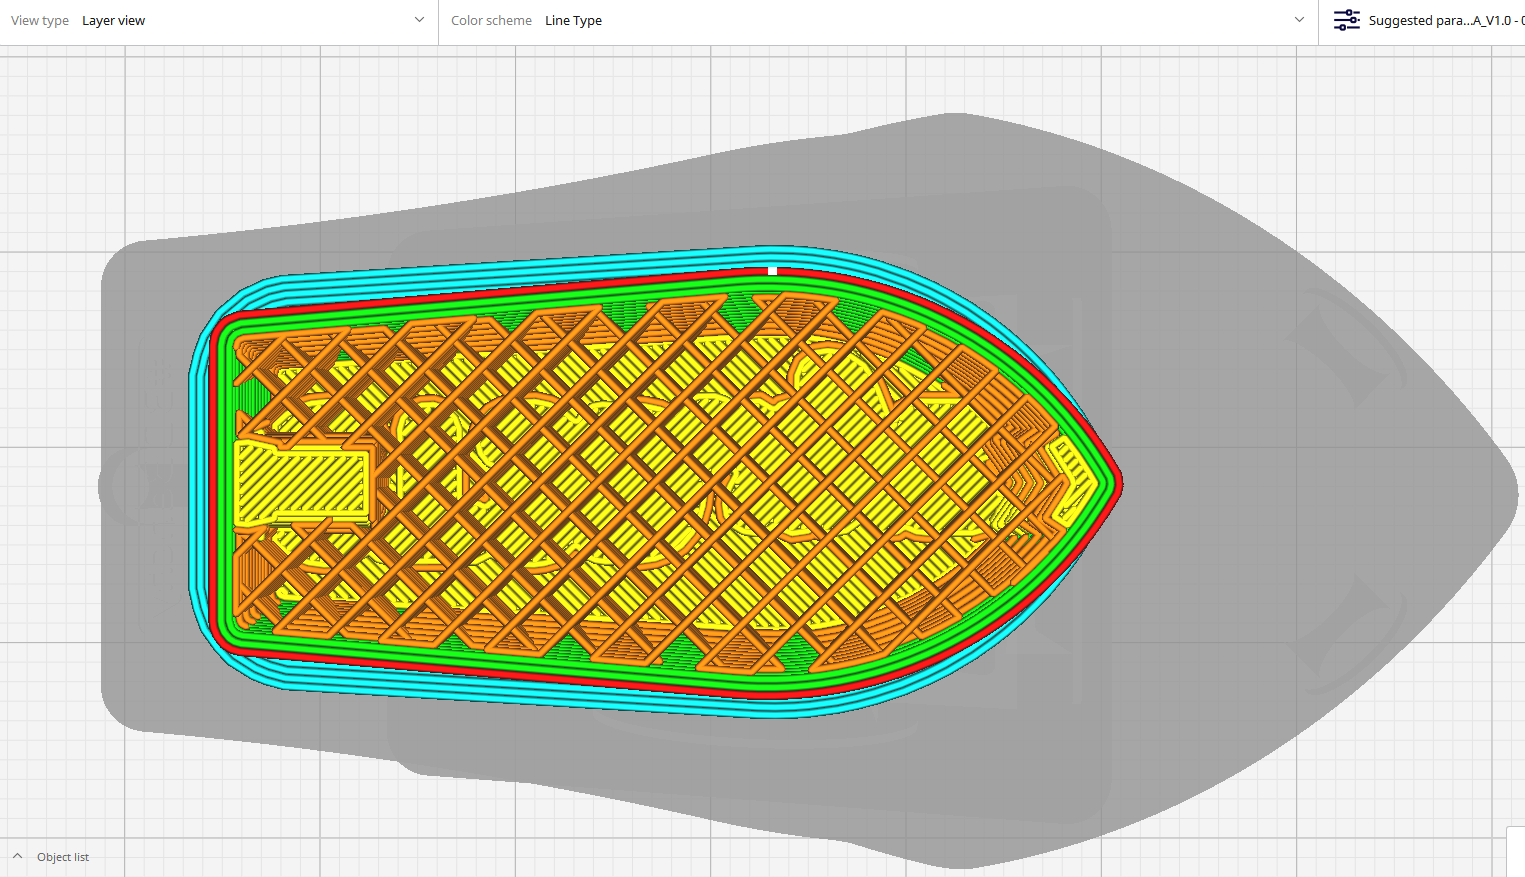
This pattern is almost similar to the line pattern but differs by having alternating lines that move in opposite directions, resulting in a zigzag pattern. While not the strongest infill pattern available, it still provides decent support for the interior of the print. The diagonal lines intersecting with each other offer some reinforcement. It is ideal for simple designs that need to be printed faster.
11. Cross (Best for Flexible 3D Prints)
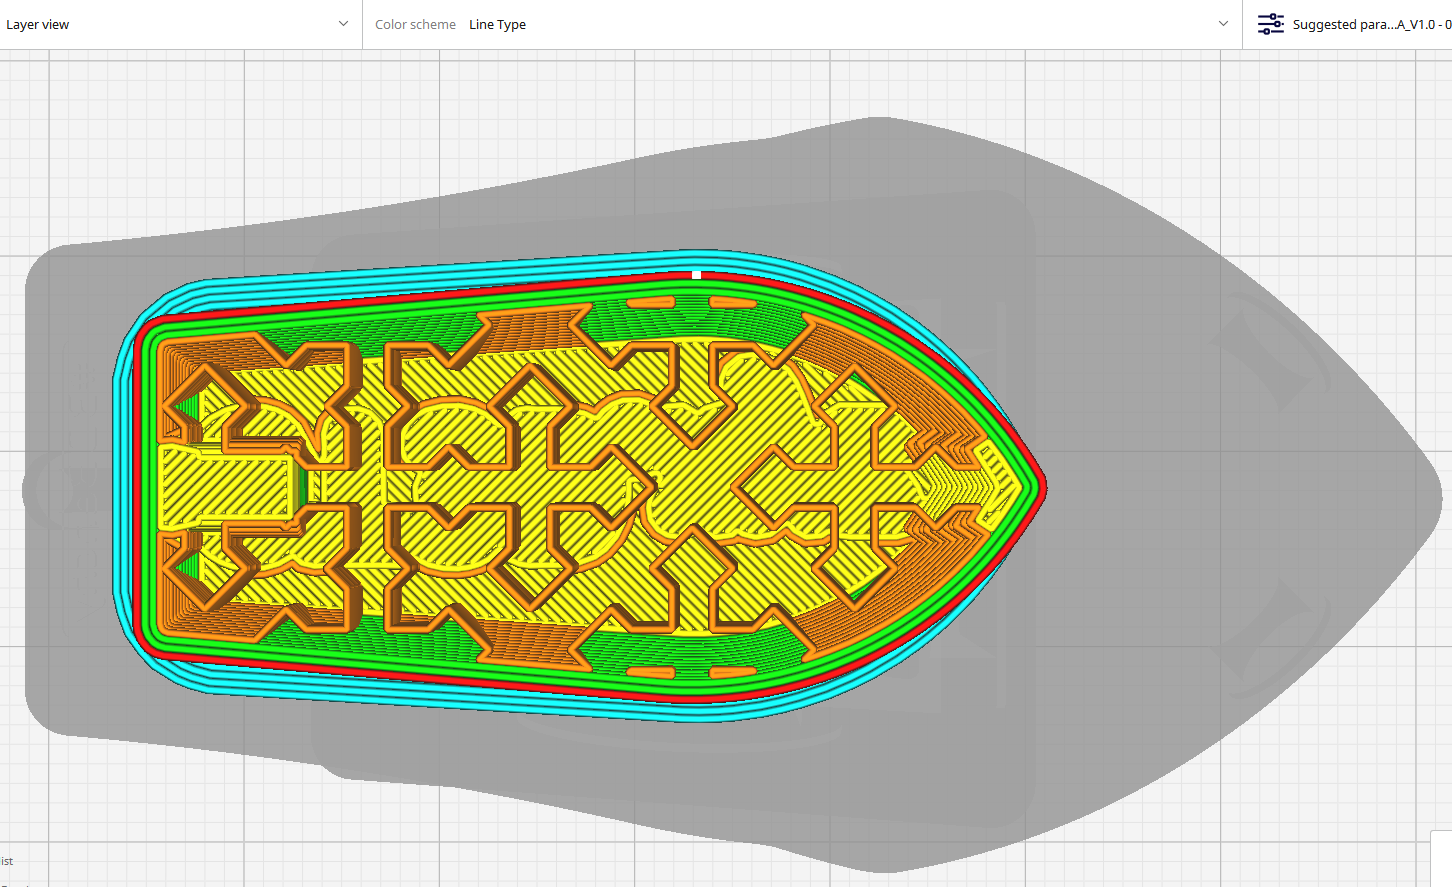
This pattern contains crossing lines that create a grid of crosses. It is not as strong as some other infill patterns, but it is flexible and can withstand much bending due to the spaces between the grid and the crosses. It’s ideal for prints that need to be able to bend or flex, like phone cases. It’s also applicable for decorative objects to add a touch of style.
12. Cross 3D (Flexible 3D Prints)
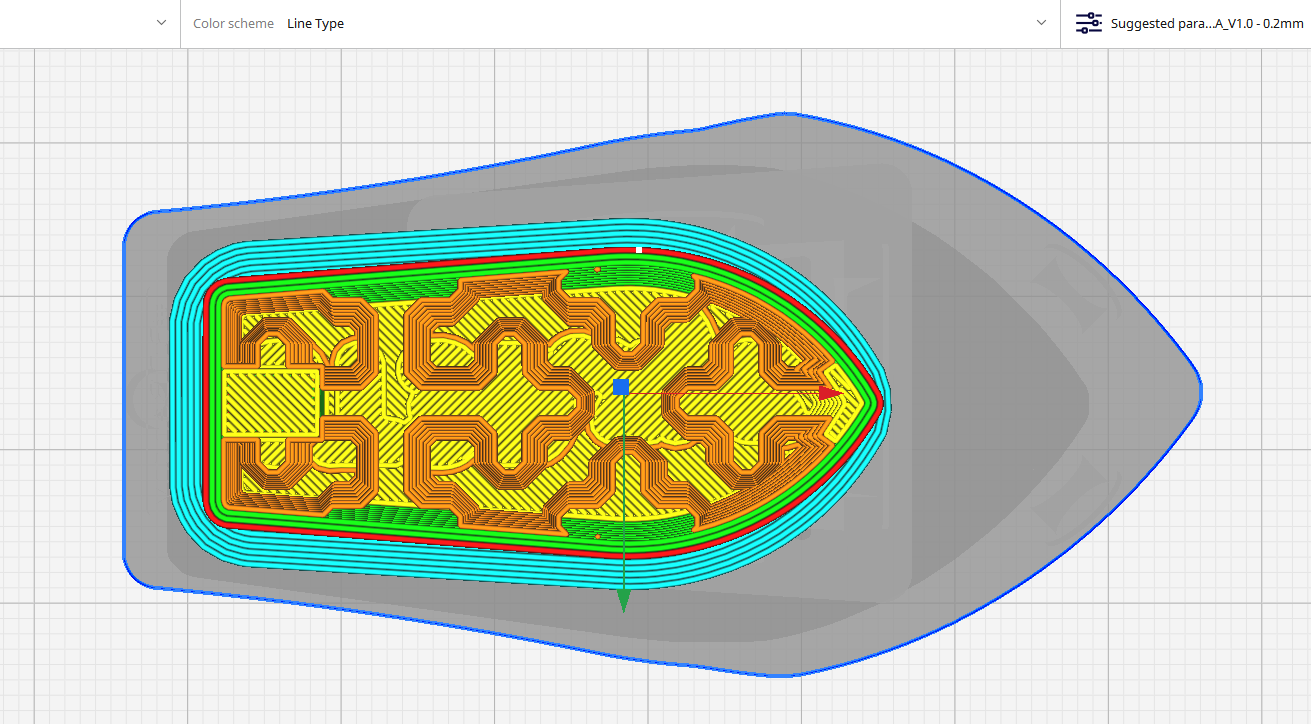
This is similar to the cross pattern, but as the name suggests, it’s a 3D version containing a 3D grid of interconnected crosses within the object's interior. This is great for flexible parts but stiffer than the ones created in the cross pattern when you use the same infill percentage. It’s also great when you are making 3D printing time-lapses.
13. Gyroid (Good for Strong and Functional Parts)
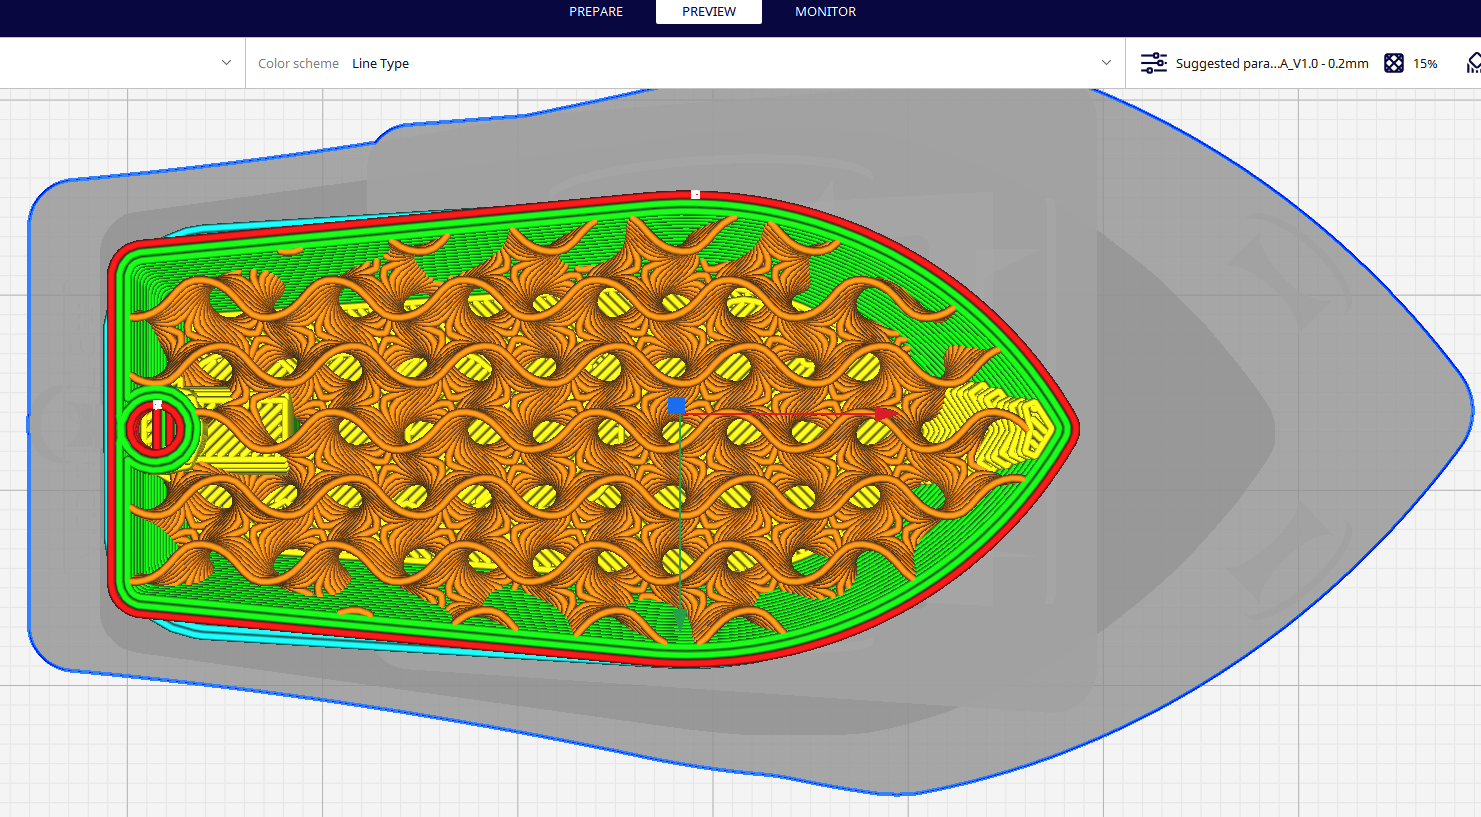
The gyroid infill pattern has a continuous lattice that seems to twist and weave, creating an almost organic-looking structure. It resembles an intricate maze of interconnected curves, creating a captivating contrast to the solid exterior of the print, and these interconnections distribute forces evenly.
When you use a higher infill density, it will result in a more solid-looking interior. A lower density will retain the lattice structure but with more pronounced gaps between the elements. The gyroid pattern helps create functional parts that will be subjected to stress. If you want to make time lapses, you can use this pattern, too, as it can add a sense of movement to the video, as the pattern constantly changes within the frame. It can also make them look much more visually attractive than using other infill patterns.
14. Lightning (Good for Designs Requiring Internal Supports)
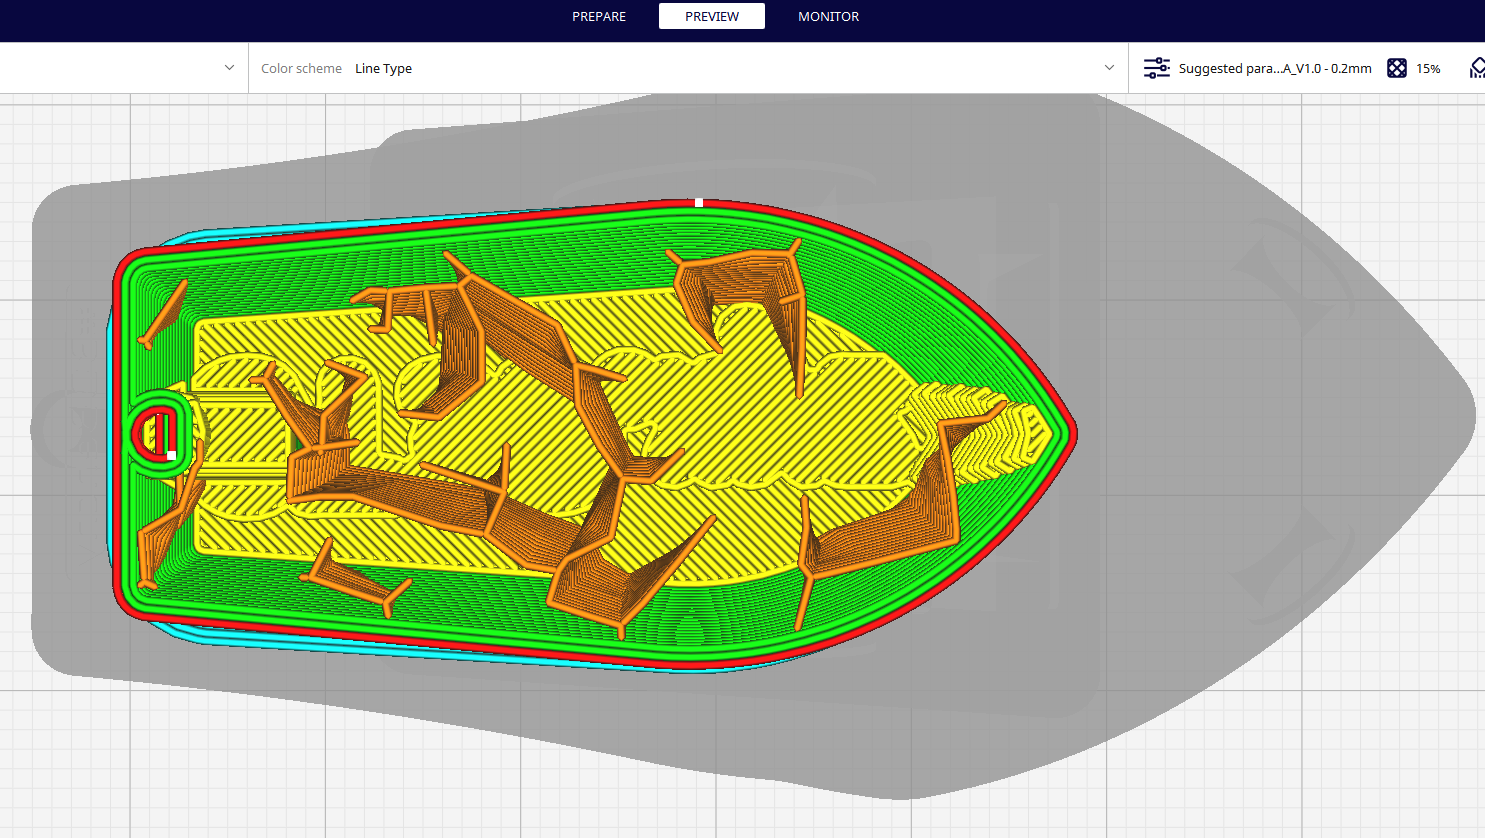
The lightning infill pattern is more of an internal support structure than an infill. Some 3D prints, like ornaments, require internal supports to support the overhangs, and lightning-infill patterns are the best. Its primary purpose is to provide structural reinforcement in the critical areas of your 3D print, ensuring that your prints maintain their integrity during printing. It consumes less material the print time is faster too.
MORE: Best 3D Printers
MORE: Best Budget 3D Printers
MORE: Best Resin 3D Printers
-
InvalidError Another factor to keep in mind when picking fill patterns: dimensional stability. As the fill cools down and shrinks, it will pull the walls in where they are attached to the infill. That is why fancy fills like Gyroid exist to give generally even pull and support in all directions without long straight stress lines in any particular direction.Reply -
edzieba A good rule of thumb is to use Gyroid unless you have a very specific reason not to. If you're just looking for faster prints, it's almost always a better idea to reduce Gyroid infill density than to try and tweak infill geometry, due to it's near-homogenous mechanical properties (outside of inter-layer delamination that is unavoidable for FDM).Reply
Exceptions include cases where you intent to infiltrate the infill volume after printing (e.g. filling with resin or grout), where Gyroids two separate watertight cavities could be an issue. Or where you are happy with near-zero infill density but still need to support a highly undulating top surface, in which case Lightning infill is likely the best bet, as Gyroid would leave some small top layer sections that hang 'below' the ultimate top surface unsupported.