How to Correctly Set a 3D Printer's Z-Offset
Improve the Quality of Your Prints by Adjusting the Z-Offset
Get Tom's Hardware's best news and in-depth reviews, straight to your inbox.
You are now subscribed
Your newsletter sign-up was successful
The Z offset is an essential setting in a 3D printer that ensures that the nozzle is at the correct distance from the bed surface. Even if you have one of the best 3D printers, if the nozzle is too close, the filament may not be able to flow correctly, leading to a print failure. Even worse, the nozzle might also damage the bed. On the other hand, if the 3D printer nozzle is too, the filament may not correctly adhere to the bed surface, resulting in poor bed adhesion. So It is essential to set the Z-offset well to ensure the first layer adheres securely to the print bed.
Before adjusting the Z-offset, you must level your 3D printer bed. Proper bed leveling ensures the print bed is at the correct distance from the nozzle at all points. You can check out our guide on manually leveling a 3D printer bed to learn how to do it right. Once the bed is well-leveled, you should be ready to fine-tune and set the Z-offset. Below, we have highlighted the various ways to set your Z-offset correctly.
Manually Setting the Z-offset
To manually set the Z-offset, you can adjust the nozzle height using the LCD screen in your 3D printer while placing a piece of paper on top of the bed until you achieve the correct settings. The process differs slightly based on the 3D printer model, but the general steps are similar whether you have one of the best 3D printers or not. To do this:
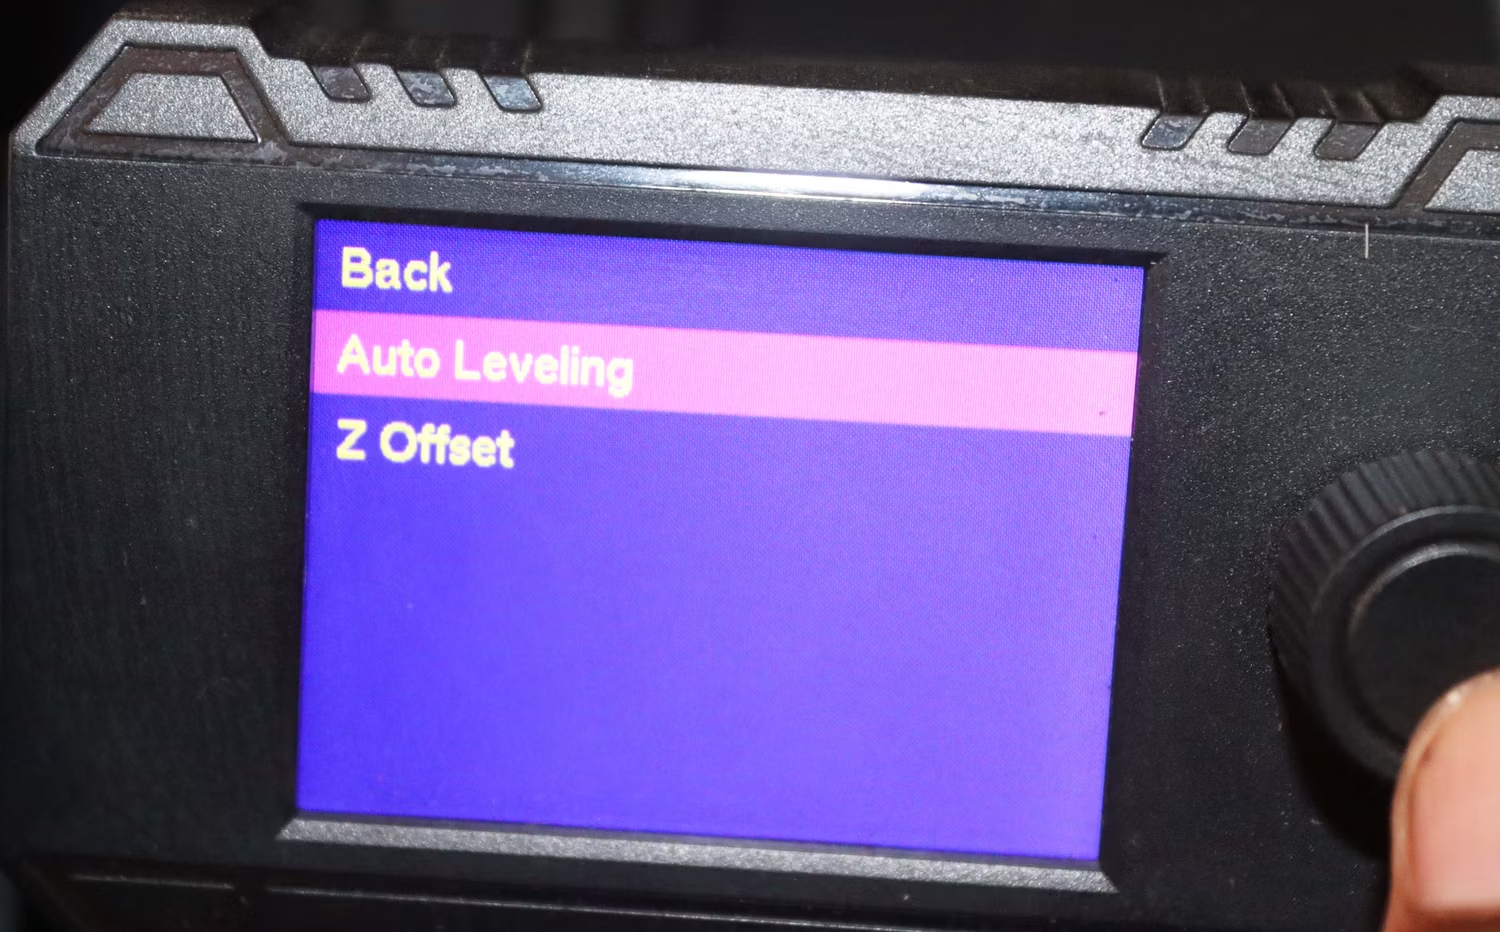
1. Home the printer to position the nozzle at the origin, which is usually the front-left corner of the bed. For my case, I am using Anycubic Kobra, so I will go to Menu > Leveling > Auto Leveling.
2. Disable the steppers to move the nozzle manually. After disabling, I can move the nozzle to the center of the bed so that it can be easier for me to insert the paper when leveling.
3. Lower the nozzle to be close to the print bed. You can use the control interface to move the nozzle in small increments until it is just above the bed's surface.
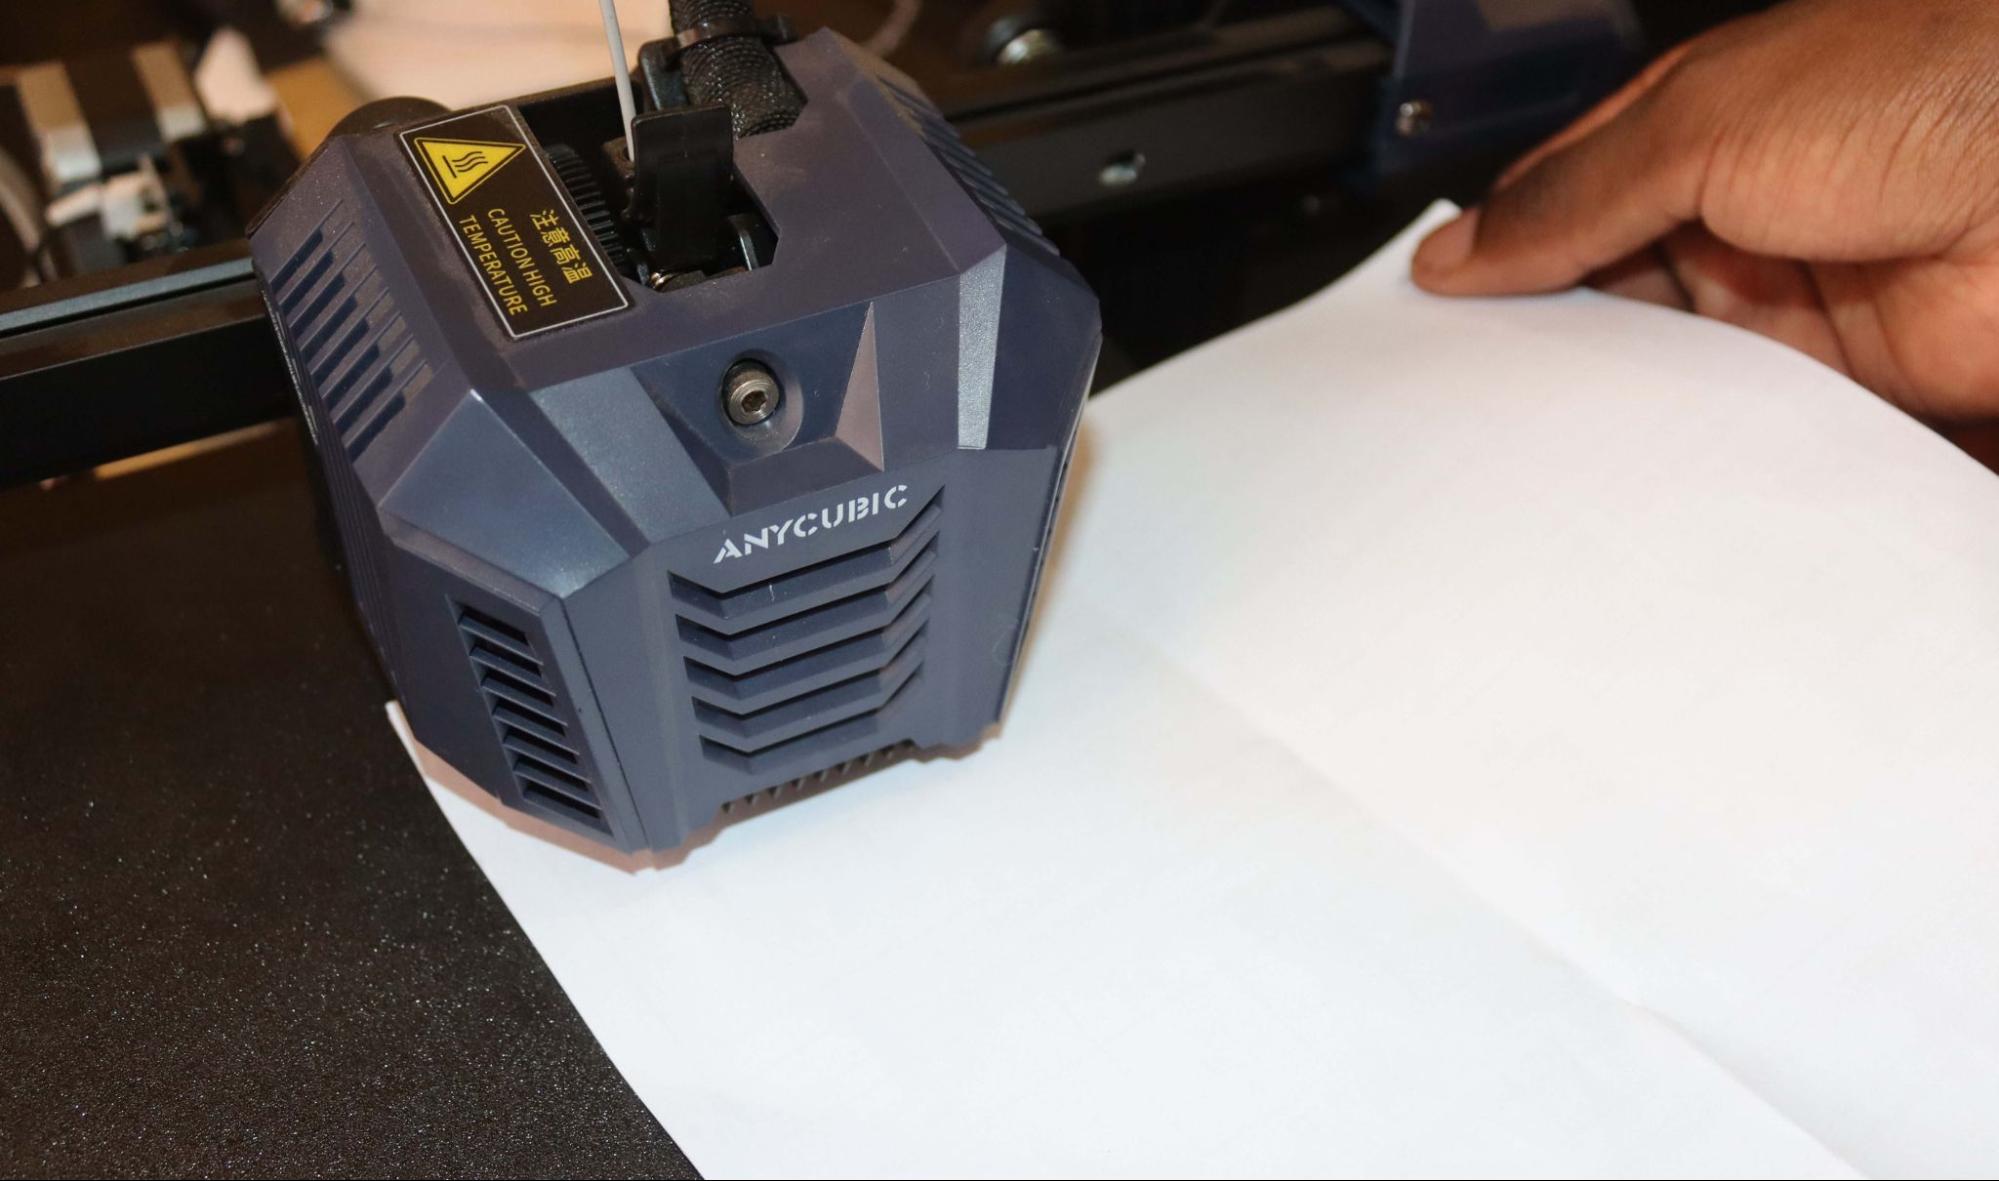
4. Gently slide the piece of paper between the nozzle and the print bed. You should feel some resistance as the paper touches the nozzle. The nozzle should not be pressed firmly against or far from the paper.
Get Tom's Hardware's best news and in-depth reviews, straight to your inbox.
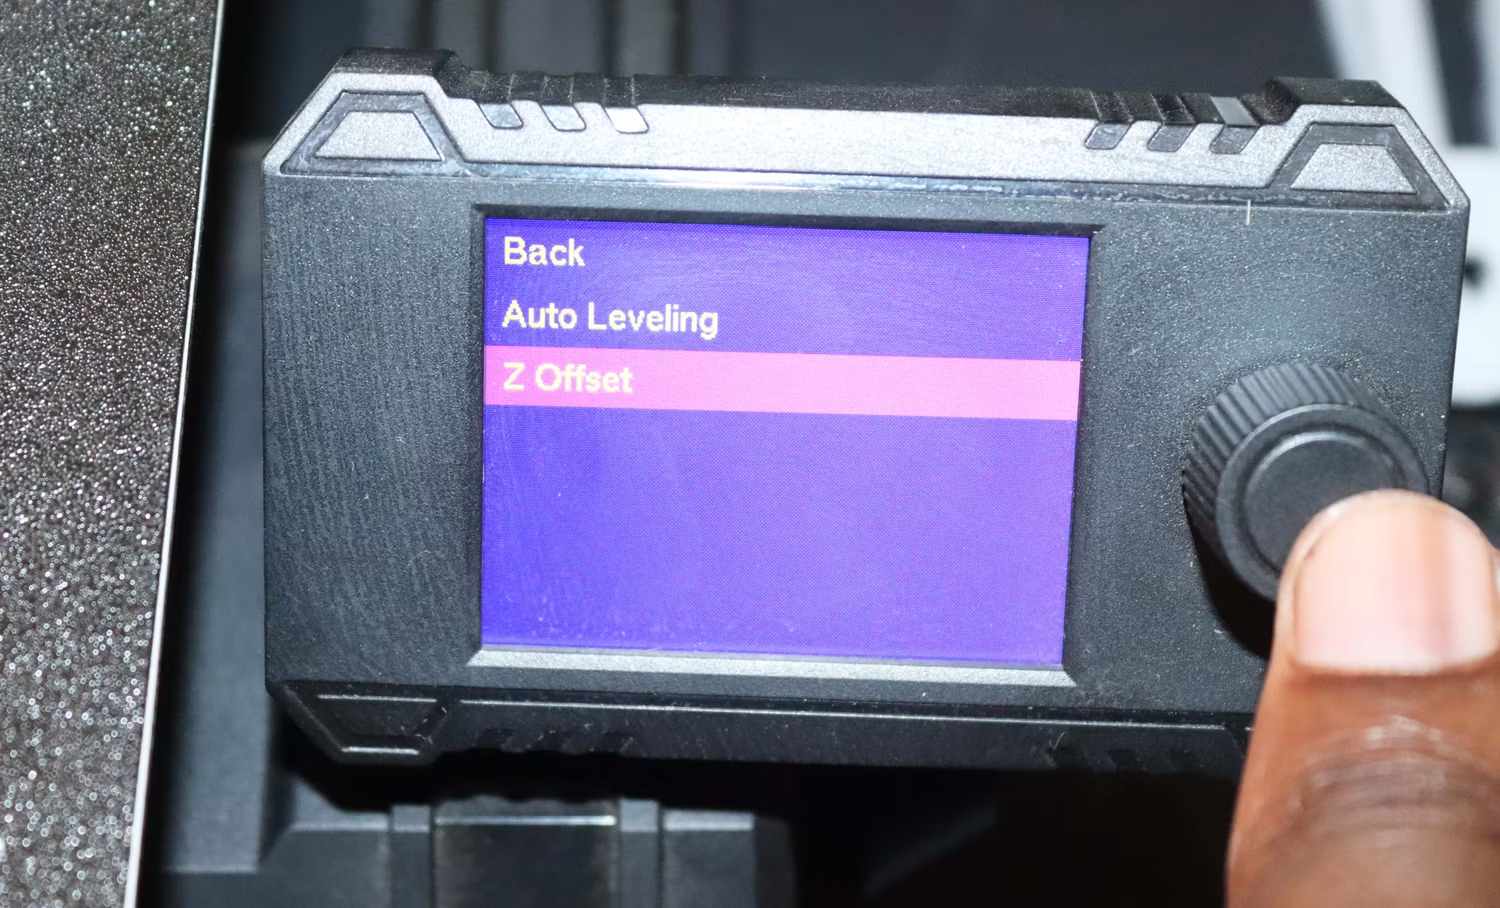
5. Adjust the Z-offset using the control interface on the screen until you feel a slight drag on the paper. You want the nozzle to be close enough to the bed that the paper can move but not too loose that it slips out easily. In my 3D printer, I will go to Menu > Leveling > Z Offset.
6. Save the Z-offset settings if your 3D printer allows you to. In my case, I will need to apply the settings by clicking on the button on the display screen.
Adjusting Z-Offset in the Slicer or G-Code
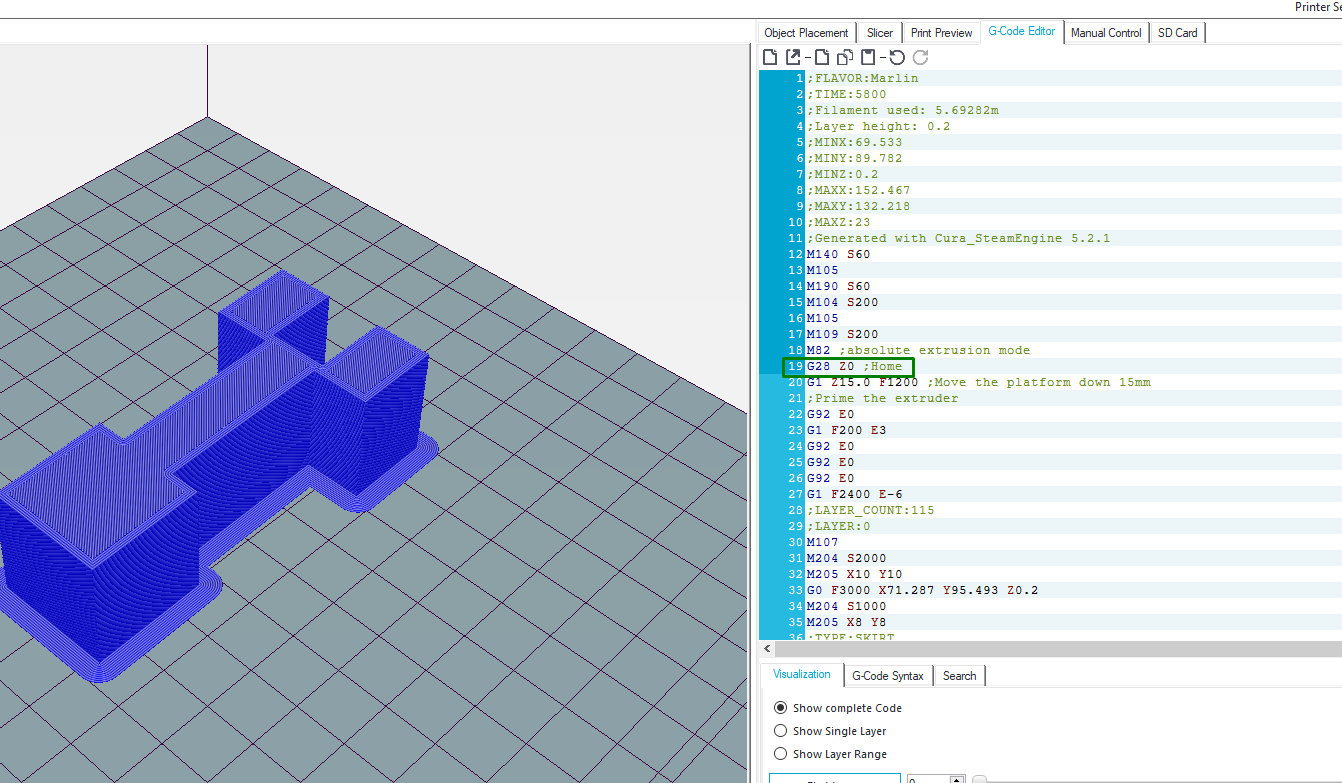
If you know how to modify the G-code, you can adjust the Z-offset directly in the G-code. To do this, we will need to locate the command responsible for homing the printer (usually G28 or G29 for auto bed leveling), as well as the one for moving the Z axis, which is G92. You can then follow the steps below to modify them.
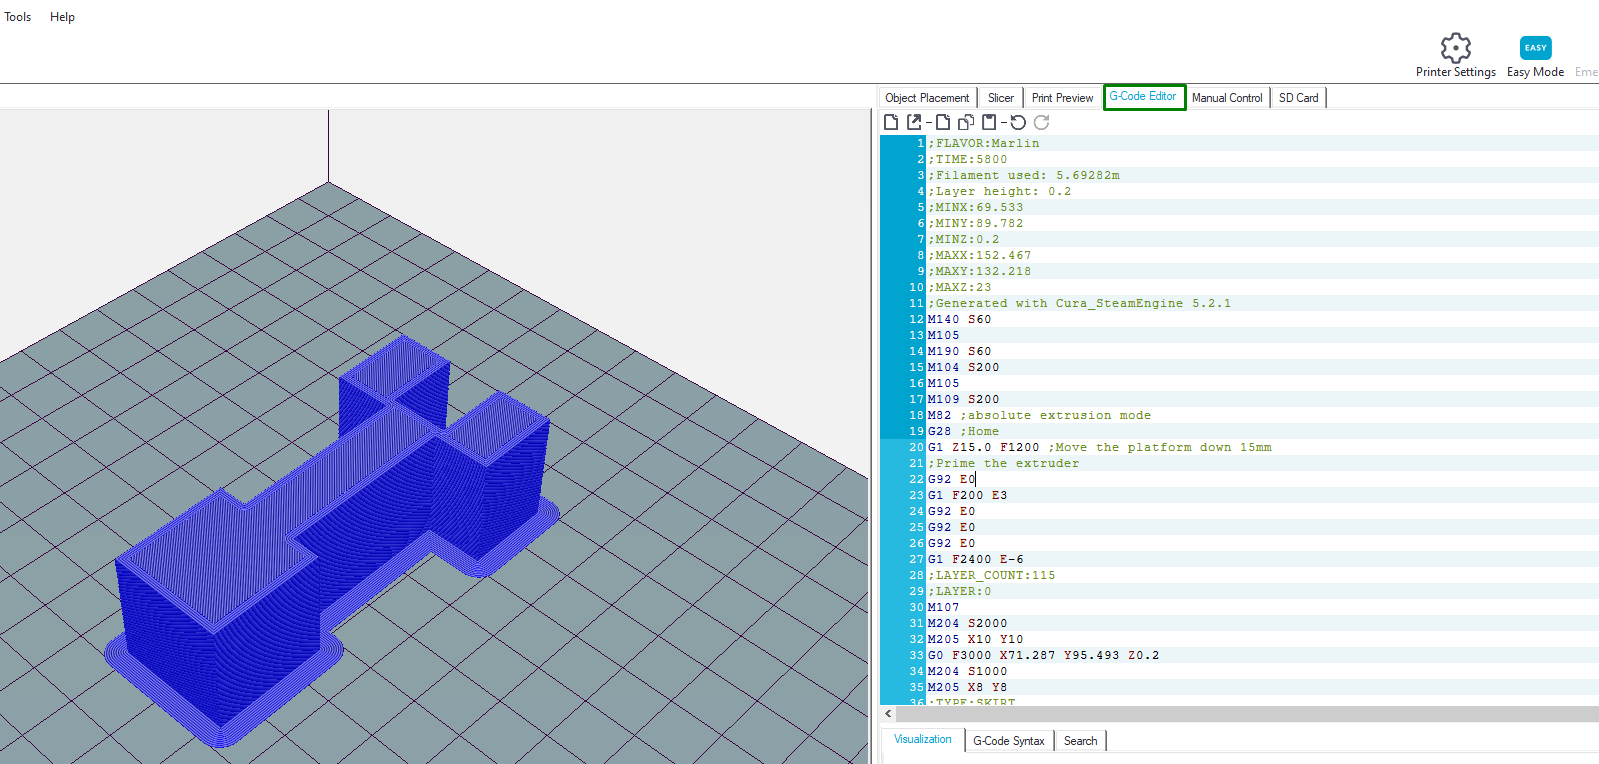
1. Open the G-code file in any 3D slicing software or G-code editor. In my case, I will open using Repetier Host as it has a section specifically for pasting the G-code and modifying it before sending it to the 3D printer.
2. Look for the G28 command, which homes the printer to its reference position, or G29 for auto bed leveling and add the Z0 command at the end to tell the nozzle to move to the zero point on the Z axis.
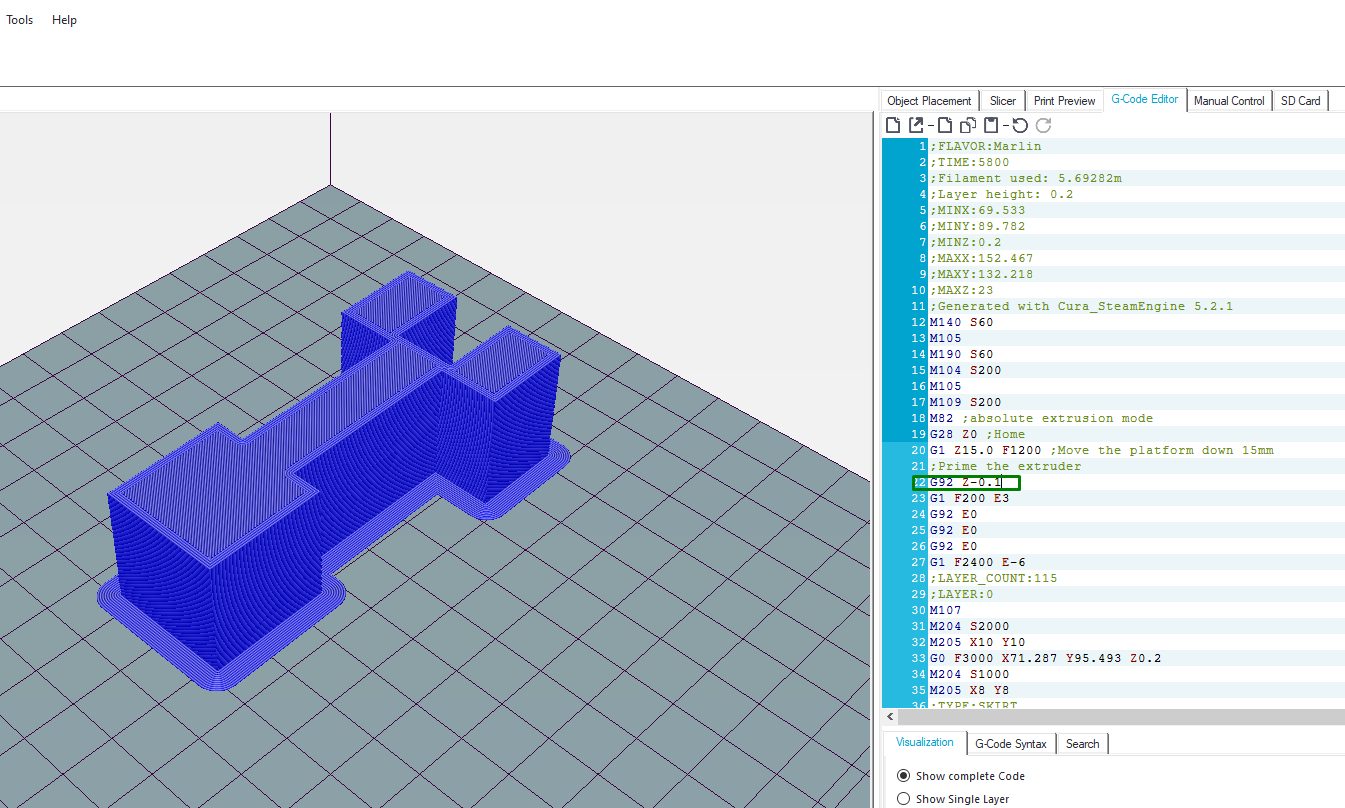
3. Go to the command that sets the initial Z position, which is G92, then add Z0.1 mm to assign a 0.1 mm value to the current position of the nozzle. To lift the nozzle to print on the surface, indicate a negative number for the Z-axis. You can add Z-0.1mm, as shown below.
4. Save the modified G-code file and send it to your 3D printer.
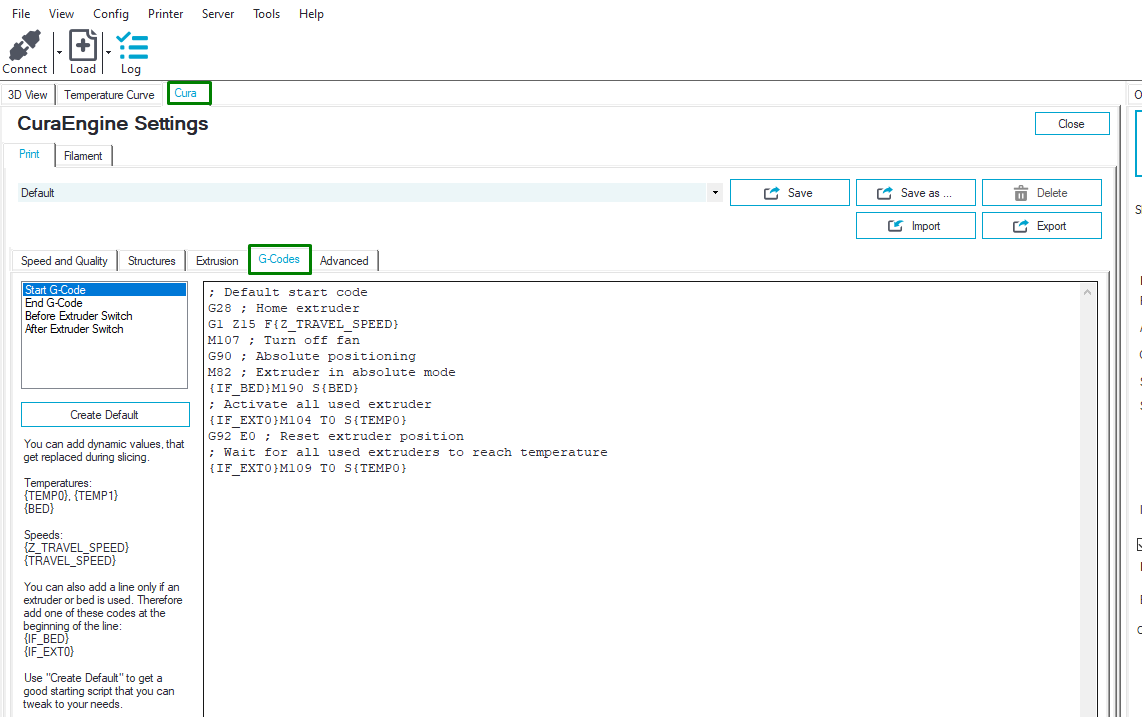
Another way to adjust the Z-offset while still in Repetier Host is by going to Cura > G-code.
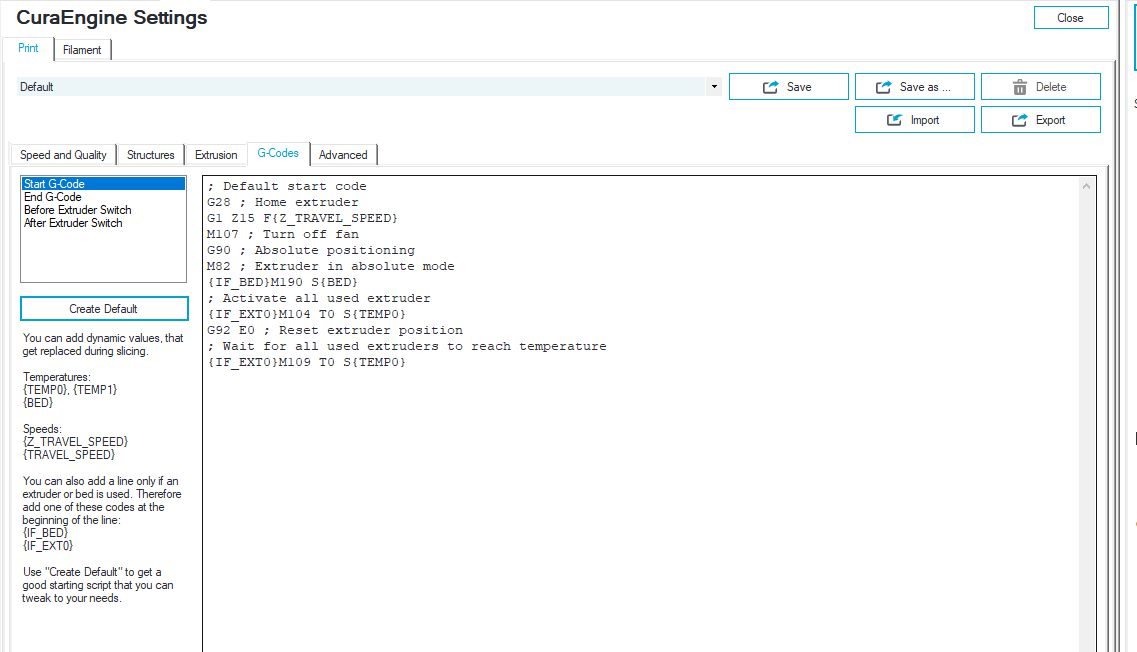
In the Start G-Code section, you can see the G28 and G92, and you can modify them as shown above. You can also save the changes to default settings so you can always use them by clicking Create Default.
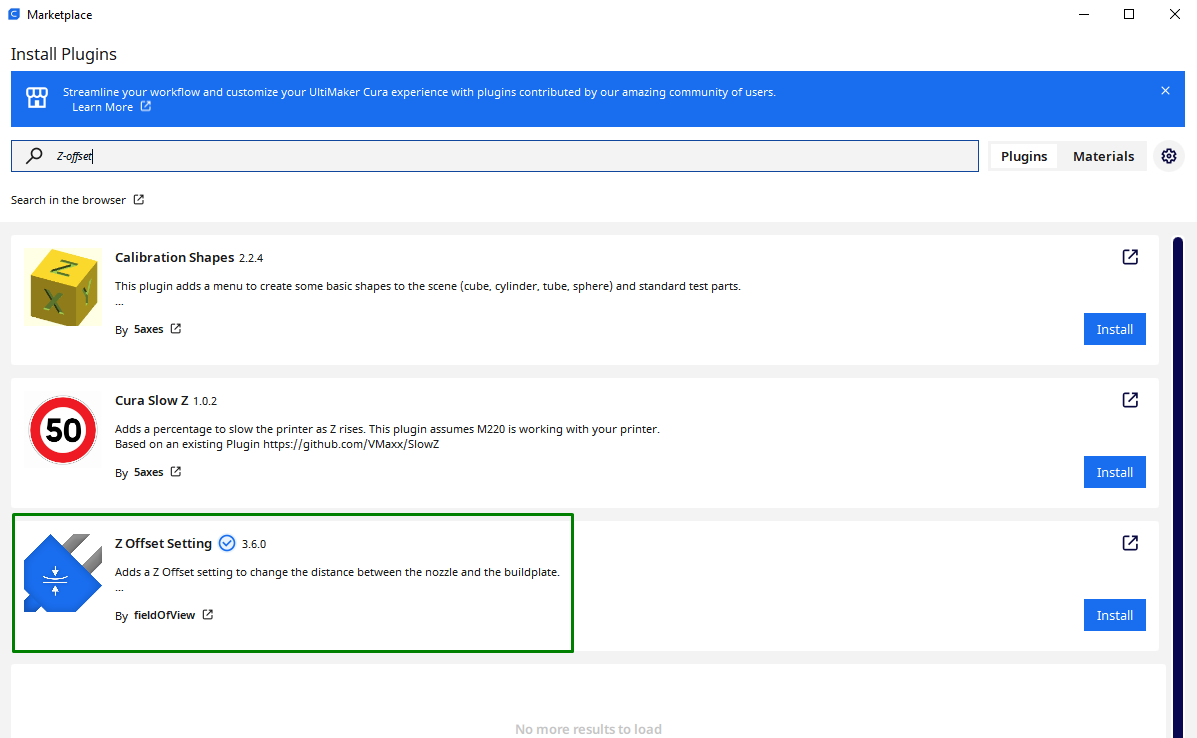
If you are using Ultimaker Cura slicer separately, you can adjust the Z-offset by installing the plugin. To do this, go to Marketplace, search for Z-offset settings, and install it.
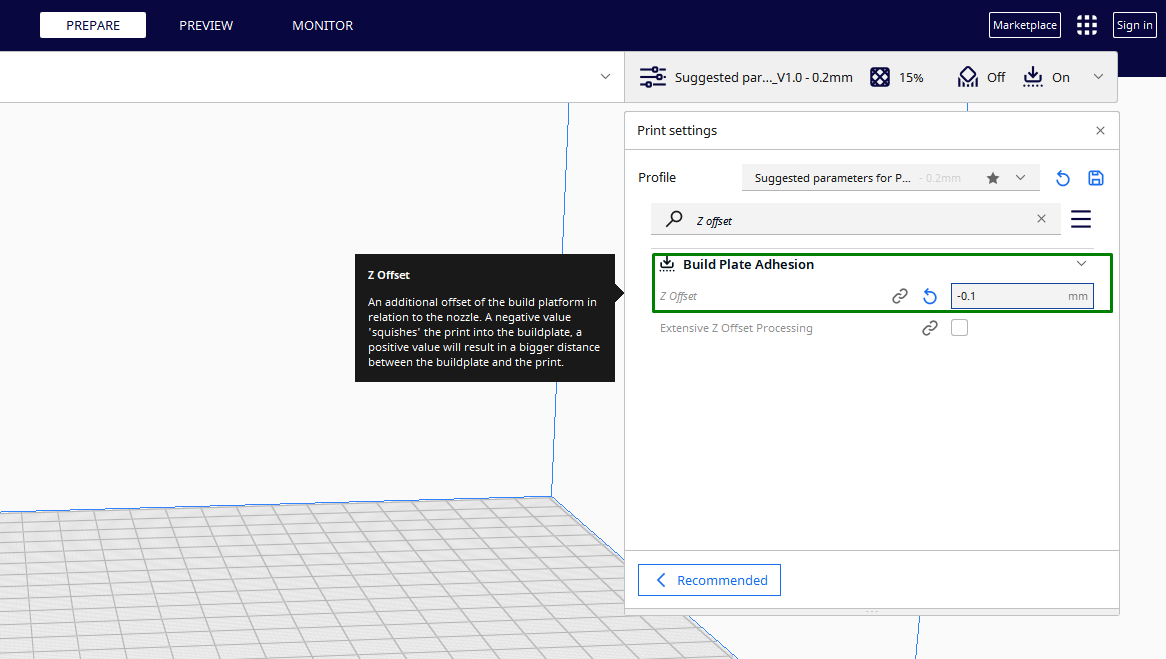
After installing, you will need to restart the slicer, then go to Print settings > profile and search Z Offset, and you will be able to see it.
Fine-Tuning the Z-Offset With “Baby Stepping”
“Baby stepping” is where you make small adjustments to the Z-offset while the printer is printing. This is done by sending a command to the printer to move the Z-axis a very small amount during the print. This way, you can adjust the Z-offset while the printer is printing, observe the changes in the first layer quality, and adjust the Z-offset accordingly.
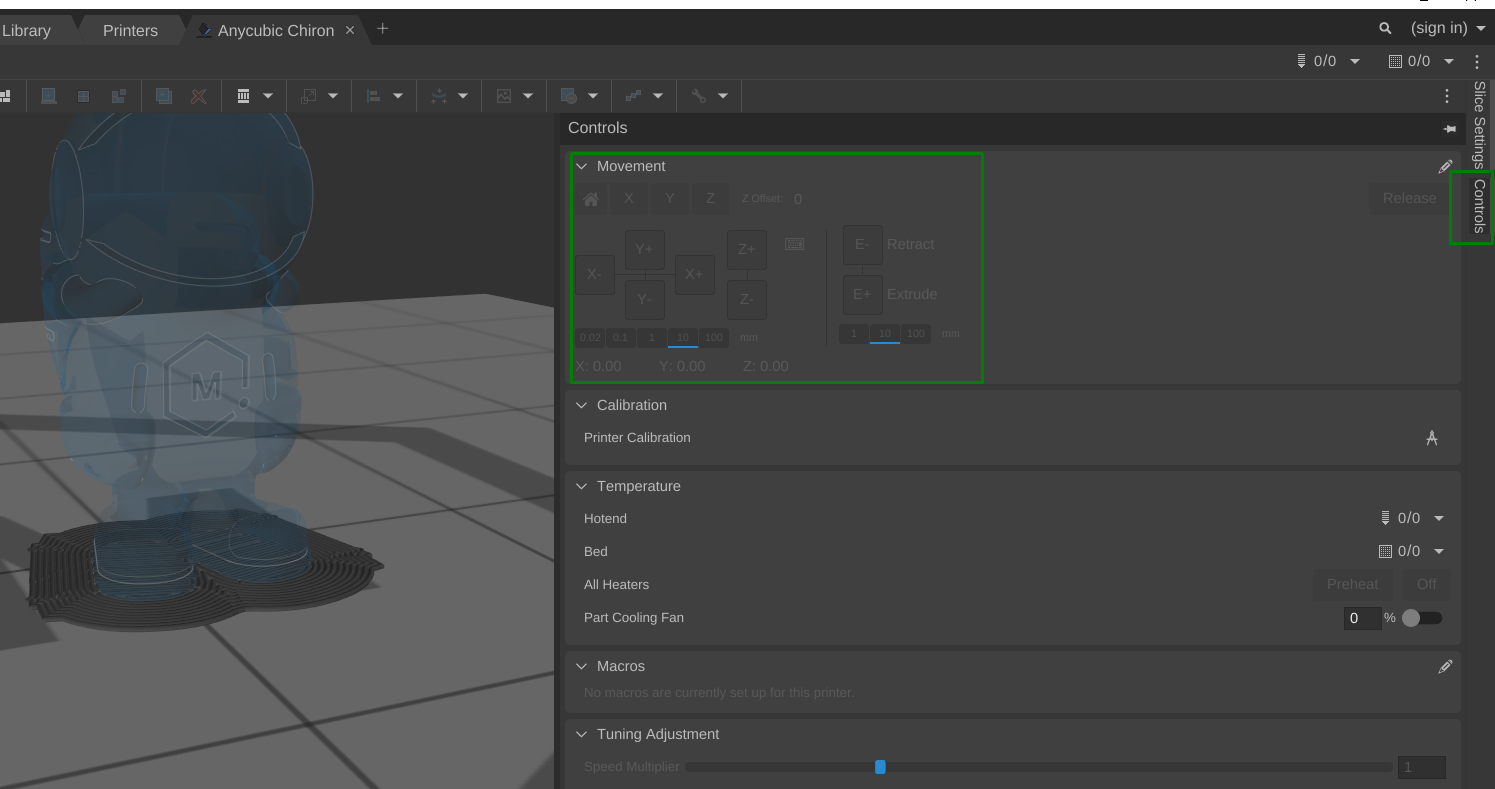
You can do this using the display screen of your 3D printer, where you pause the print, adjust the Z-offset, then resume the printing. Alternatively, you can use MatterControl software to do baby stepping without modifying your firmware or changing the settings on the display screen. You can also move the X and Y axis beside the Z axis as the print continues. After downloading the software and connecting your 3D printer, you can go to Controls > Movement.
After starting your print, you can click Z+ or Z- to move the nozzle higher or lower, and then you can watch your print in real time.
3D Printing Test Prints
To check if you have correctly set your Z-offset, you can 3D print a square that is 0.22mm high. Your goal is to have the top surface flat. If you see ridges or valleys on the 3D print, you should adjust the Z-offset until you find a smooth surface. You can download the files on Printables.
The above strategies should help you set the Z-offset of your 3D printer correctly. If you are confident that the Z-offset is correctly set, but you continue to encounter issues with your 3D prints, you should inspect and adjust other settings of your 3D printer.
MORE: Best 3D Printers
MORE: Best Budget 3D Printers
MORE: Best Resin 3D Printers
Sammy Ekaran is a freelancer writer for Tom's Hardware. He specializes in writing about 3D printing tutorials and guides. You can find more of his work on various publications, including Makeuseof, All3dp, and 3Dsourced.
