How To Set Up an SSH Key For Secure Connections
You can use a secure key for SSH, instead of a password.
Get Tom's Hardware's best news and in-depth reviews, straight to your inbox.
You are now subscribed
Your newsletter sign-up was successful
The Secure Shell Protocol (SSH) is perhaps the most well-known means to make a secure connection between a client machine (your laptop, phone or desktop) and a remote server in an office, data center or in your home network. You’ll likely use SSH if you want to get to the command line on your web hosting service or a headless Raspberry Pi. SSH is available in some form for nearly every operating system, and often it is integrated into the OS.
Most servers give you a choice of connecting to SSH via a password or via SSH keys, which are more secure. The SSH key method uses cryptographically-generated public and private keys to create an encrypted connection between devices.
Our public key is stored on the remote machine and a private key is stored on our machine. The two SSH keys are required to make a secure connection. Keys can also be used with passphrases to add another level of security, but they can also be used without, for example in automated processes.
In this how to we will learn how to create SSH keys using PuTTY, the most popular SSH client, and at the Windows Command Prompt / Linux Terminal.
Preparing the Remote Server for SSH Keys
Our remote machine can be in a data center run by a web hosting service, our office or home. Typically Linux servers such as VPS and cloud hosting will have SSH running by default, using passwords for secure logins. If this is not the case, you will need to enable SSH via the control panel for your VPS / cloud service. If you are using a home server, then it is possible that it may not be installed. If that is the case, follow these steps before moving onwards.
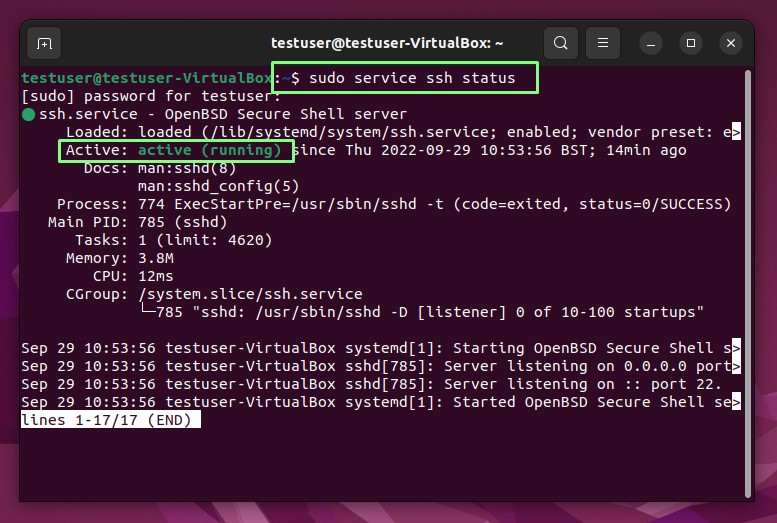
1. Open a terminal and check for a running SSH service on the machine. If the SSH service is running it will return Active: active (running).
sudo service ssh status2. On the physical server, open a terminal and install OpenSSH Server. You will need to be sat in front of the machine to issue these commands.
Get Tom's Hardware's best news and in-depth reviews, straight to your inbox.
sudo apt update
sudo apt install openssh-server
3. Start the SSH service.
sudo service ssh start4. In your home directory create a hidden directory called .ssh.
mkdir .ssh5. Close the connection by pressing CTRL+D or typing exit and pressing Enter.
Using PuTTY to Connect to a Remote Server Using SSH Keys
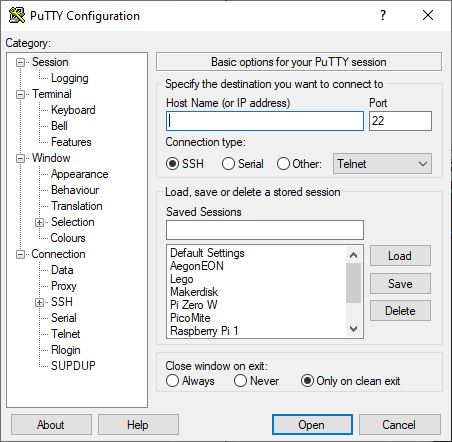
PuTTY is an application to create and manage SSH and serial connections to devices. PuTTY comes with its own key generator application and in this part of the how to we will create a public for our remote server and private key on our trusted device.
1. Download and install PuTTY. Windows does have its own command prompt, which can be used with SSH, but PuTTY is by far the most accessible means to open an SSH connection.
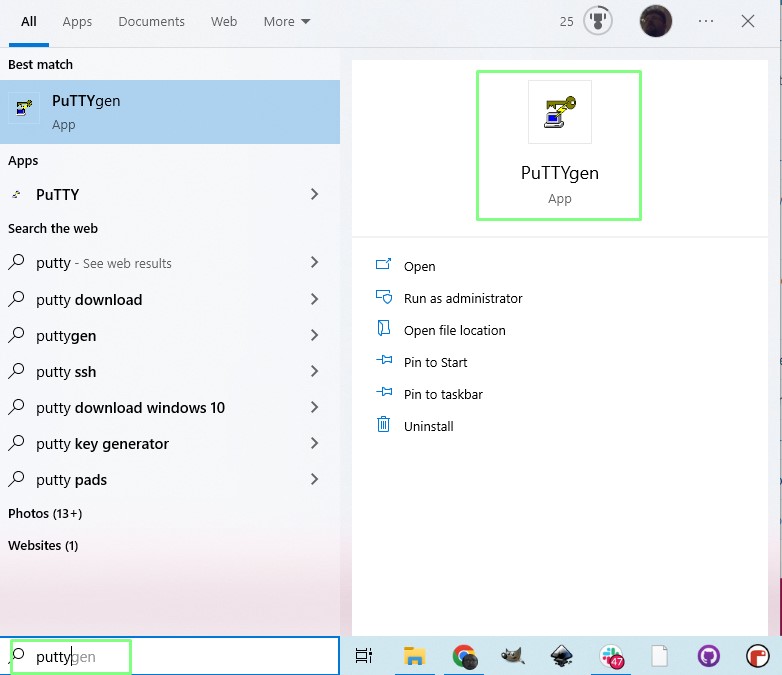
2. Search for puttygen and open the application.
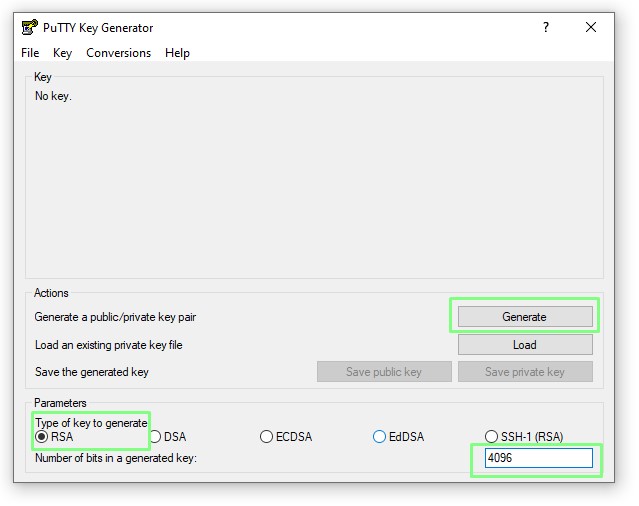
3. Click on RSA and set the bits to 4096. Click Generate to create a key.
4. Move the mouse around the blank area of the dialog to generate a random seed for the key.
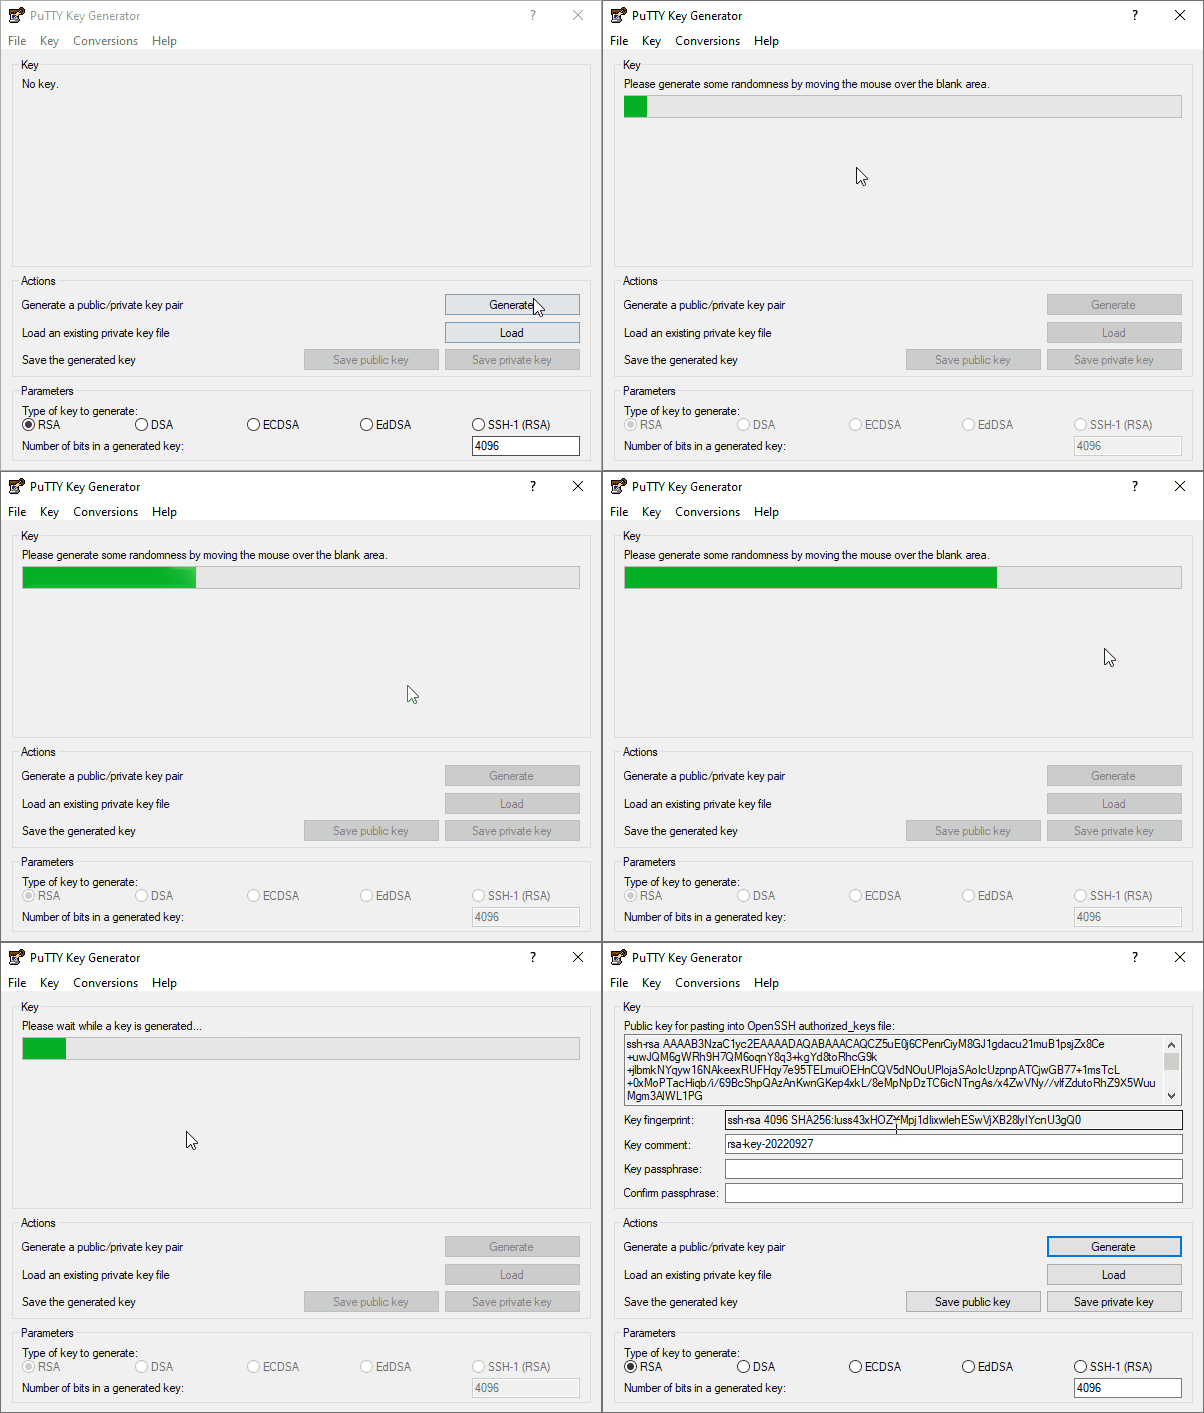
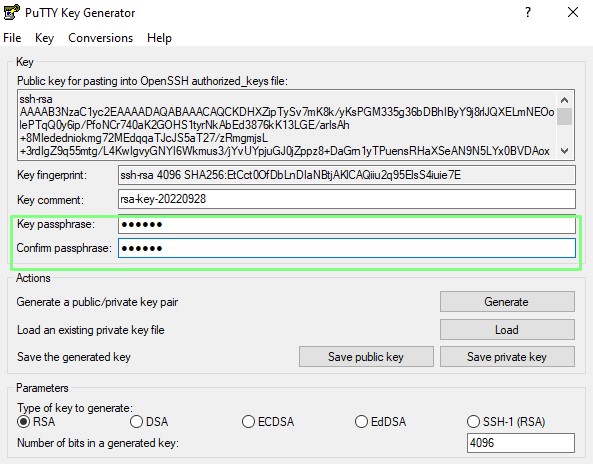
5. Create a passphrase for the key. This is advised for SSH keys that will be used in interactive sessions.
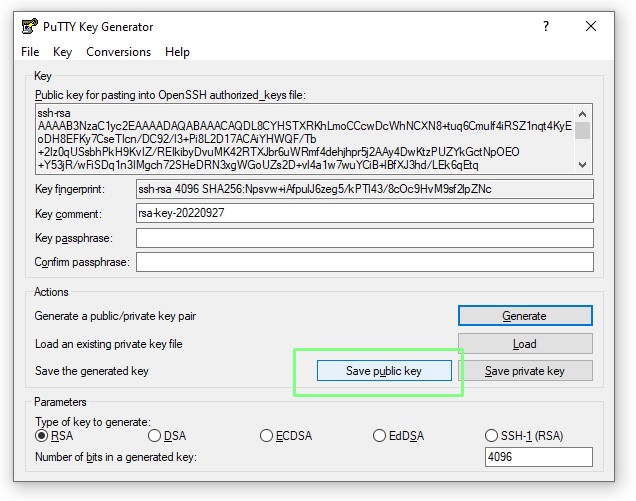
6. Save the public key as id_rsa_putty.pub to a folder called .ssh.
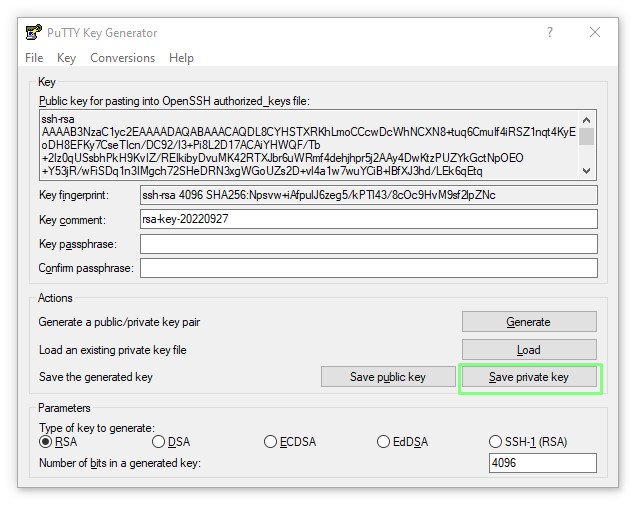
7. Save the private key as id_rsa_putty.ppk. The ppk file is Putty’s own private key format.
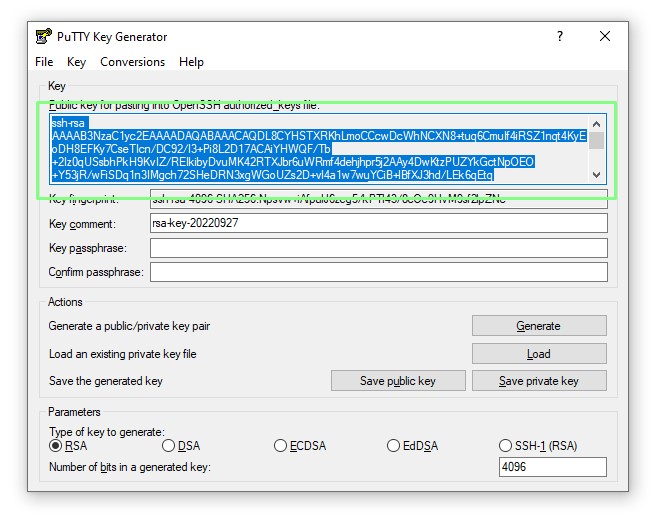
8. Highlight the public key and copy the text.
Copying the Public Key to the Remote Server
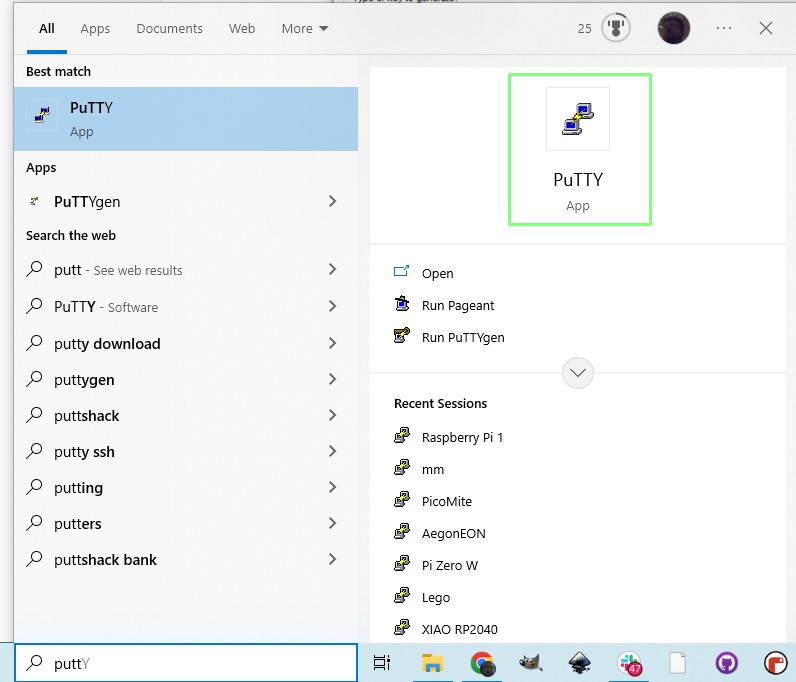
1. Launch PuTTY.
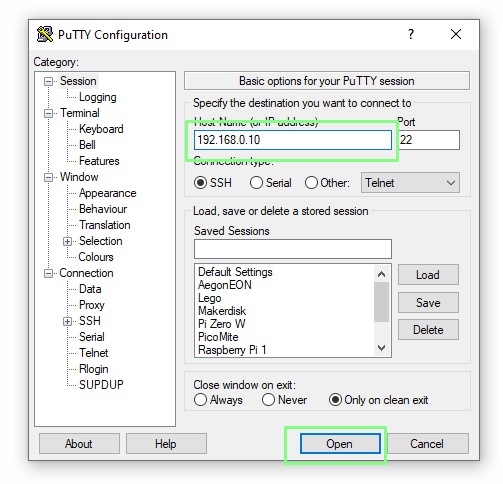
2. Enter the IP address or hostname for your remote server and click Open.
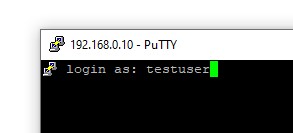
3. When prompted, enter your username and password for the remote server. Note that the password is not shown. This is a security feature to prevent “shoulder surfing”.
4. Using the nano text editor, create a new file called authorized_keys in the .ssh directory.

5. Right click and paste the public key (created in PuTTYGen) into the blank file. Save by hitting CTRL+X,then Y and Enter.
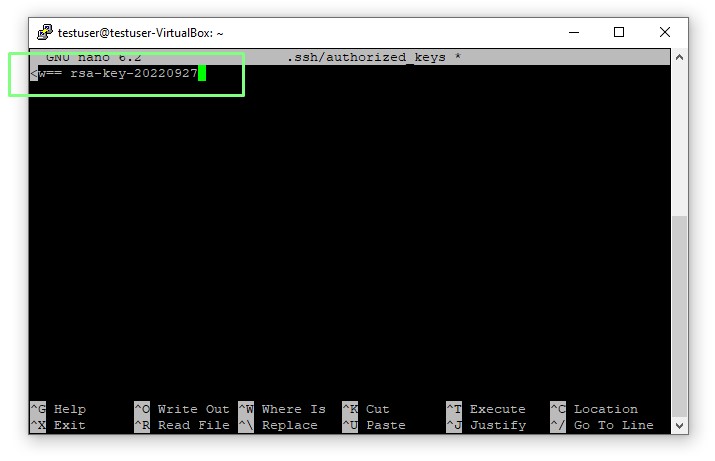
6. Log out of the SSH session by pressing CTRL + D.
7. Re-Open PuTTY and go to SSH >> Auth.
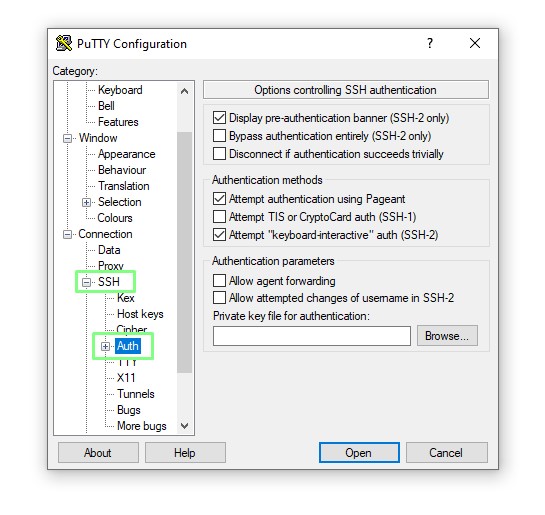
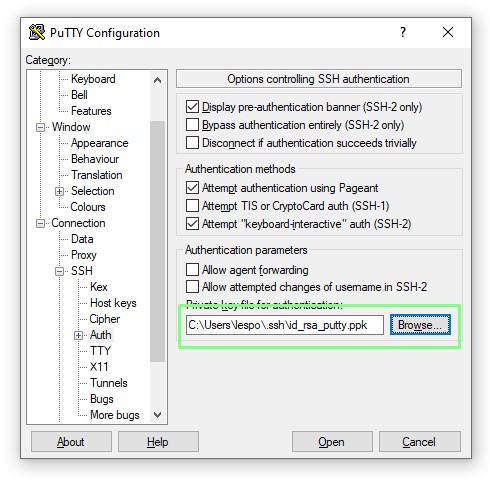
8. Select the Putty Private Key (ppk) that we just created.
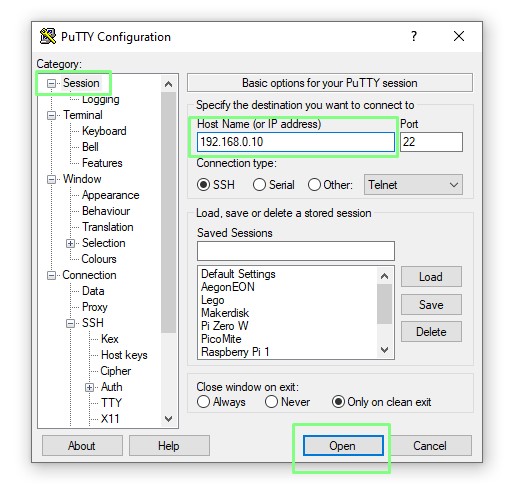
9. Scroll back to Session, enter the hostname / IP address for your server and click Open to start a connection.
10. Enter your username, then the passphrase for your key. Press Enter to login.
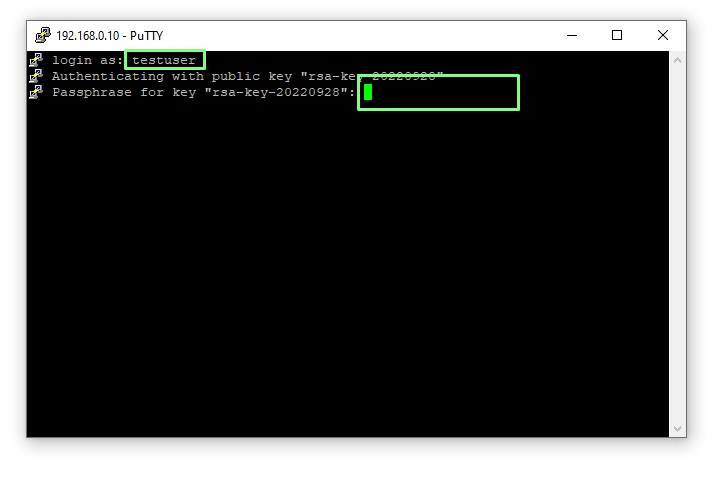
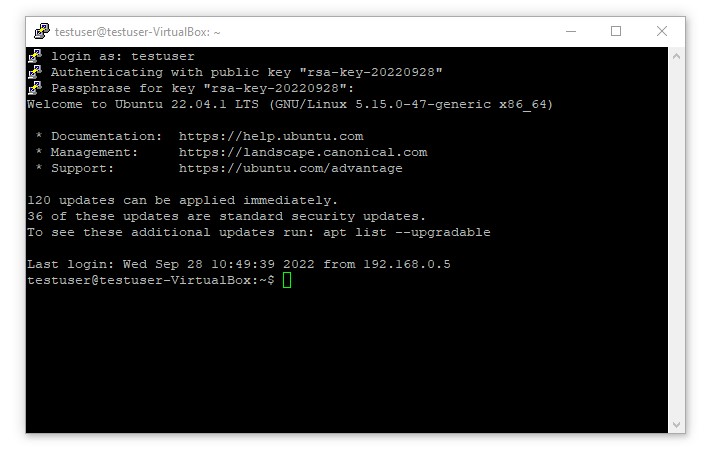
You are now in control of the remote server, using a Linux terminal working in the Linux filesystem. To close a connection use CTRL + D or click on the X to close the window.
How To Create an SSH Key Pair via the Command Prompt / Terminal
Creating an SSH key pair from the command prompt / Linux terminal can be done with just one command and a few questions to answer. We set up the public and private keys on our client machine, copying the public key to the remote server. These steps apply to the Windows command prompt and the Linux terminal.
1. Open a Command Prompt by pressing the Windows key and search for CMD. Press Enter to run.
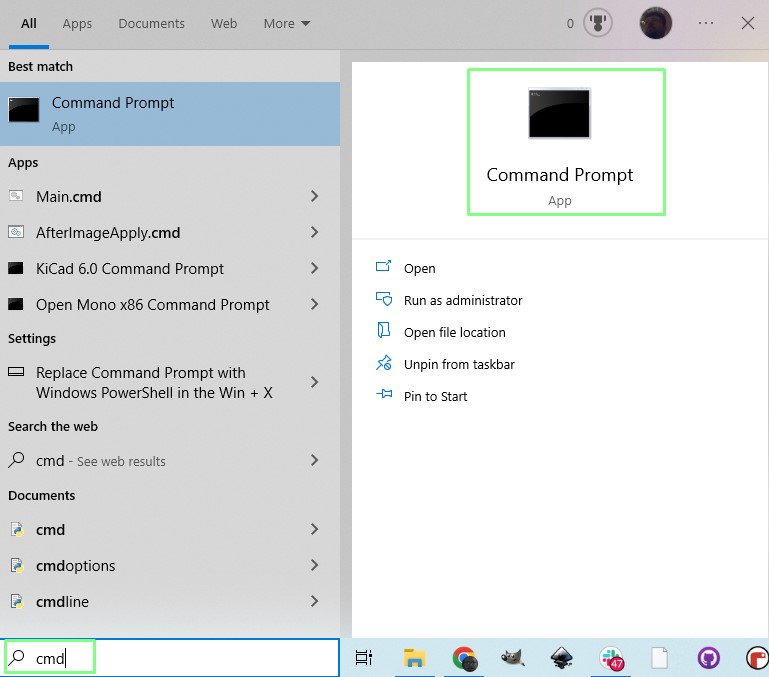
2. Use the ssh-keygen command to create a SSH key using the RSA key type, with 4096 bits.
ssh-keygen -t rsa -b 4096 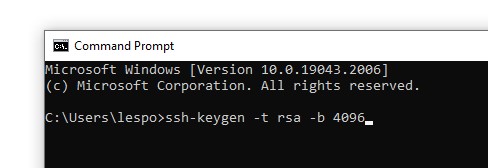
3. When prompted to name your key, press Enter. This will save the private and public key to the .ssh directory for your named account. For example our keys were saved to C:\Users\lespo\.ssh. Linux users, the keys will save to .ssh in your home directory \home\user\.ssh
4. When prompted, give your key a passphrase as an extra level of security. A passphrase is an additional security step for SSH keys that will be used by real users (interactively). A passphrase is not needed if the SSH connection will be used in an automated script.
5. Change directory to the location of your SSH keys. Here we assume that you are in your named account. For example C:\Users\lespo is ours. Under Linux it would be /home/les/.ssh
cd .ssh6. List the files in the directory. There should be id_rsa and id_rsa.pub.
Windows Command
dir
Linux Command
ls
Copying the Public Key to the Remote Server
The public key is stored on our remote server, and it interacts with the private key on our trusted machine to form a secure connection. In order to get the public key to our server we need to securely copy (scp) the file across.
1. In a Command Prompt use the scp command to securely copy the id_rsa.pub to your home directory on the remote server. You will need to know the IP address or hostname of the remote computer. In our example we copied the file to testuser@192.168.0.10:/home/testuser/
scp id_rsa.pub user@hostname:/home/username2. SSH into the remote computer.
ssh user@hostname3. Verify that the id_rsa.pub file is present in your home directory.
ls *.pub4. Copy the contents of the file into a new file in the .ssh directory. Using the cat command we send the contents to the file, authorized_keys using a pipe that appends the data to the file (>>).
cat id_rsa.pub >> .ssh/authorized_keys5. Close the SSH connection by pressing CTRL + D or by typing exit.
6. Reconnect via SSH to the remote computer. If you created a passphrase for your SSH key, you will be prompted for it.
Using SSH Keys on Another Machine
Reusing your private SSH key is possible, but it isn’t the best security practice. Losing a laptop with the key means that you will need to regenerate your keys. Best practice would be to generate a new key pair for each device that wishes to connect. Appending the public key to the authrozied_keys file on the server. That said, it is relatively easy to reuse a private key across multiple devices.
Reusing a PuTTY Private Key
PuTTY stores the private key as a PPK key and this file is all we need for a machine to connect to a remote server using our public key.
1. Go to your .ssh folder and copy the PPK file to a USB stick. Keep this USB stick safe as it can be used by anyone to gain access to your server.
2. Insert the USB stick into another computer.
3. Create an .ssh folder in your home directory. For windows this would be C:\Users\username\.ssh and Linux /home/user/.ssh.
4. Copy the PPK file to the .ssh directory.
5. Follow from Step 7 of Copying the Public Key to the Remote Server to login.
Reusing a Command Prompt / Terminal Private Key
1. Go to your .ssh folder and copy the private key file to a USB stick. Keep this USB stick safe as it can be used by anyone to gain access to your server.
2. Insert the USB stick into another computer.
3. Create an .ssh folder in your home directory. For windows this would be C:\Users\username\.ssh and Linux /home/user/.ssh.
4. Copy the private key file to the .ssh directory.
5. Start an SSH session to the remote computer. If you created a passphrase for your SSH key, you will be prompted for it.
ssh user@hostname
Les Pounder is an associate editor at Tom's Hardware. He is a creative technologist and for seven years has created projects to educate and inspire minds both young and old. He has worked with the Raspberry Pi Foundation to write and deliver their teacher training program "Picademy".
