How to Use Cura Vase Mode
Produce aesthetically pleasing designs with Cura vase mode
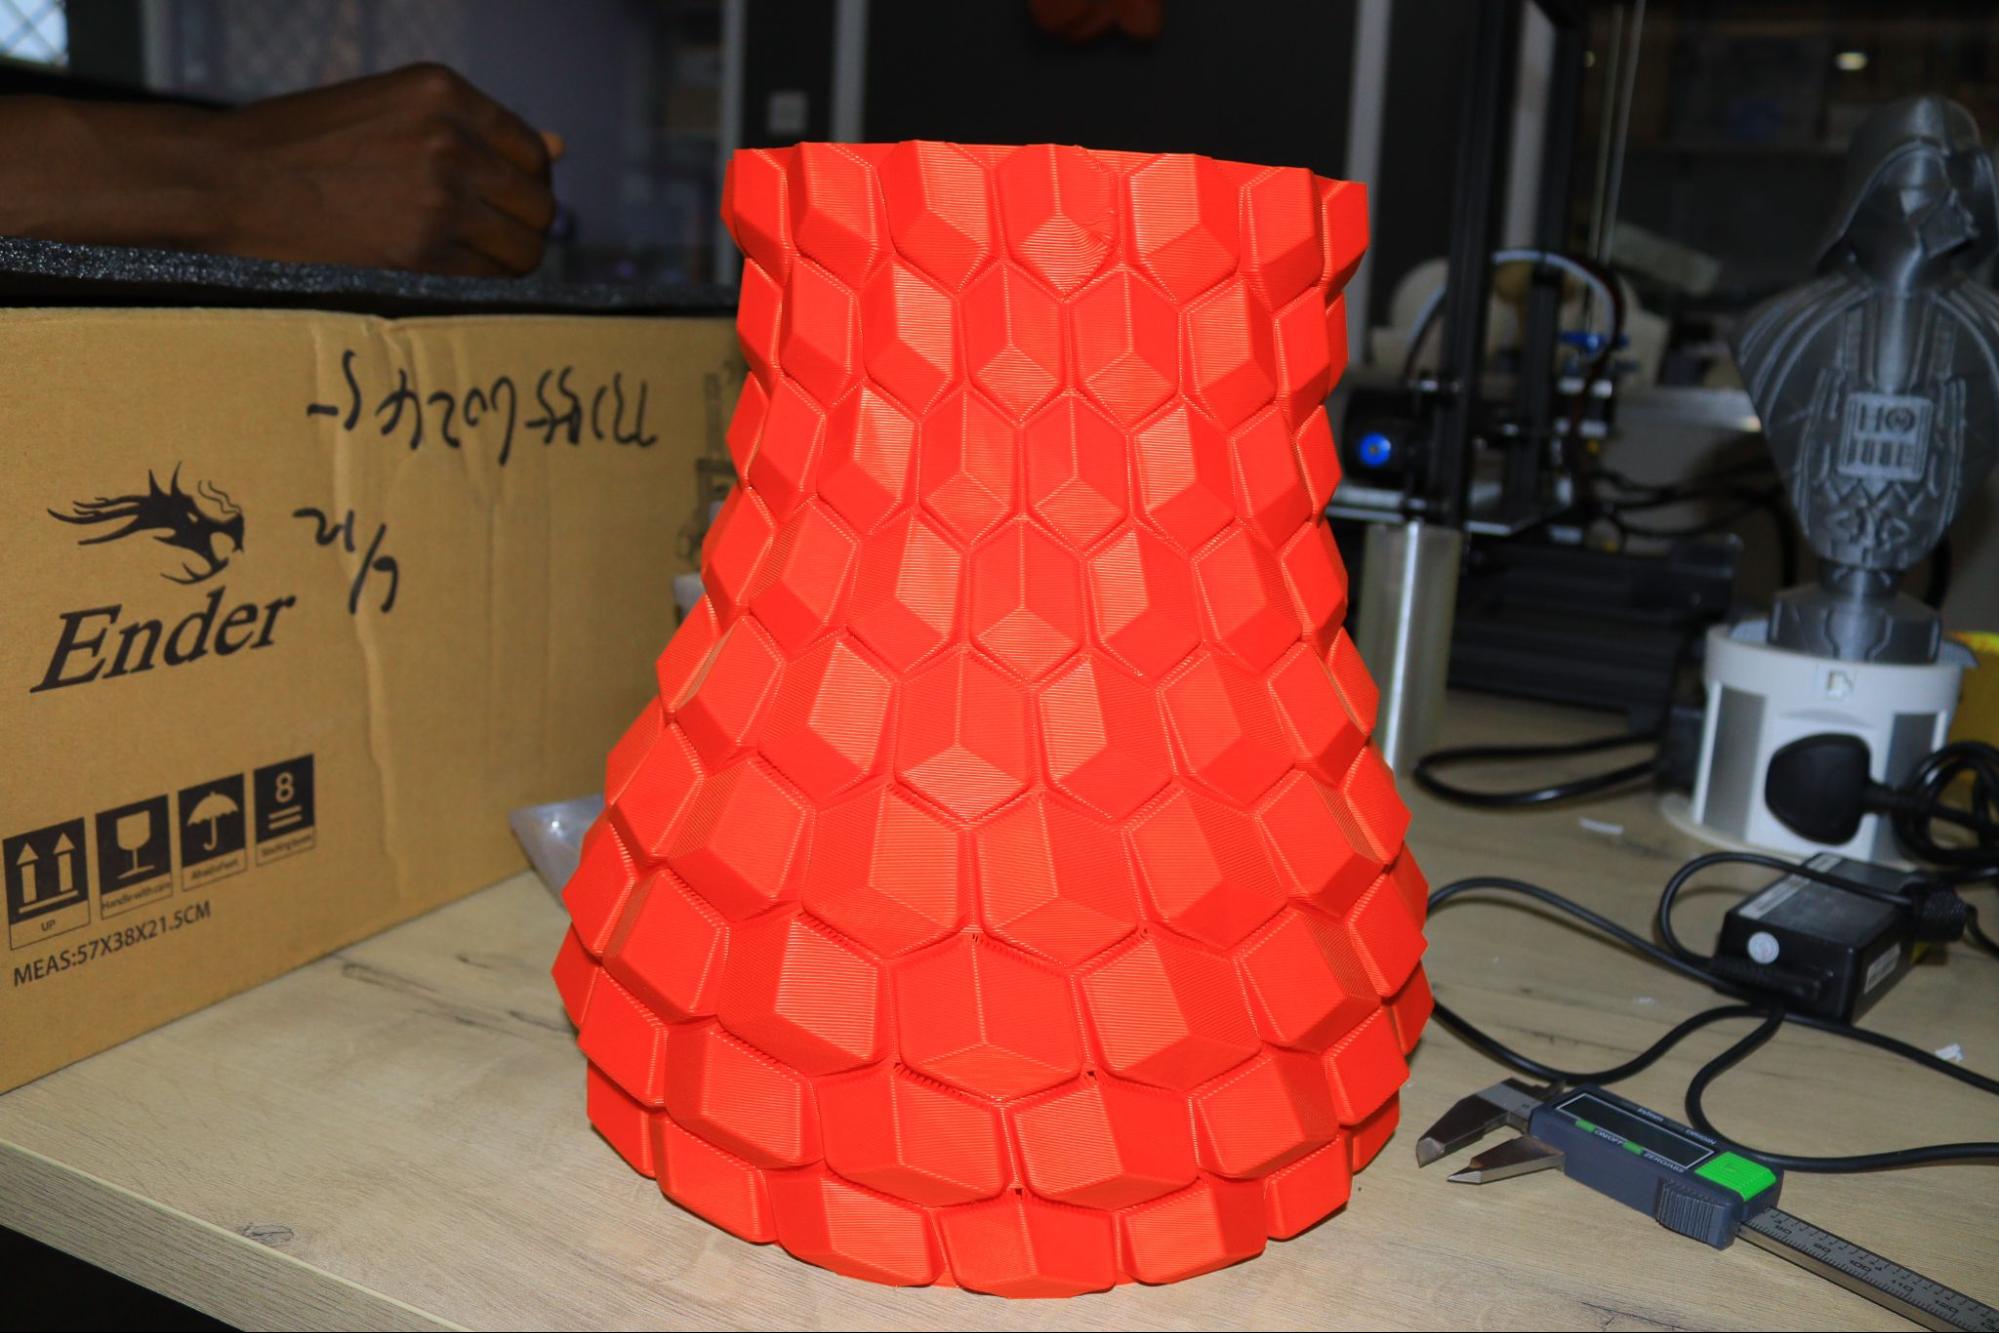
3D printing visually appealing designs that have a continuous geometry, like a vase or cylinder, can be a challenge. When you try to use the standard settings, you will realize that the outer sections don’t come out well. In Cura slicer, this issue is solved using the Cura vase mode or “Spiralize Outer Contour.” This feature allows you to produce 3D prints with a continuous, spiral, single outer wall with a smooth surface finish. It does this by slowly increasing the Z-axis continuously. It can also speed up print times while using less material.
Cura vase mode works perfectly for decorative items like vases and plant plots with artistic designs and patterns that might not be produced easily using standard settings. Even though it’s useful for such designs, you can use it in other projects, like sculptures, with unique design twists.
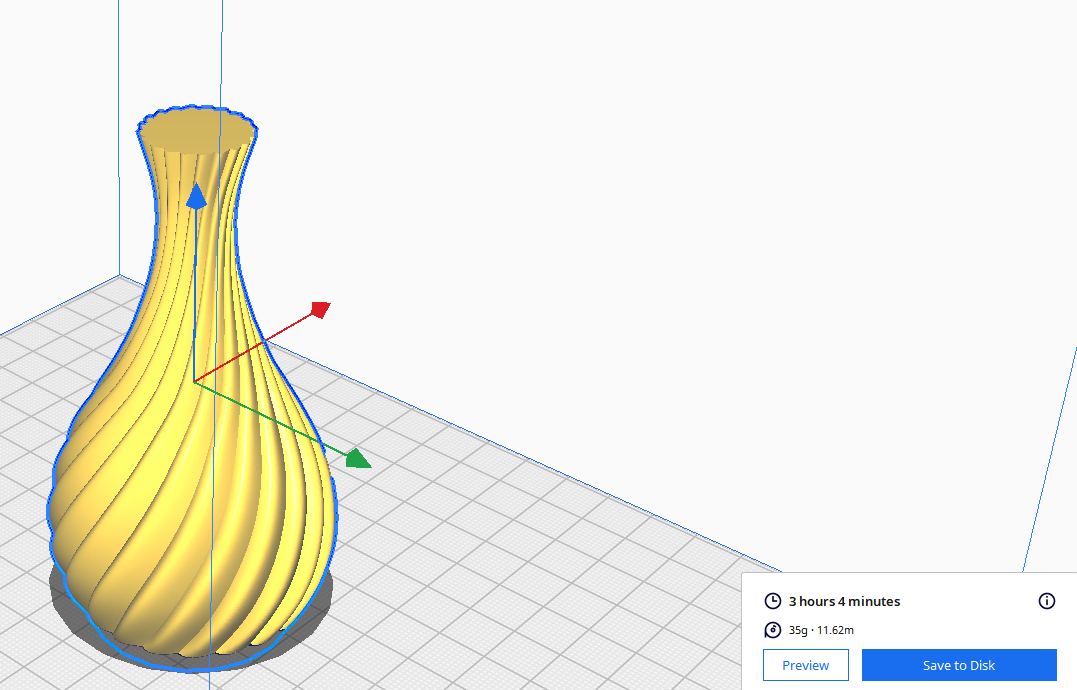
Compared to normal settings, this mode uses less material and takes less time to print the same object. For example, when using the normal settings, the print takes 3 hours and 4 minutes and uses 35g of the material.
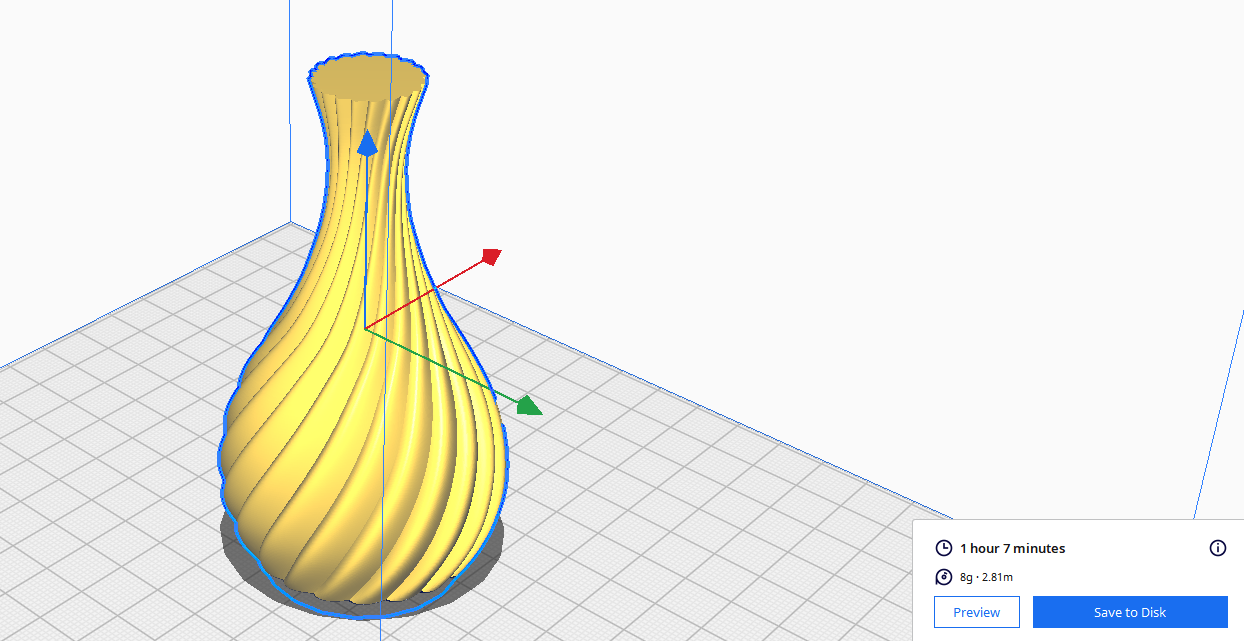
When Cura vase mode is activated, it takes 1 hour and 7 minutes and uses around 8g.
Another key benefit of using Cura vase mode is that the quality of the print you produce using different materials and nozzle sizes is always of high quality. There are also fewer post-processing activities required as there usually are no visible layer lines on the outer surface of the design that need to be removed as the nozzle doesn’t have places where it starts and stops.
To enable this setting in Cura, follow these steps:
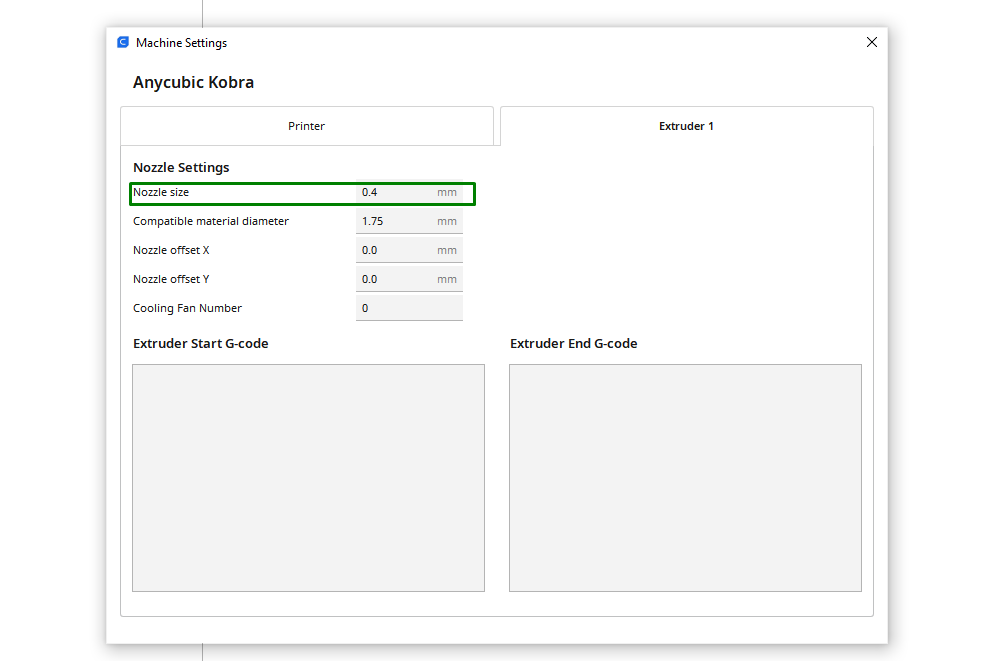
1. Set up your 3D printer. After launching Cura, go to the printers section and add your machine if you have not yet done so. Most of the best 3D printers using FDM 3D printing technology have their profiles in Cura, and you can set yours up quickly. You also need to set up your nozzle size. The one that works best for Cura vase mode is between 0.4 and 0.6 mm.
Stay On the Cutting Edge: Get the Tom's Hardware Newsletter
Get Tom's Hardware's best news and in-depth reviews, straight to your inbox.
2. Import your design to Cura and select it.
3. Search for Special modes from the custom settings section.
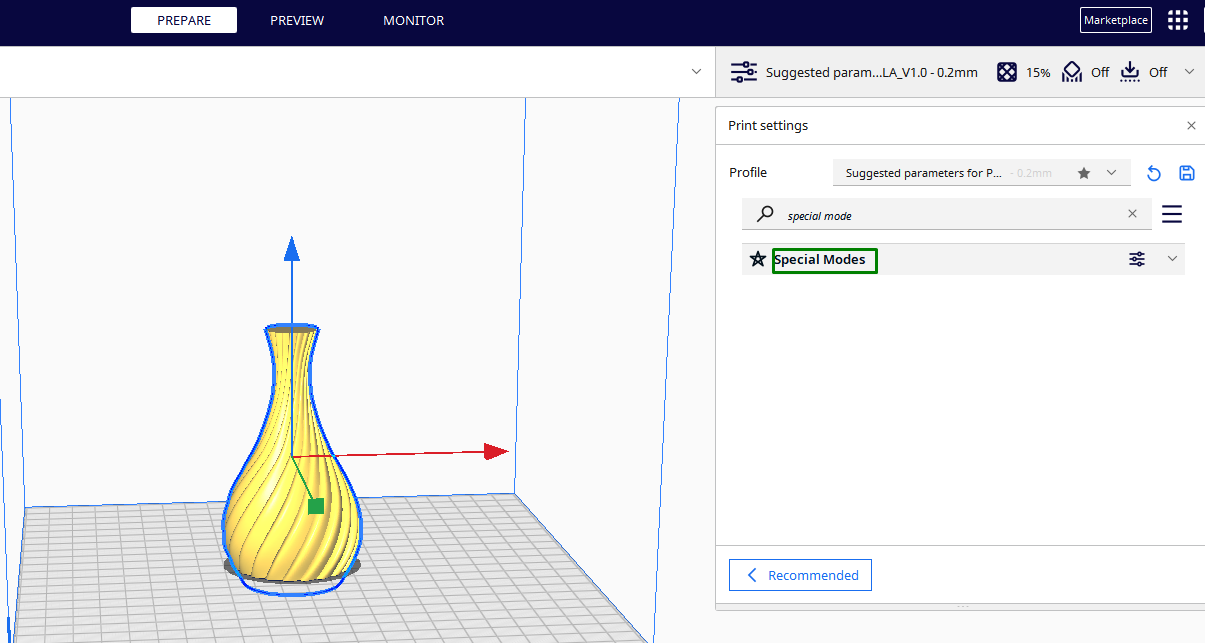
4. Check the Spiralize Outer Contour and Smooth Spiralized Contours.
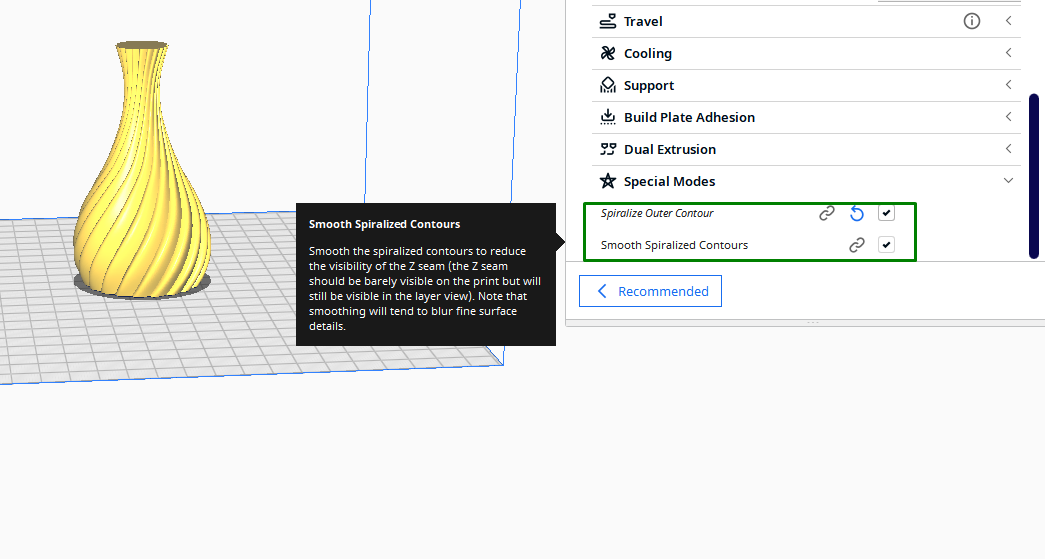
If you go to the Preview section and check the 3D printing simulation, you will realize that only the outer section is being 3D printed. You can proceed to set the temperature based on the material you are using and the speed. After that, there are other necessary settings that you need to adjust before slicing the file and sending it for 3D printing. These include:
Temperature
There is no specific temperature for 3D printing in Cura vase mode, as it varies depending on the material you are using and even speed. However, you need to use a slightly higher temperature, especially if you change the nozzle to a larger one. You can increase the temperature in small values until you achieve the perfect one. You can also download and 3D print a test model to use as a gauge for finding the ideal value.
Wall Line Width and Nozzle Size
The wall line width is the width of the outermost walls of the object, and it defines how thick the outer walls will be. The value is usually the same as the nozzle size you are using. For example, I am using a nozzle with a diameter of 0.4mm; you can see that it’s the same value in this setting.
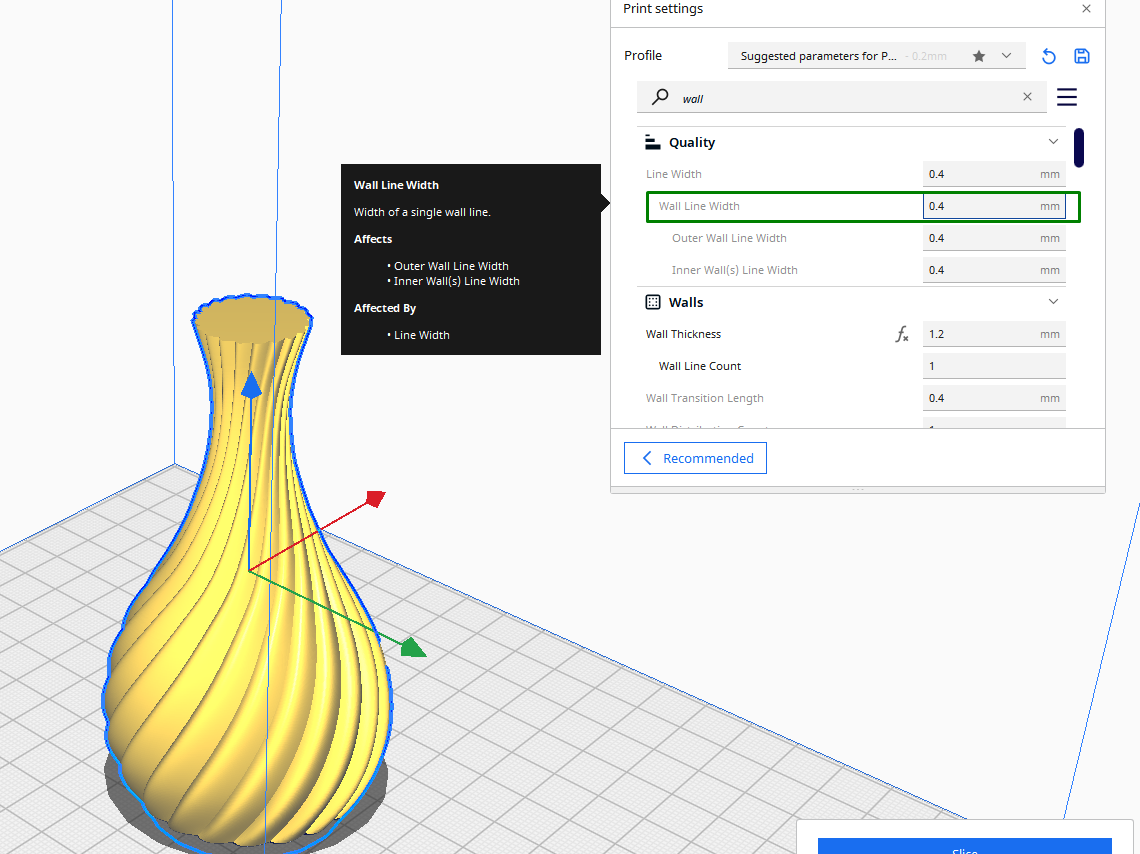
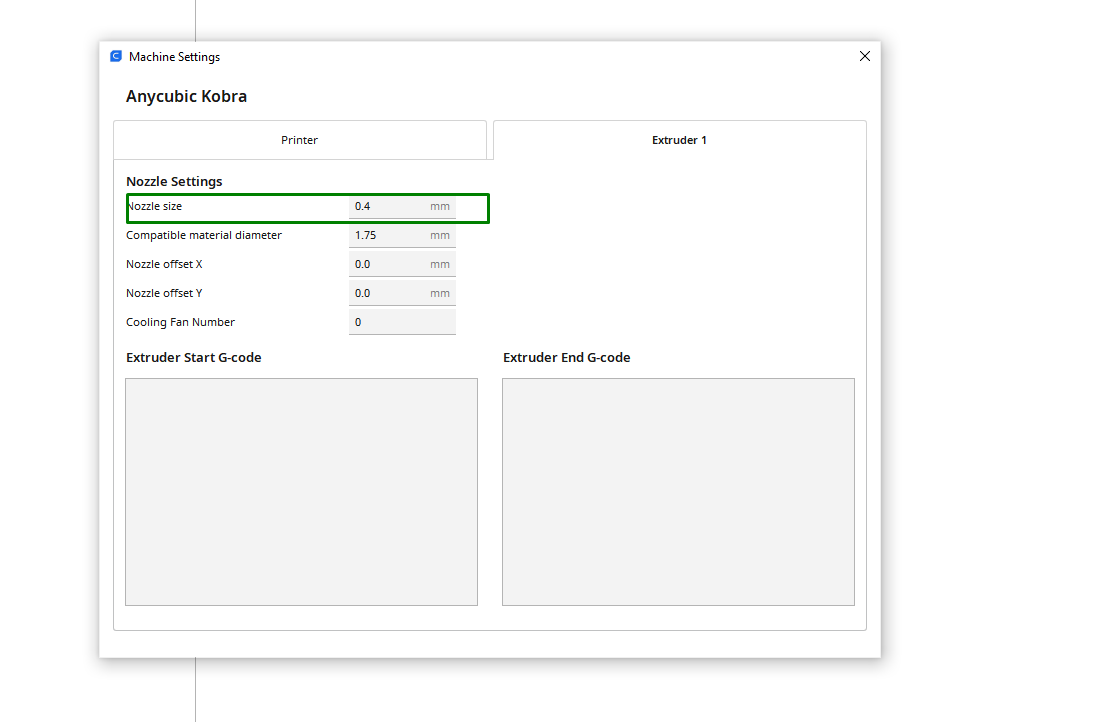
If you want to achieve stronger parts, you can either change the nozzle and use a bigger one or increase the size of the wall line width, maybe up to 0.6mm, and it will work well. When you change your nozzle, you need to adjust it too in the slicer by going to Settings > Printer > Manage Printers, then choose Machine Settings. In the Extruder section, you will see nozzle size settings.
Speed
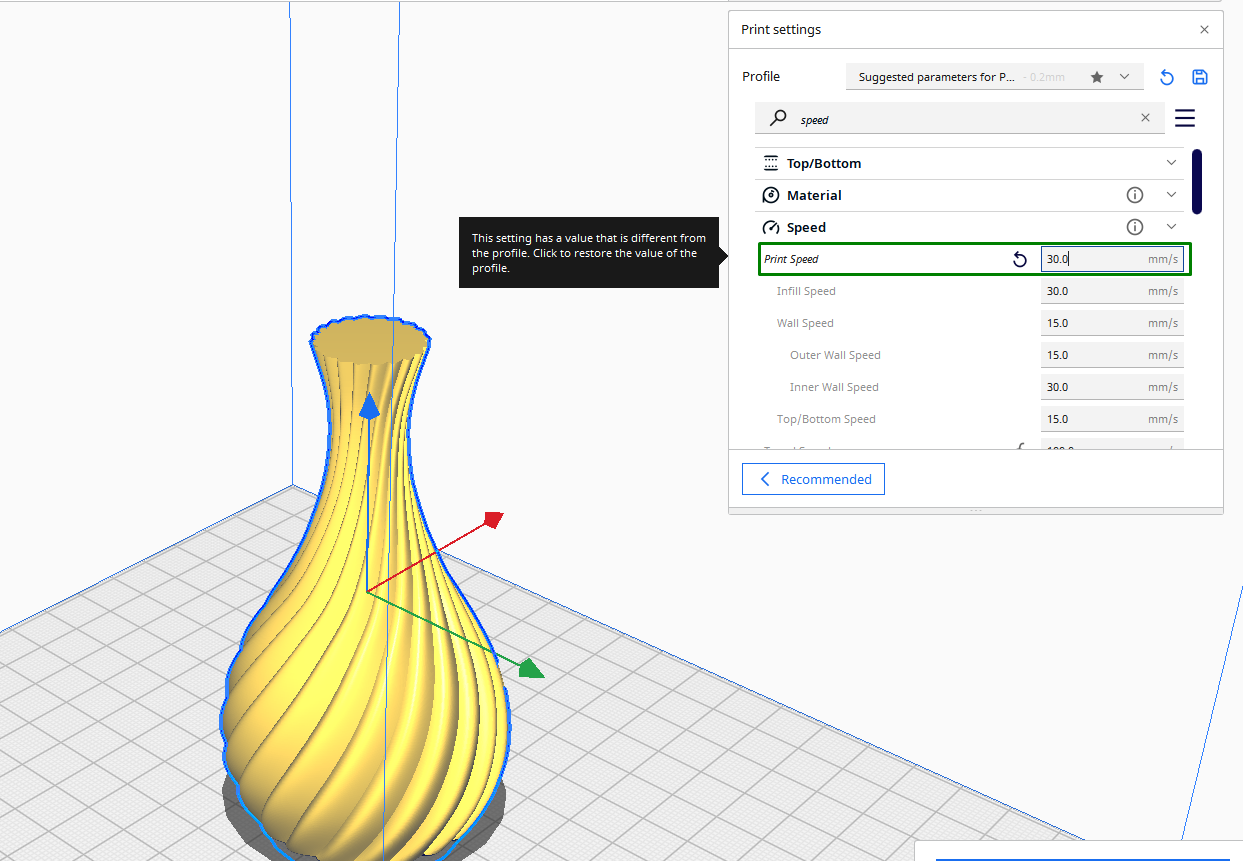
As I explained above, when 3D printing in vase mode, the nozzle moves in a continuous spiral motion, creating a single wall and not the normal layer-by-layer method. If it moves faster, the material might not get enough time to cool, and it can result in a failed 3D print. So, you need to use a lower temperature of around 20 to 30 mm/s so that the material can cool appropriately before the next pass. Also, a very high speed can result in vibrations, which might affect the structural integrity of your design. You can adjust the print speed settings in the Print Speed section.
Even though Cura vase mode has many benefits, as we have seen, you need to remember that it has its limitations. For example, it doesn’t work on designs that have:
- Their tops closed, and those that are fragile: Cura vase mode works best on the designs whose top section is open.
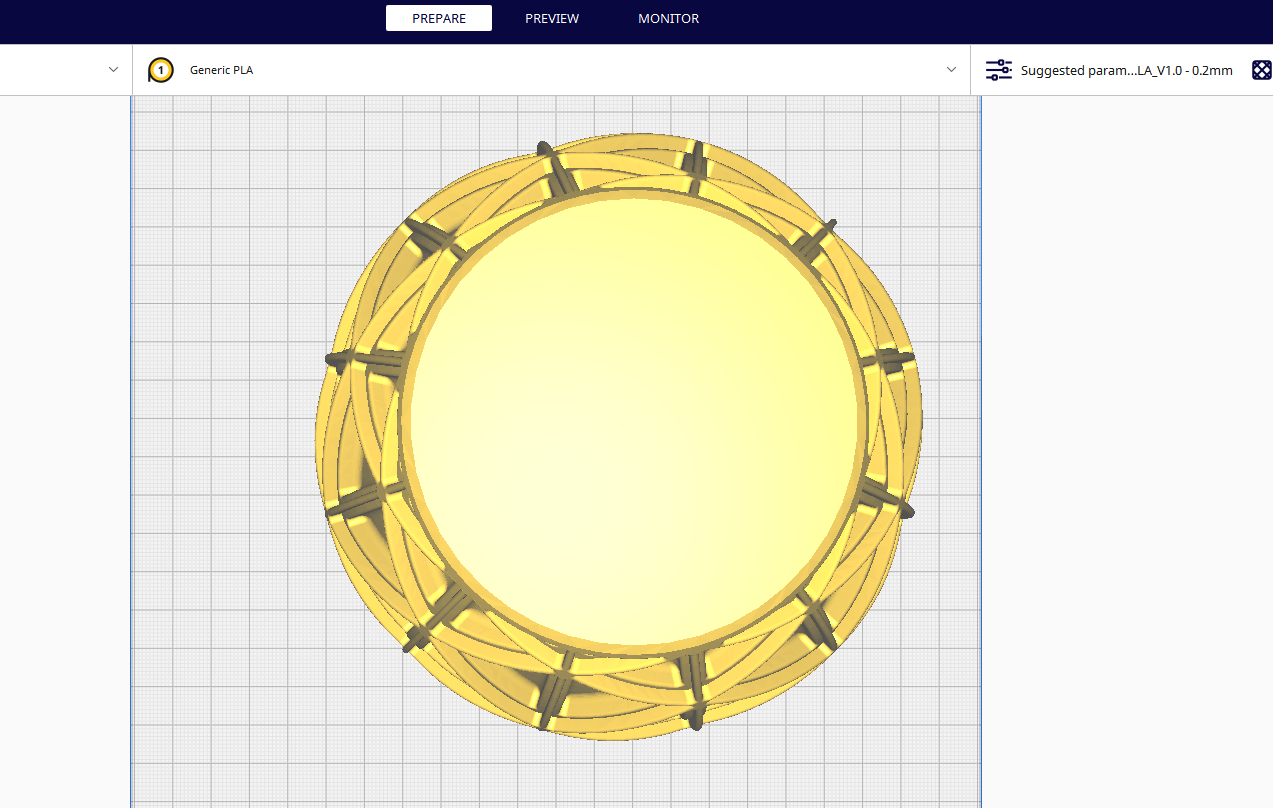
- Multi-walled objects: Cura vase mode works perfectly for single-walled prints. If the design you are printing has multiple walls or other intricate internal structures, like the one shown below, it might not work well with this feature.
- Solid objects: It works on hollow objects. You should use the normal print mode if you are printing objects with internal structures.
- Objects that require overhangs: This feature doesn’t work on objects that need support structures, as the overhangs can fail in this mode.
- Designs with non-cylindrical shapes: Even though you can use vase mode in other designs that don’t have vase-like shapes, the objects with irregular shapes or those with sharp angles may not be 3D printed easily in vase mode.
- Multi-material objects: It’s hard to 3D print objects with multiple materials or colors in vase mode.
So before you use this feature, you need to evaluate your 3D model and see if it’s worth using it as it’s only useful for specific designs.
Related Tutorials
More: How to Use PrusaSlicer: A Beginners Guide
More: 5 Ways Fix Z Banding in 3D Printing
More: How to Use FreeCAD for 3D Printing
More: How to Convert OBJ Files to STL Files for 3D Printing
More: How to Clean and Cure Resin Prints