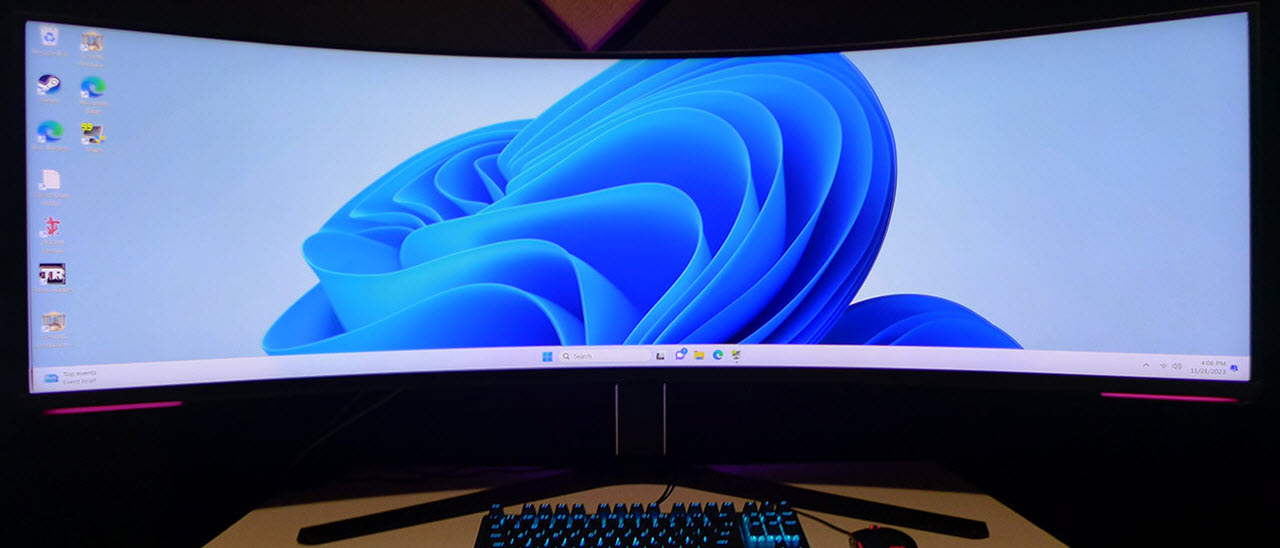
Tom's Hardware Verdict
There is nothing else that can deliver the immersive experience of the Samsung Odyssey Neo 57 G9. With tremendous resolution, speed, brightness and color; it creates a virtual world unlike any other monitor. It’s expensive for sure but worth every penny.
Pros
- +
Addictive gaming experience
- +
Stunning image with deep contrast and saturated color
- +
Super smooth at 240 Hz
- +
Premium build quality and styling
- +
There’s nothing else like it
Cons
- -
No remote
- -
No internal speakers
- -
Challenging system requirements
- -
Expensive
Why you can trust Tom's Hardware
First-person gaming is a major factor in my monitor reviews, but I usually talk about shooters and other virtual worlds where the player moves through an environment on foot. Simulators are another category that has become significant thanks to rapid advances in both software and hardware.
There’s nothing quite like the feel of a force feedback rig that takes you to great racetracks like Spa or Watkins Glen, but to maximize the experience, you need one of the best ultrawide gaming monitors. Many setups employ two or three 34-inch screens, but there’s that annoying vertical line you can’t unsee.
Samsung, probably the most prolific maker of extreme monitors, comes to the rescue with its Odyssey Neo 57 G9. It’s a 57-inch 32:9 aspect VA Mini LED screen with Dual Ultra HD (DUHD, 7680x2160) resolution, 240 Hz, Adaptive-Sync, wide gamut color and HDR10+ with 1,000 nits. There’s nothing normal about it.
Samsung Odyssey Neo 57 G9 Specs
| Panel Type / Backlight | VA / Mini LED |
| Row 1 - Cell 0 | 2,392 dimming zones |
| Screen Size / Aspect Ratio | 57 inches / 32:9 |
| Row 3 - Cell 0 | Curve radius: 1000mm |
| Max Resolution and Refresh Rate | 7680x2160 @ 240 Hz |
| Row 5 - Cell 0 | Freesync: 48-240 Hz |
| Row 6 - Cell 0 | G-Sync Compatible |
| Native Color Depth and Gamut | 10-bit / DCI-P3 |
| Row 8 - Cell 0 | HDR10+, HDR 1000 |
| Response Time (GTG) | 1ms |
| Brightness (mfr) | 420 nits SDR |
| Row 11 - Cell 0 | 1,000 nits HDR |
| Contrast (mfr) | 2,500:1 |
| Speakers | None |
| Video Inputs | 1x DisplayPort 2.1 |
| Row 15 - Cell 0 | 3x HDMI 2.1 |
| Audio | 3.5mm headphone output |
| USB 3.0 | 2x up, 2x down |
| Power Consumption | 79w, brightness @ 200 nits |
| Panel Dimensions WxHxD w/base | 52.3 x 19-23.6 x 19.7 inches (1,328 x 483-599 x 500mm) |
| Panel Thickness | 13.3 inches (338mm) |
| Bezel Width | Top/sides: 0.4 inch (9mm) |
| Row 22 - Cell 0 | Bottom: 0.8 inch (20mm) |
| Weight | 41.8 pounds (19kg) |
| Warranty | 3 years |
The 57G9 is a massive display by any measure. You’ll need a lot of room to accommodate its nearly five-foot width and two-foot depth. Unlike other high-end Odyssey monitors I’ve reviewed, it has no streaming or TV aspirations. It’s a straight-up gaming monitor with high performance and superb image quality at the forefront.
DUHD resolution is a new one for me and with it comes a few caveats. Dual Ultra HD is 7680x2160 pixels, 16.6 megapixels, not quite 8K, but that is a lot of dots to move at 240 Hz. You get Adaptive-Sync in both flavors as well. The 57G9 hasn’t been certified by Nvidia, but I'll be surprised if it isn’t on the list when you read this. I confirmed G-Sync operation in my tests.
Running 240 Hz at full resolution comes with some specific system requirements, mainly that you need a DisplayPort 2.1 or HDMI 2.1 interface. You won’t find that on many video cards, most notably the GeForce RX 4090, which has DP version 1.4. This means that you’ll be limited to 120 Hz at full resolution. If you want to run at 240 Hz, you can back off to 5120x1440. Either way, the overdrive is locked out when Adaptive-Sync is turned on. That means you’ll want to run at 240 Hz, even if it means reducing resolution. I’ll talk about that more below.
The 57G9’s VA panel is lit by a 1,000-nit Mini LED with 2,392 dimming zones. Local dimming is used to good effect to produce infinite contrast for HDR content. You also get a wide gamut courtesy of a Quantum Dot layer that covers 90% of DCI-P3, according to my test results. Accuracy is assured by factory calibration, and I confirmed that as well. There is good looking color aplenty.
Gaming features include aiming points but no timers or frame rate indicator, and you get LED lighting in the back with two small accents in front. OSD control is via navpad underneath the center of the panel. I thought a remote might be in the box, but there is none. There are three HDMIs and one DisplayPort along with USB ports that have a KVM feature. However, there are no built-in speakers.
The 57G9 is the ideal simulator screen if you can budget $2,000. While that is certainly expensive, nothing else is remotely like it for sale. With the preliminaries out of the way, let’s take a closer look.
Assembly and Accessories
The 57G9 comes out of a coffin-like box and assembles like any other monitor. The base attaches with two captive bolts, and you’ll need a Phillips-head screwdriver to tighten the panel to the upright. The resulting package is almost 42 pounds and large, so consider having a friend help you get it into place. A plastic trim ring and cable clip complete the assembly. High-speed HDMI and DisplayPort cables are included along with USB and a power cord with right-angled plugs. A heavy metal bracket serves as an adaptor for the 100mm VESA mount if you use an aftermarket mounting solution.
Product 360
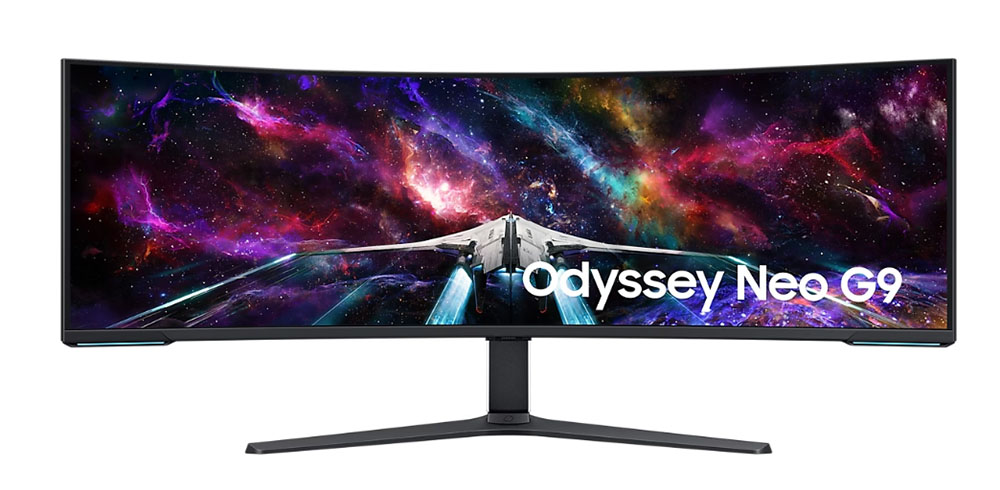
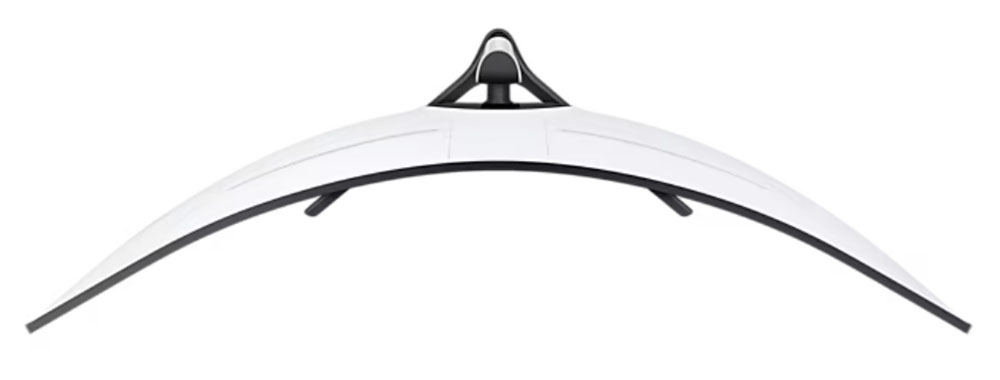
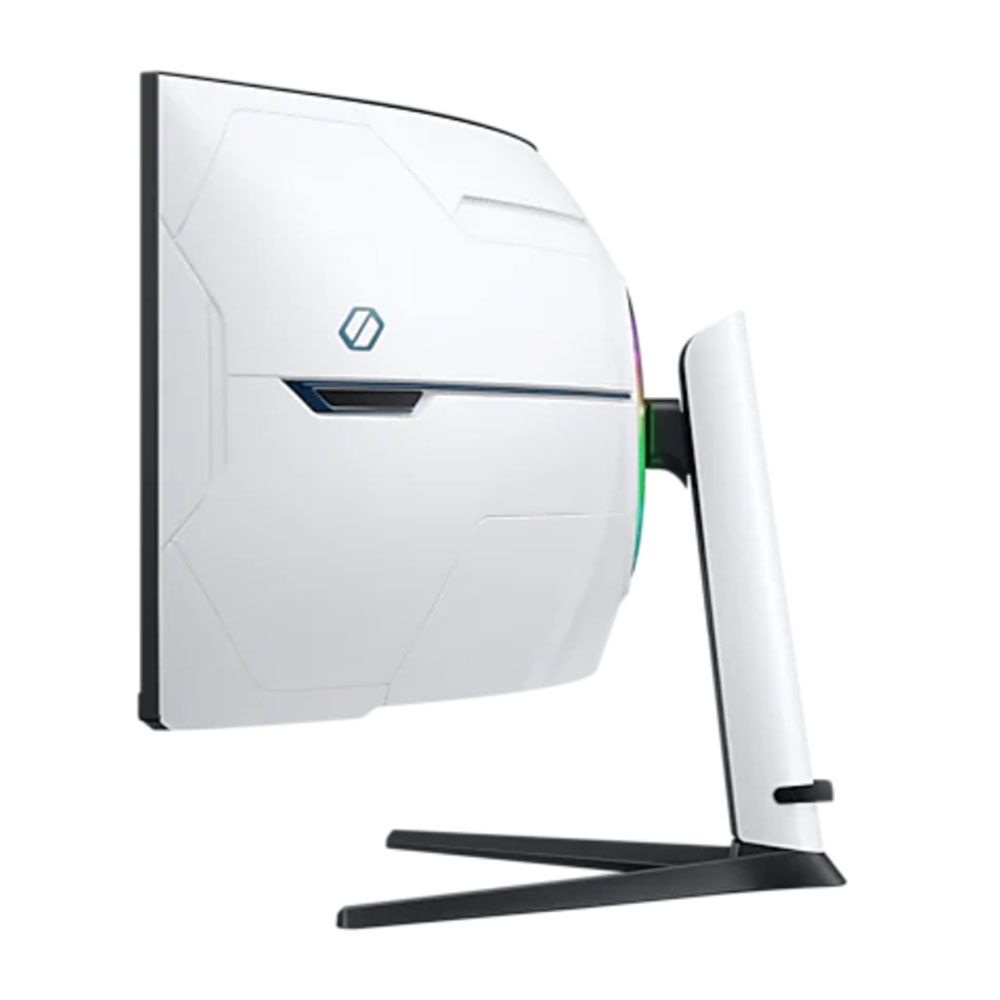
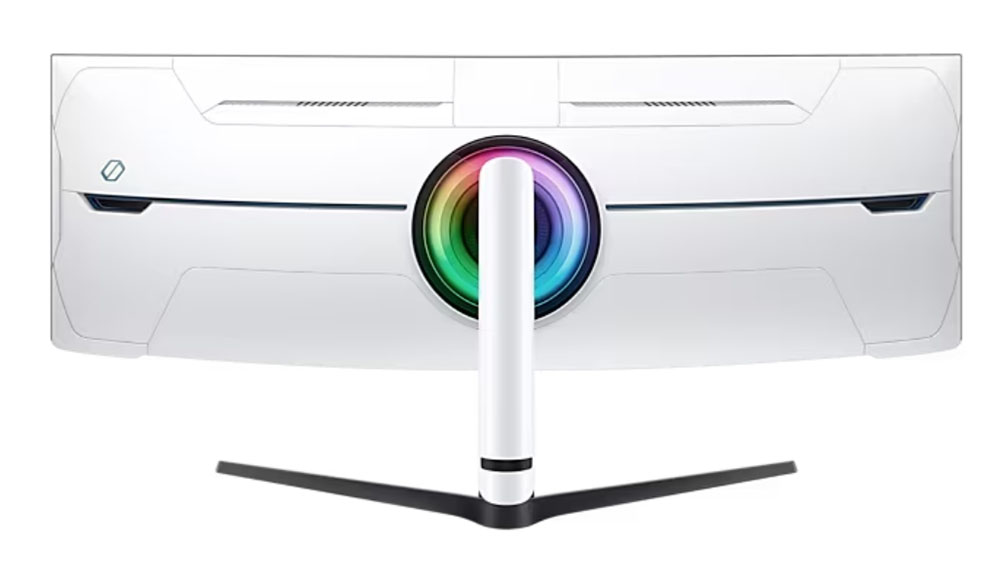
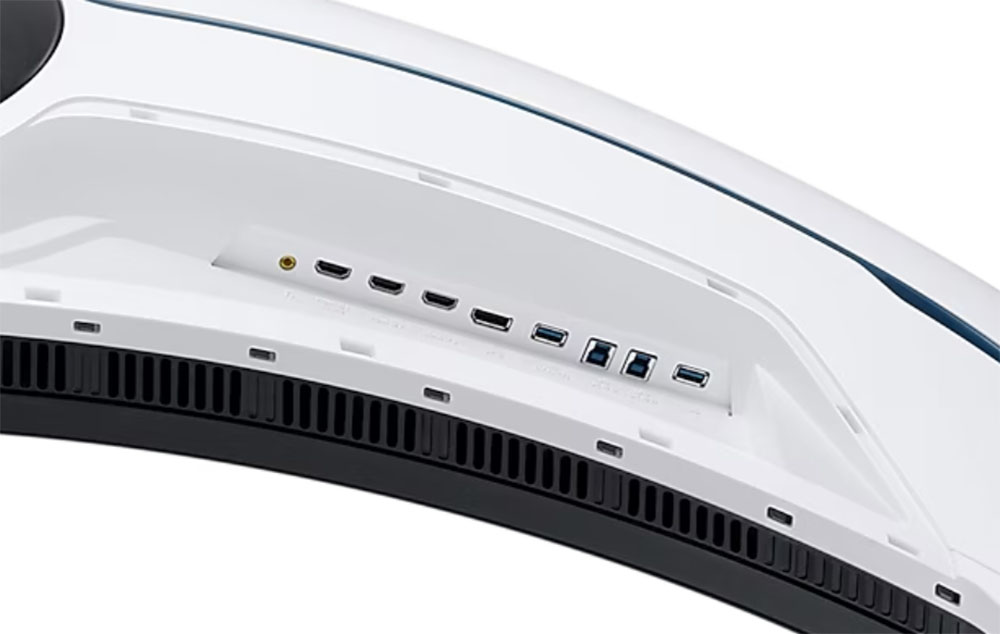
The photos above don’t portray the sheer size of the 57G9. If you’re considering one, I urge you to consult the dimensions in the spec table above to ensure you have room. It’s not just wide but deep as well. The stand is similar to what you’ll find with most monitors, just upsized. Ergonomics include a 4.6-inch height adjustment plus -3/10 degrees tilt and 15 degrees swivel. Movements are firm and solid with no extraneous play or wobble. The 57G9 is a very stout package.
The screen’s curve is extreme, which you can see in the photos. The sides extend past your peripheral vision if you sit two to three feet away. It’s no wonder because the center of the screen is more than 13 inches in from the outer edges. It doesn’t get more simulated than that. The anti-glare layer is aggressive, as it should be, with so much potential for reflection. I saw no distractions in my sunlit rooms.
The 57G9 maintains the Odyssey series’ styling cues with a white stand and back panel trimmed with black accents. The base is solid metal and finished in a matte black powdercoat. A few molded lines break up the large swaths of shiny white plastic, but for the most part, styling is simple and elegant.
The input panel is in the traditional spot up and under and off to one side. You get a single DisplayPort 2.1 along with three HDMI 2.1. Only numbers two and three support full resolution at 240 Hz. You also get two upstream and two downstream USB 3.0 ports. A headphone jack rounds out the connections.
OSD Features
After reviewing other Odyssey monitors, I expected the 57G9 to have streaming and TV features, but pressing the button underneath the center of the panel reveals a traditional OSD. Though the nav pad is easy to use, I missed a handheld remote.
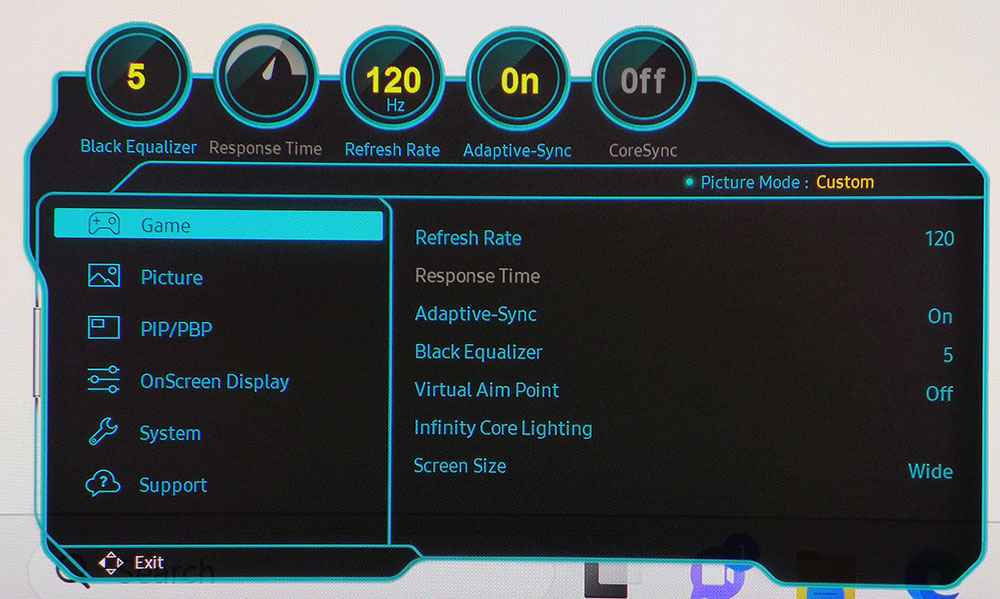
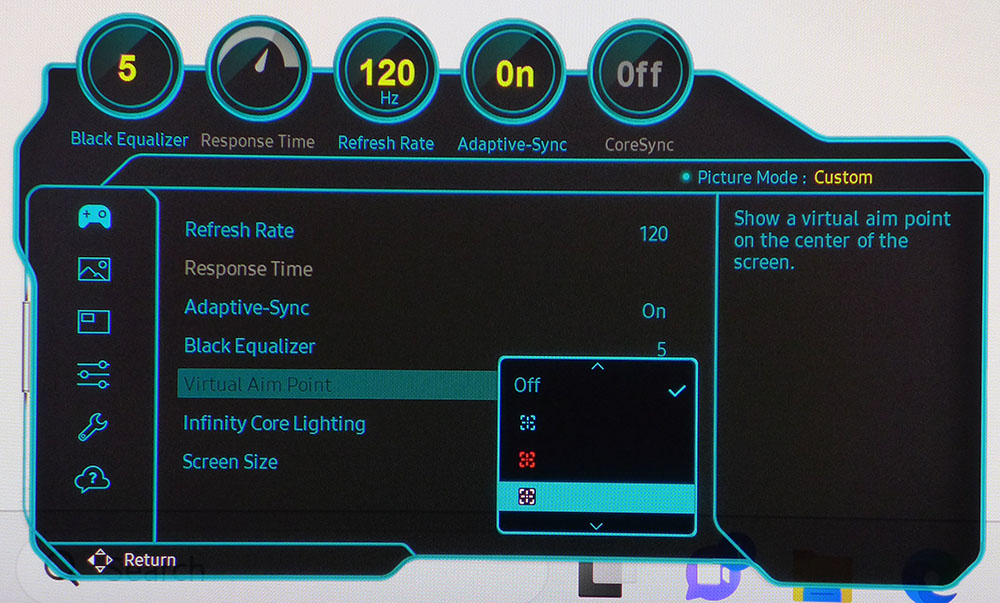
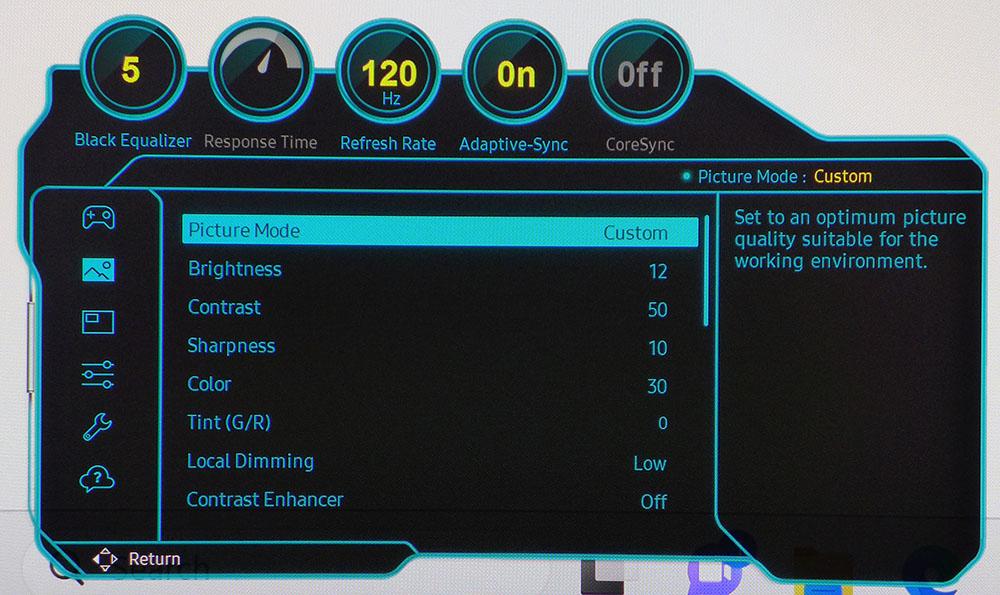
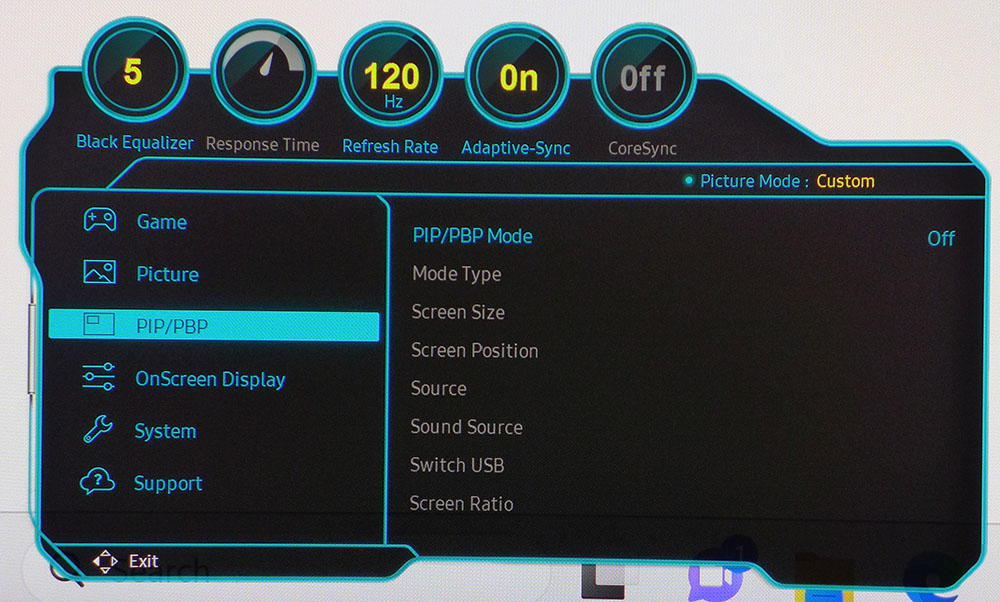
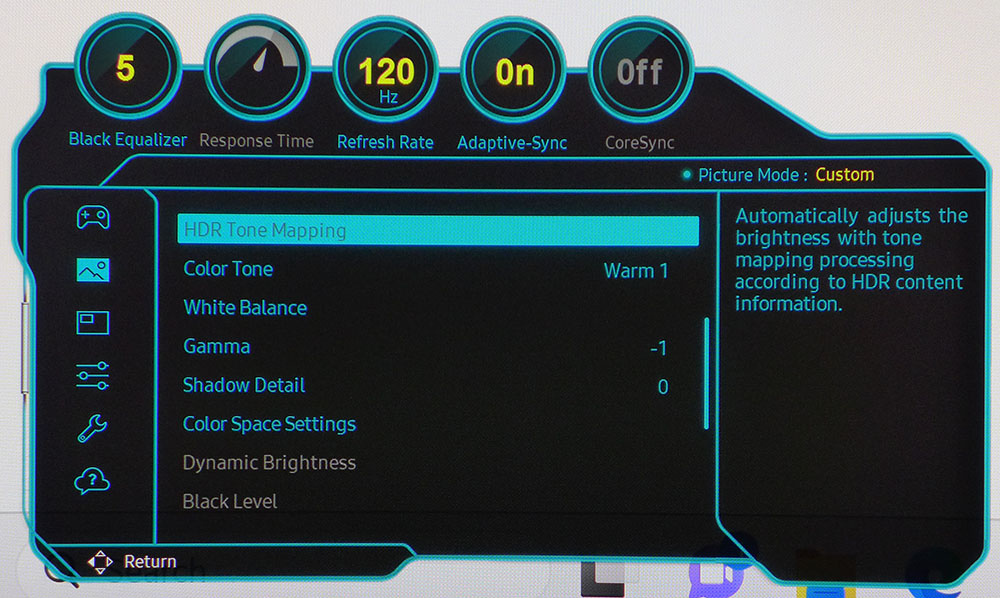
The 57G9’s OSD looks like the menu I’ve seen on many other Samsung gaming monitors. It keeps signal information at the top, so you always know the refresh rate and Adaptive-Sync status. The current picture mode is also displayed, but I missed knowing the current input.
In the Game menu, you can change the refresh rate between 120 and 240 Hz. The Response Time (overdrive) is only available when Adaptive-Sync is turned off. It has three levels plus a backlight strobe option. All are effective at reducing blur and the strobe is free of artifacts. But if you want FreeSync or G-Sync, overdrive is grayed out, which is unusual. If you can run at 240 Hz though, this isn’t a big deal. The menu also has a set of aiming points.
In the Picture menu are 11 modes. Eco is the default, but since it limits brightness, I went straight to Custom for testing and calibration. It can be used without adjustment and has no visible grayscale or color errors. Controls include a one-point white balance and five gamma presets. Color Space Settings let you choose between the full gamut for all content or Auto, which will switch between DCI-P3 and sRGB color for HDR and SDR signals, respectively. That’s a nice feature that few monitors have.
A large screen just begs for PIP/PBP and the 57G9 can view two signal sources at once. You can bind inputs and USB functions as well using the KVM feature. The aspect ratio can be altered within the windows so the pictures have the right shape.
Samsung Odyssey Neo 57 G9 Calibration Settings
The 57G9 comes set to its Eco picture mode, which is accurate enough to work without calibration. It doesn’t allow full brightness, though, so I switched to Custom. It also can be used without adjustment as it has very accurate grayscale and color tracking. Gamma is a bit wonky and that required a compromise. You’ll see what I mean on page four. HDR mode can also be calibrated, so I did that and found I needed different RGB values. All the settings for SDR and HDR are below. If you prefer to use the wide color gamut, 90% of DCI-P3, for all content, leave Color Space Settings on Native. To switch automatically between sRGB for SDR and DCI-P3 for HDR, set it to Auto.
| Picture Mode | Custom |
| Brightness 200 nits | 8 |
| Brightness 120 nits | 3 |
| Brightness 100 nits | 1 (min. 87 nits) |
| Contrast | Row 4 - Cell 1 |
| Gamma | -1 |
| Color Temp User SDR | Red -4, Green 0, Blue 1 |
| Color Temp User HDR | Red -10, Green 4, Blue 9 |
Gaming and Hands-on
I’ll start with my experience getting the 57G9 up and running at full resolution and 240 Hz. The bottom line is that you’ll need a video card with either DisplayPort 2.1 or HDMI 2.1 to do this. I borrowed a system with an AMD RX 7900 XTX so I could set 7680x2160 at 240 Hz. There was only one catch: that card couldn’t produce the framerates I’m used to seeing from the GeForce RX 4090 I usually test with. To be fair, that’s a lot of pixels.
Doom Eternal ran between 80 and 100 fps with the 7900, which was OK, but with no overdrive in play, blur was a factor. After a few hours, I switched to my RX 4090 system. To run at 240 Hz over its DisplayPort 1.4 interface, I had to back off the resolution to 5120x1440. The static image was a tad less sharp, but the moving one was far smoother and cleaner, thanks to the higher frame rate. I was seeing 220-240fps, which is a much better gaming experience. I could play at 7680x2160 at 120 Hz and sustain 120fps, but the lower motion resolution was apparent.
Once I had settled on the right combination of settings, gaming was an addictive experience. I literally had to make myself stop playing it was so immersive. There’s so much going on that you have to focus on the important parts of the game. In an adventure title, one could easily become lost in the experience. The 57G9 is truly the most immersive gaming monitor I have experienced to date.
The HDR image was superb, with rich color and deep contrast. All local dimming settings produced excellent results with true blacks and bright highlights. In practice, the 57G9 is about as close to an OLED as it gets. In menu screens with large black backgrounds, I could see some halo effect around bright windows, but this was not an issue during gameplay.
During my HDR gaming sessions, I switched back and forth between static and dynamic tone-mapping. The latter option mimics the Dolby Vision and HDR10+ feature where the content’s HDR metadata is supplanted with algorithms from the display. In practice, it will make some content look better and some look worse. Doom Eternal lost some of its impact with much brighter mid-tones that flattened the image. But Call of Duty WWII gained deeper blacks. So, you’ll want to try it on a game-by-game basis.
I increased contrast and impact with local dimming on low in SDR games like Tomb Raider. Higher settings made shadow detail harder to see, but the increased dynamic range was a real enhancement. I enjoyed the extra color saturation too, even though it wasn’t strictly to spec. If you’re a color purist, just change Color Space Settings to Auto and you’ll get sRGB with SDR content.
The 57G9 is undoubtedly capable of workday tasks. I used only the center two-thirds of the screen because the sides are so far away. Image distortion isn’t as significant as you’d think with a 1000R curve. I had no problem with web browsers or Word documents. Spreadsheets are a bit strange if you view them full screen. In Photoshop, I kept the graphics in the center and arranged toolbars on the sides, and I still didn’t use the whole screen.
Since I experimented with different settings during this part of the review, I often had to reach for the menu buttons. A monitor as large as the 57G9 should include a remote control. Most displays in this size range do. If you use it just for work or just for play, it won’t be a big deal. But if you want it to be more versatile, you’ll find reaching for the buttons to be a bit awkward. It’s a minor point, but for $2,000, there should be a remote.
Takeaway: The 57G9’s system requirements are somewhat unique. You need a DisplayPort 2.1 or HDMI 2.1 interface to see its full capability. But a Radeon RX 7900 XTX can’t maintain 240fps at full resolution, so it’s a Catch-22. I greatly enjoyed playing at 5120x1440 at 240fps though, so there is an addictive experience here. My advice – to get the most out of a 57G9 right now, you’ll want a GeForce RX 4090 for the highest possible frame rates, and play games at 5120x1440 until Nvidia adds DisplayPort 2.1 to its flagship video card.
MORE: Best Gaming Monitors
MORE: How We Test PC Monitors
MORE: How to Buy a PC Monitor
MORE: How to Choose the Best HDR Monitor
MORE: Best Gaming Monitors
MORE: How We Test PC Monitors
MORE: How to Buy a PC Monitor
Current page: Features and Specifications
Next Page Response, Input Lag, Viewing Angles and Uniformity
Christian Eberle is a Contributing Editor for Tom's Hardware US. He's a veteran reviewer of A/V equipment, specializing in monitors. Christian began his obsession with tech when he built his first PC in 1991, a 286 running DOS 3.0 at a blazing 12MHz. In 2006, he undertook training from the Imaging Science Foundation in video calibration and testing and thus started a passion for precise imaging that persists to this day. He is also a professional musician with a degree from the New England Conservatory as a classical bassoonist which he used to good effect as a performer with the West Point Army Band from 1987 to 2013. He enjoys watching movies and listening to high-end audio in his custom-built home theater and can be seen riding trails near his home on a race-ready ICE VTX recumbent trike. Christian enjoys the endless summer in Florida where he lives with his wife and Chihuahua and plays with orchestras around the state.
-
Pipsi Hello. Great review as always Christian. But there is no information on the brightness level of the monitor when it is set to strobing mode (extreme MBR option in response time tab). And most of your reviews on other monitors have that info. I ask this because I would like to buy this monitor, but the brightness in strobing mode has to be decent for me to consider it. In RTINGS review about it, they said that, while there is still extreme MBR option in the menu, it doesn't do anything when selected, and the monitor doesn't strobe at all. So naturally the brightness stays the same as in non-MBR modes. But they concluded that maybe with future upgrades to firmware the strobbing option will be available. So can you, please, measure the brightness level with the strobing (extreme MBR) option enabled to check if your particular unit has that option functional? That would mean very much to me to decide on the eventual purchase of this monitor.Reply
Kind regards,
Ivan
