How to Delid Your Processor and Why it's Worth It
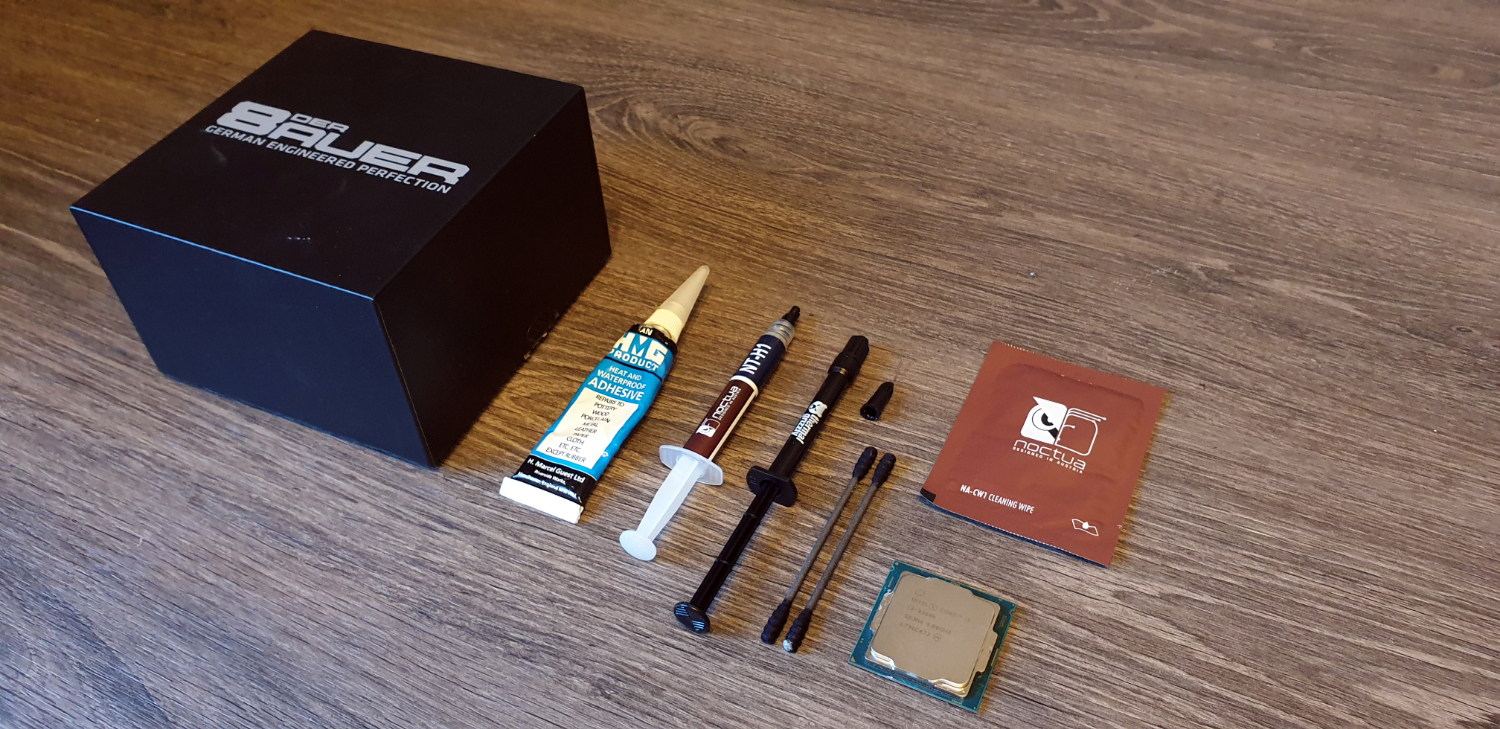
Ah delidding, that old terrifying procedure for CPU overclocking that's usually only recommended for the elite. For the uninitiated, delidding is the act of separating the integrated heat spreader (IHS) from the top of your processor, and then replacing the stock thermal paste the manufacturer has used, with something a little more premium, usually liquid metal or a better thermal paste.
Once upon a time it used to be quite a terrifying process, involving all sorts of razor blades and clamps, and a myriad of techniques to carefully slice apart your processor from the IHS, hopefully without damaging the silicon underneath (or yourself for that matter).
For the longest time it was rarely ever worth it. As temps on the high end parts remained resolutely below that 70 degrees Celsius mark, even with the weakest of aftermarket coolers, the big question was: “why bother?” Hell, even when overclocking, it was rare to see temperatures shoot past 75-85 degrees before you hit your silicon limits, especially with a decent AIO cooler.
That was then, and this is now, and as the core wars continue to rage between Intel and AMD, both battling for multi-threaded supremacy, thread counts and operating temperatures have begun to skyrocket, especially for those companies sticking to the traditional manufacturing processes they were used to (aka non-soldered chips).
With that, It’s not uncommon to see an Intel Core i7-8700K peak at 75 degrees Celsius when under load, regardless of overclocks. And although the company has taken steps to solder some of its high end parts (the 9000 series and Core i9-9980XE respectively), for those still stuck on the last generation Coffee Lake, or harboring a Skylake-X HEDT chip, delidding offers substantial improvements to both a superior overclocking experience, and far lower temperatures across the board.
Don’t believe us? Check out our own testing below.
Intel Core i9-7900X - Temperature Testing
| Row 0 - Cell 0 | Idle | Prime95 Burn Test | Prime95 Maximum FPU Heat Test | CineBench R15 Multi-threaded Test | 3DMark: Fire Strike CPU Physics Test | 3DMark: Time Spy CPU Physics Test |
| Factory @ Stock | 31° | 51° | 62° | 64° | 61° | 60° |
| Factory @ 4.4 GHz | 30° | 68° | DNF | 80° | 78° | 77° |
| Delidded @ Stock | 23° | 40° | 55° | 55° | 55° | 53° |
| Delidded @ 4.4 GHz | 27° | 53° | 84° | 67° | 64° | 65° |
Our test bed consisted of an Asus X299 Prime Deluxe, 32GB (4x8GB) of Corsair Dominator Platinum DDR4, and an Nvidia GeForce GTX 1080 GPU. Our Intel Core i9-7900X was clocked at 4.4 GHz across all 10 cores at 1.2V when overclocked. All figures measured in Celsius.
Stay On the Cutting Edge: Get the Tom's Hardware Newsletter
Get Tom's Hardware's best news and in-depth reviews, straight to your inbox.
Intel Core i7-8086K - Performance Testing
| Row 0 - Cell 0 | CineBench R15 Multi-threaded Test (Celsius) | CineBench R15 Multi-threaded Test (Index) | CineBench R15 Single-threaded Test (Score) | CPU VCore Voltage (Volts) | Maximum All Core Clock Frequency (GHz) |
| Stock | 78° | 212 | 1,446 | Auto | 4.3 |
| Overclocked | 97° | 224 | 1,682 | 1.36 | 5.2 |
| Overclocked & Delidded | 83° | 233 | 1,753 | 1.48 | 5.4 |
Our test bed consisted of an Asus Maximus XI Formula, 32GB (2x16GB) of G.Skill Trident Z DDR4, and an Nvidia GeForce GTX 1080 GPU. Our Intel Core i7-8086K, was pushed to 1.48v on an overclocking test, not something we’d recommend for day-to-day running, just to demonstrate temperature delta.
Delidding Today
As more and more enthusiasts delve into the murky world of delidding their favorite processors, manufacturers have gone out of their way to make the procedure far simpler, and safer than it was in the past. With affordable delidding kits now available for purchase for anything from an AMD Ryzen 3 2200G, all the way up to a Skylake-X Core i9-7980XE and beyond, it really is an accessible tweak, even you can do at home.
And all of that, is what we’re going to show you. However, we must warn you in advance, that delidding absolutely invalidates your warranty, and still does come with an element of risk.
For our demonstration we’re going to be using Der8auer’s Delid Die Mate 2 (Intel LGA1151), and Delid Die Mate-X (Intel 2011-3) delidding kits, available from CaseKing in Germany, Overclockers in the UK, and Amazon.com in the US.
What You’re Going to Need
- Delidding Tool ($43, £30 for Delid Die Mate, or $102, £80 for Delid Die Mate-X)
- Liquid Metal or Thermal Paste (We recommend Thermal Grizzly Conductonaut, or Noctua’s NT-H1)
- Alcohol Wipes or 99% Proof Isopropyl Alcohol
- Thermal Paste Spreader
- Heatproof Glue
- Microfiber Cloth
Delidding A Coffee Lake Processor
First up on the block today is one of Intel’s 1151 Coffee Lake processors. We’re going to be using the Intel Core i3-8350K for our demonstration chip. It’s a fairly well rounded processor, not too dissimilar from the old i5s of Kaby Lake and prior. Although it doesn’t come with a Turbo, or hyper-threading, it’s a fairly sound gaming processor, or overclocking chip for any budget tinkerer.
For this guide we’re going to be showing you how to replace the thermal paste between the chip and the IHS with some of Noctua’s NT-H1 TIM instead. The paste Intel use is typically of poor quality, and with this you can expect to see temperature improvements ranging from 3 to 5 degrees Celsius, dependent on overclock, and load application.
Liquid-metal is the far superior alternative (one we’ll be showcasing later), but it comes with an added risk factor as it’s conductive, so any spillage on the side of the PCB can cause irreparable damage to the processor. As you can see from our charts above, you can effectively reduce your temps using liquid-metal from anywhere between 8 and 15 degrees Celsius on average, again dependent on clock-speed and workload. So let’s get started.
1. Unboxing The Delid Die Mate 2
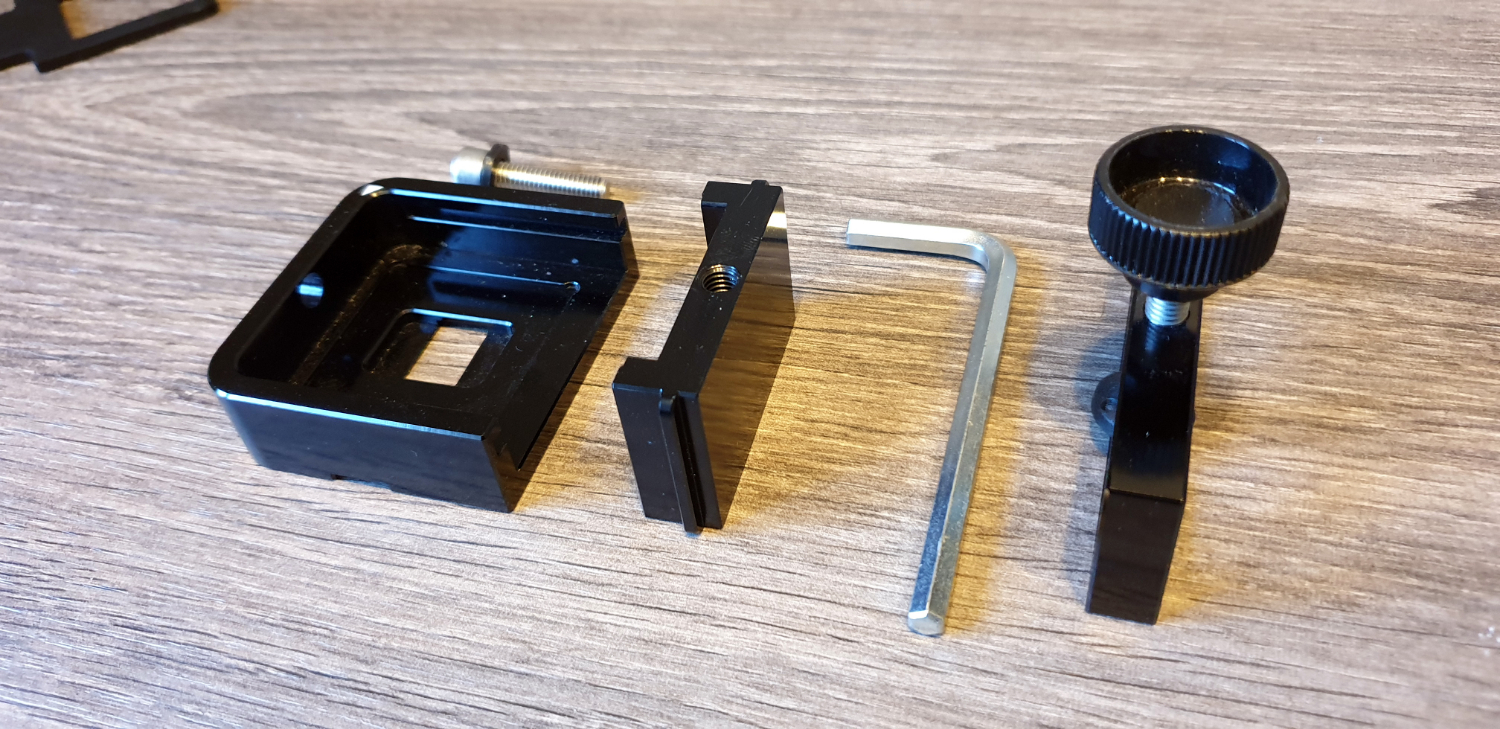
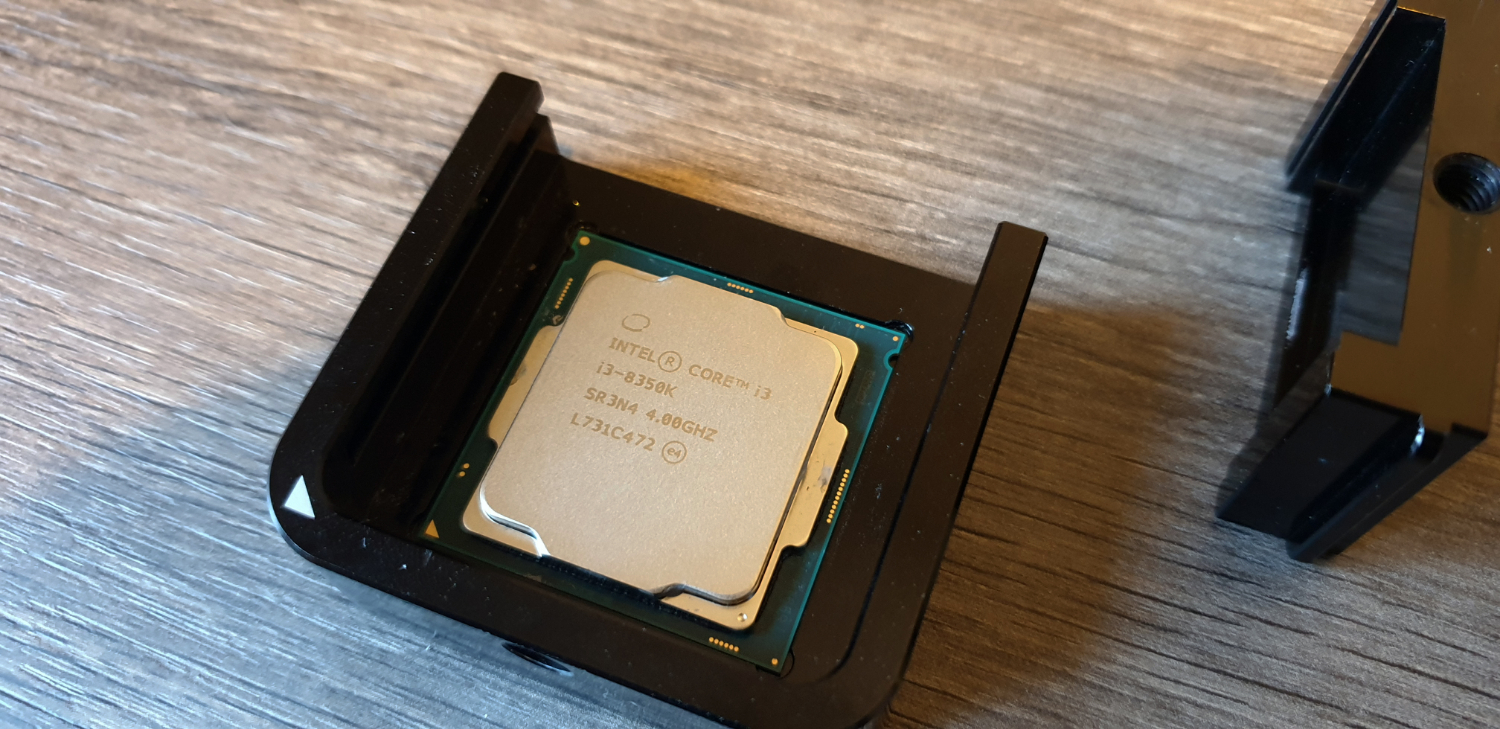
The first thing you’ll want to do is unbox and disassemble your Delid Die Mate 2 delidding tool. In the package, you should find a small CPU retaining holder, a sliding block that fits in it that sits snug against the IHS, a hex bolt, a washer for the bolt, an allen key, and a clamp.
Take all of this apart, and get a good understanding of just how this works.
Once that’s done, you simply need to drop the processor into the device. To do this, line up the gold triangle on the bottom left corner of the CPU, with the triangle marking on the delidding tool. Much like you would install a processor into a CPU socket.
2. Removing the IHS
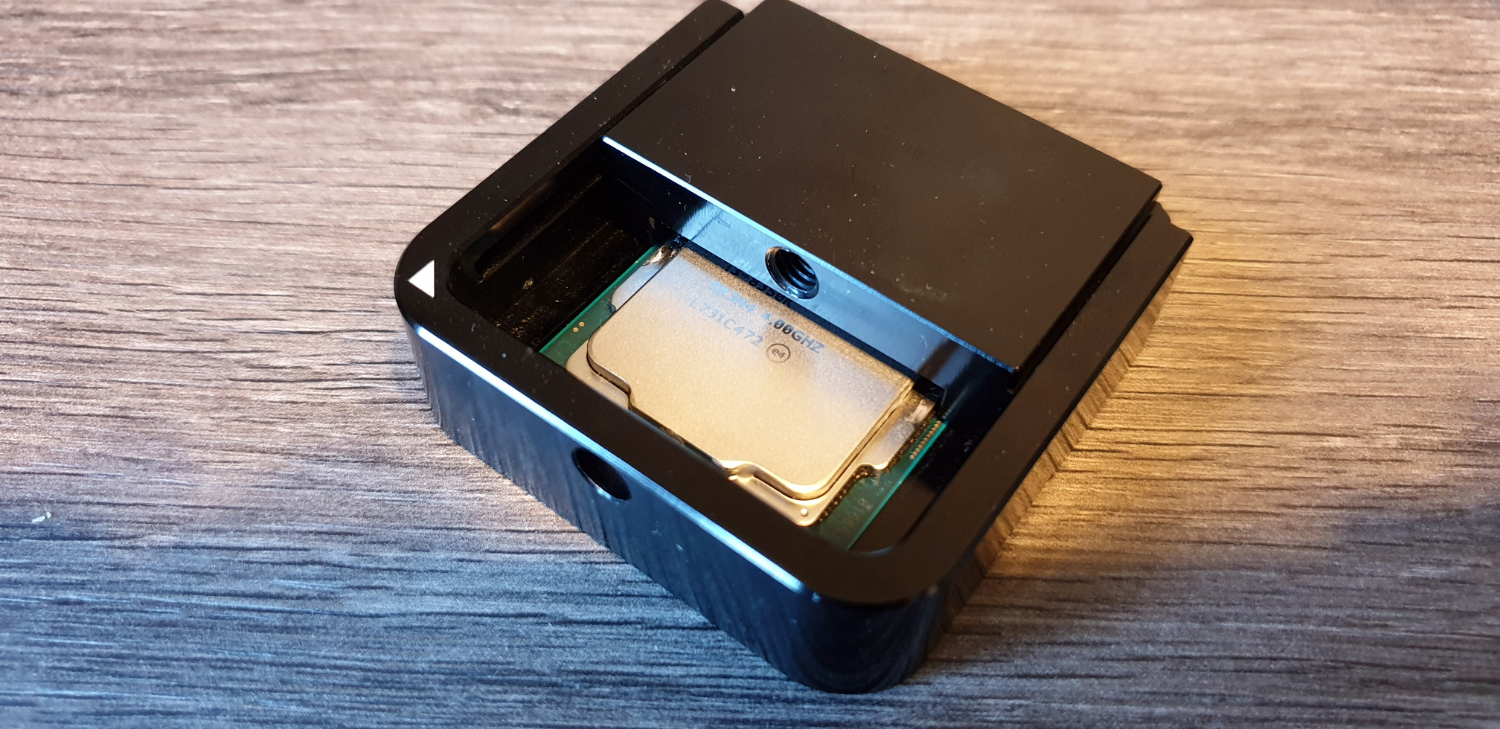
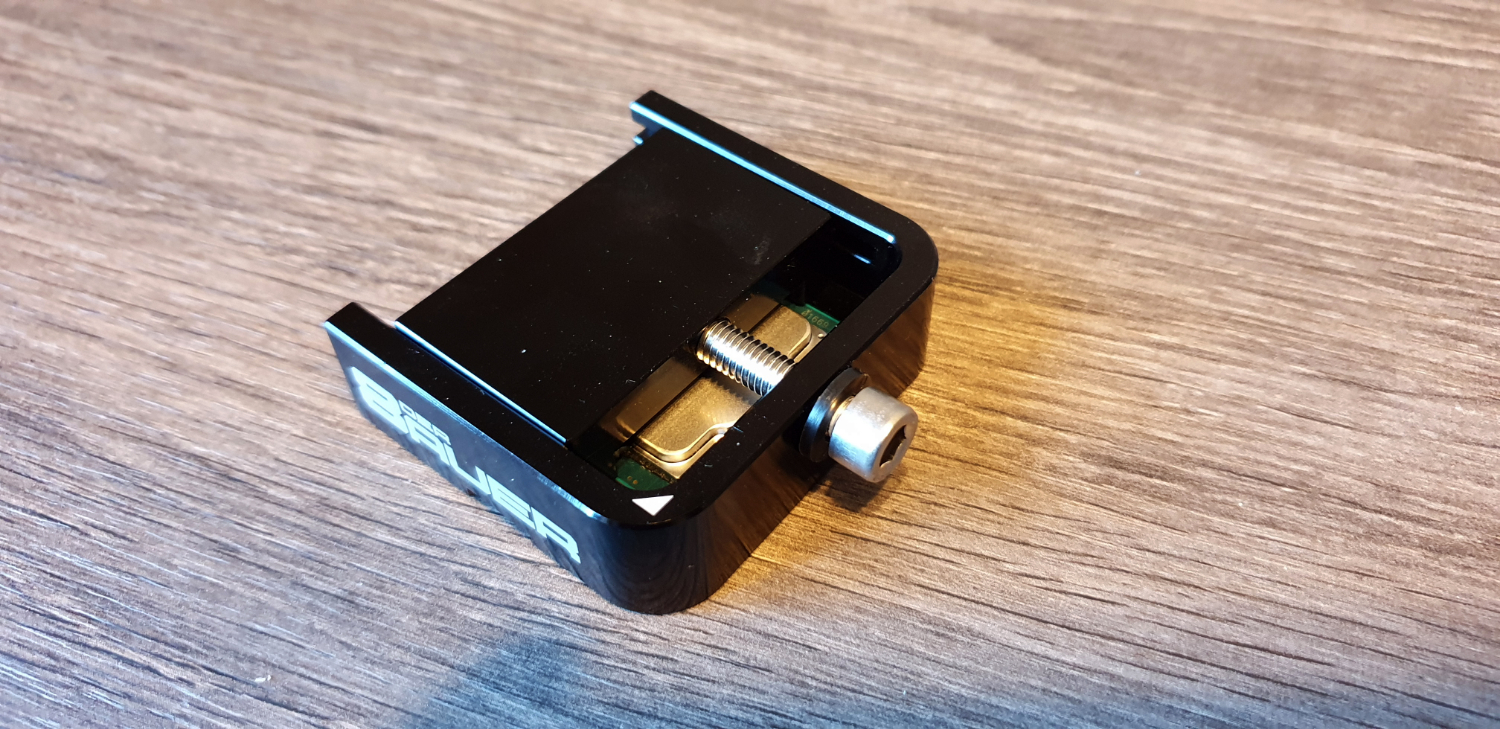
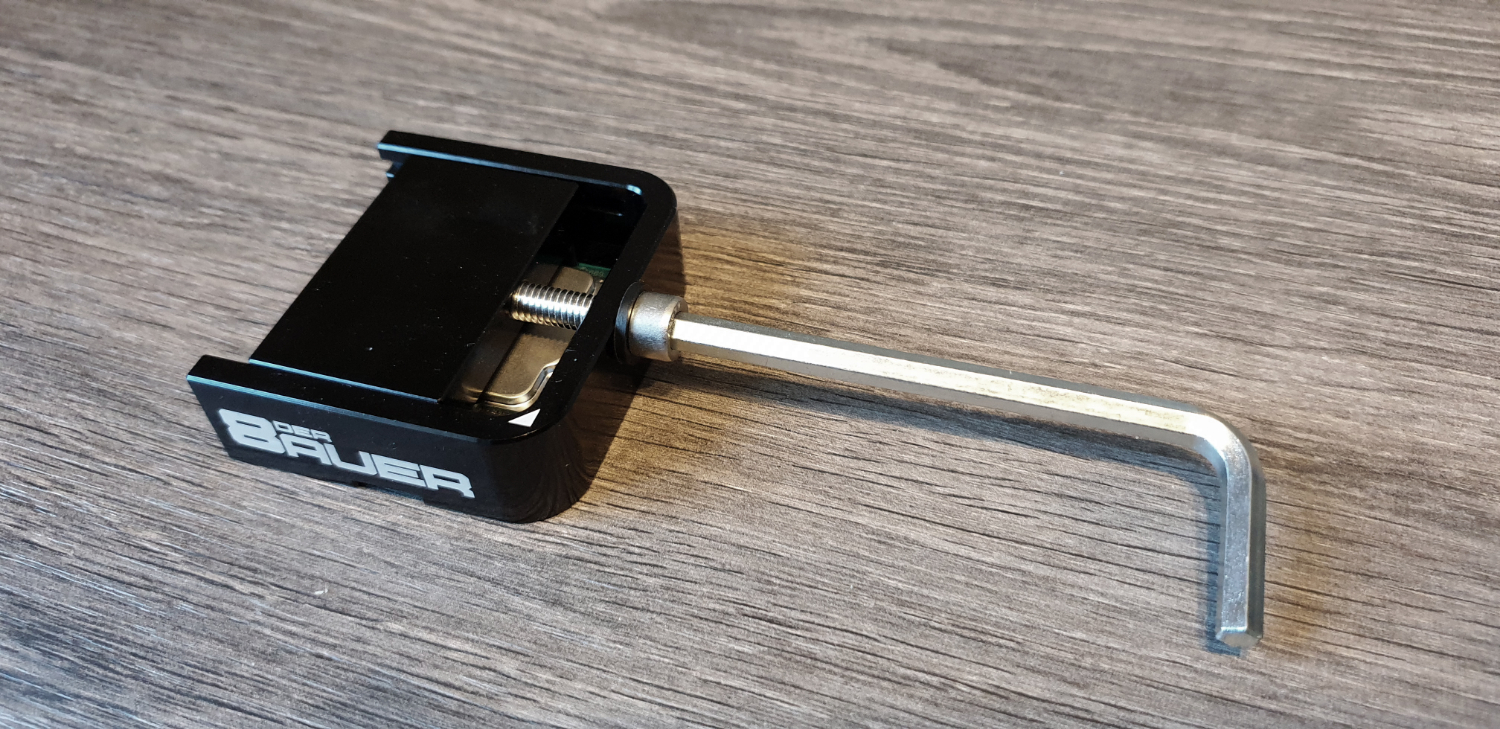
Once that’s done, carefully slide the top IHS remover into the device. There’s two rails along the top of the CPU retaining holder that it slides into, once in, make sure the screw thread and the hole in the retaining holder line up.
Then you can secure it in place using the included hex bolt, making sure to keep the washer on the outside of the Delid Die Mate 2. You can do this by hand, and keep going until you can no longer turn it.
Once you get this far, you’ll then need to use the allen key to pull the IHS remover closer. This will push the IHS off the top of the processor. This does require a bit of force, and can be a touch nerve wracking, as it may make a noise as you do this, but you’ll slowly see the IHS move off of the chip.
3. Cleanup and Paste Application
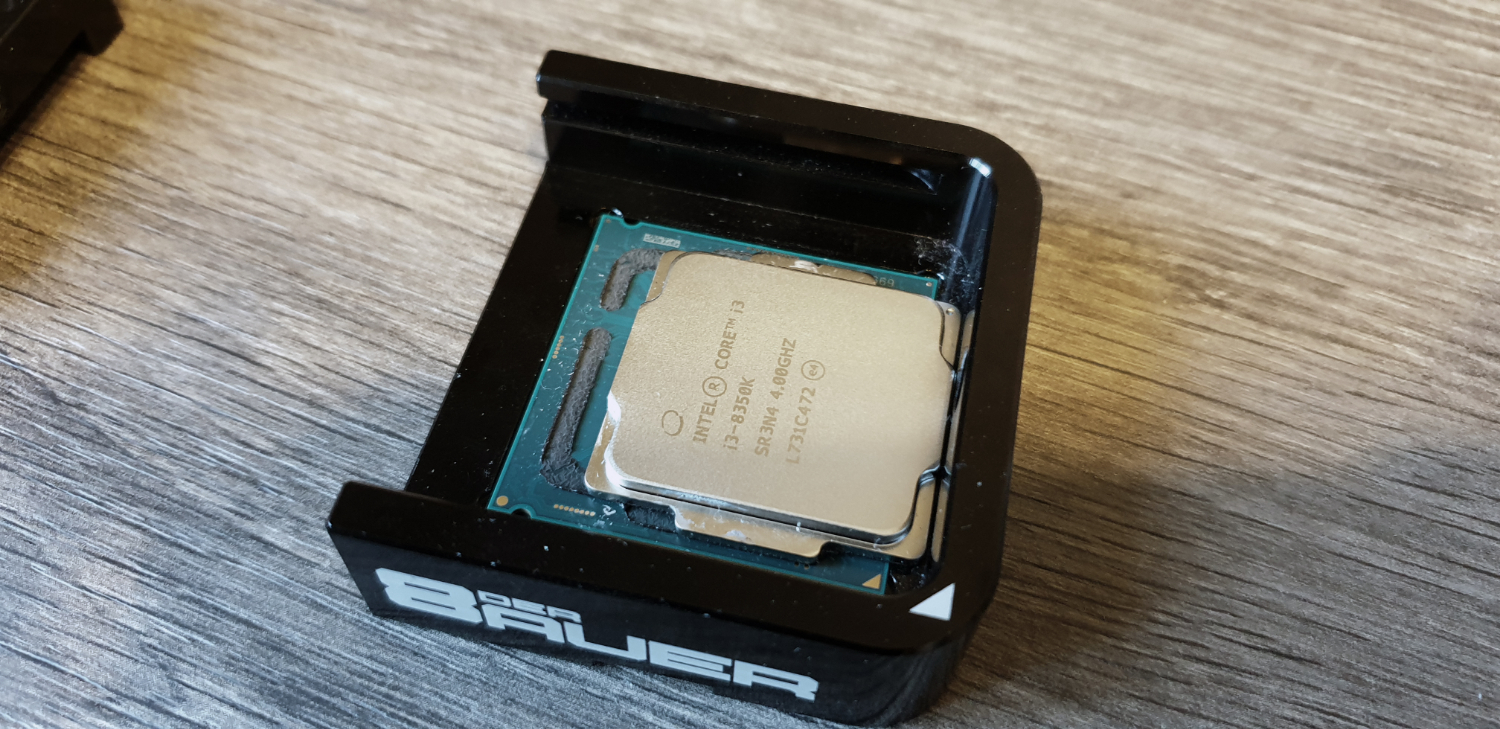
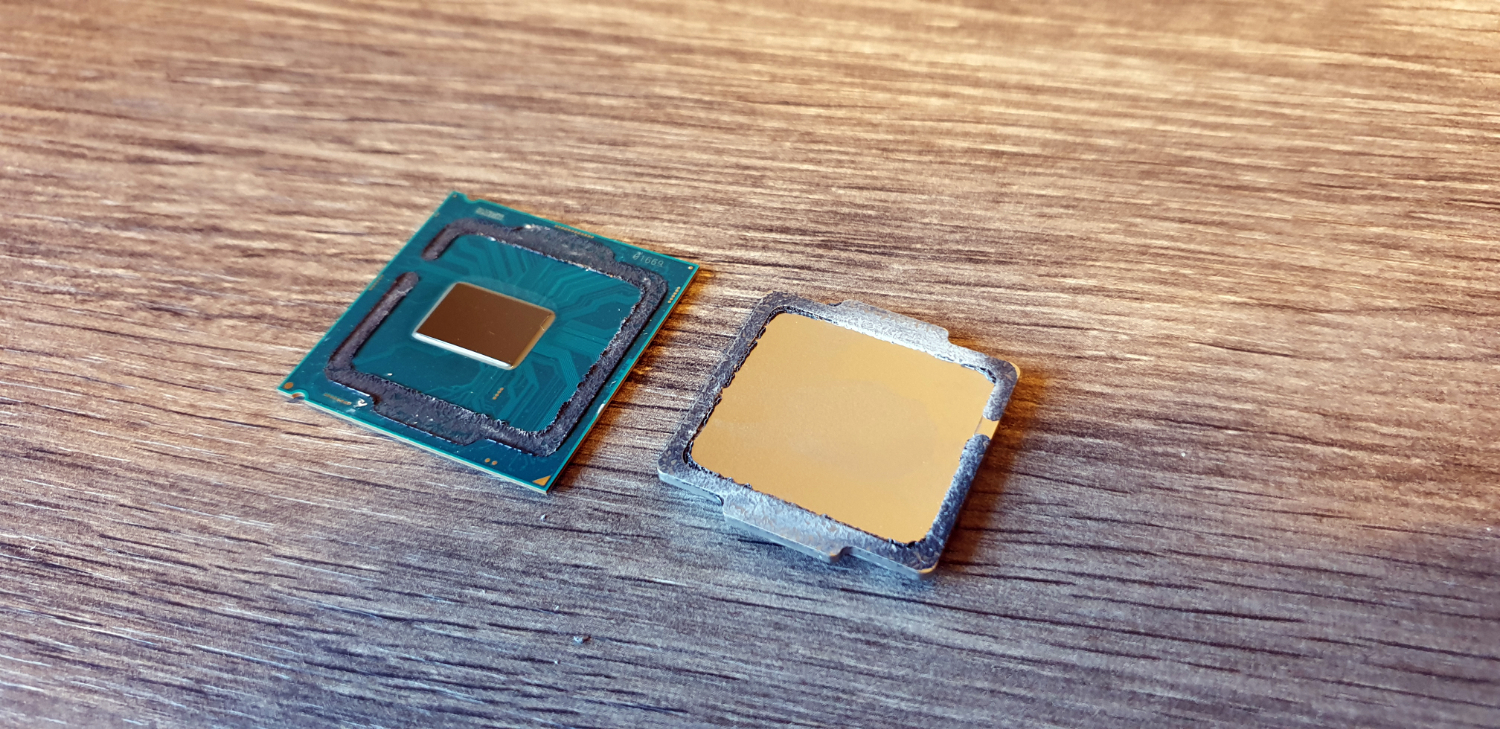
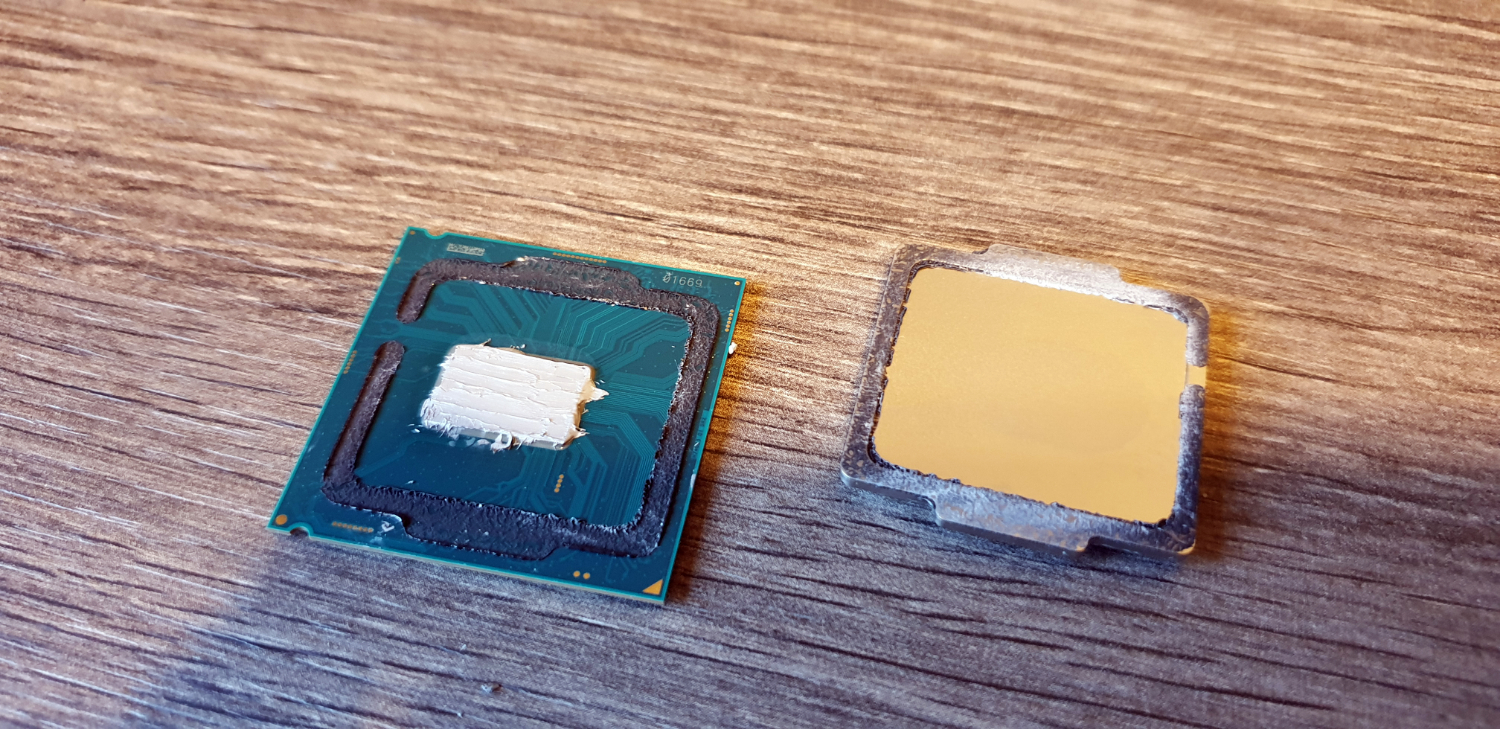
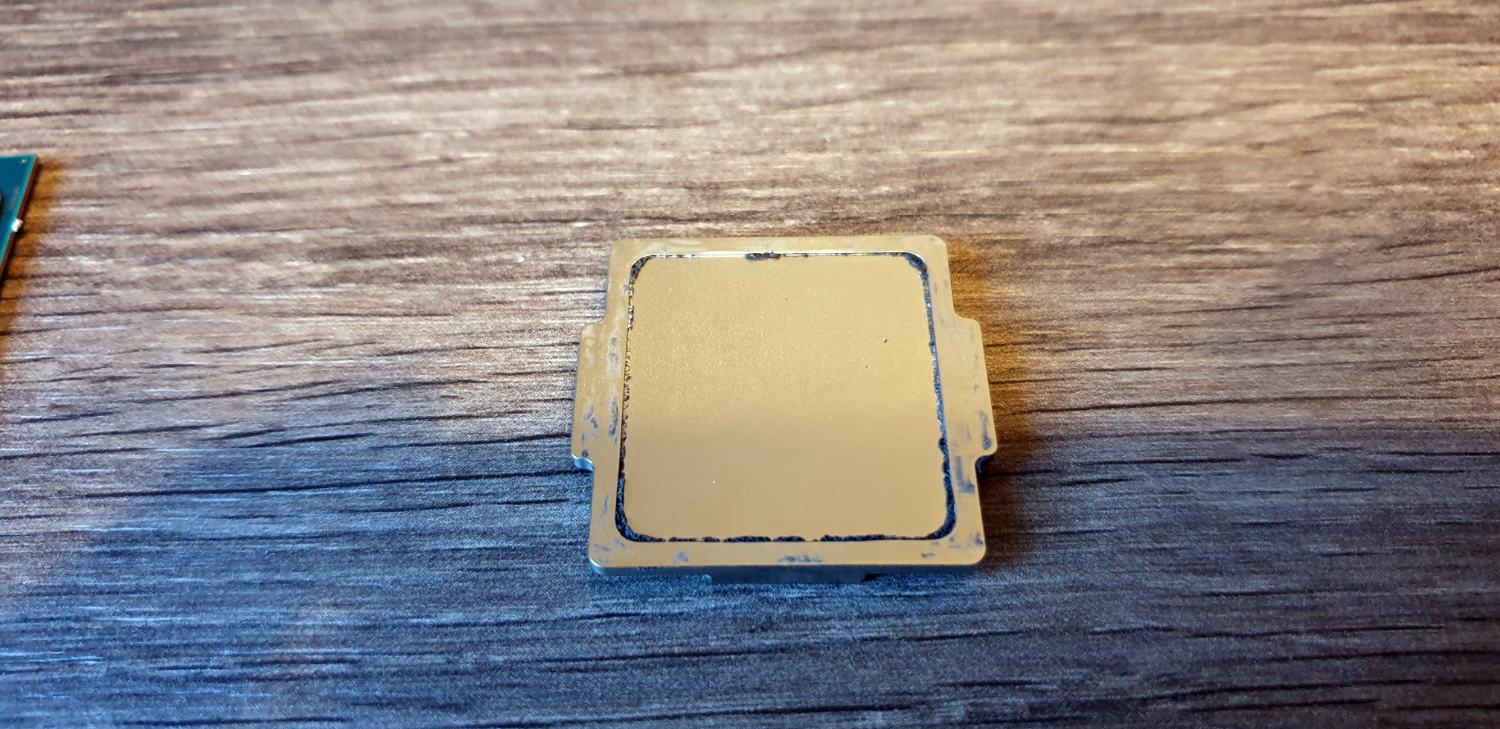
Once that’s done, undo the bolt, and remove the IHS remover from the device, you should now be able to see that the heat spreader has cleanly slid off of the processor. Carefully take the IHS off of the chip, and remove the processor from the device.
The IHS is the vast majority of a processor’s weight, so be careful when picking the CPU up out of the device.
Once out use an alcohol wipe, or a microfiber cloth and isopropyl alcohol to clean off both the processor and the heat spreader of Intel’s thermal paste. Once that’s done, you can apply your own thermal paste to the chip. To do this, apply a small dot of paste in the middle of the silicon, and then spread it, either with a paste spreader, or an old business card or credit card you no longer use. Make sure you’re using non-conductive thermal paste, that way it doesn’t matter too much if you make a mess, and some spills out onto the green PCB. We’
Once that’s done, we recommend cleaning up the IHS of all of the glue that stuck it down to the chip to begin with. We’ll be adding a fresh layer anyway, but by removing the glue residue from the IHS we’ll be reducing the total height between the heatspreader and the silicon, and improving thermal performance. I personally use a finger nail to do this, although you can do it with a sharp edged blade.
4. Securing Down the IHS
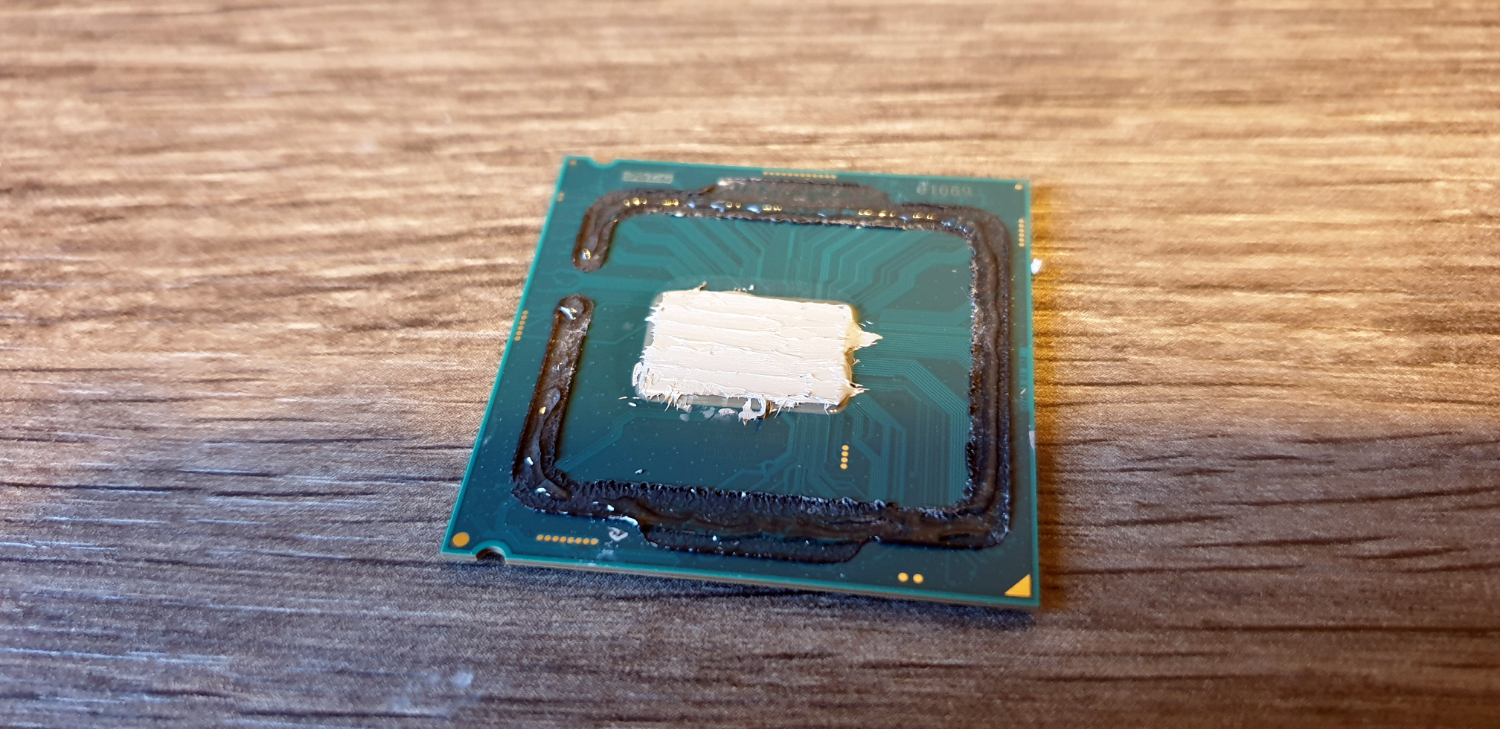
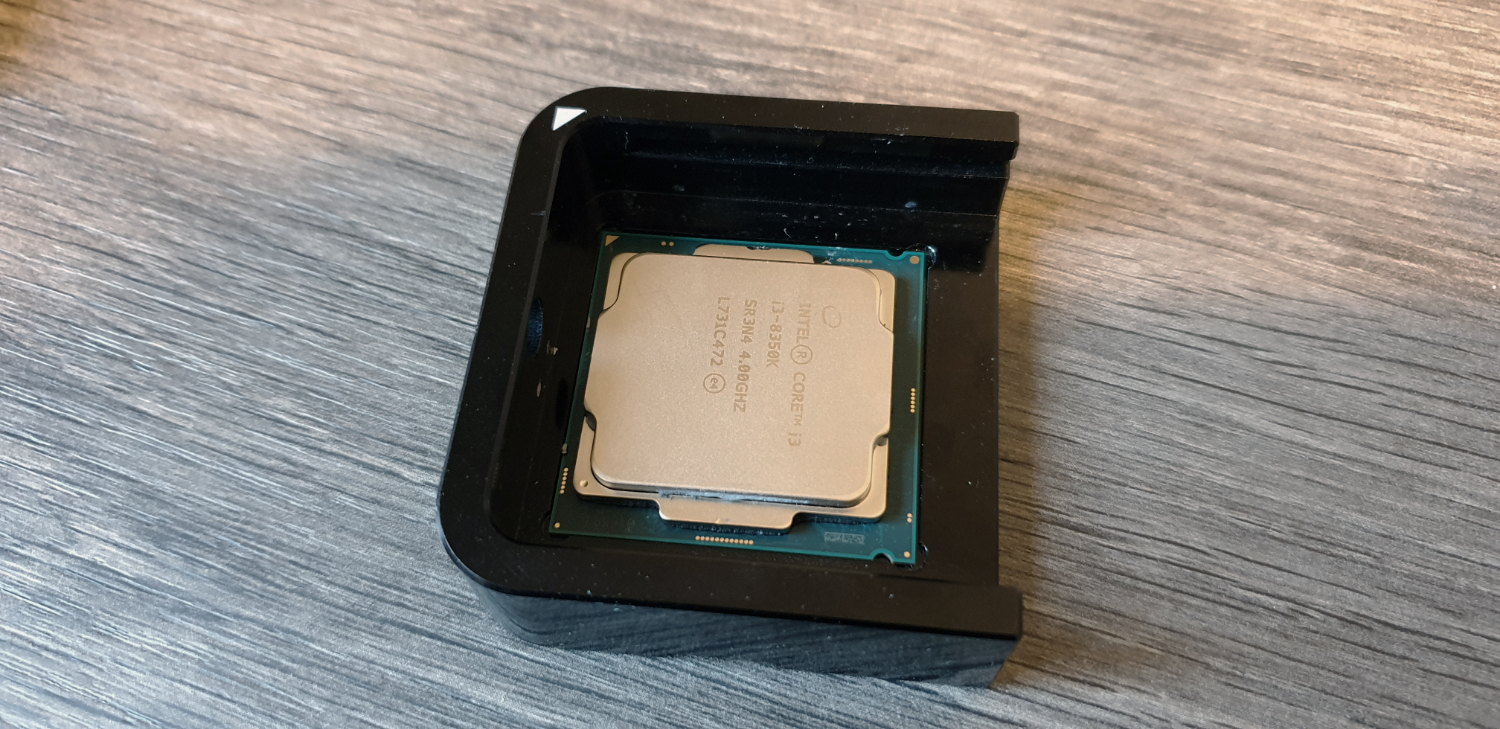
At this point you have two options. You can, just place the processor into a motherboard socket, carefully put the IHS back down on top, and then use the motherboard’s socket bracket to secure the assembly into position, or alternatively glue the IHS back down and clamp it, so you can swap it in and out of motherboards without worrying later on.
We like to glue ours back down. To do this we recommend you pick up a heatproof and waterproof adhesive. What you’ll want to do here is simply apply a small amount of glue along the remaining glue traces on the CPU itself. Once that’s done, we can reattach the IHS.
It’s important here that you orient the IHS the correct way round. To do this locate the gold triangle on the processor, then make sure it’s aligned with the bottom left of the IHS’s text. Simply drop the heatspreader into position, on top of the glue traces. If you don’t get it right first time don’t worry, simply lift it off and try again, or nudge the IHS into the position using your fingers.
5. Curing
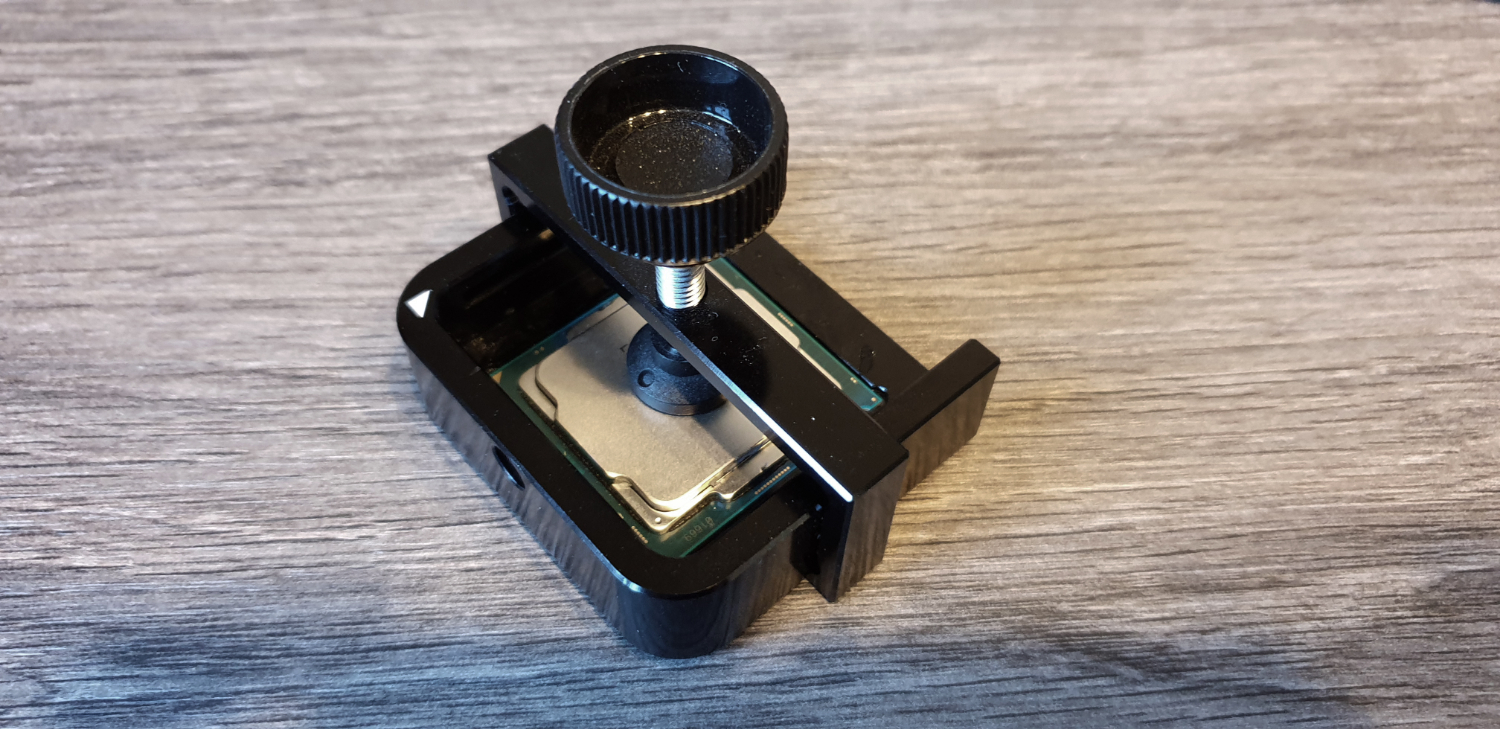
Once that’s done, take the clamp mechanism and carefully maneuver it into position above the CPU. There’s a cut out notch located on the bottom of the Delid Die Mate 2 that the clamp will sit in. Once here, tighten the clamp until it puts pressure on the processor.
In an ideal world, we recommend you leave the glue to cure for 24 hours, just to make sure the glue is set, however you can probably get away with 2-3 hours at a push.
Delidding A Skylake-X Processor and Liquid Metal
Now that we’ve got the Core i3-8350K done, we’ll show you how to delid the slightly more complex Skylake-X series, including how to apply liquid-metal to it as well. You can apply liquid-metal to both, but it is slightly more troublesome to work with than thermal paste, purely due to its conductive nature.
Skylake-X presents a number of challenges when it comes to delidding, the majority of which stems around the fact it features a raised RFID chip, on top of the processor, outside of the IHS, meaning if you knock it off, that’s game over.
Because of that you’ll need another specialist delidding tool (in our case Der8auer’s Delid Die Mate-X), which does cost around twice as much as the standard tool, however it's designed to ensure you won’t knock the RFID chip off when you begin to move the IHS off of the processor. We’ll also be using Thermal Grizzly’s Conductonaut liquid metal as our thermal interface material.
1. Delidding the CPU
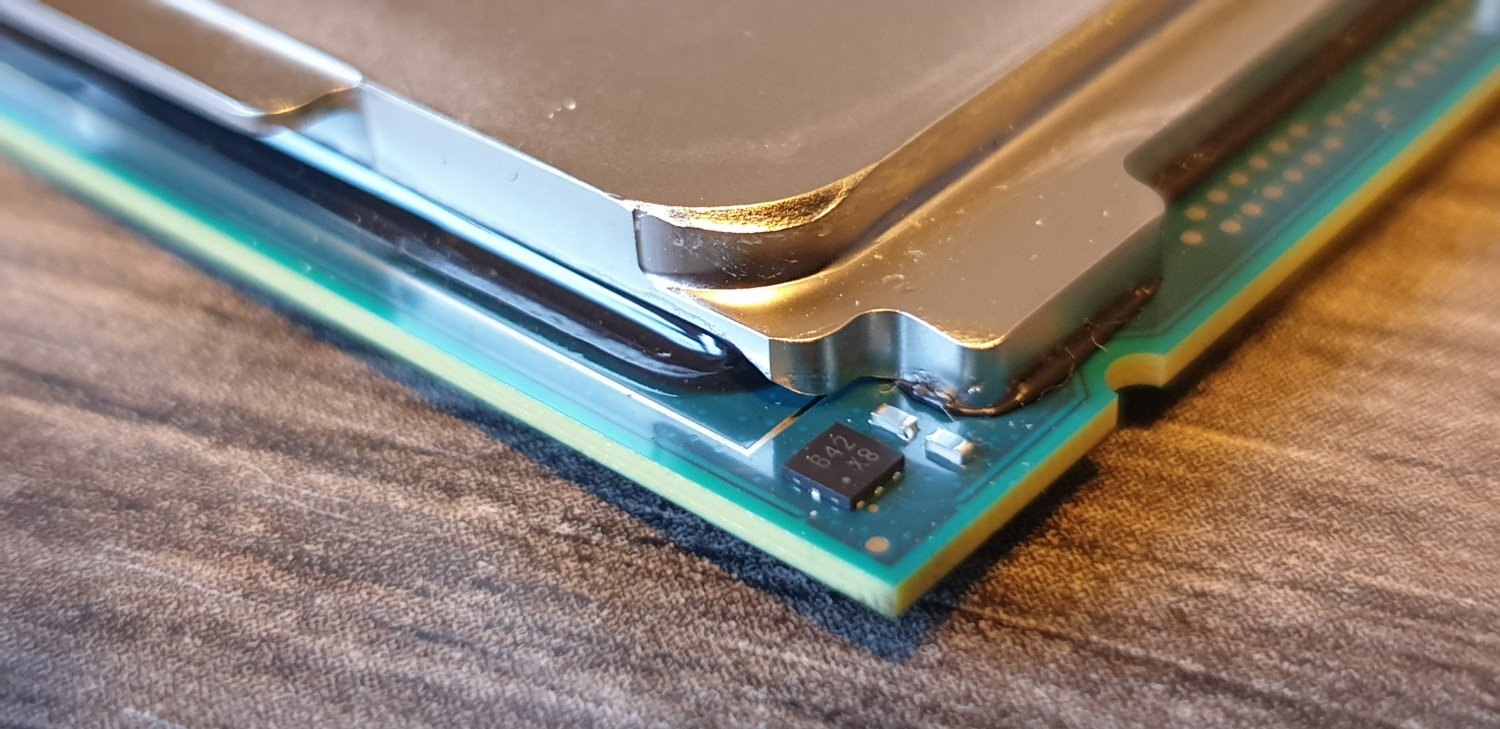
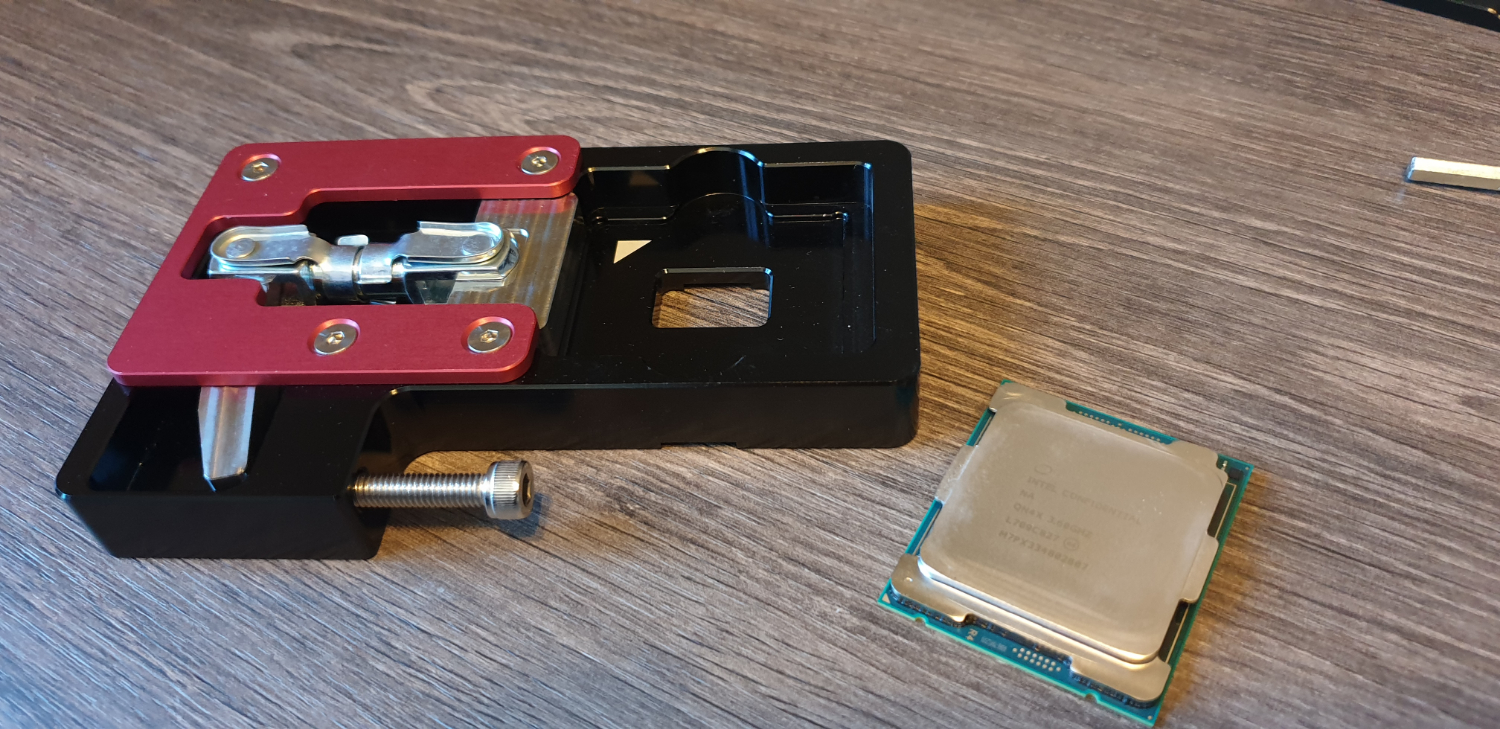
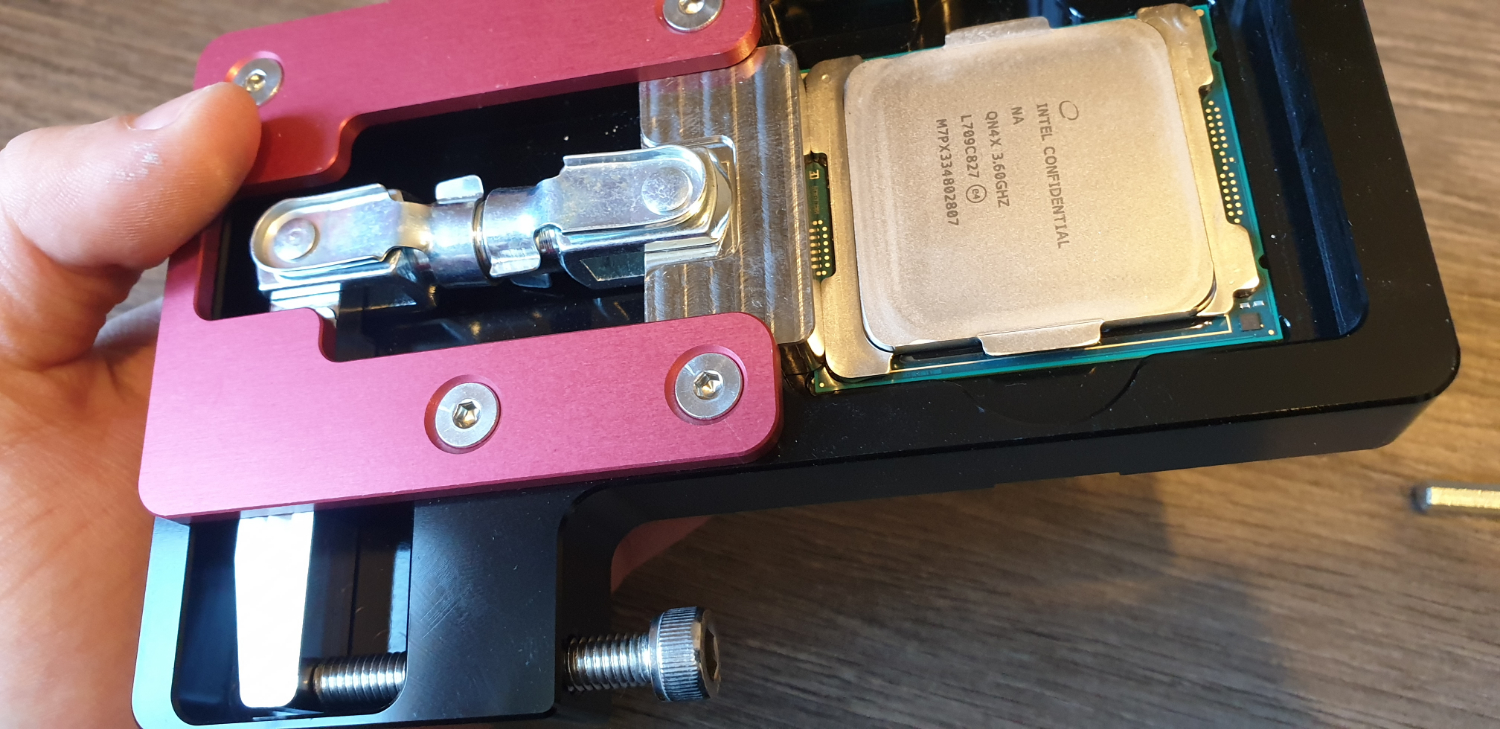
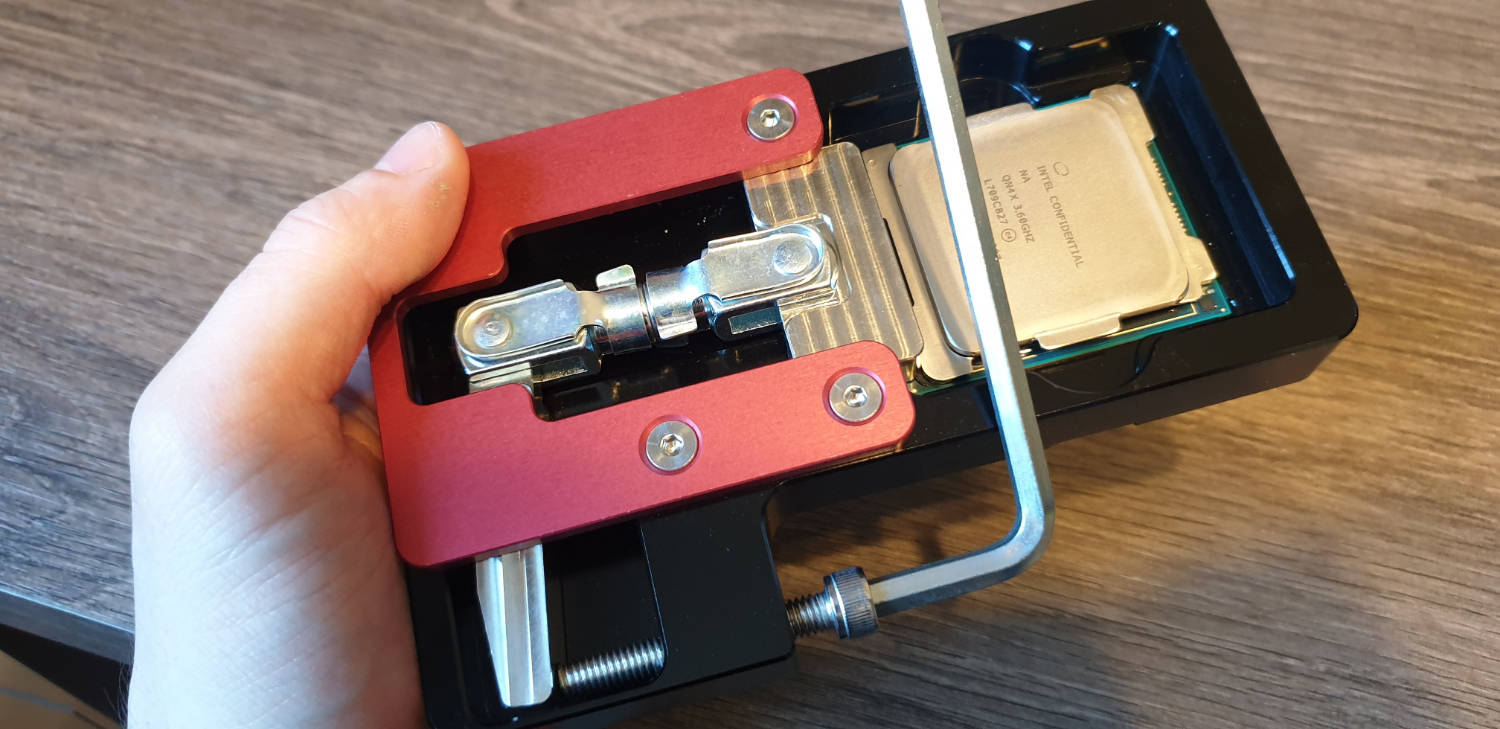
The Delid Die Mate-X is a far gnarlier looking beast than what we used before on the LGA1151 processor, and it’s all thanks to that little RFID chip located on the corner of each and every Skylake-X processor(something Broadwell-X lacked). Like the Delid Die Mate 2 kit, the X comes with a delidding tool (now one whole unit), a clamp to secure the IHS back down, and an allen key to tighten it.
As with the Delid Die Mate 2, you’ll want to place the chip in the correct way. To do this, locate the golden triangle on the corner of the processor, and line it up with the white marked triangle inside of the Delid Die Mate-X.
Once it’s in, hand tighten the hex bolt until the IHS remover makes contact with the IHS itself.
Now for the scary bit. Unlike Coffee Lake parts, because the IHS is far bigger, it does require some force to loosen the heat spreader off of the processor. Insert the allen key and rotate it until you feel a large click. This will signify the release of the heat spreader from the processor. Loosen the hex bolt and check to see if you can remove the IHS by hand. If it’s still stuck in place, tighten the bolt again and apply slightly more force, moving the IHS until you can pick it up.
2. Clean Up and Liquid Metal Application
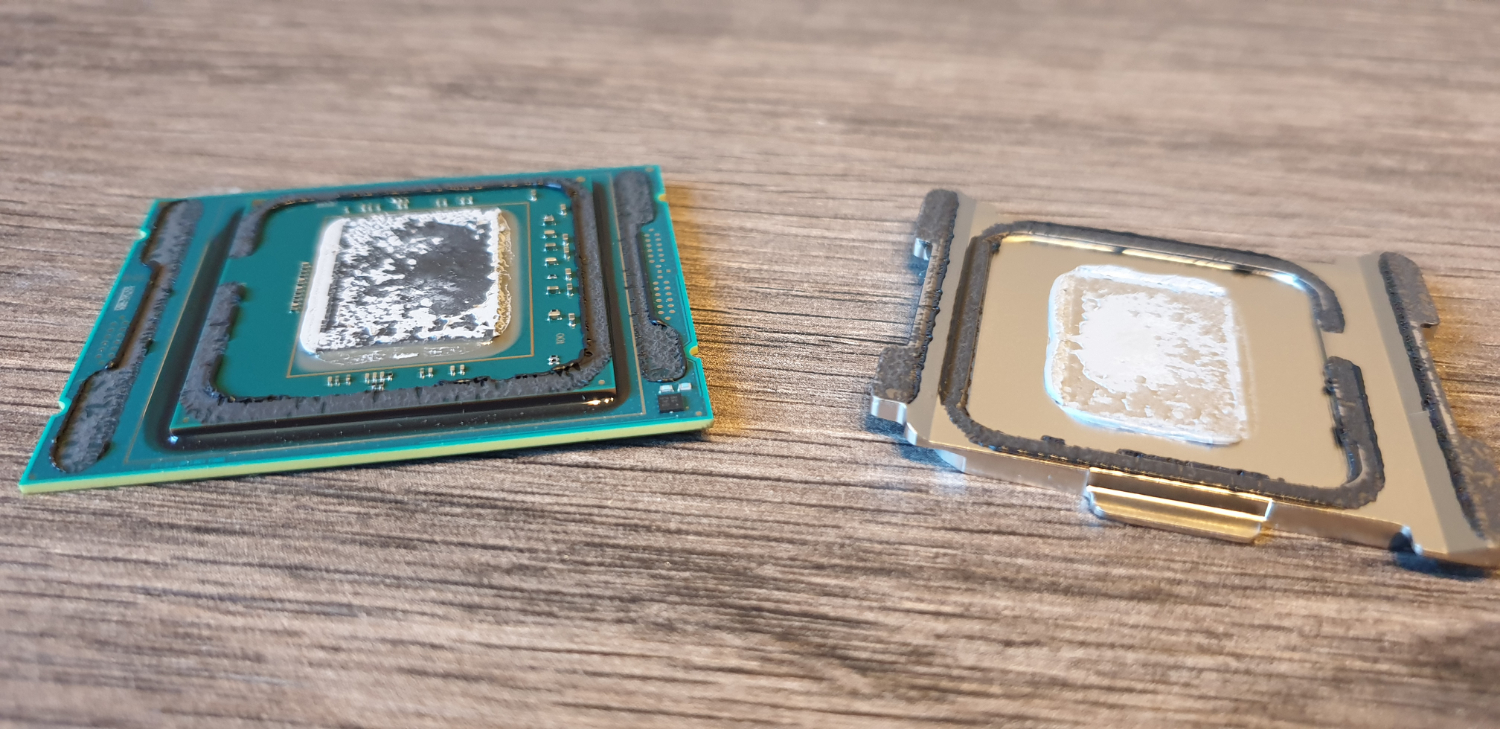
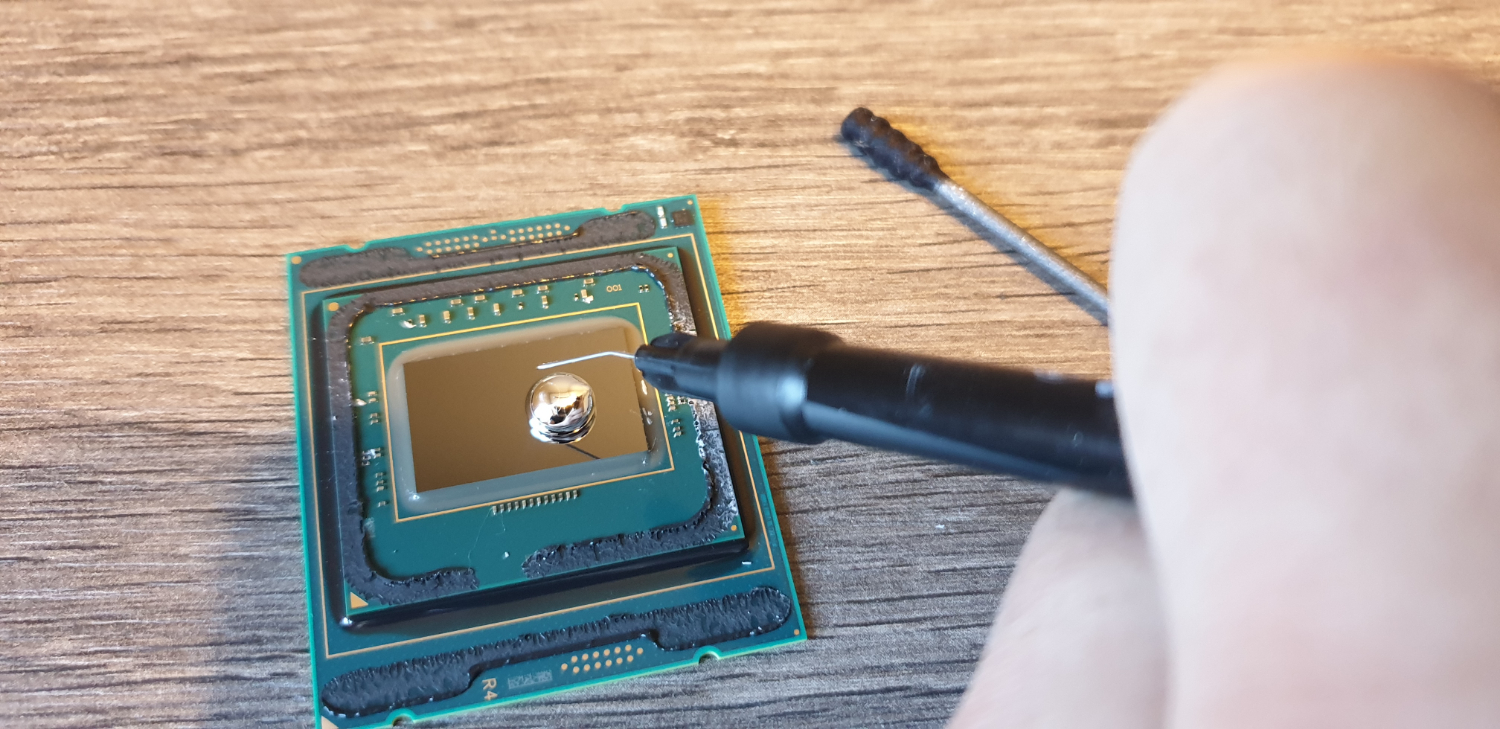
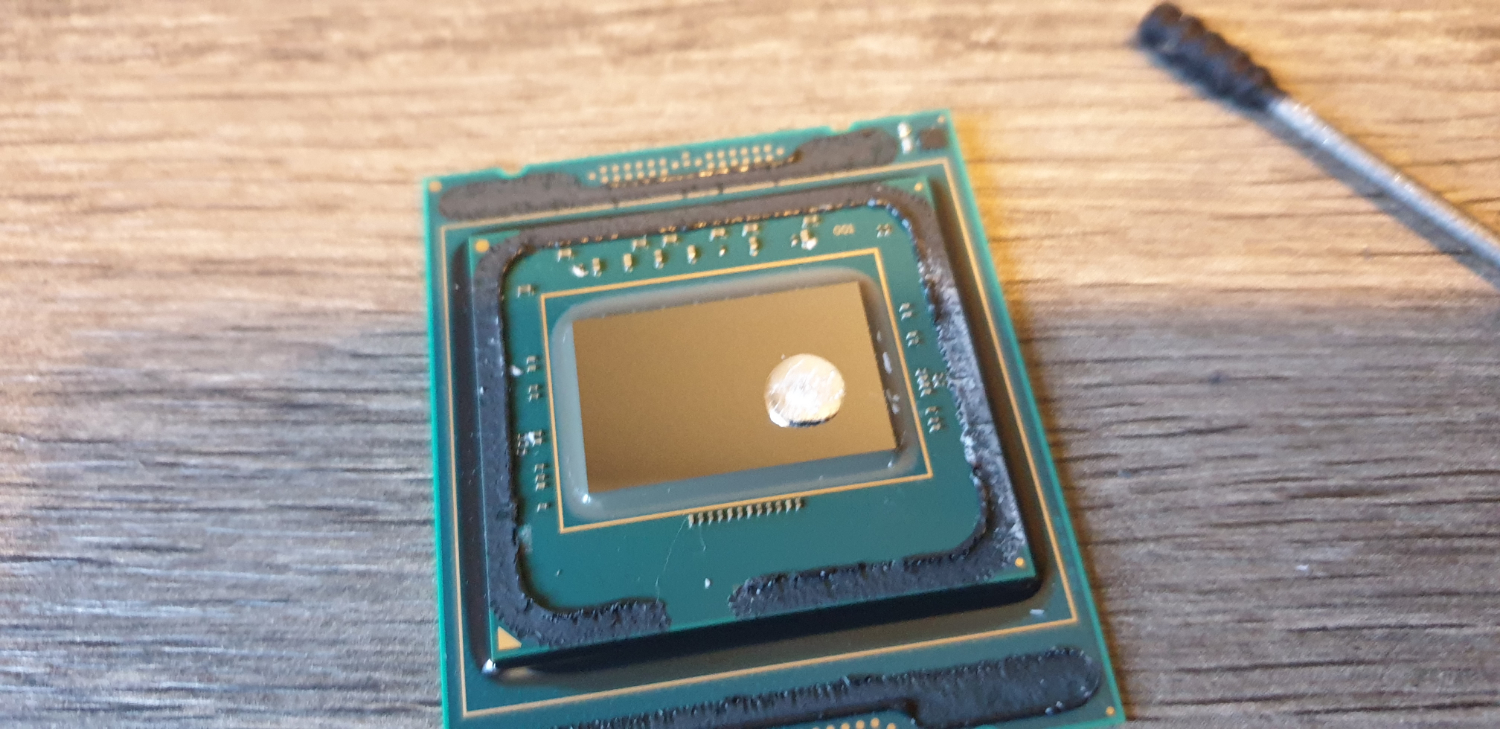
Once you’re done, lift the processor out of the Delid Die Mate-X and get to work cleaning it up. You can either use alcohol wipes or isopropyl alcohol and a micofiber cloth to do this. Once that’s done, it’s a good idea to clean off the remaining glue from the IHS, again either use a finger nail, or a sharp blade.
To apply the liquid-metal, you’re going to want to attach the hypodermic needle end to the syringe, then carefully push out a small drop of it onto the silicon itself. You don’t want too much here, as a small amount covers a surprisingly large area, and as this is conductive any spillages onto the PCB are going to signal bad news.
If you push too much out onto the silicon, use the syringe to pull the excess back up into it. Start out with as little as you can, you can always add more later. Once you’ve got what you think is enough, use the included cotton bud sticks to carefully spread it across the silicon.
3. Reattaching the IHS
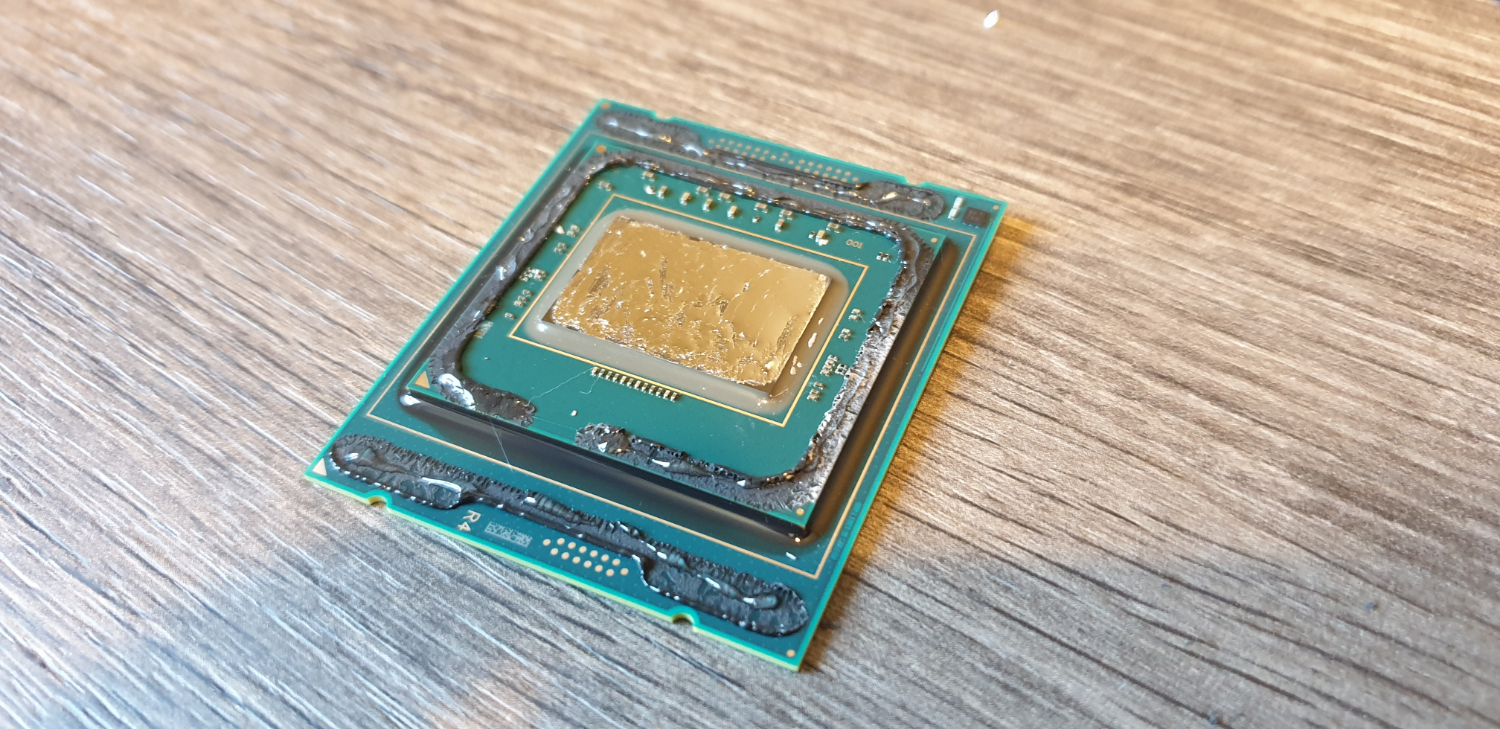
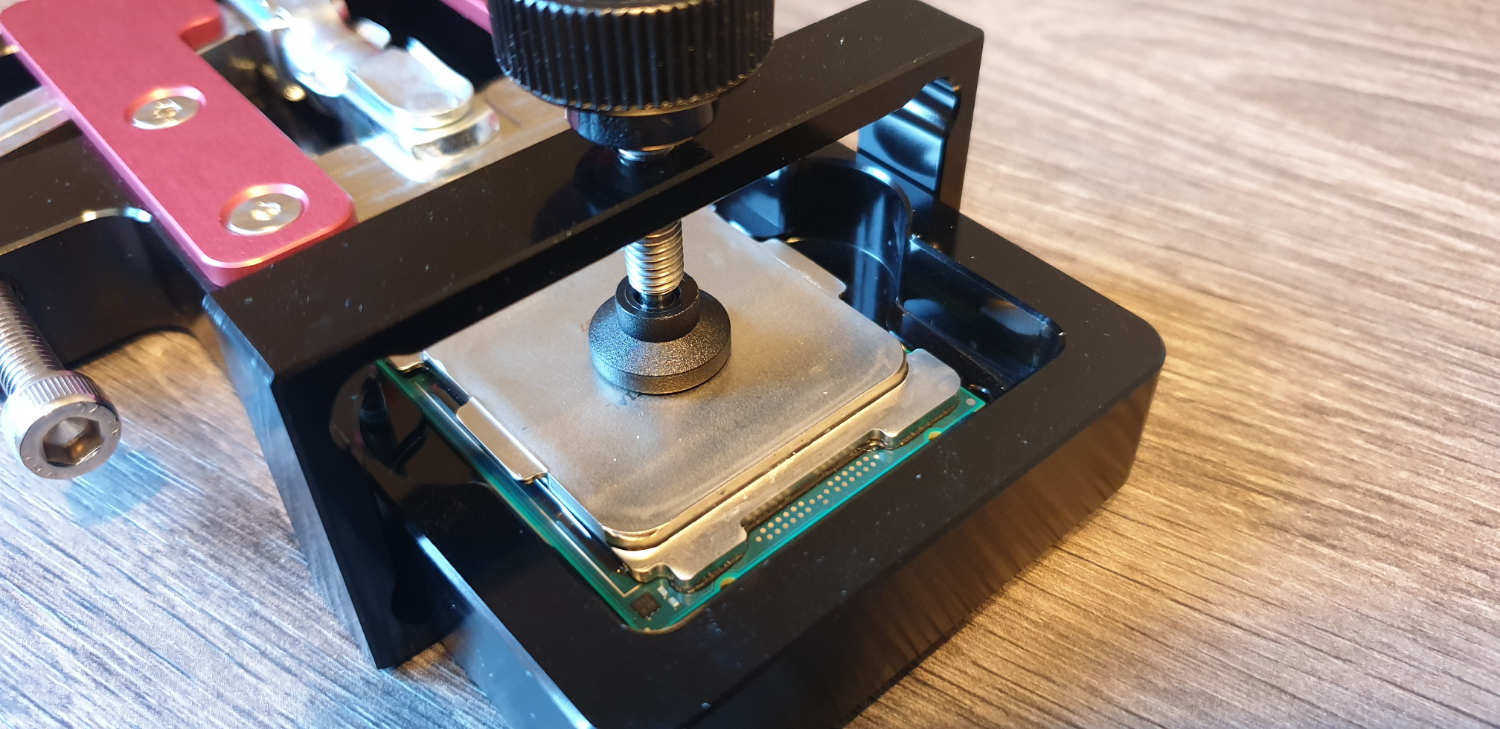
Once that’s done, using waterproof adhesive, place a line of glue across all of the black glue tracks on the CPU, then carefully place the processor back into the Delid Die Mate-X. Once that’s wrapped up, you can then place the heat spreader back onto the top of the CPU.
To make sure it’s correctly aligned, notice that the top of the spreader has to make way for the RFID chip we mentioned earlier. So it’s a little shorter than the bottom part of the IHS. It’s also worth noting that the golden triangle once again goes on the bottom left of the device, with the text starting from the top left.
After that, it’s simply a case of applying the clamp to the device, and carefully pushing pressure back down on to the IHS to secure it into place. Again we recommend 24 hours, but 2-3 hours should be good enough if you’re in a hurry.
Conclusion
And there you have it, two intel processors successfully delidded, with their thermal interface materials reapplied.
Is it worth it though? Well that really depends on your needs and tolerance for risk. If you own an older CPU that doesn't use solder TIM (any Intel before 9th Gen) and you’re into overclocking or just prefer a quieter, cooler stock operation, delidding can make a significant difference. However, if you don't need top-of-the-line performance and thermals, delidding may not be worth the cost and the possibility of damaging your CPU.
Want to comment on this story? Let us know what you think in the Tom's Hardware Forums.
As Associate Editor of Tom's Hardware's prestigous British division, Zak specializes in system building, case reviews and peripherals, and has a particular penchant for liquid-cooling. He's also a lover of all things Viking/Scandinavian (thus the poor attempt at a beard).
