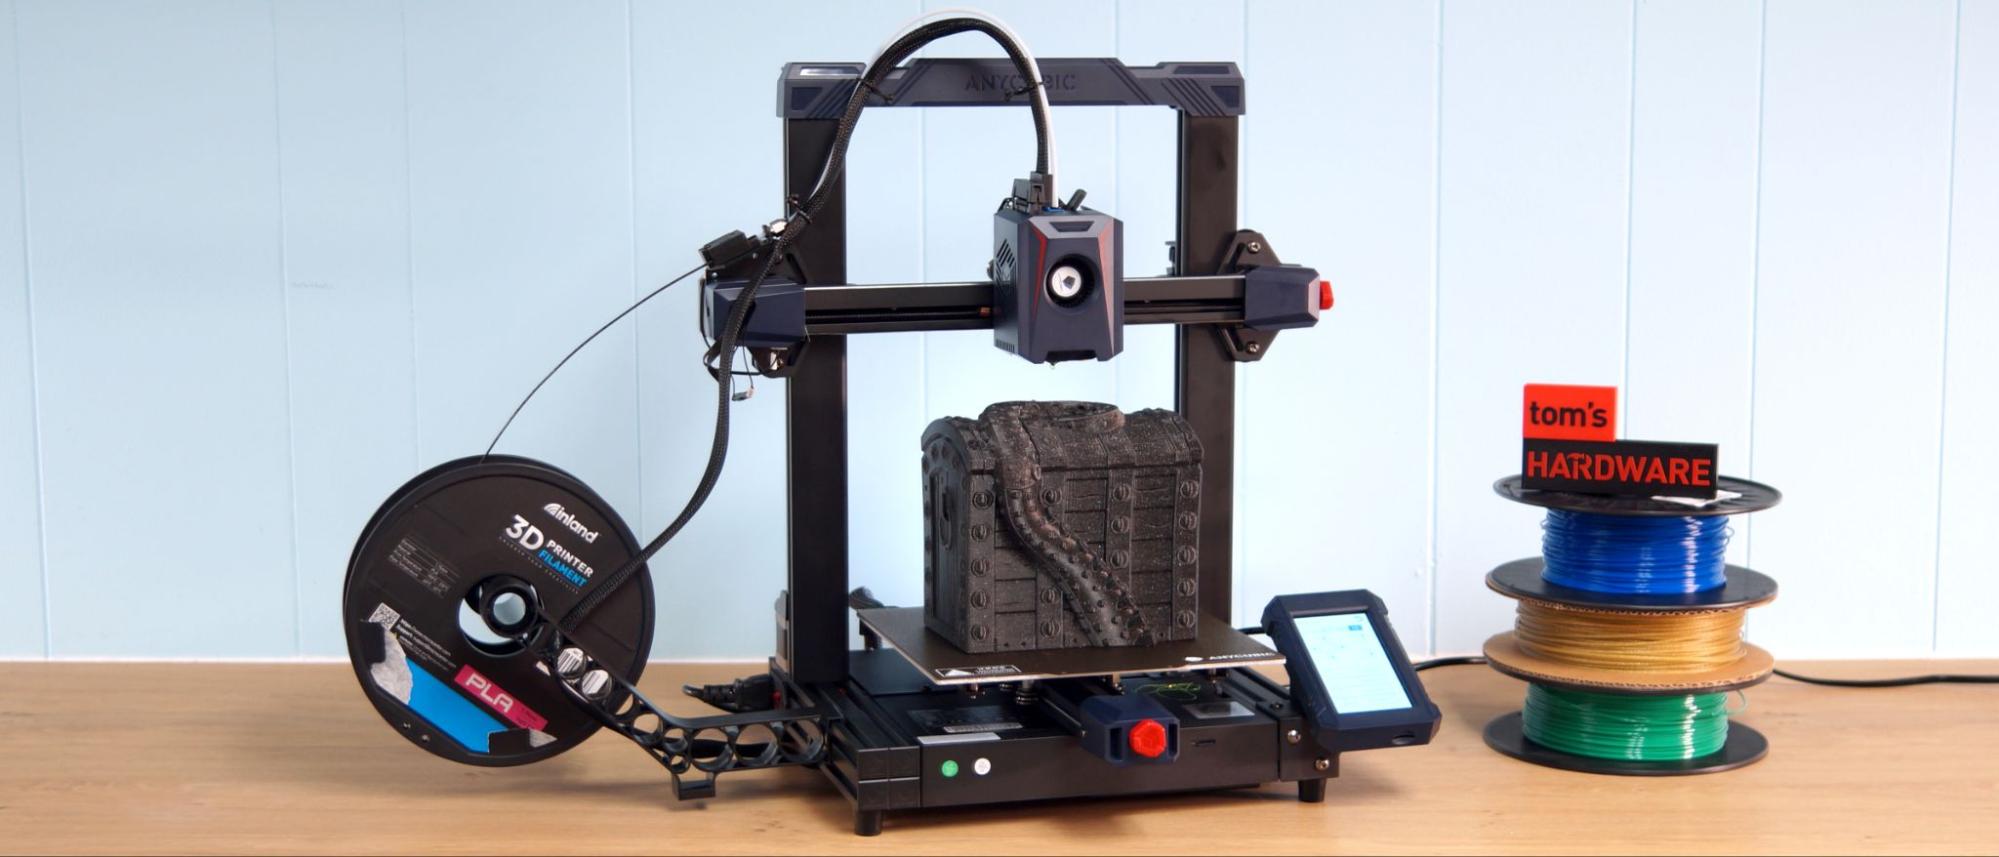
Tom's Hardware Verdict
The Anycubic Kobra 2 is a speedy take on the i3 style bed slinger with improved bed leveling and a sweet price tag.
Pros
- +
Amazing speed
- +
Improved auto bed leveling
- +
All metal hotend
- +
Direct Drive
- +
Easy assembly
Cons
- -
No input shaping
Why you can trust Tom's Hardware
The 3D printing industry was caught off guard in 2022 when Bambu Lab and AnkerMake, new players in the market, each introduced incredibly fast printers. Now the race is on, with consumers expecting to see a rise in high speed machines. Anycubic is answering that demand with the Kobra 2, a printer redesigned to bring speed to the masses at an affordable price.
Essentially Anycubic has given us a “bionic” Kobra, taking its flagship printer apart and rebuilding it with more metal parts, more cooling and a more efficient Volcano style hotend. The Kobra 2 boasts a default print speed of 150 mm/s and draft mode of 250 mm/s, which Anycubic says is about 5 times faster than last year’s models.
Speed isn’t the only improvement we’re seeing on the Kobra 2. Auto bed leveling is now completely hands free with the introduction of Anycubic’s “LeviQ 2.0.” It still uses an inductive sensor, but now the nozzle taps a switch at the back of the plate to let the printer set its own Z height.
The only flaw in the Kobra 2 is the lack of input shaping, a method to dampen vibrations, introduced by Klipper and currently available as an experimental addition to Marlin firmware. Input shaping reduces echos and ringing found in high speed prints. Some of our larger test prints showed signs of vibrations even after the machine was well adjusted and all components firmly tightened.
But input shaping is a firmware issue that can be addressed with a future update. The machine is so well-built that it produces some of the smoothest, cleanest layers I’ve seen. Horizontal lines are practically invisible even at a standard .2 layer height and the powerful cooling fan makes for tidy overhangs.
Because of this, I’m willing to overlook a few high speed vibrations. It prints beautifully at “normal” speeds and can run PETG and TPU at full tilt, something that’s unusual with inexpensive printers. I believe this is due to the dual geared extruder in the direct drive that maintains excellent control of the filament.
The Kobra 2 is an impressive printer for the unbeatable price of $269, and may be one of the best 3D printers we’ve seen this year. It’s a speedy printer for those who thought high speed printing was far out of reach. With its competitive price, easy set up and time saving speed, it’s a viable alternative to more expensive fast printers.
Specifications: Anycubic Kobra 2
| Build Volume | 250 x 220 x 220mm (9.8 x 8.7 x 8.7 inches) |
| Material | PLA/PETG/TPU (up to 260 degrees) |
| Extruder Type | Direct Drive |
| Nozzle | .4mm Volcano style |
| Build Platform | PEI Spring Steel, Heated |
| Bed Leveling | Inductive Auto Leveling with Smart Z |
| Filament Runout Sensor | Yes |
| Connectivity | MicroSD/USB |
| Interface | Color LCD Touch Screen |
| Machine Footprint | 440 x 435 x 486 mm (17.3 x 17.1 x 19.1 inches) |
| Machine Weight | 8.4KG (18.51 pounds) |
Included in the box: Anycubic Kobra 2
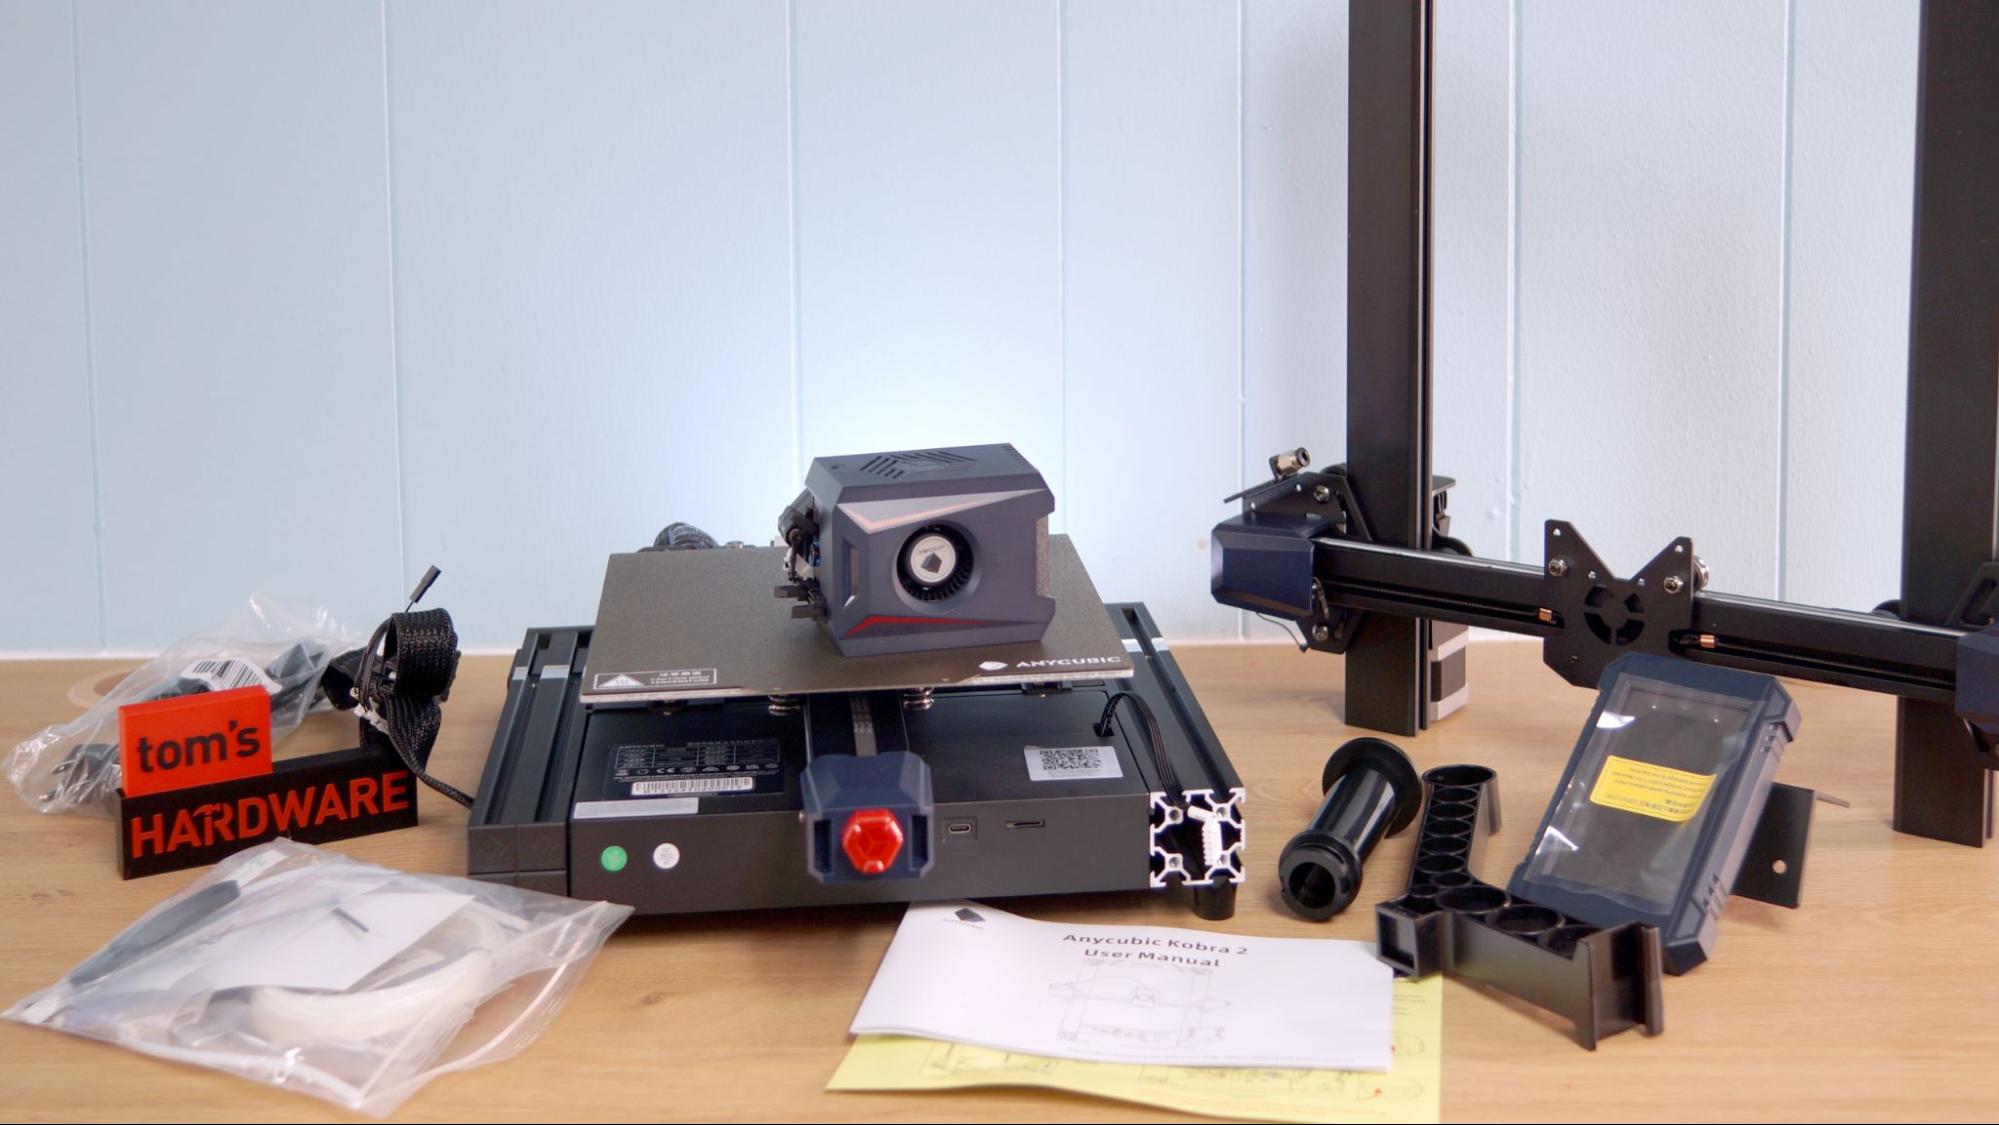
The Anycubic Kobra 2 comes with everything you need to get started: tools to build and maintain the printer and a microSD card with a USB adapter. You also get a spare nozzle and small sample of PLA.
There’s a paper copy of the quick start guide to help you build the printer. The microSD card comes with sample models, a PDF copy of the manual, plus a copy of both Cura and PrusaSlicer.
Assembling the Anycubic Kobra 2
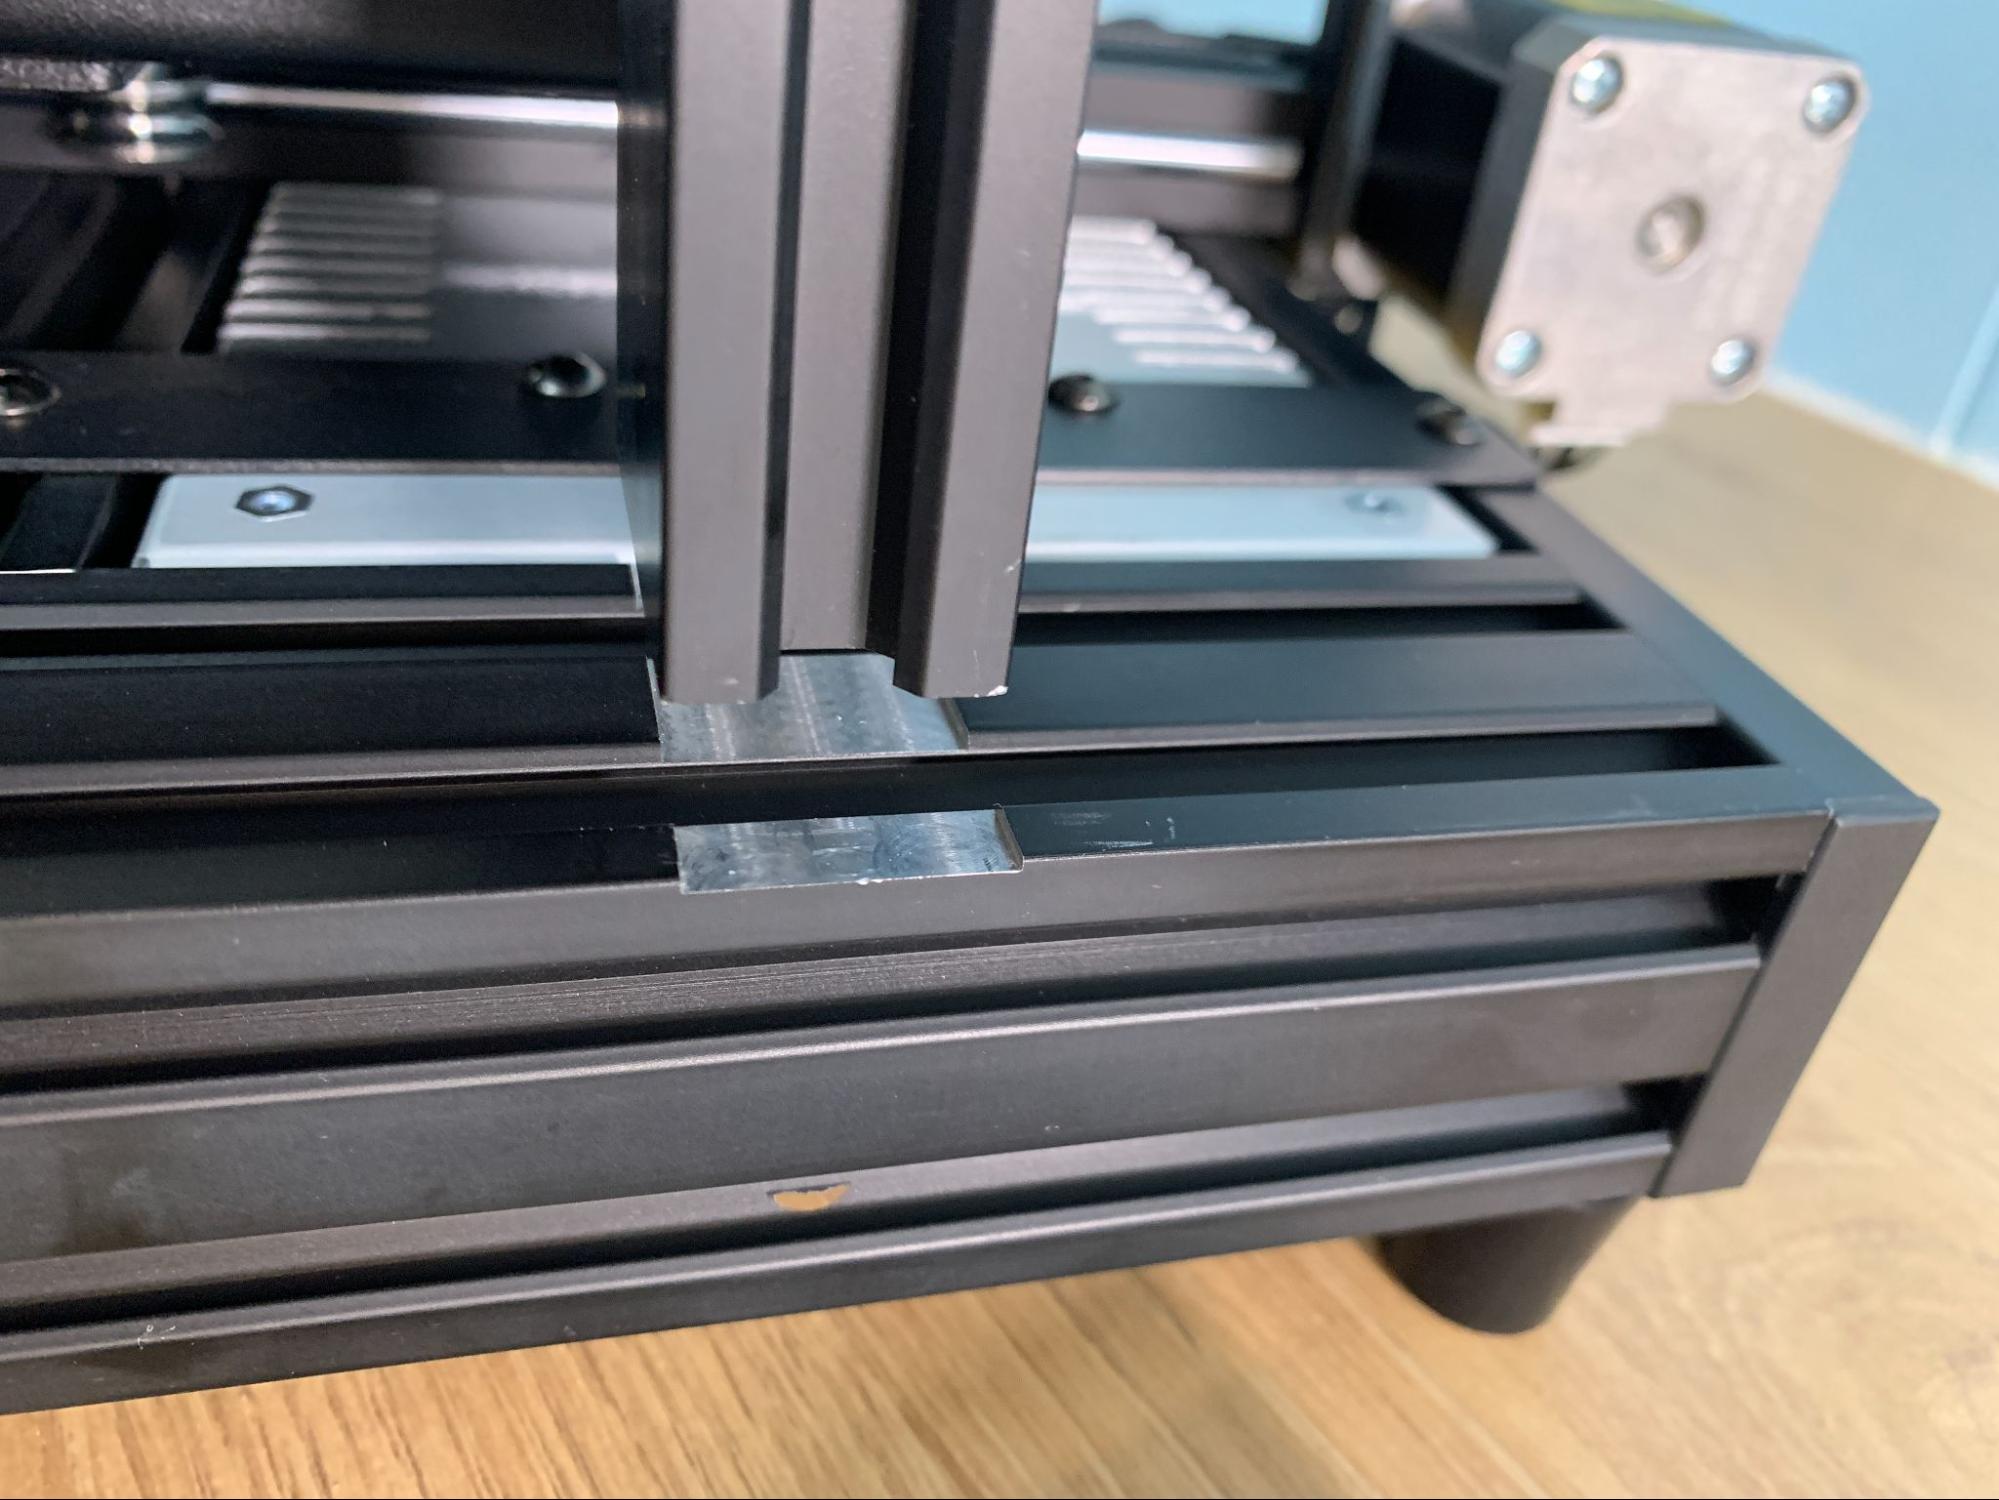
I set up the Anycubic Kobra 2 in about 20 minutes. It ships mostly assembled in two large sections and only needs four bolts and a handful of screws to put together the machine. Notches in the base help you find the right place to set the gantry while helping to hold it steady. The tool head is packed separately and needs four screws to lock it into place. The wiring is clearly marked and easy to plug into place.
Leveling the Anycubic Kobra 2
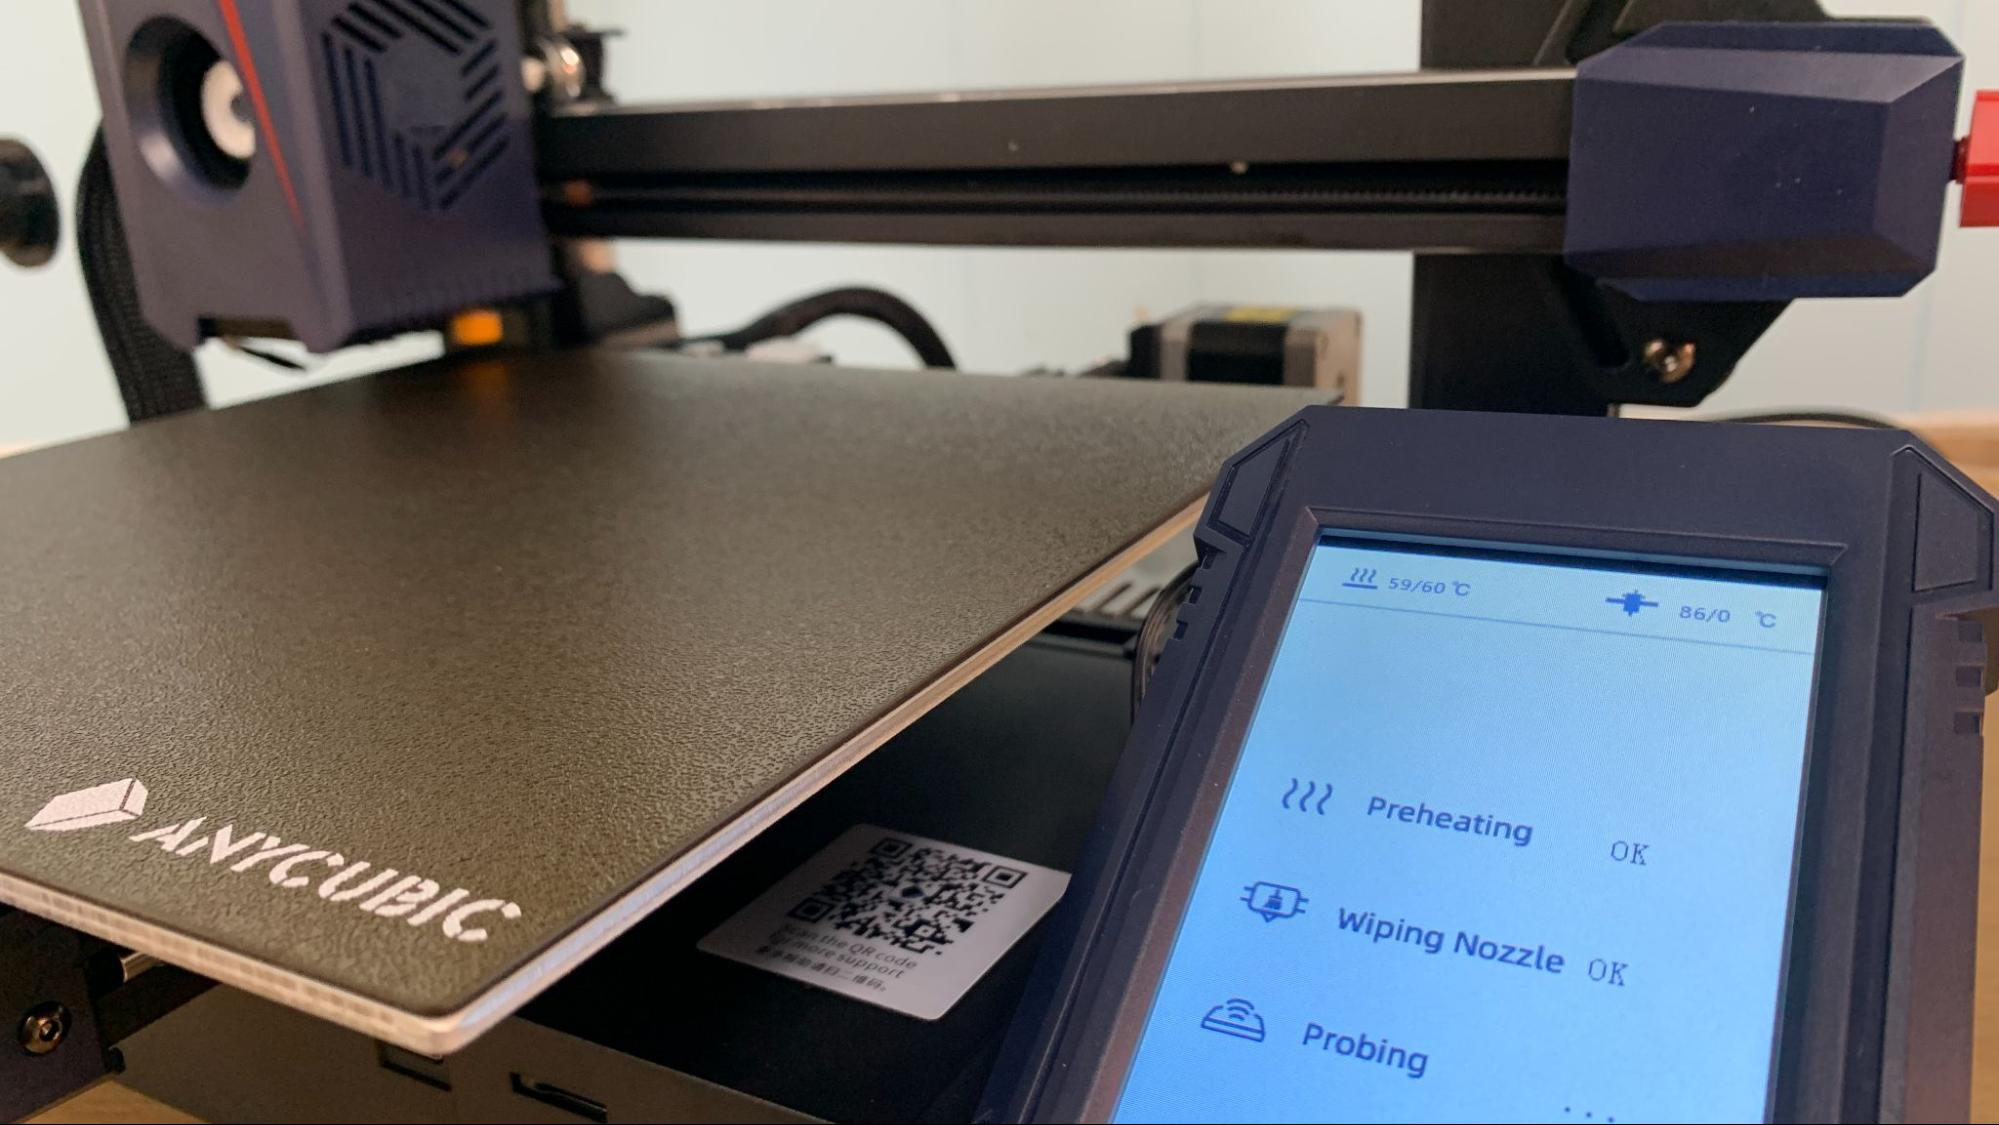
The Kobra 2 comes with an update of Anycubic’s inductive leveling sensor, dubbed the Anycubic LeviQ 2. Inductive leveling uses a non-contact magnetic probe – it senses the metal surface of the build plate while hovering a few millimeters above it.
To level the bed, select Prepare → Leveling. Then select Auto-Leveling and the printer takes care of the rest. It will heat up the bed and nozzle, tap the bed a few times, then zoom to the back of the machine to wipe the nozzle clean on the white silicone square. Next it taps the neighboring switch to calculate the Z height. The switch is placed at the exact same height as the build plate. When the nozzle presses the switch, it learns how much to adjust for a perfect first layer. This method is quite accurate and avoids the need for overly complex sensors in the bed or tool head.
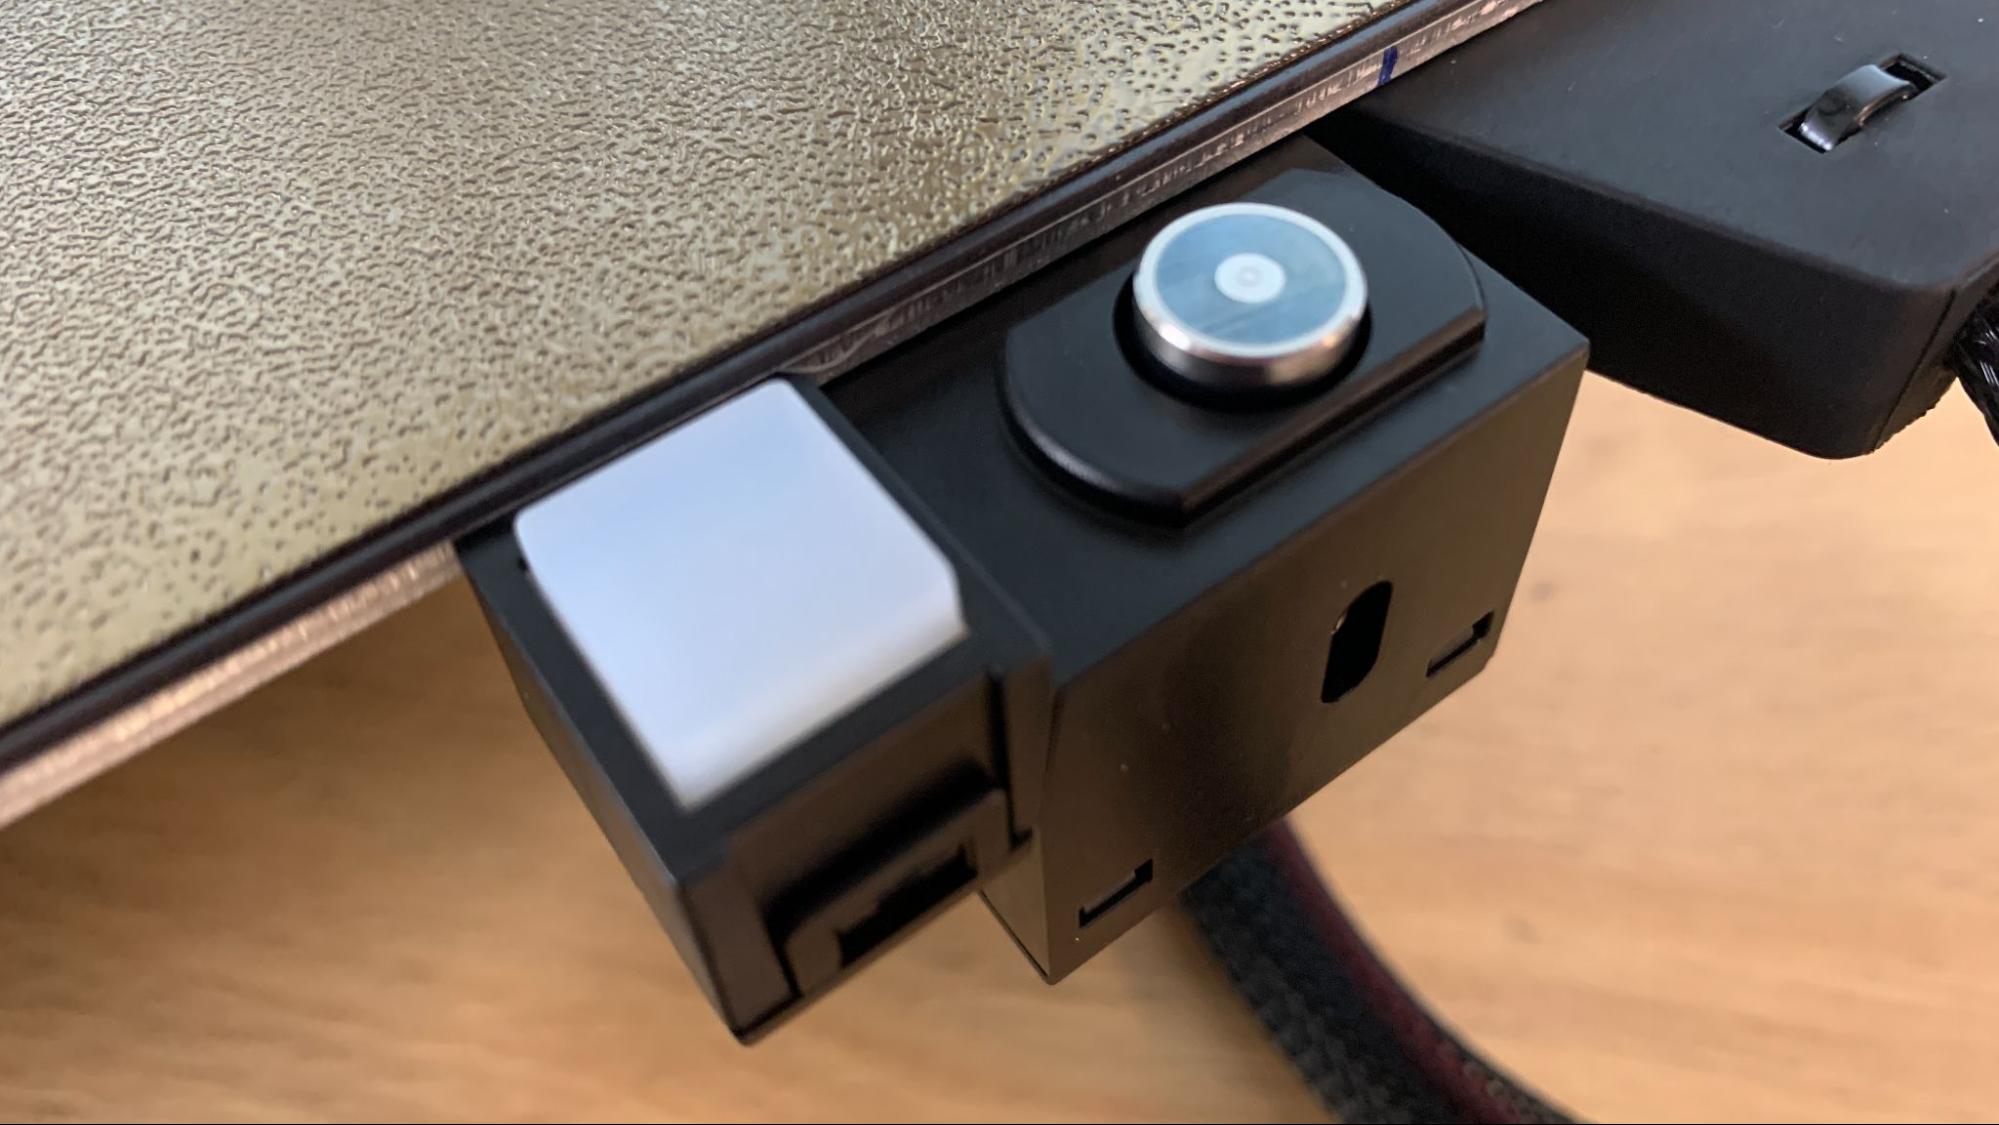
Once the Z height has been calculated, it returns to the build plate to probe 25 spots in a grid across the bed surface. The sensor stops a few millimeters above the bed, not allowing the nozzle to touch during auto leveling.
All this data is saved to the machine’s memory for future use. It will not recheck the bed before every print, so it’s up to you to run the leveling program after moving the printer or changing the nozzle. Because the bed is hard mounted, it should hold its level indefinitely.
Loading Filament in the Anycubic Kobra 2
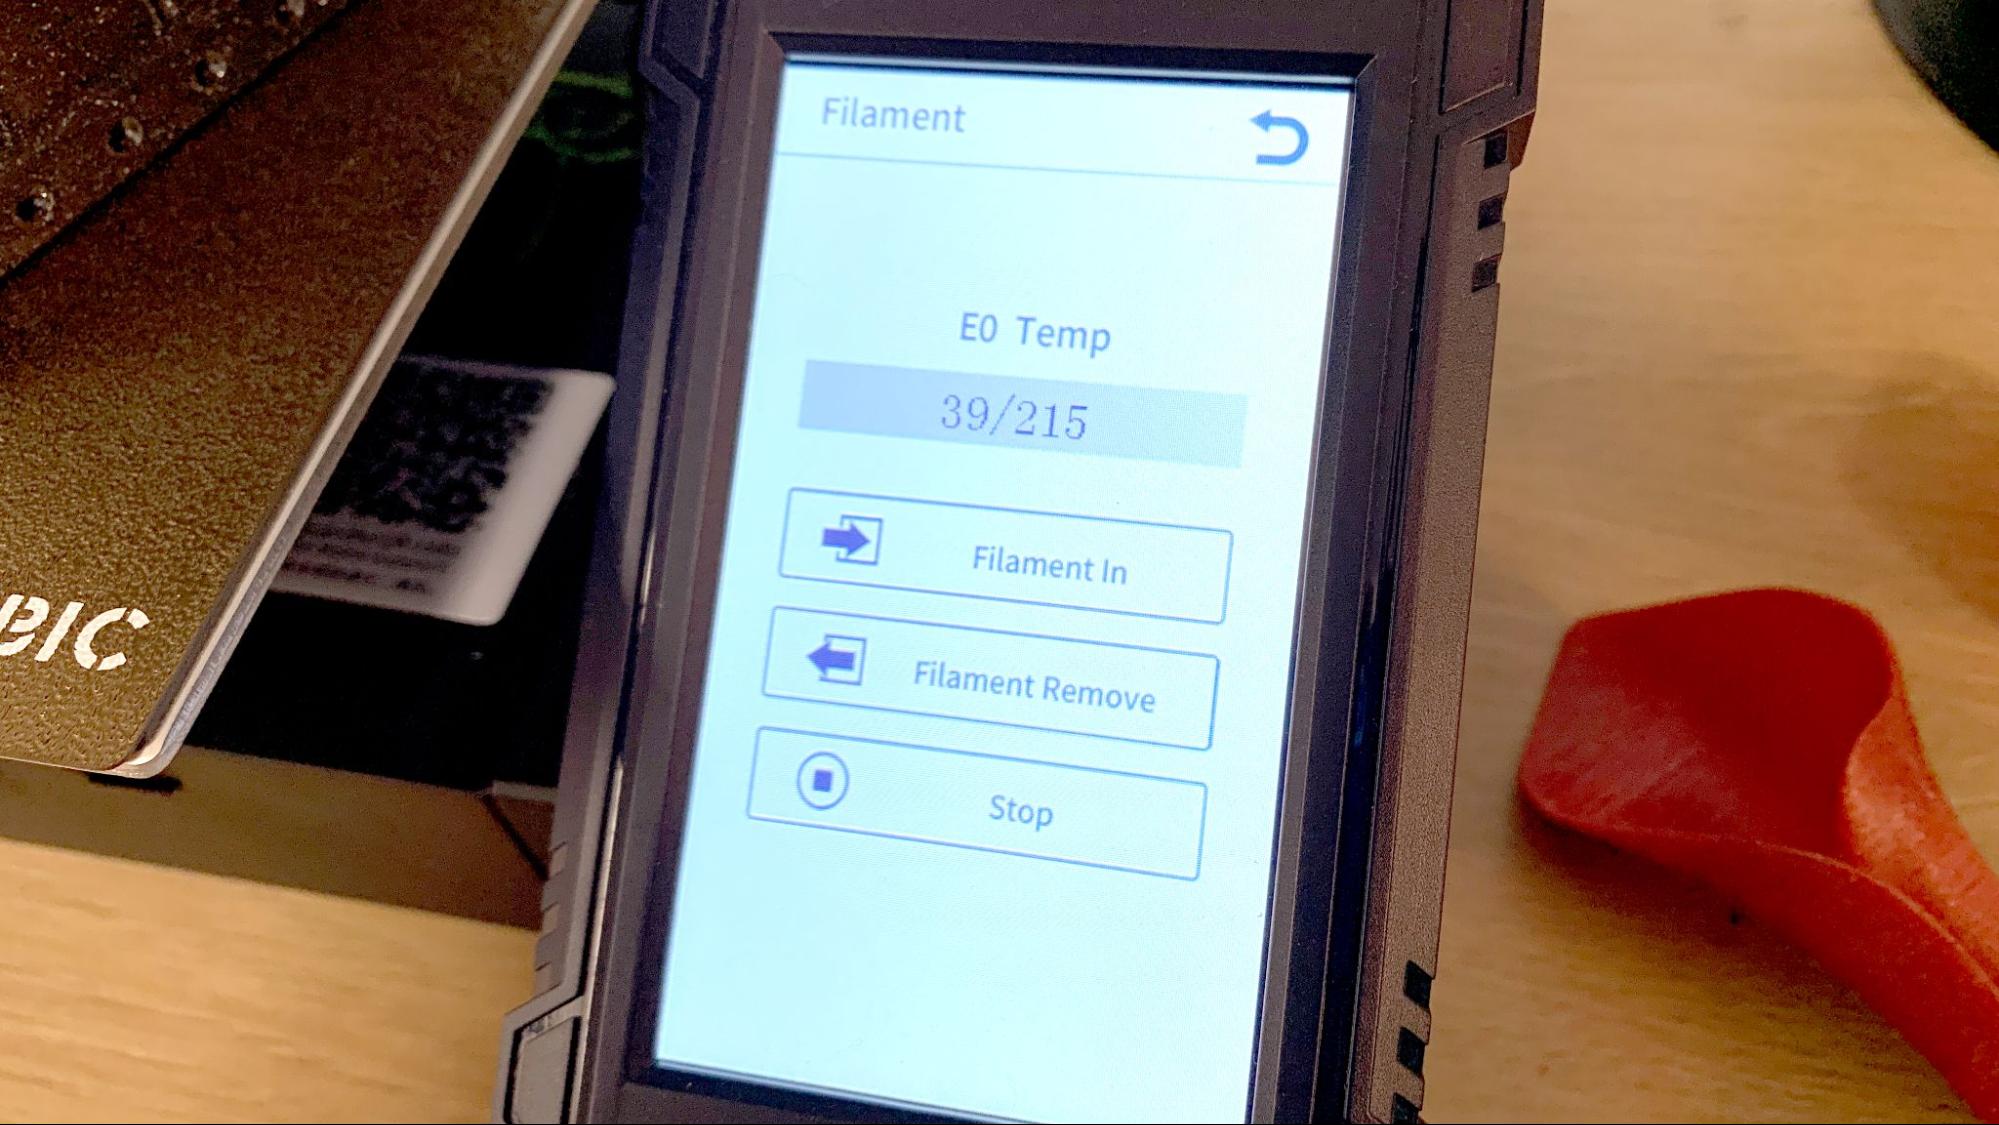
The Anycubic Kobra 2 has a direct drive tool head with a reverse Bowden and a filament runout sensor near the side mounted spool holder. All the extruder gears, fans and hotend are in one front-mounted package.
To load filament into the printer, press Prepare on the main menu. Next select Filament. Now select Filament In or Filament Remove. The machine will quickly heat up to 230 C. Put your spool on the spool holder, and place the end of the filament into the runout sensor and through the white tube leading to the tool head. Press Filament In and pull back on the lever next to the white tube. Push the filament in until the gears grab hold and then let it feed. Press Stop when the filament is coiling below the tool head.
Removing the filament works the same, just in reverse. Let the tool head preheat, select Filament Remove and let the gears back the filament out. Remove the filament by hand when there is no more tension on the plastic.
Design of the Anycubic Kobra 2
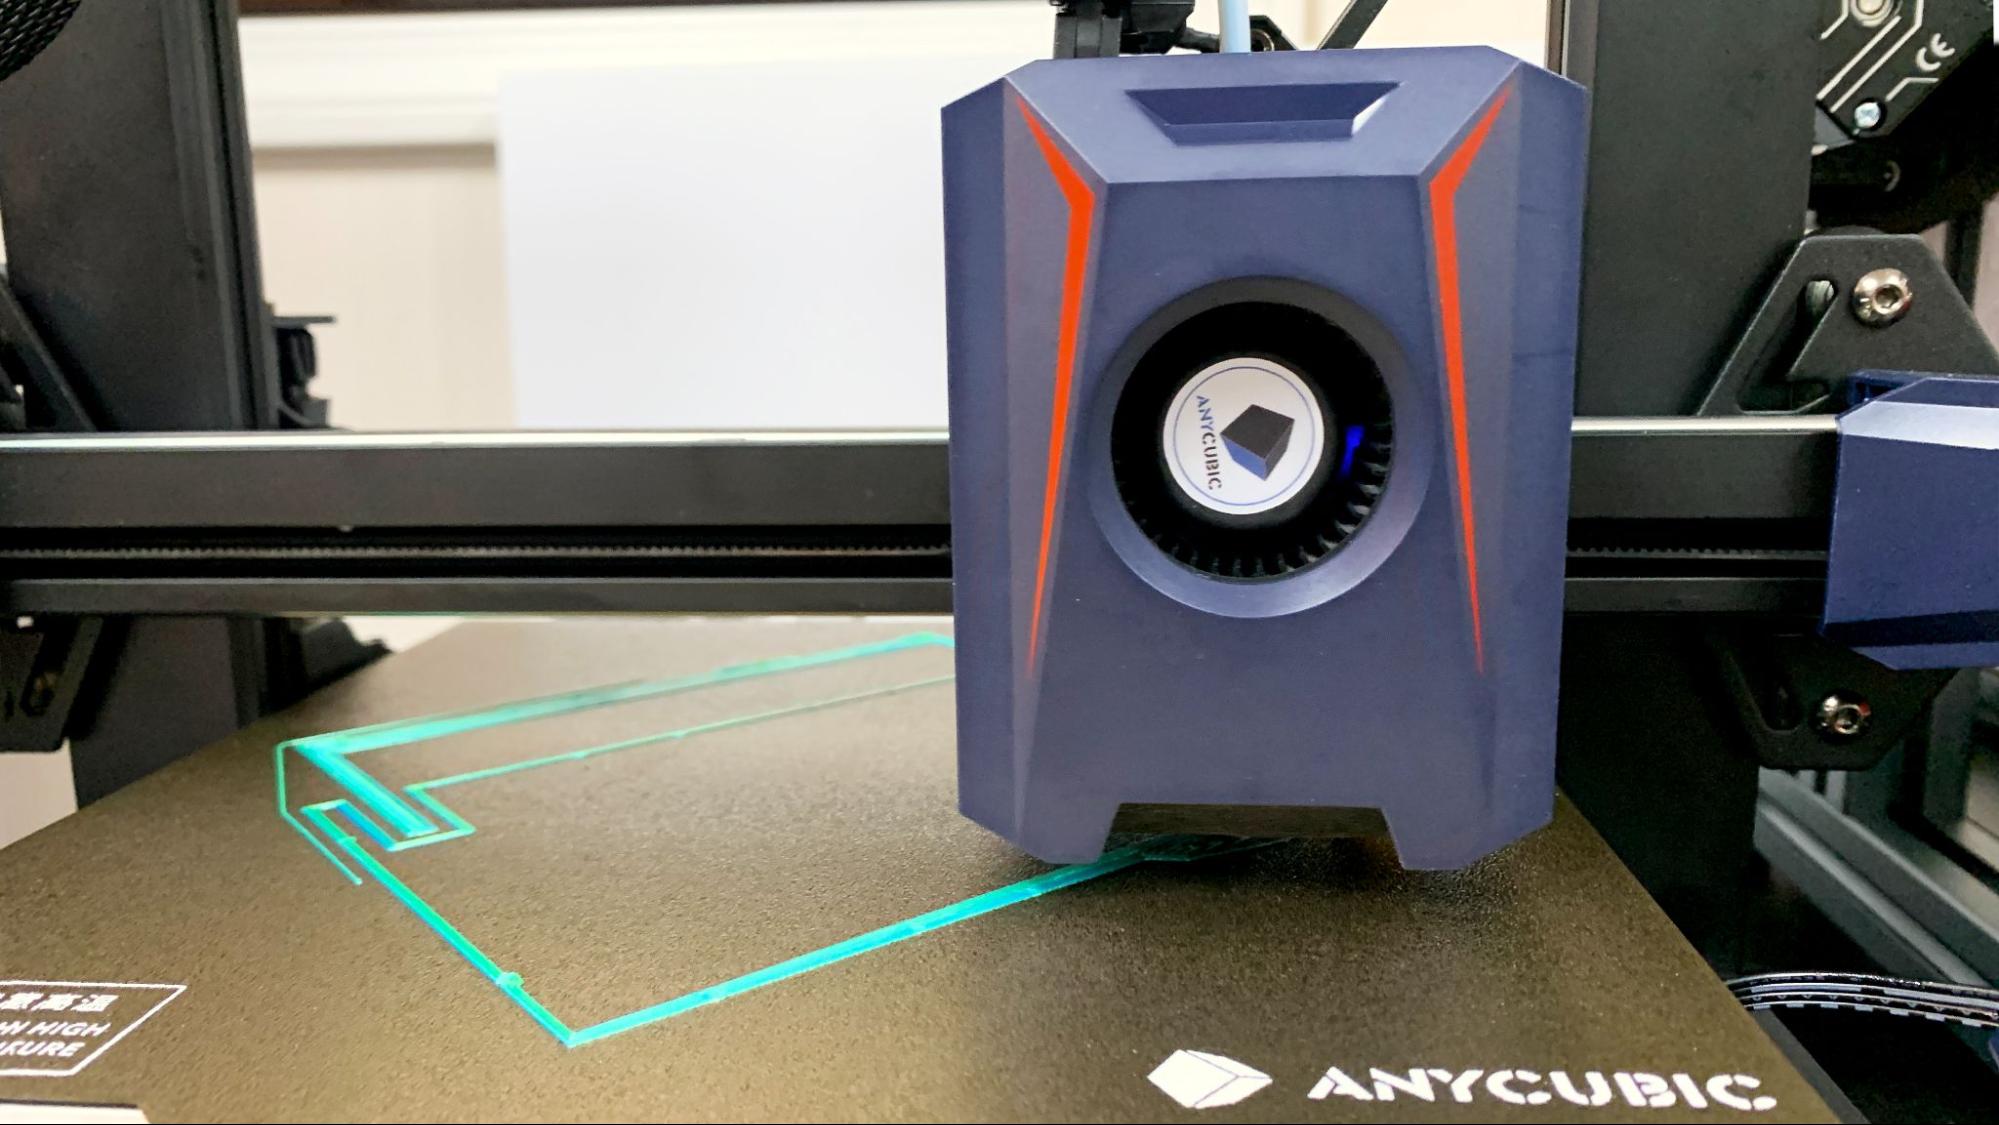
The Anycubic Kobra 2 looks similar to its black and blue Kobra siblings, but now has an opening in the hotend cover to accommodate a powerful new hamster wheel like blower fan. The electronics and a 400w power supply are tucked under the build plate so it has a nice neat footprint.
One of the most interesting improvements are the metal rails embedded into the X and Y axis. This is a mash-up of two popular motion systems: V slot wheels and Linear rods. V Slot wheels are seen on most budget minded printers, and use disposable rubbery wheels that run in the slots of the metal frame. Durable linear rods are seen on more expensive machines like the Prusa MK4 and Bambu Lab P1P. Anycubic stated that the new “SG 15 bearings…can reduce the friction between moving parts, allowing for smoother, faster movements and are more wear-resistant.”
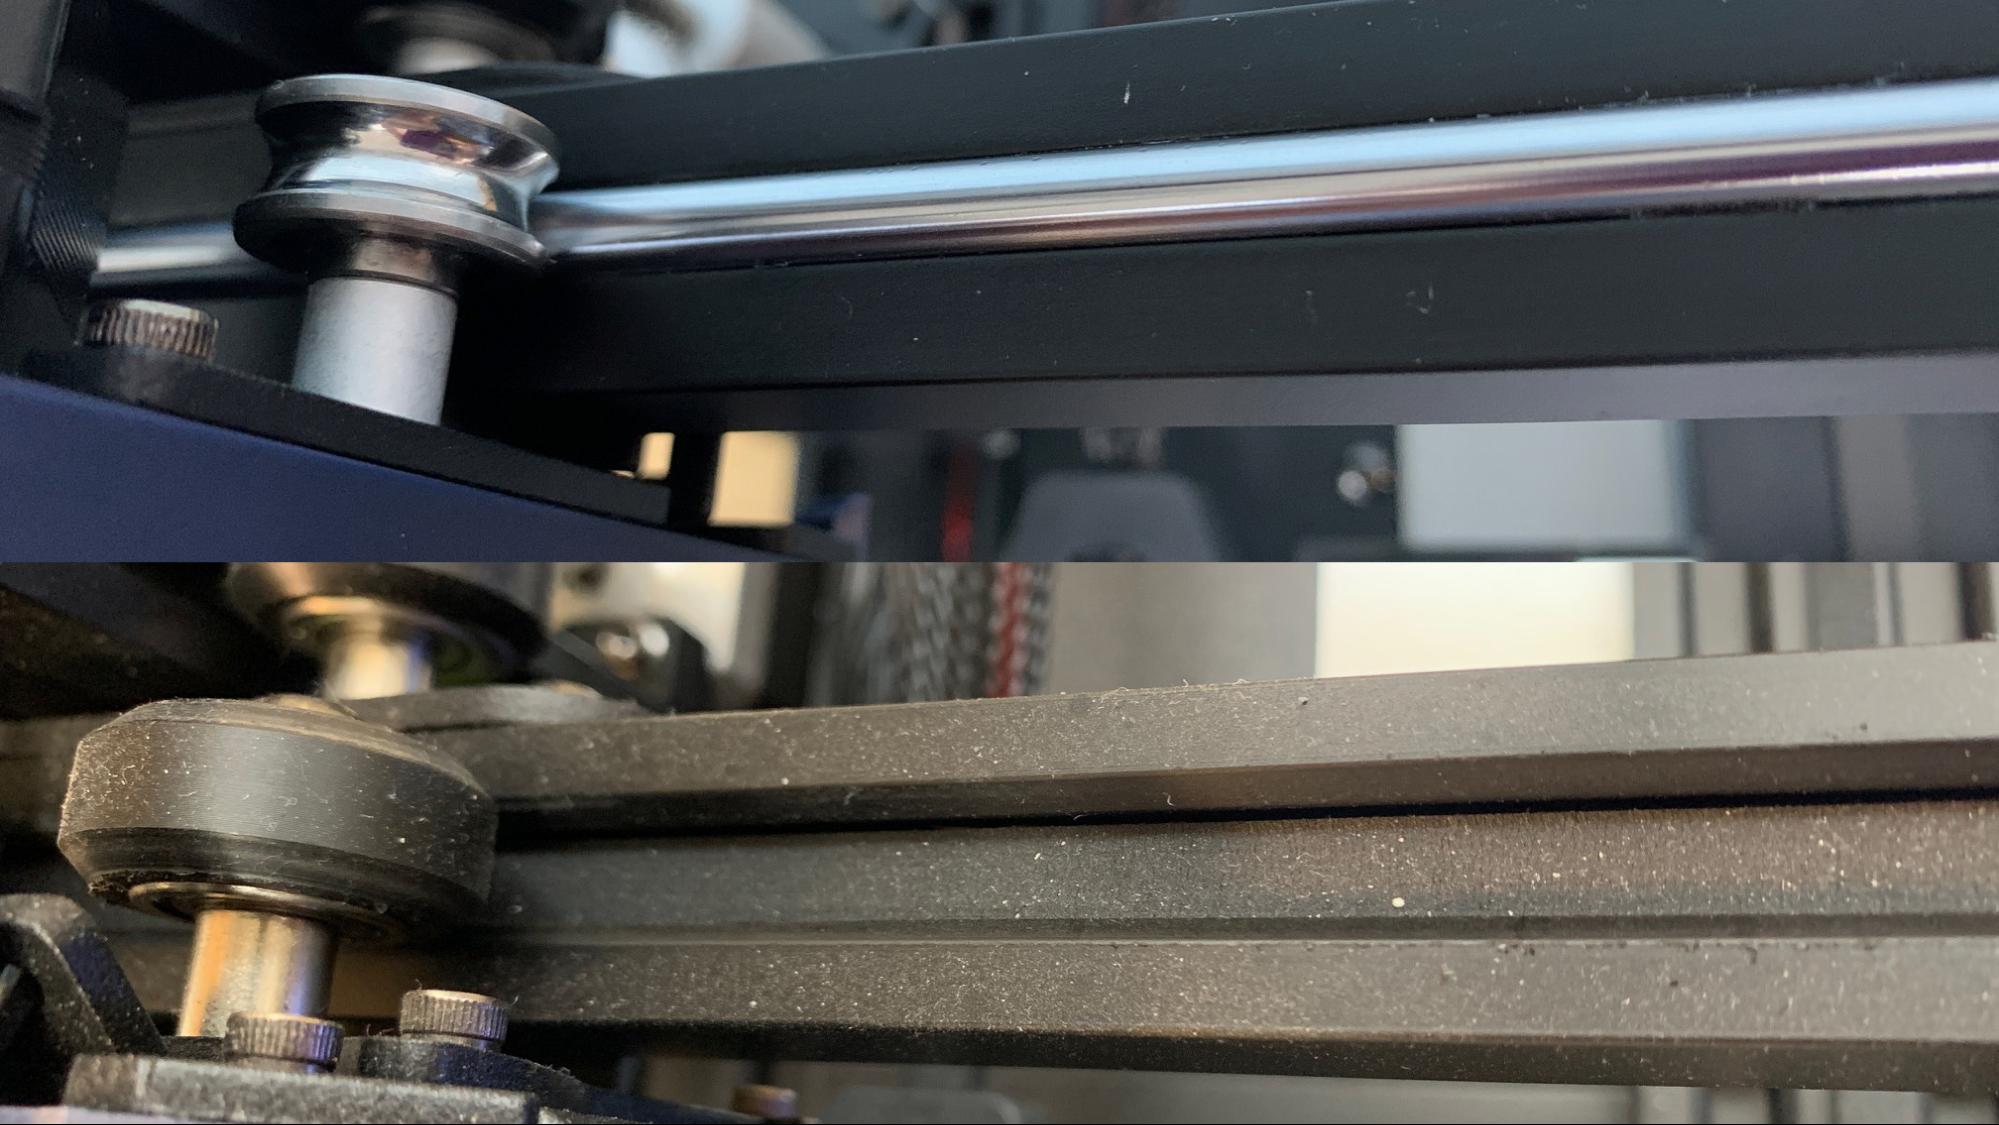
The Kobra 2 has a new “double screw motion system” on the Z axis, with the X gantry supported on both sides by twin Z screws. The second rod does not have its own stepper motor, but the screws are kept in sync with a belt. This allows the Z axis to move quickly and precisely.
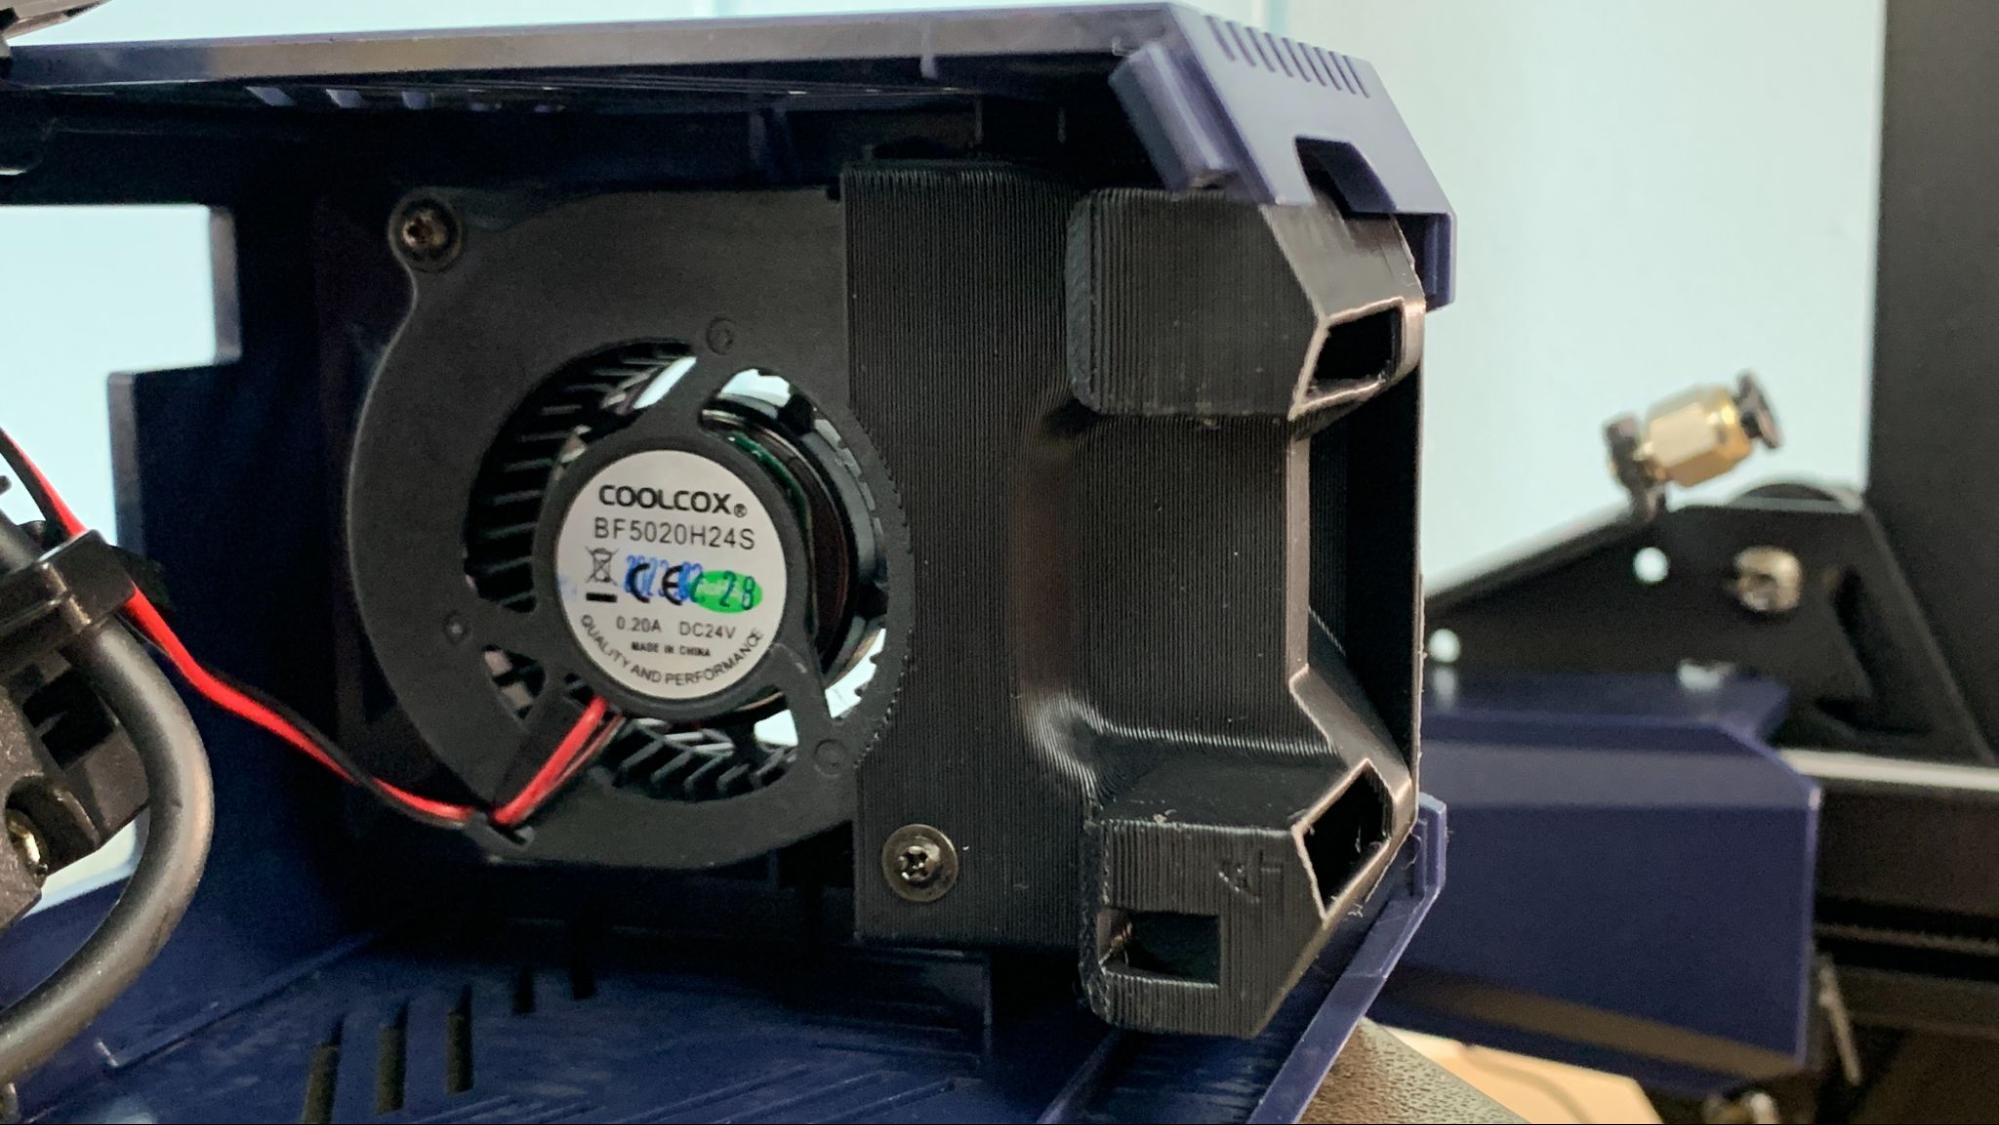
Hotend cooling is provided with one giant 5020 fan in the center capable of 7000 rotations per minute. The breeze is directed downward into two ducts that point at the nozzle.
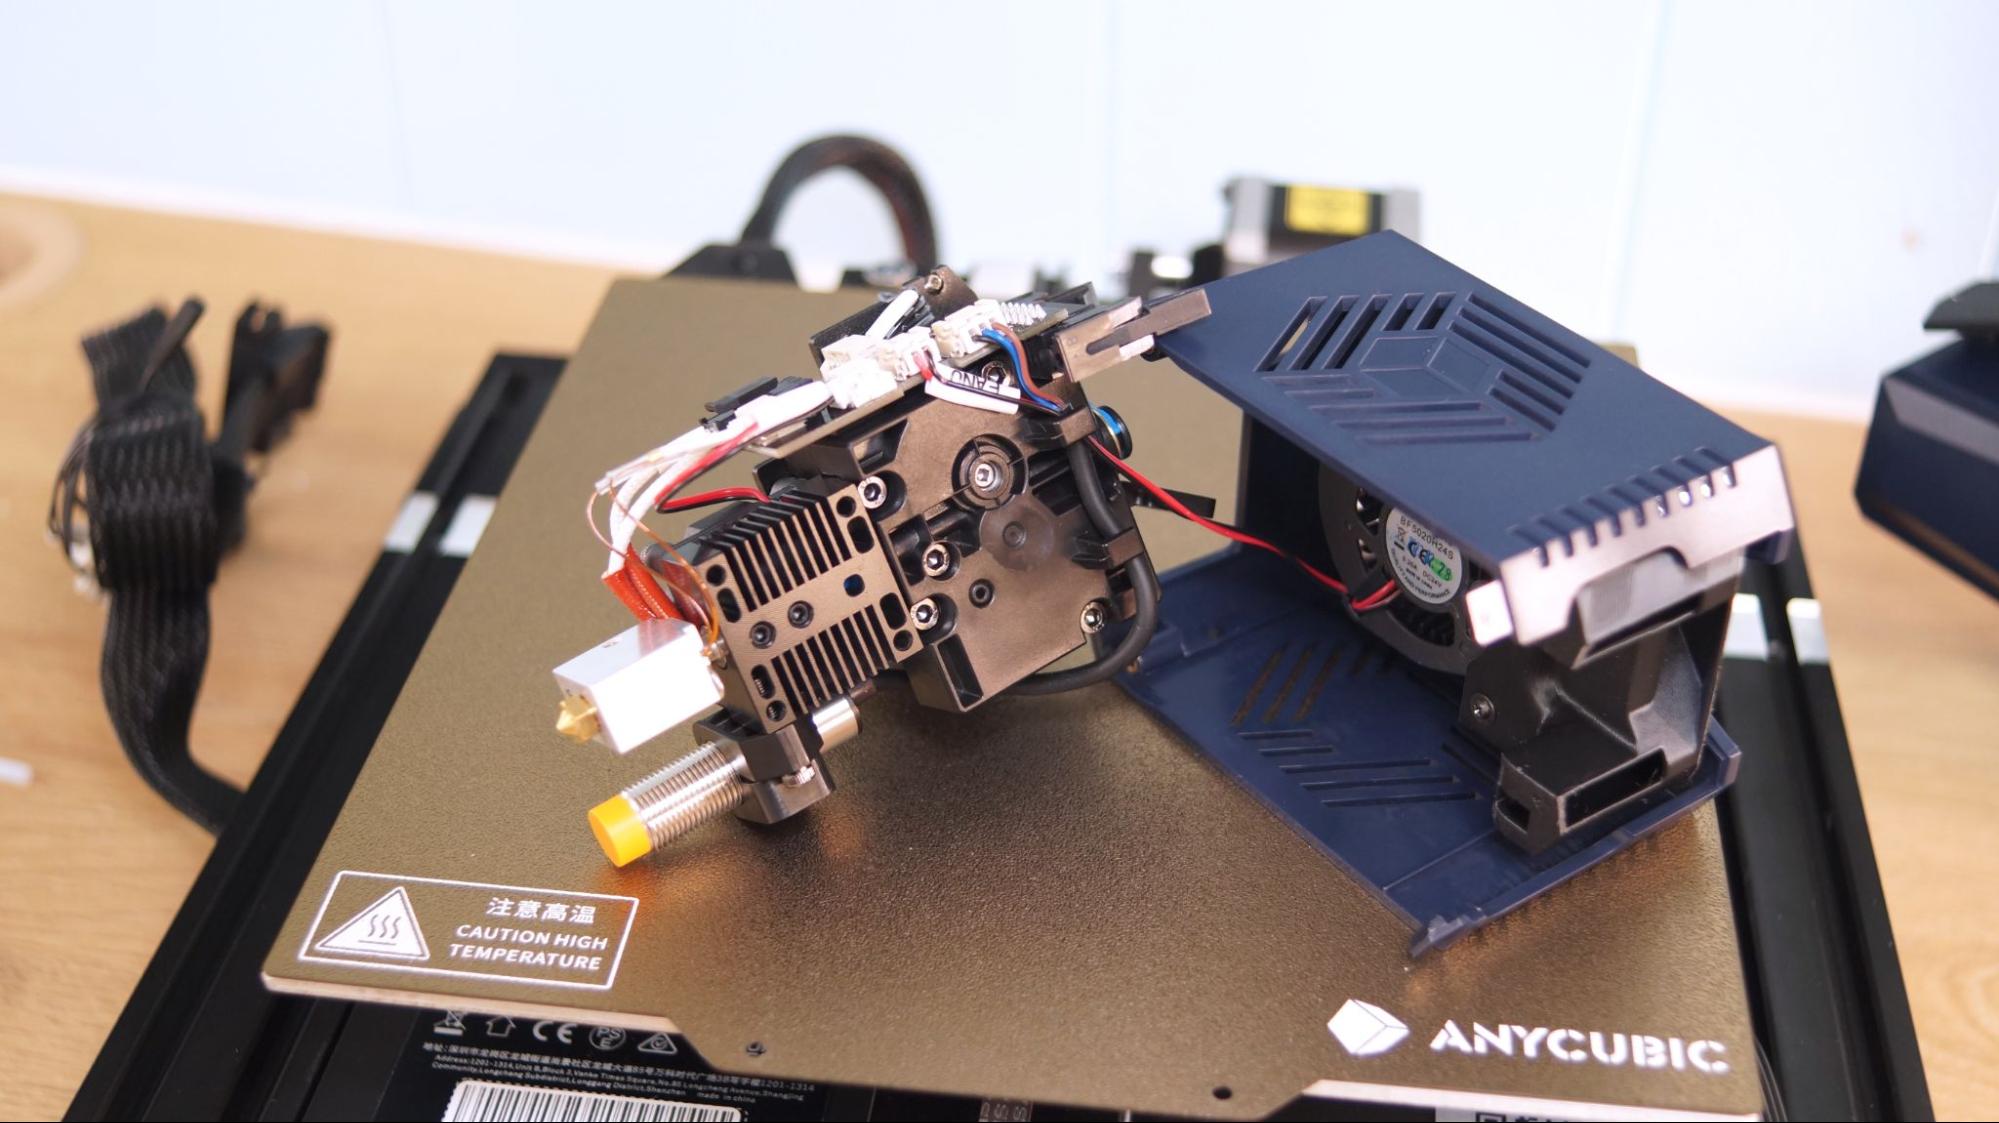
The Kobra 2 has a direct drive with dual gears that grab filament on both sides for controlled feeding into a Volcano style hotend. The extra long Volcano is kept toasty with a 60 watt heat block that can melt filament more quickly and keep up with the printer’s promised 250 mm/s speed. I’m particularly grateful that Anycubic is using E3D’s Open Source design, which gives users access to a variety of 3rd party nozzles when it’s time for a replacement or upgrade.
It comes with a textured PEI coated spring steel plate firmly held in place by a magnet sheet. Most prints simply release when the bed cools down, but larger or more sticky PETG prints can be removed easily by flexing the plate. The bed can reach temperatures of 110 C, but the hotend is lined with PTFE tubing which limits the max temperature to 260C.
The touch screen is the same 4.3 inches display seen on all the 2022 Anycubic Kobras and continues to use the same easy to navigate menu. The home screen has four options: Print, Prepare, Tools and System.
The only problem I had with the Kobra 2 is the lack of Input Shaping, a function long available to high speed printers running Klipper firmware. Marlin firmware is experimenting with Input Shaping too, so we know it's not completely out of reach. Input shaping allows the printer to cancel out vibrations that cause ripples or echos in the print.
Preparing Files / Software
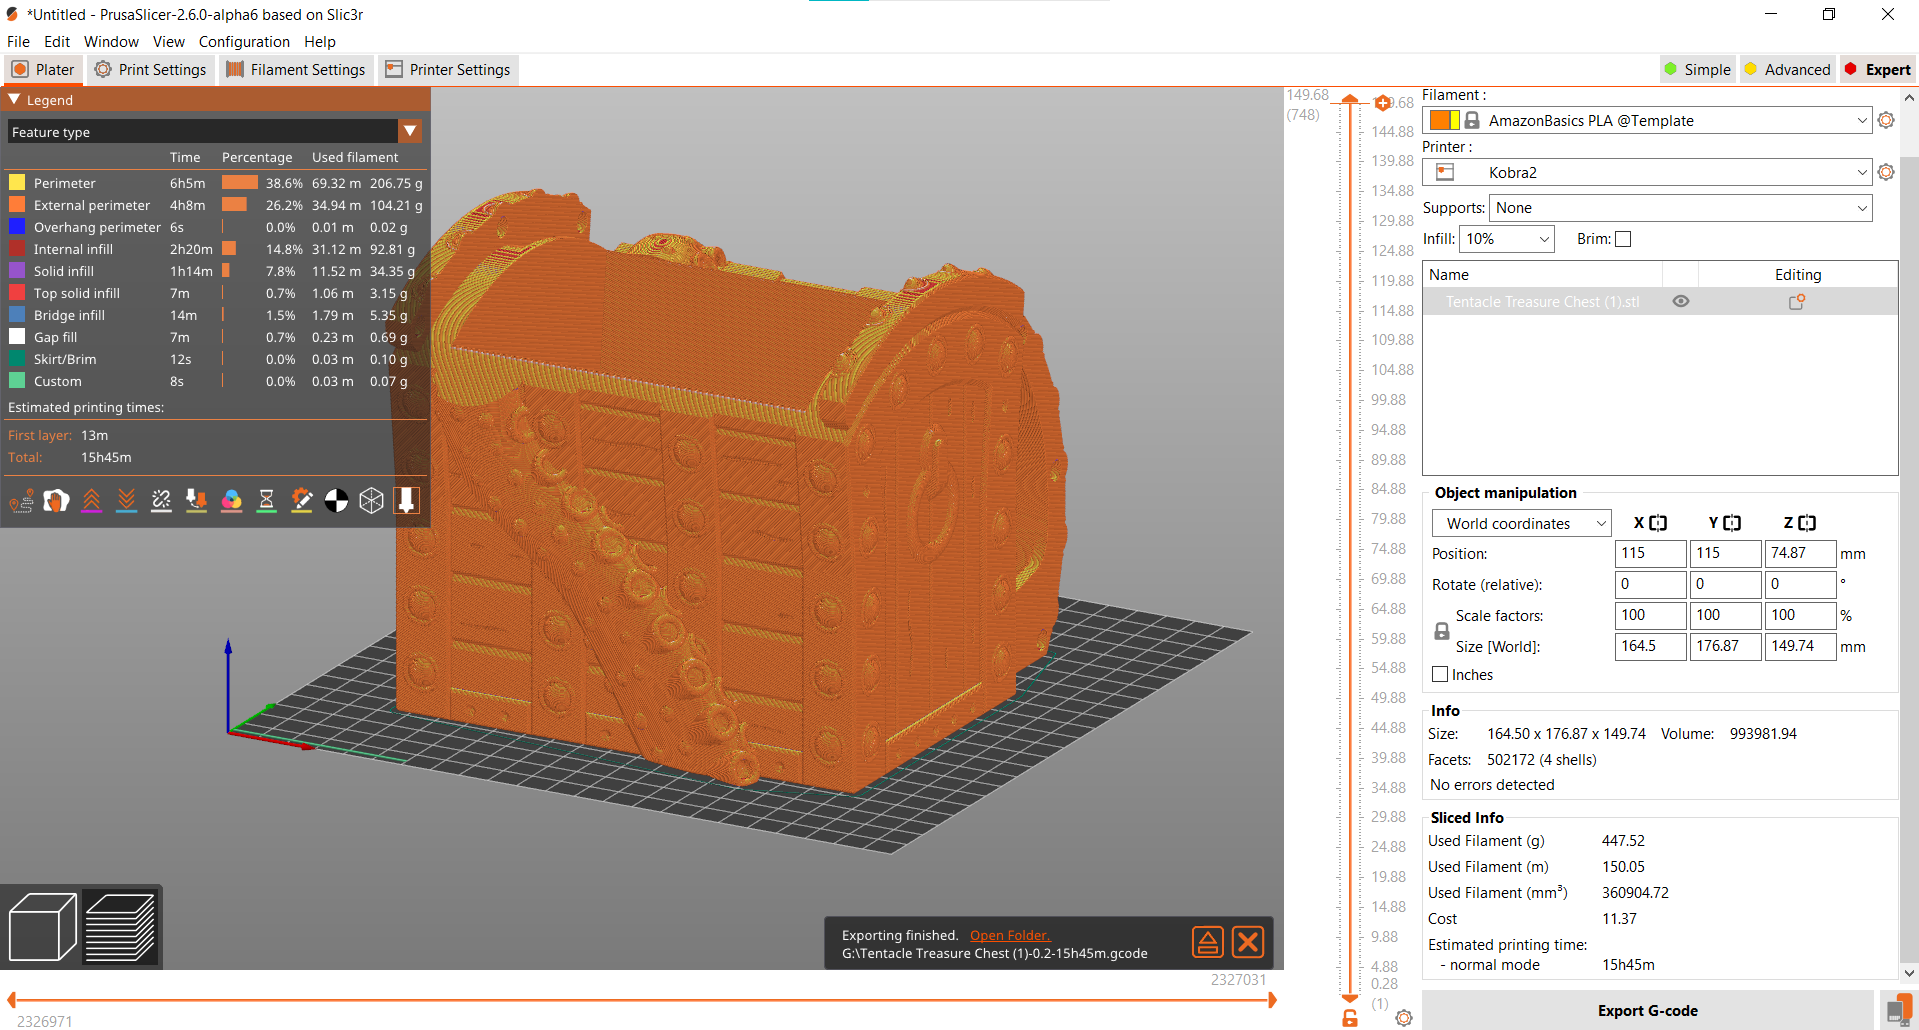
The Anycubic Kobra 2 is the first non-Prusa printer I’ve reviewed that comes with a copy of PrusaSlicer. We’re reviewing a pre-release test unit, so there’s no public profile for the Kobra 2 as yet on Prusa’s website. However, the printer did come with instructions for adding a profile with a default speed of 150 mm/s.
There was also a similar profile to add the Kobra 2 to Cura, which yields similar print results.
Printing on the Anycubic Kobra 2
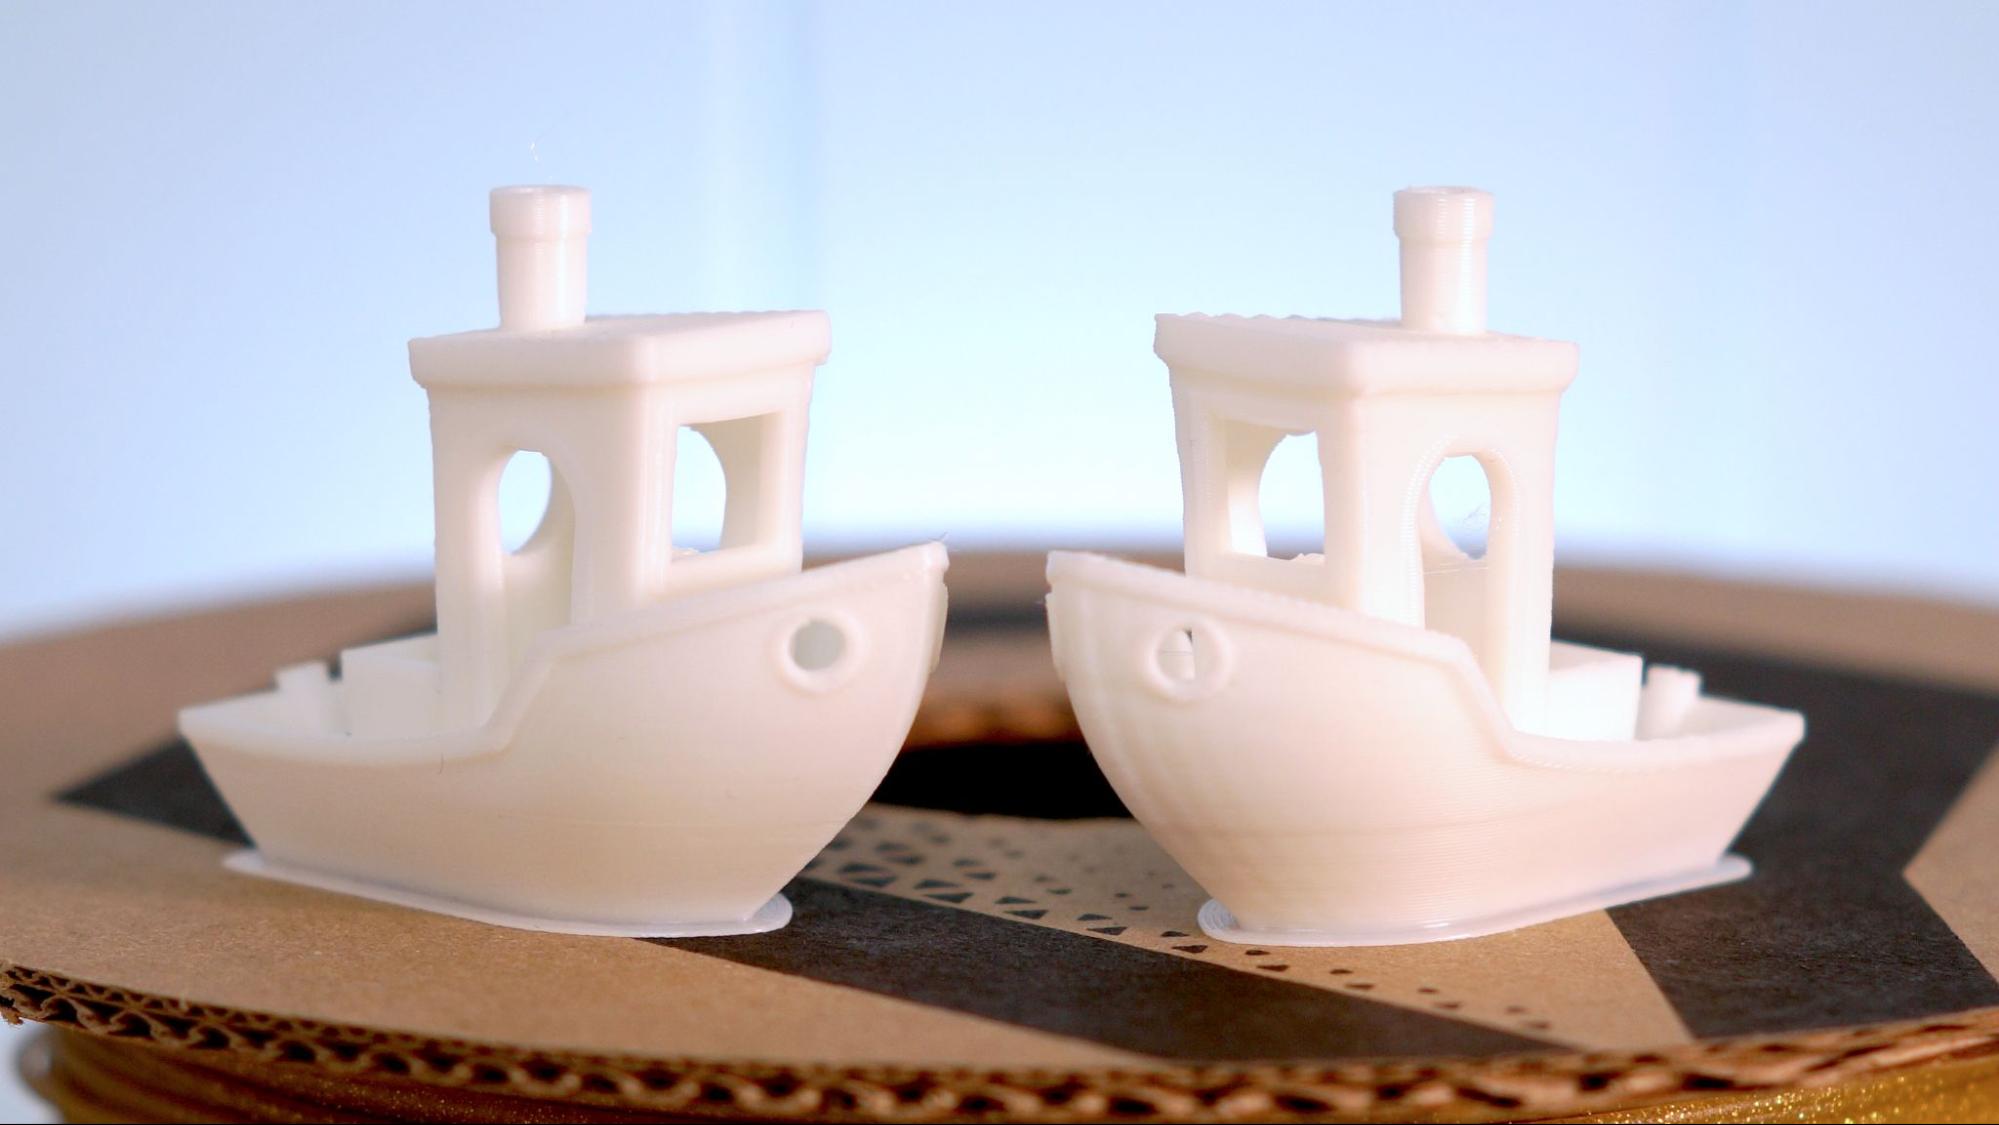
The Kobra 2 comes with two pre-sliced Benchys that print in 30 and 38 minutes, respectively. I used the provided sample to print these, but you’ll soon need more filament. You should check out our guide to the best filaments for 3D printing for suggestions before stocking up.
Both Benchy models looked very nice, with smooth hulls that show plentiful cooling. There was a little ringing around the porthole, which shows the printer was moving a bit too fast. The white filament provided was difficult to photograph and hid layer lines, so I discarded the rest of the sample.
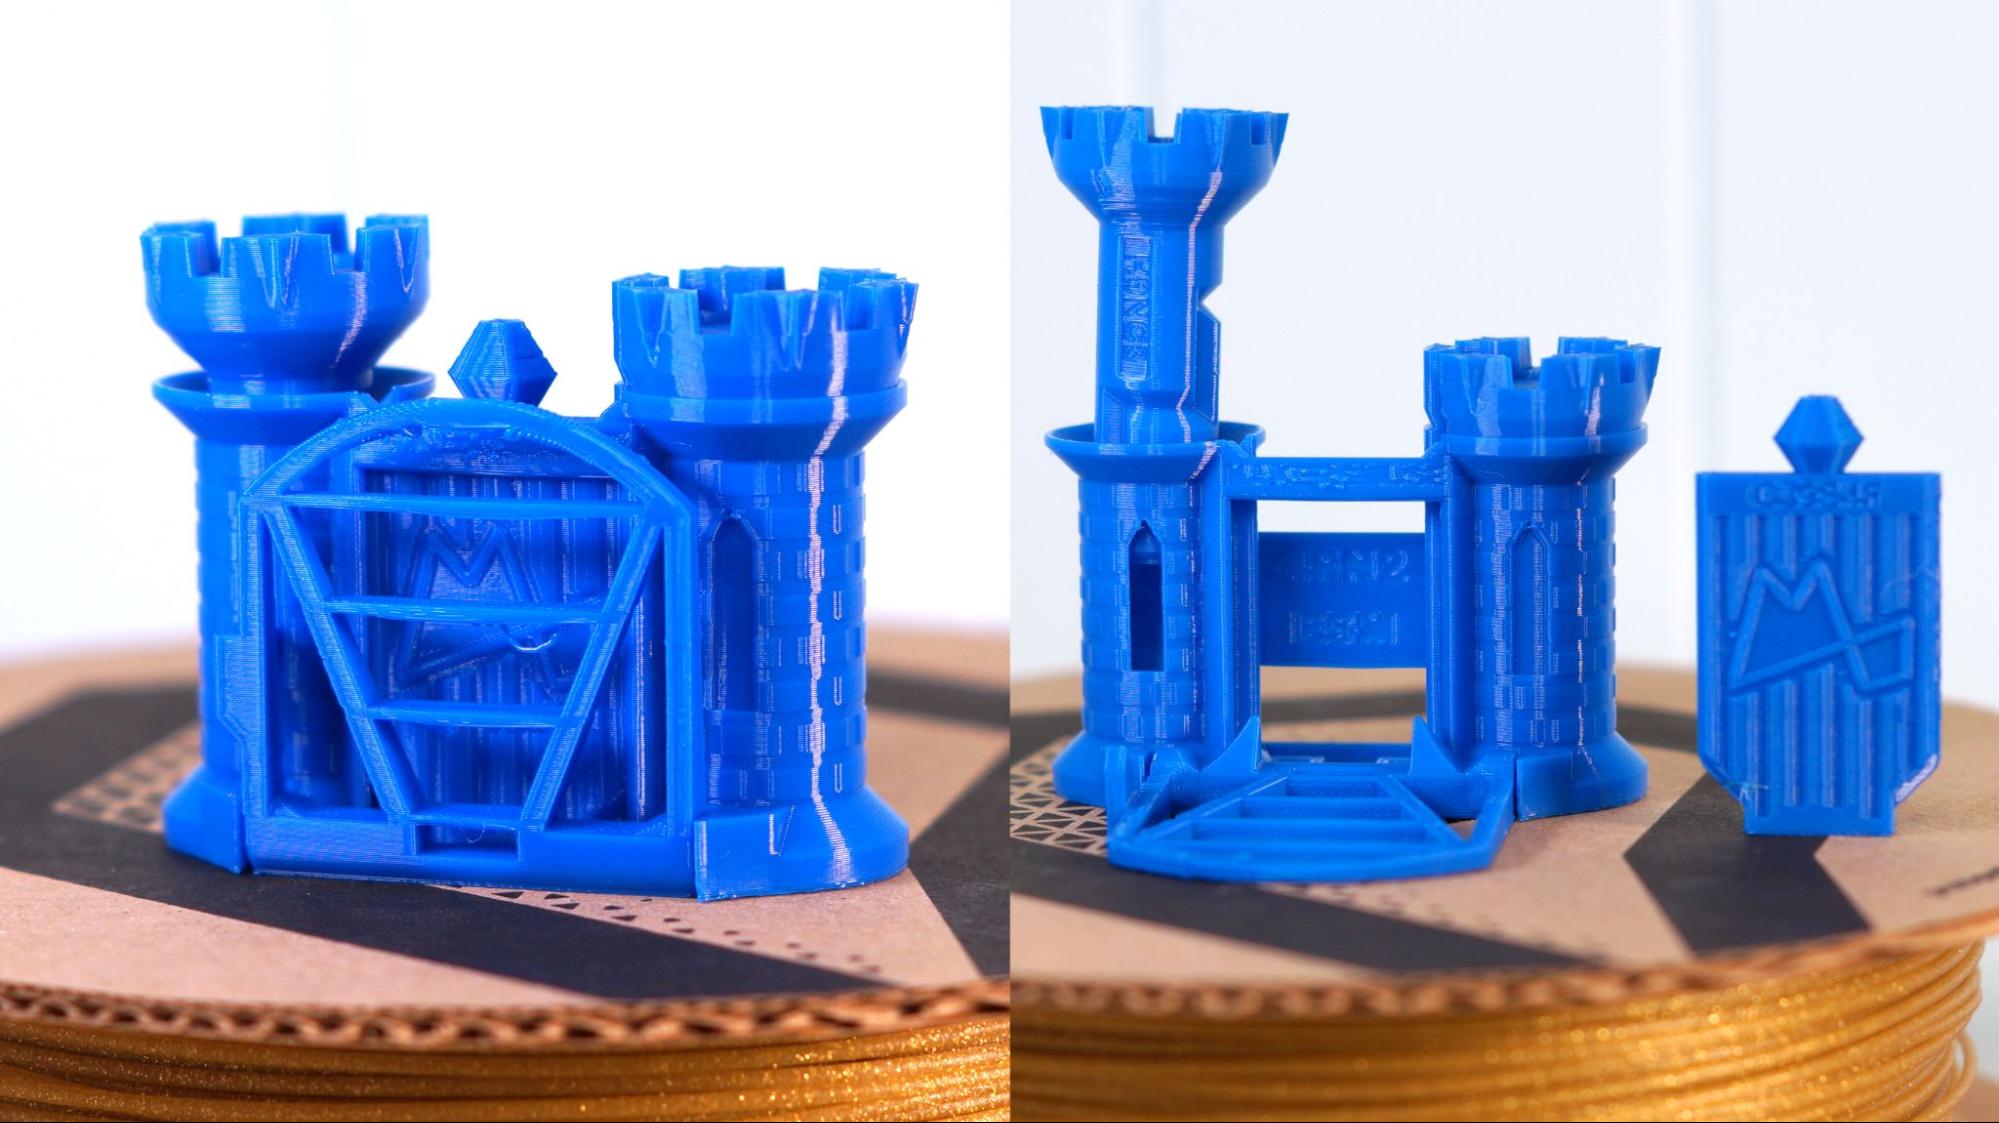
I tested the precision of the Kobra 2 with a Clearance Castle, normally a print that takes 4 to 5 hours on an average bed slinger. This one printed in 2 hours and 52 minutes using a standard .2 layer height. The default 150 mm/s profile would have taken even less time, but I slowed the outer wall to a “normal” 30 mm/s to see if that would dampen the high speed ringing – which it did quite a bit. I still used the rest of the 150 mm/s profile, so the inner walls and infill still ran at 150 mm/s. The model turned out wonderfully, with glossy smooth layers, crisp details and no sticky or too-tight moving parts. This is printed in Matterhackers Blue Build Series PLA.
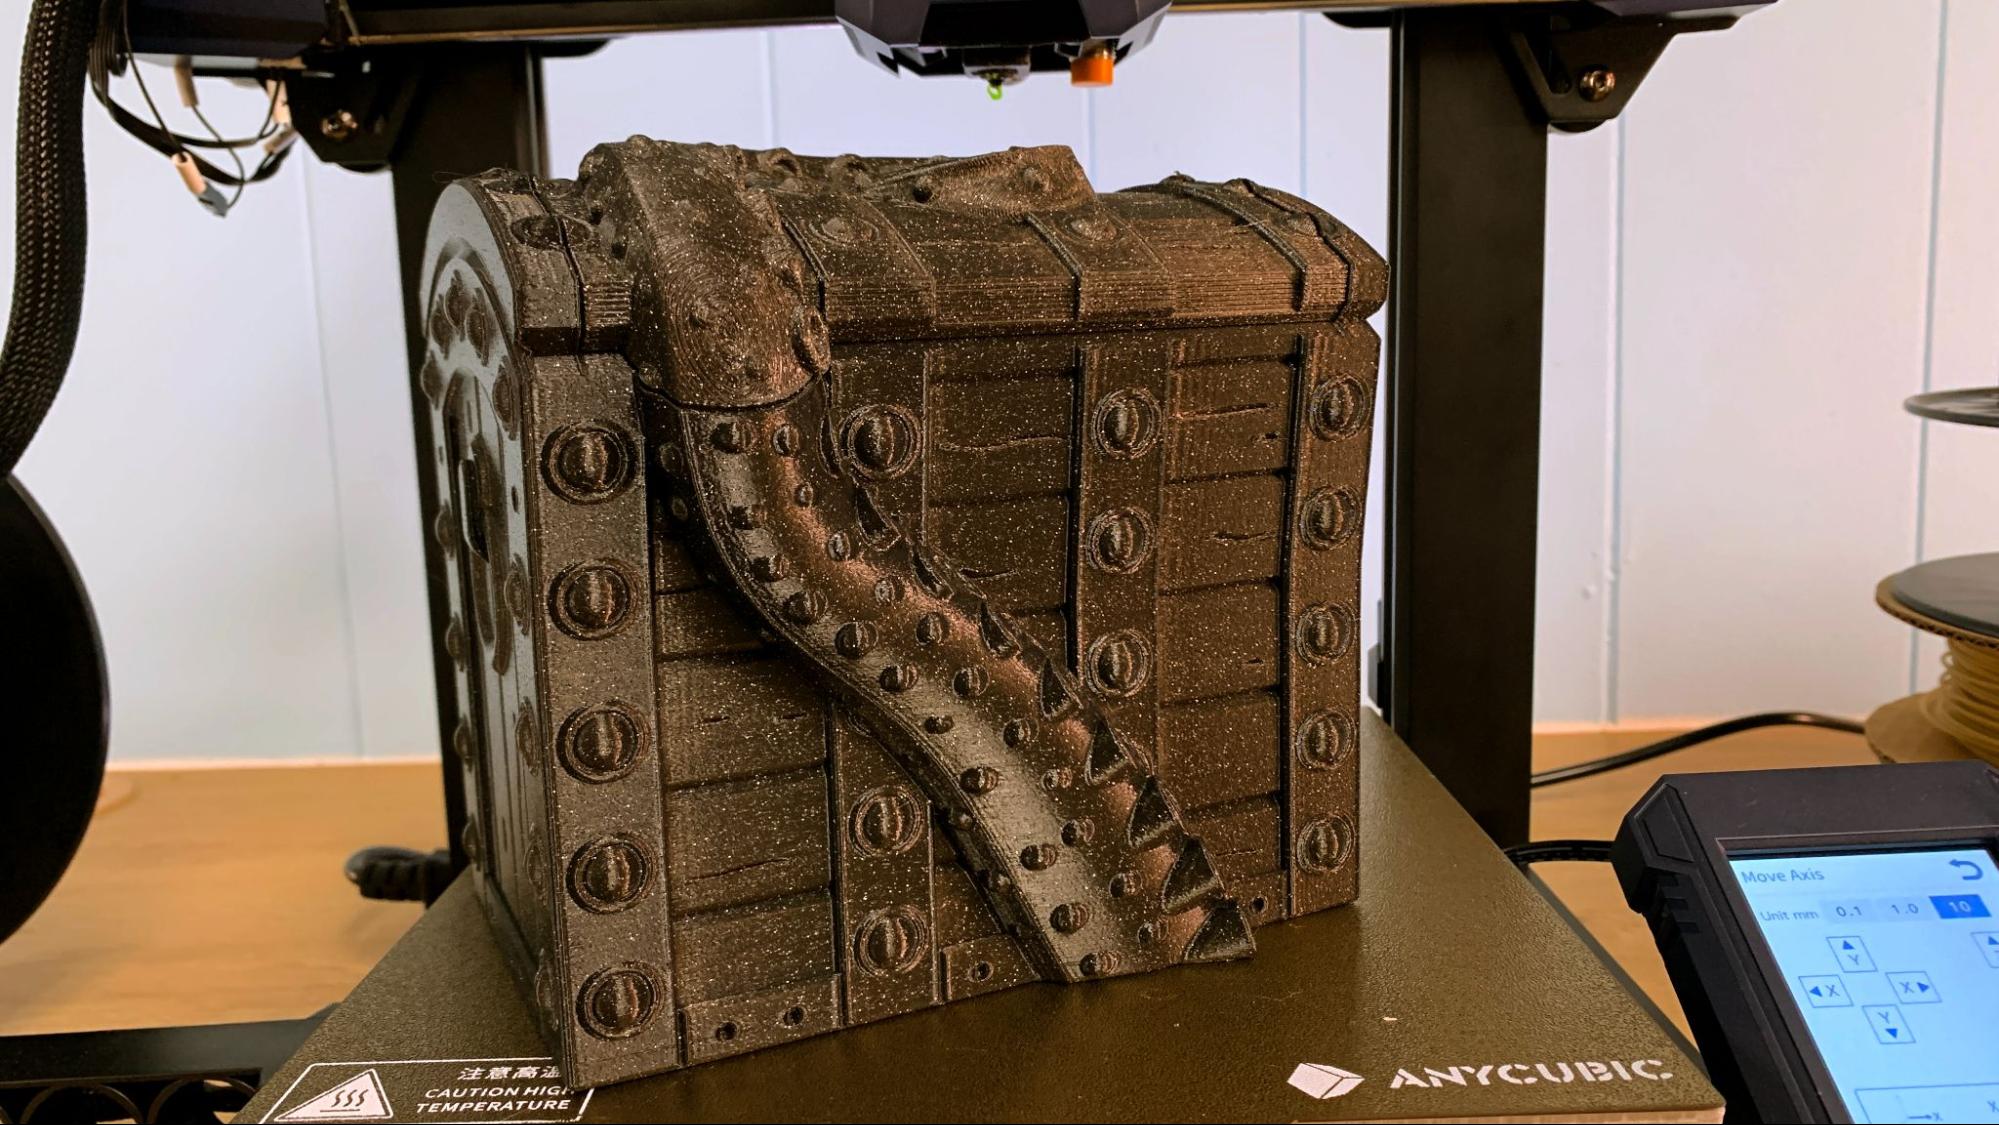
I printed this nearly 7-inch wide Clockspring Tentacle Chest in Inland Twinkling Black using the default 150 mm/s profile as is, and the results showed signs of ghosting from the printer’s high speed – especially towards the top. The echos grew worse the taller the print became.
The print is still pretty good, but hopefully Anycubic’s engineers will include Input Shaping into a future firmware upgrade to unleash the Kobra 2’s full potential. This printed in 17 hours and 53 minutes at 150mm/s using a .2 layer height. For comparison, the Kobra Neo would take 47 hours and 10 minutes to print the same thing using a typical, 60 mm/s speed setting.
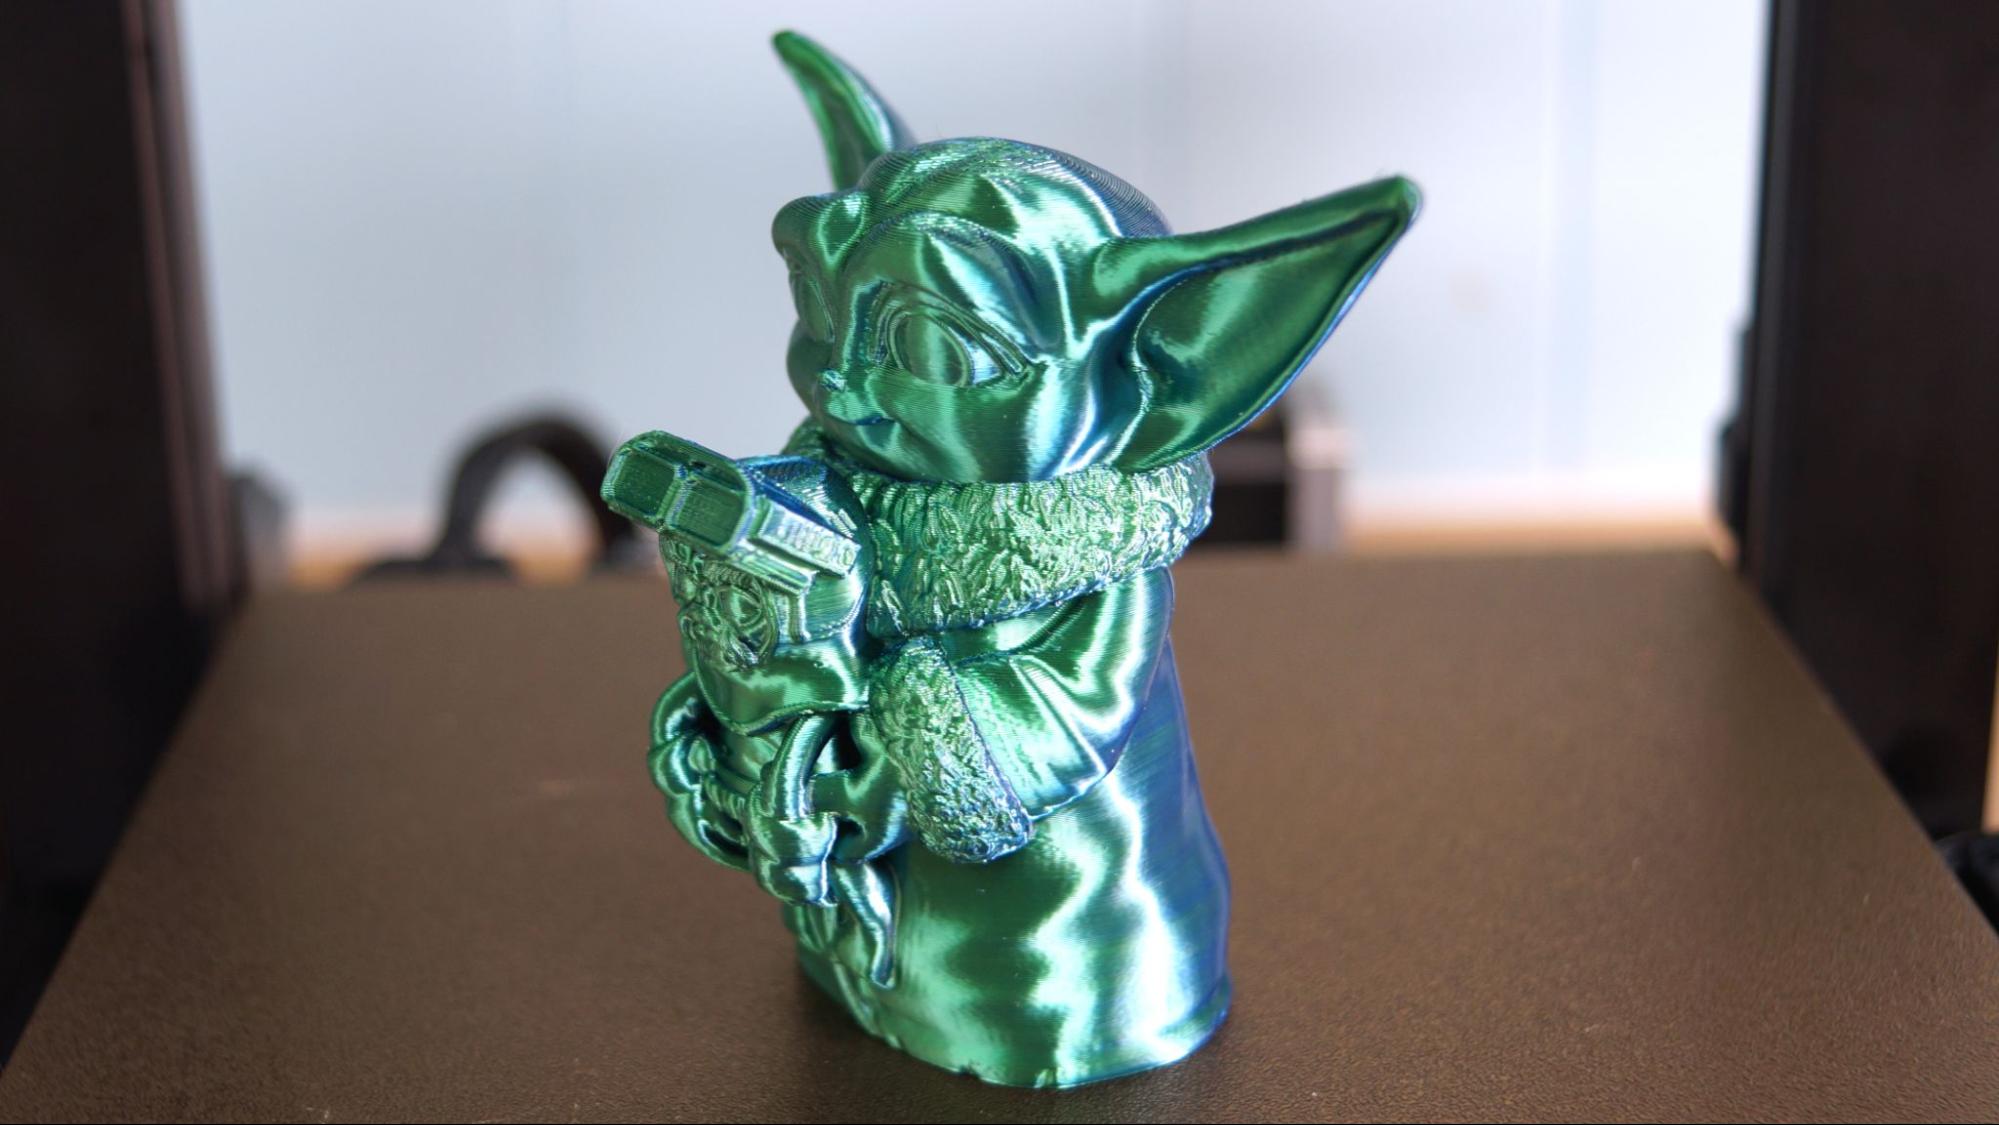
Organic shapes turn out much smoother on the Kobra 2. This Grogu looks great in Matterhacker’s silk Blue Green Quantum PLA, with just a tiny bit of ringing in the vertical creases and buttery smooth layer lines. It only took 2 hours and 36 minutes to print at 150 mm/s and a .2 layer height. A Kobra Neo would have taken 6 hours and 45 minutes to print at a 60 mm/s speed.
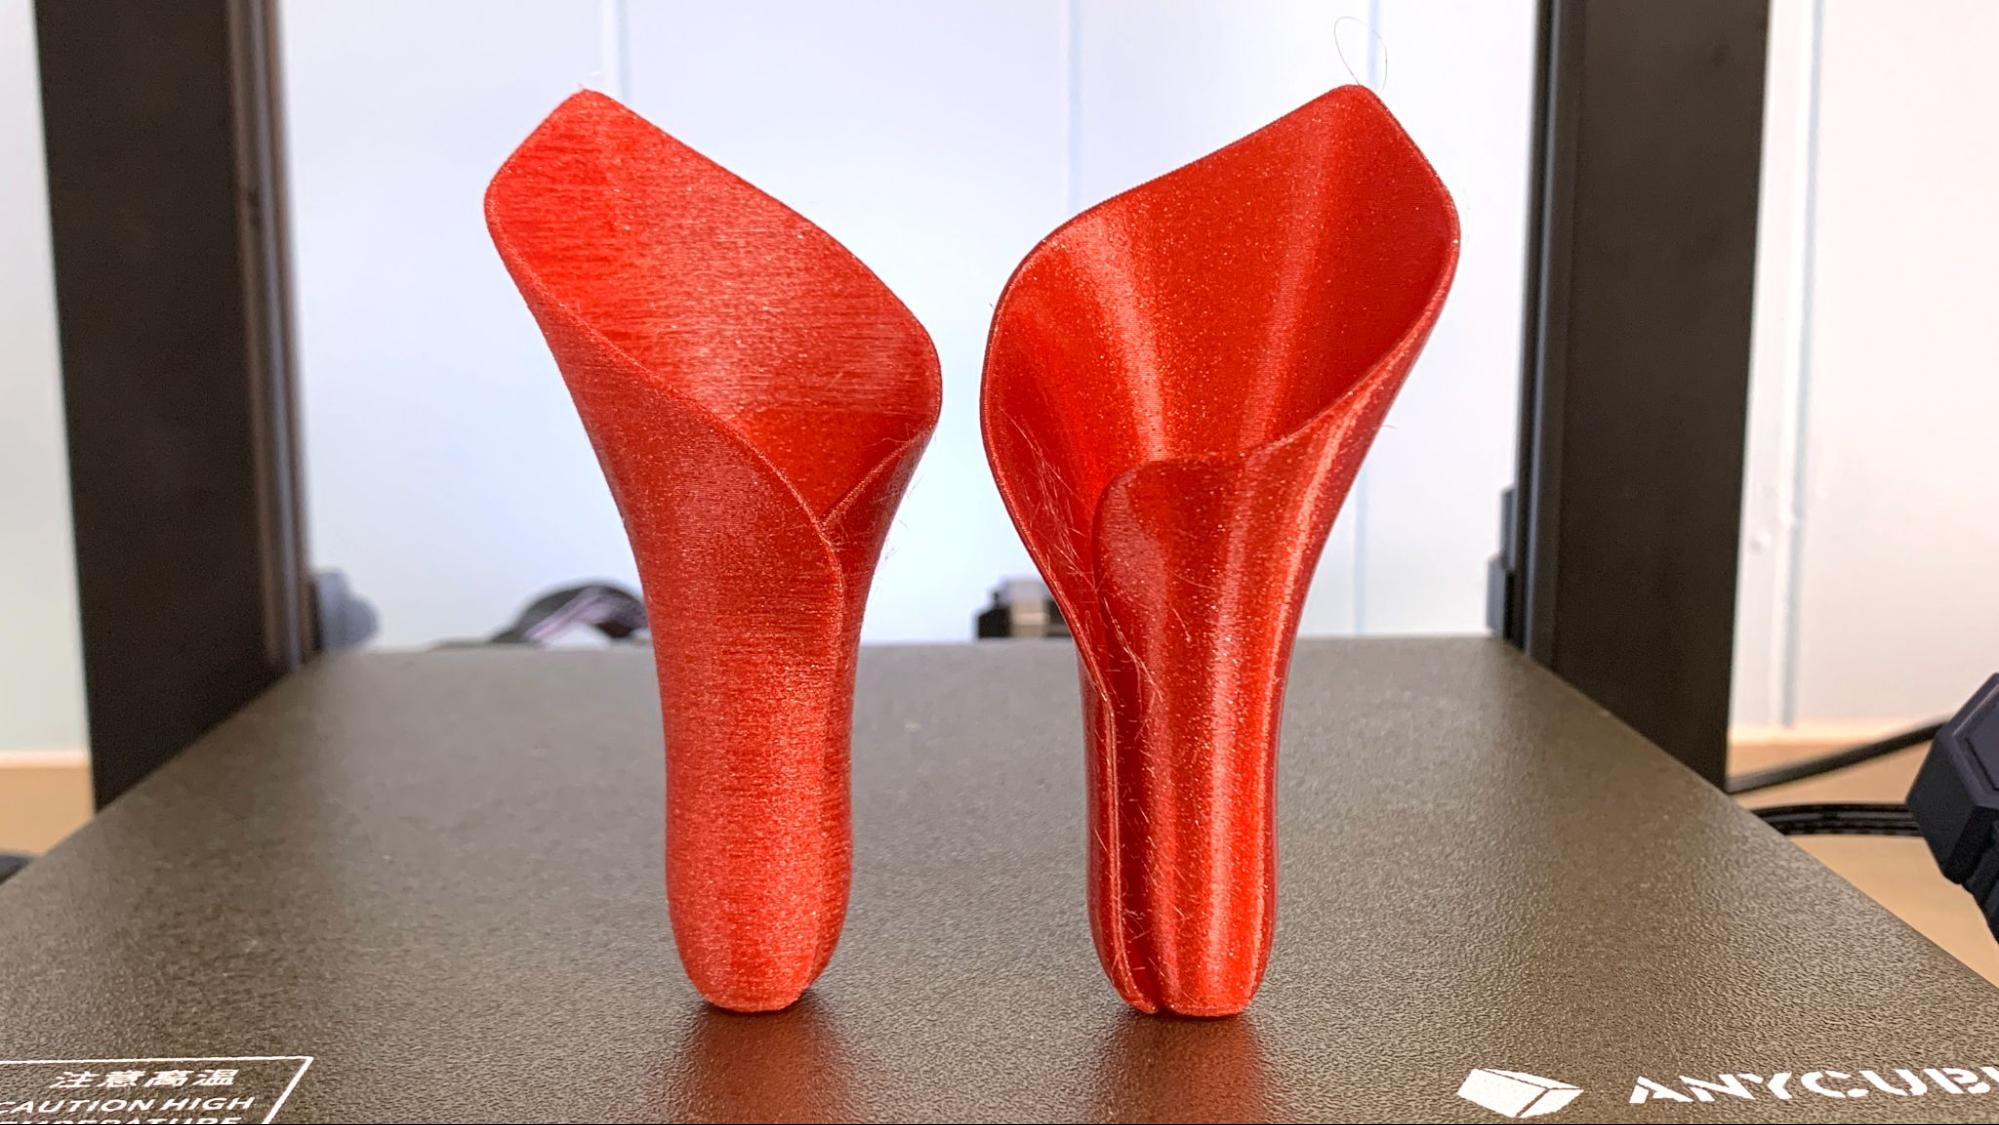
I was honestly shocked at how well the Kobra 2 handled PETG, which normally needs to run slower to avoid stringiness. This machine actually did worse when slowed down, producing a rough and fuzzy print. But when the printer was set at 150 mm/s, the print turned out beautifully smooth with a few very thin wisps.
There was no need to use a glue stick, as the printer’s texture plate does not bond to PETG like glass or smooth PEI can. This was run in Prusament PETG Carmine Red Transparent with a .2 layer height. The one on the left was printed at 60mm/s speed, while the one on the right was printed at 150 mm/s.
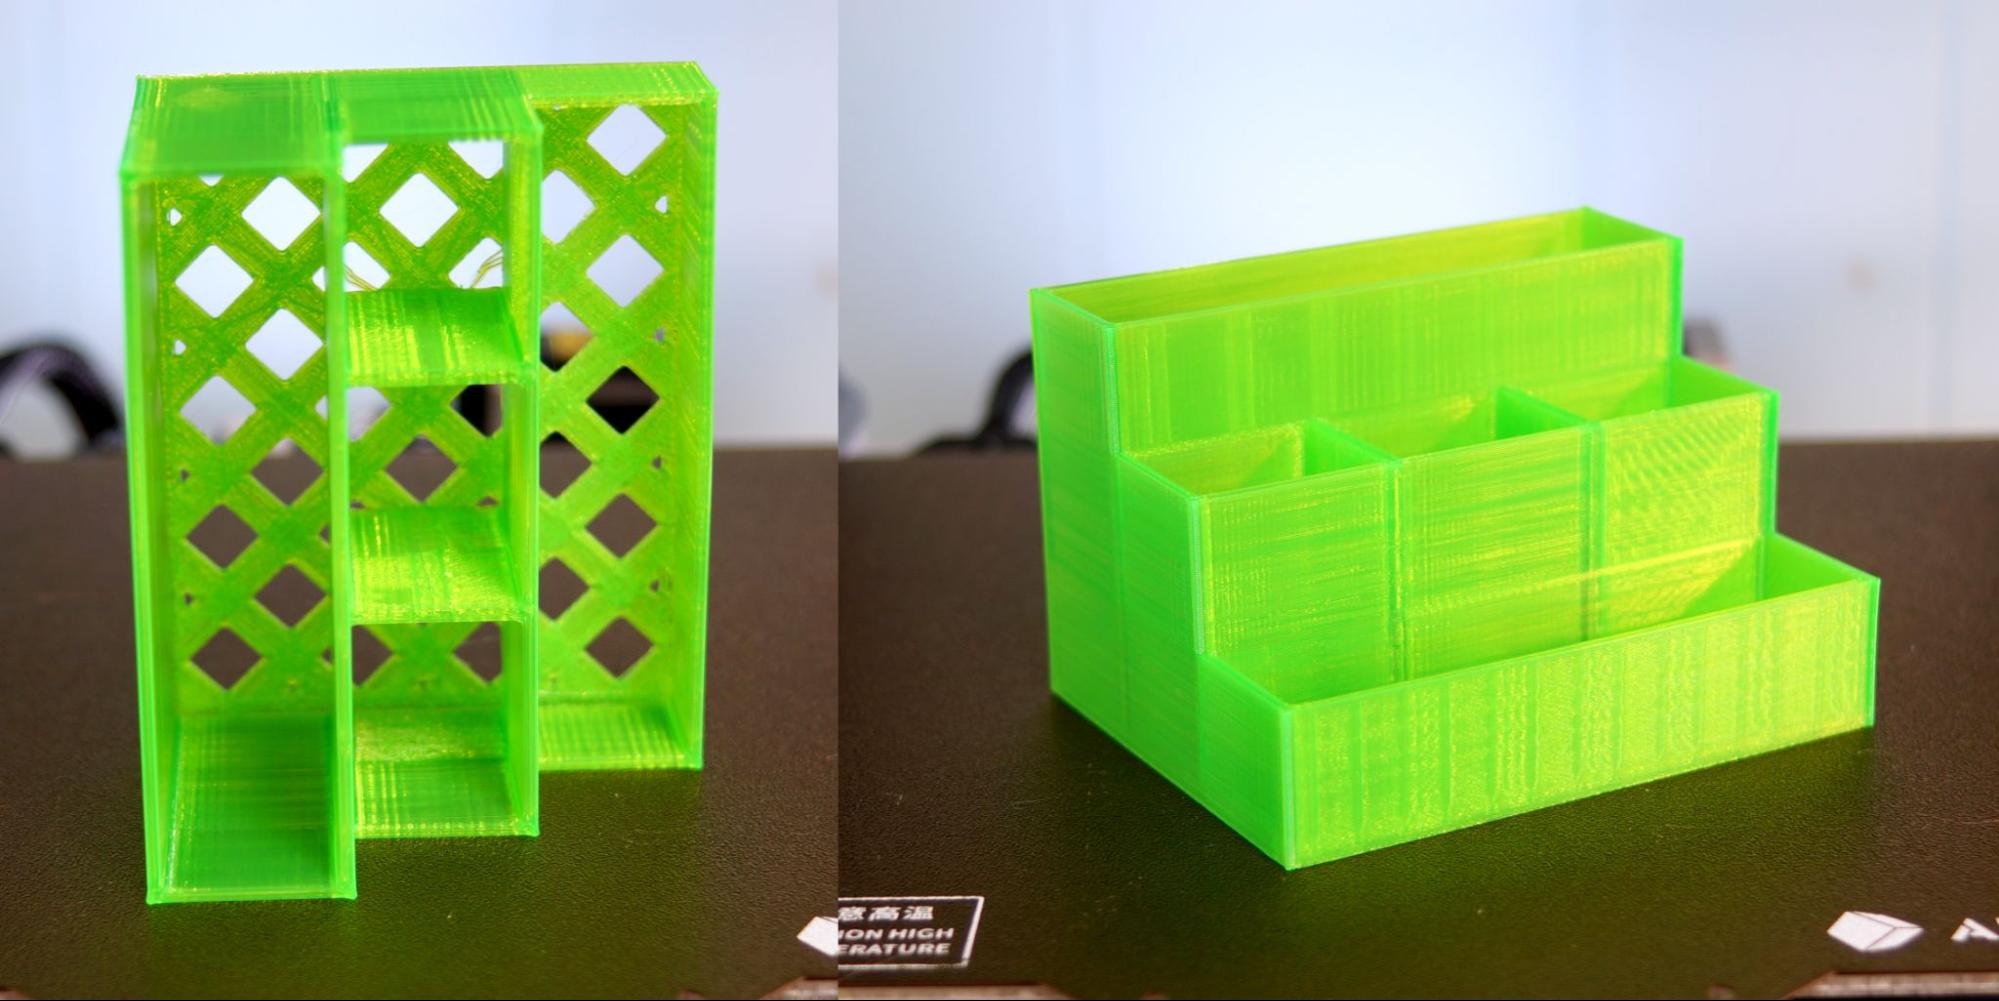
The Kobra 2 was also able to run flexible filament at high speed, something that’s simply unheard of. This tool organizer I whipped up in Tinkercad ran perfectly at 150 mm/s with barely any strings. Like the PETG, this TPU peeled right off the textured build plate with no need for glue stick. It took 2 hours and 33 minutes at a .28 layer height at 150 mm/s speed. A Kobra Neo would take 6 hours and 46 minutes to print this at a typical for TPU 40 mm/s.
Bottom Line
We’re now seeing the ripple effect of high speed consumer printers, with makers demanding more speed from their favorite brands. The Anycubic Kobra 2 is one for the masses – an easy-to-use, affordable printer with faster speeds and excellent hands-free bed leveling.
The Kobra 2 is fighting an uphill battle for a high speed printer. Without the benefit of input shaping, it will always risk flawed prints on more challenging models. During testing, I noticed that smaller prints were quite good and average speed prints were near perfect at any height. Layer lines practically disappear at all speeds.
It’s nowhere near the speed 500 mm/s Bambu Lab, but can give the AnkerMake a run for its money. The Kobra 2’s brisk 150 mm/s default speed for $269 is a tremendous deal and will save you gobs of time. When compared to an ordinary Kobra, Neptune or Ender, the oversized cooling, well-built mechanics and improved bed leveling make it worth considering even if you decided to not run the machine at full tilt.
If you’re interested in other high speed printers, check out the $699 Bambu Lab P1P which prints twice as fast with the option of multicolor prints. If you’re more interested in budget printers, then the $189 Anycubic Go is worth a look.
MORE: Best 3D Printers
MORE: Best Resin 3D Printers

Denise Bertacchi is a Contributing Writer for Tom’s Hardware US, covering 3D printing. Denise has been crafting with PCs since she discovered Print Shop had clip art on her Apple IIe. She’s been a freelance newspaper reporter, online columnist and craft blogger with an eye for kid’s STEM activities. She got hooked on 3D printing after her son made a tiny Tinkercad Jeep for a school science project. Excited to learn more, she got a Creality CR10s and hasn’t looked back. She loves reviewing 3D printers because she can mix all her passions: printing, photography and writing. When she’s not modding her Ender 3 Pro or stirring glitter into a batch of resin, you’ll find her at the latest superhero movie with her husband and two sons.
