Tom's Hardware Verdict
The Anycubic Photon Mono is an MSLA resin 3D printer that offers fast print speeds, highly-detailed models, and a seamless user experience at a very-affordable price.
Pros
- +
+ Low cost
- +
+ High quality prints from the 2K LCD
- +
+ Mono LCD screen prints parts quickly
- +
+ Photon Workshop slicer app is easy-to-use
Cons
- -
Software lacks some key features
- -
Uses proprietary FEP film
Why you can trust Tom's Hardware
Based on its specs alone, the Anycubic Photon Mono is an impressive MSLA resin printer that becomes a knock-out when you factor in the retail price of around $230. With a per-layer cure time of about two seconds, the Photon Mono is capable of printing tall, highly-detailed parts quickly while offering a seamless print preparation experience with the included Photon Workshop software. Quality-of-life features such as the angled build platform to prevent resin from pooling and the pour spout on the resin vat make this a machine that’s as easy to use as it is to look at and one of the best 3D printers on the market.
Specifications
| Machine Footprint | 9.8" x 9.8" x 12.9" (24.9cm x 24.9cm x 32.8cm) |
| Build Volume | 5.11" x 3.14" x 6.49" (130mm x 80mm x 165mm) |
| Resin | DLP Photopolymer Resin |
| UV Light | 405nm Matrix Parallel Light Source |
| Masking LCD Resolution | 2560 x 1620 |
| Masking LCD Size | 6.08" |
| Interface | 2.8" LCD Touchscreen |
| XY Axis Resolution | .051mm |
Anycubic Photon Mono: Included in the Box
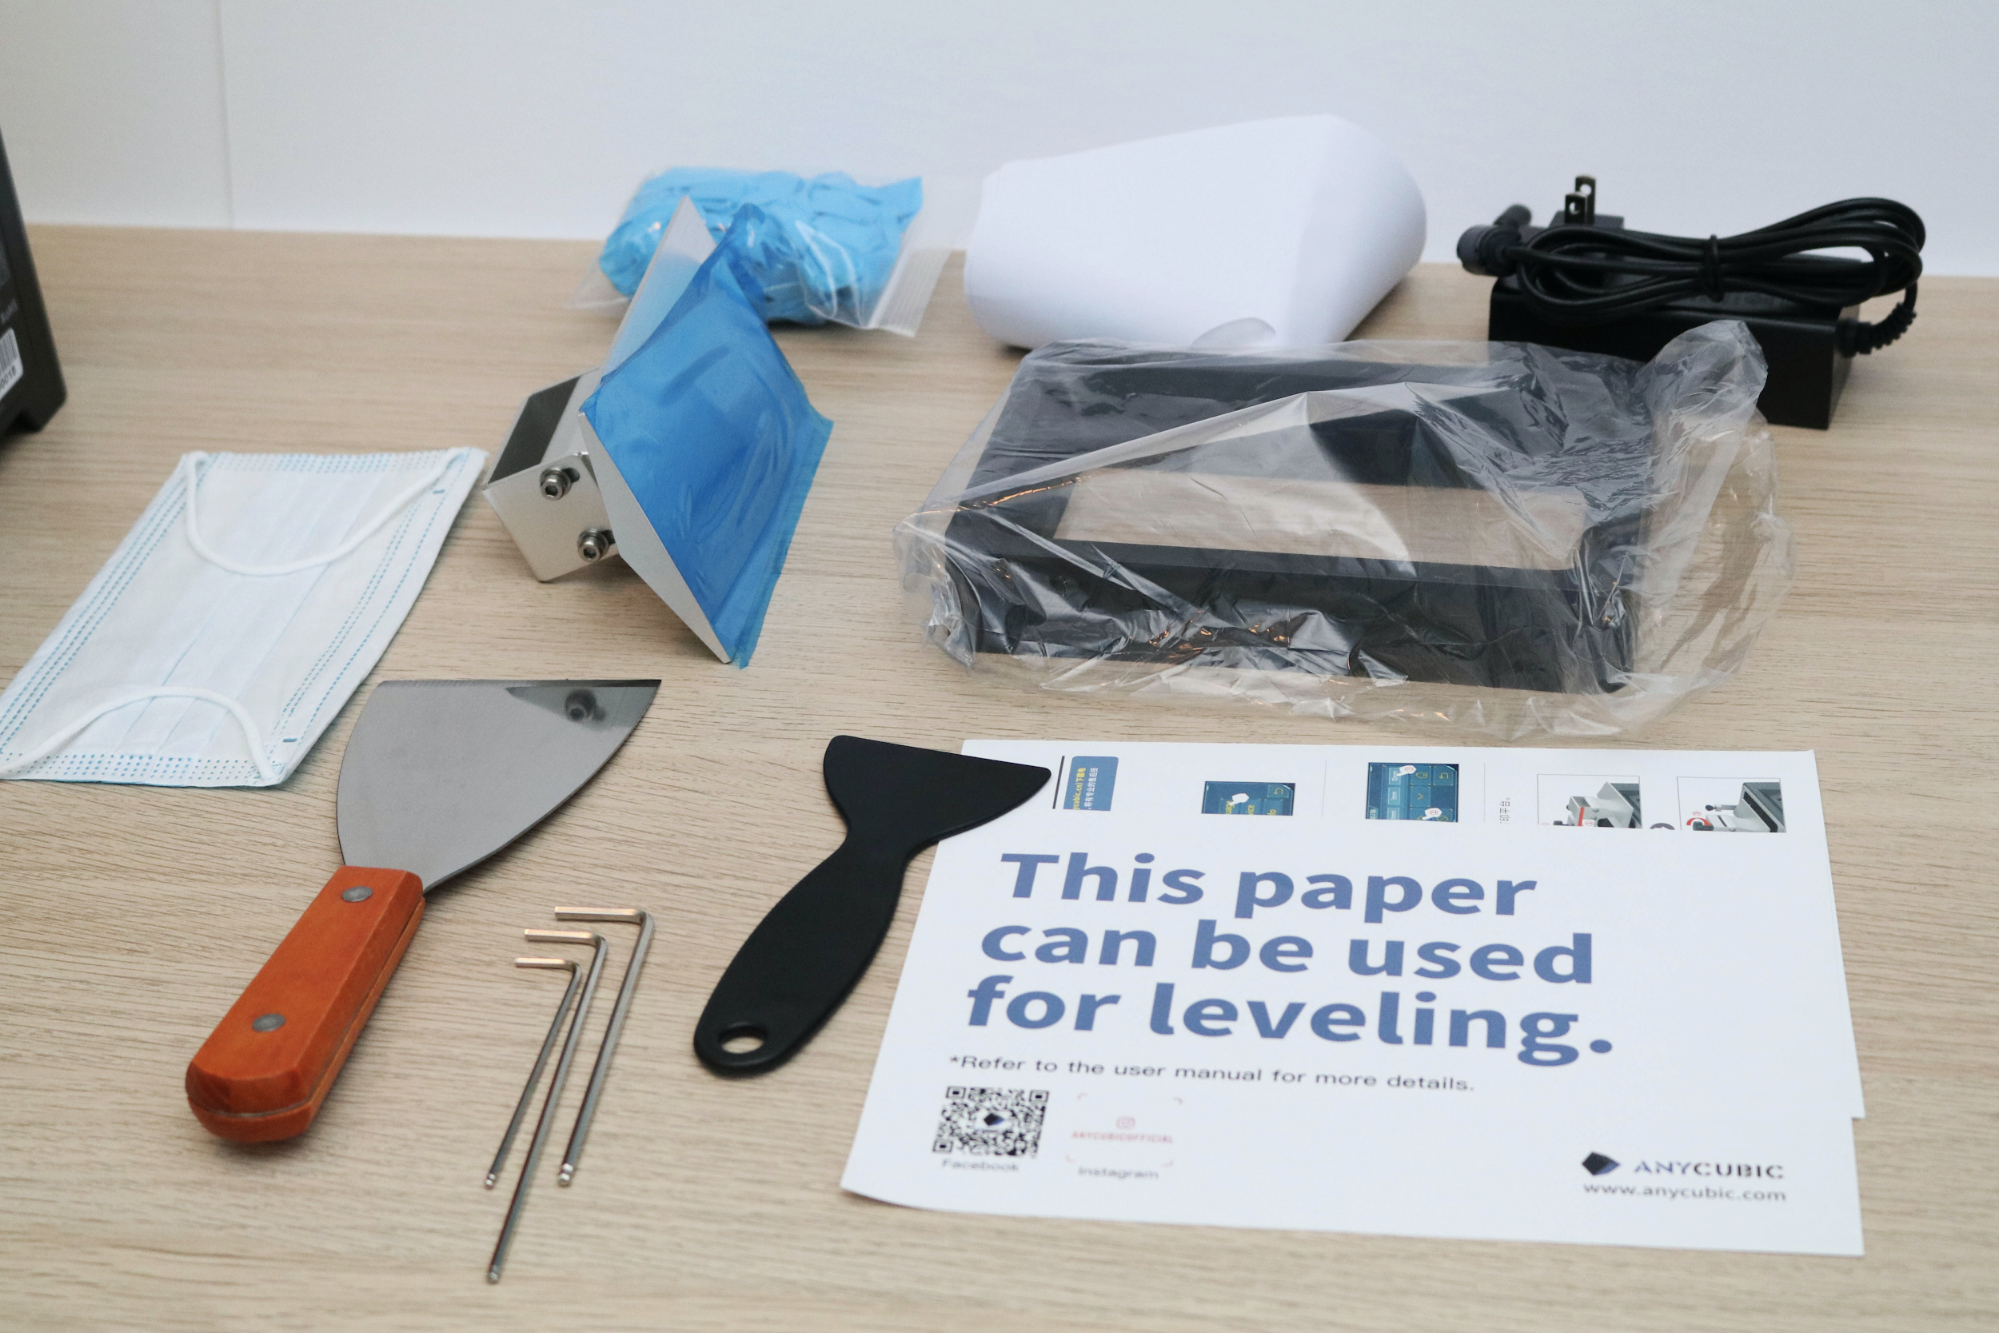
The resin storage vat and the build platform are included in the packaging but not assembled on the printer. In addition to the components you need to assemble the printer, Anycubic has also included many of the common consumables used in resin 3D printing in the box: several paper filters for filtering unused resin, a surgical-style facemask for wearing while handling the resin, a bag full of blue nitrile gloves (you’ll go through a lot of these) and a pair of scrapers for removing parts from the build platform and the resin vat.
Anycubic Photon Mono Design
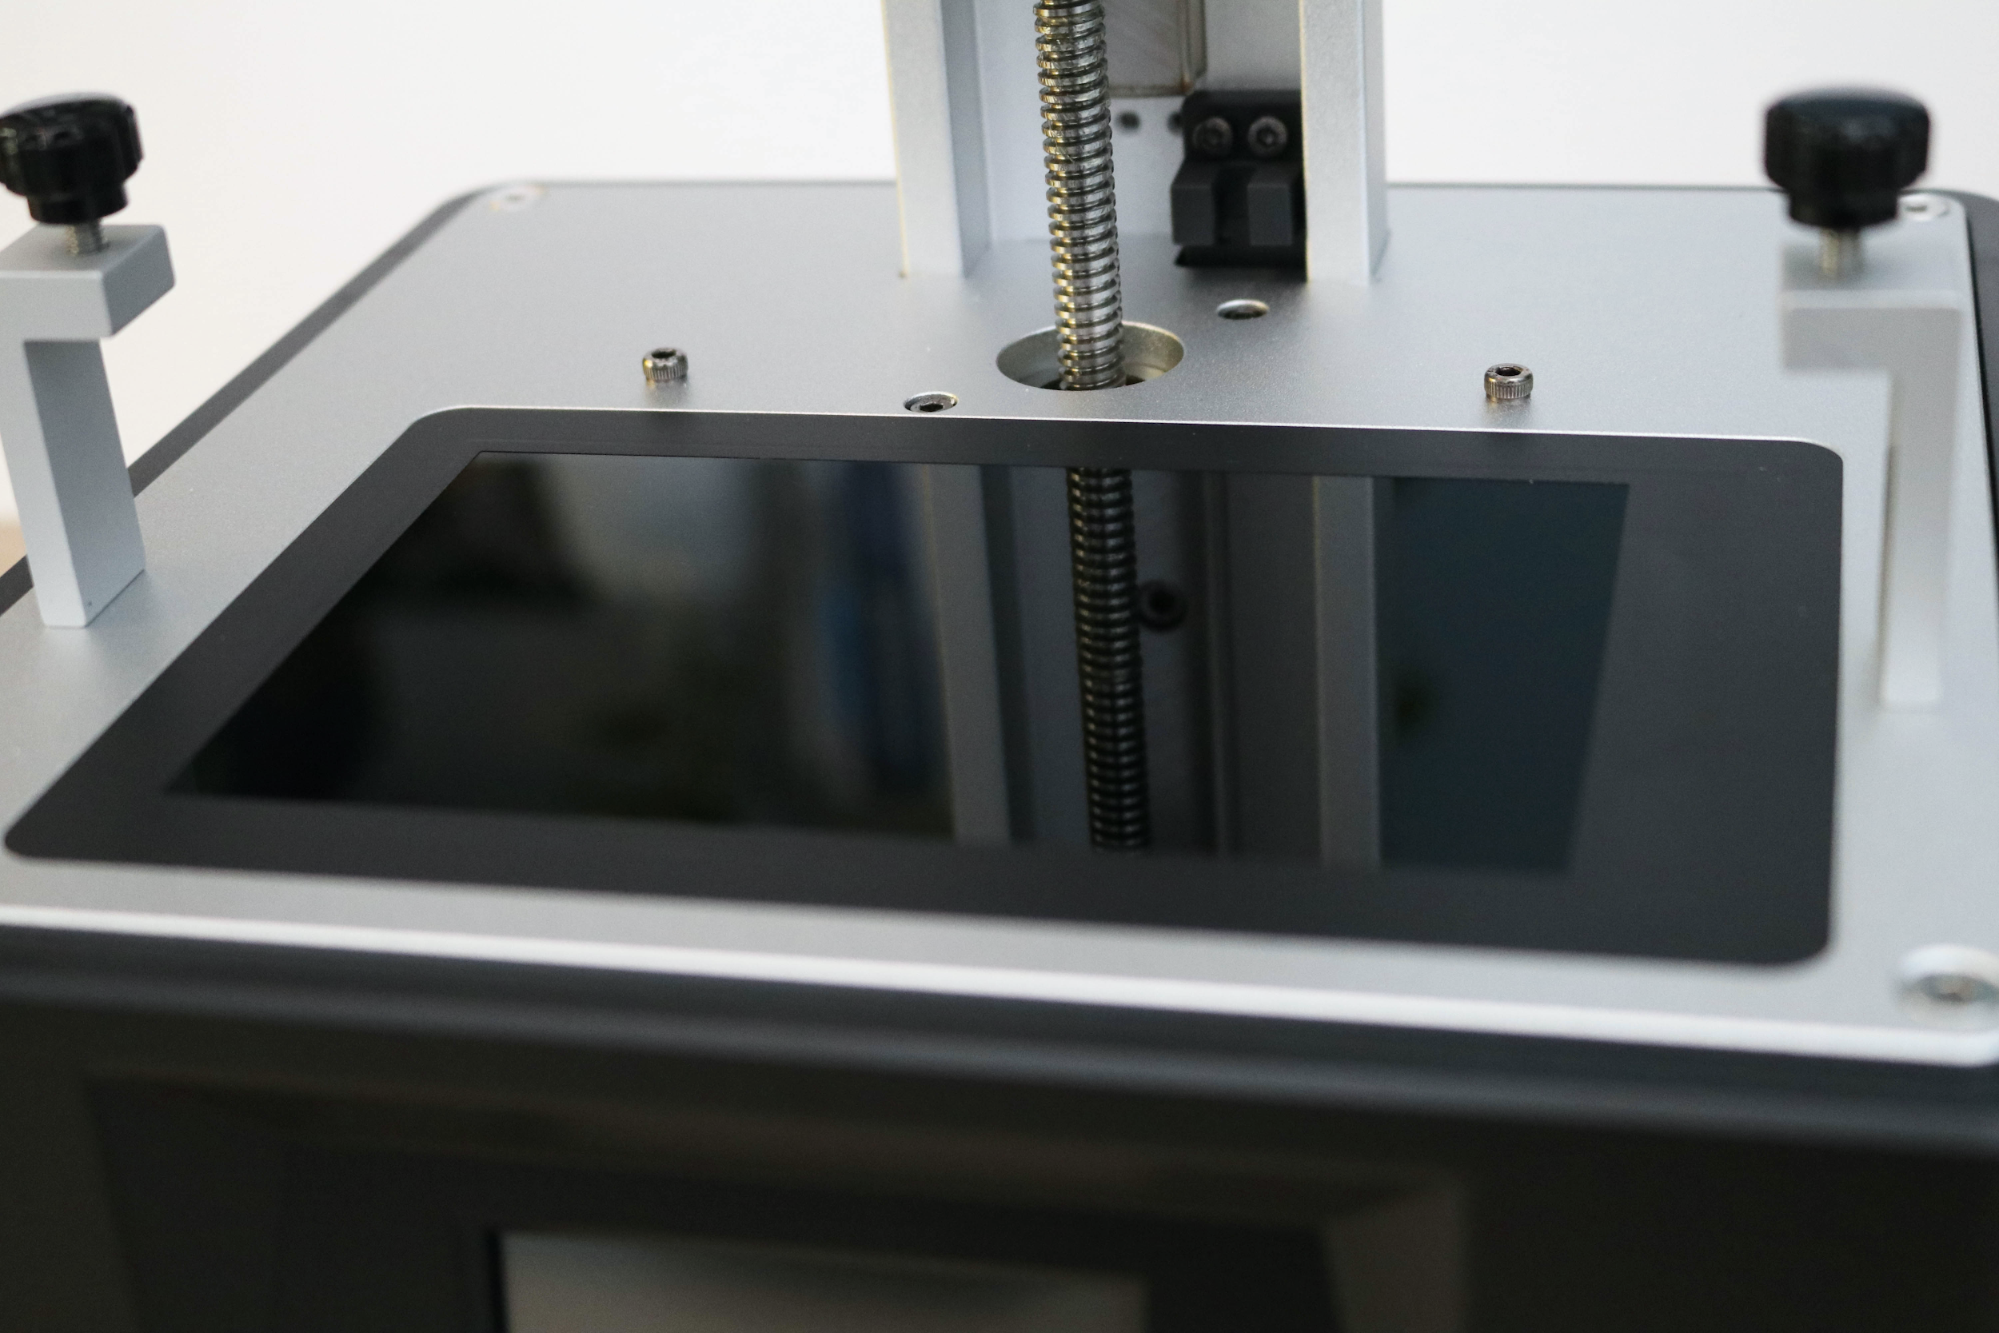
The Photon Mono uses an LCD with a resolution of 2560 x 1620 to selectively mask the 405nm UV light source which cures the liquid resin in the vat. The LCD is precisely taped to the upward facing surface of the base to keep it level with the top as well as to prevent any resin from leaking into the machine. The base of the Photon Mono is made from injection-molded plastic, which felt a little less sturdy than the solid metal base found on the Elegoo Mars 2 Pro.
The resin vat is held in place with a pair of easy-to-tighten thumbscrews that clamp down into a recessed circular feature, holding it rigid while the build platform drops down on the FEP film.
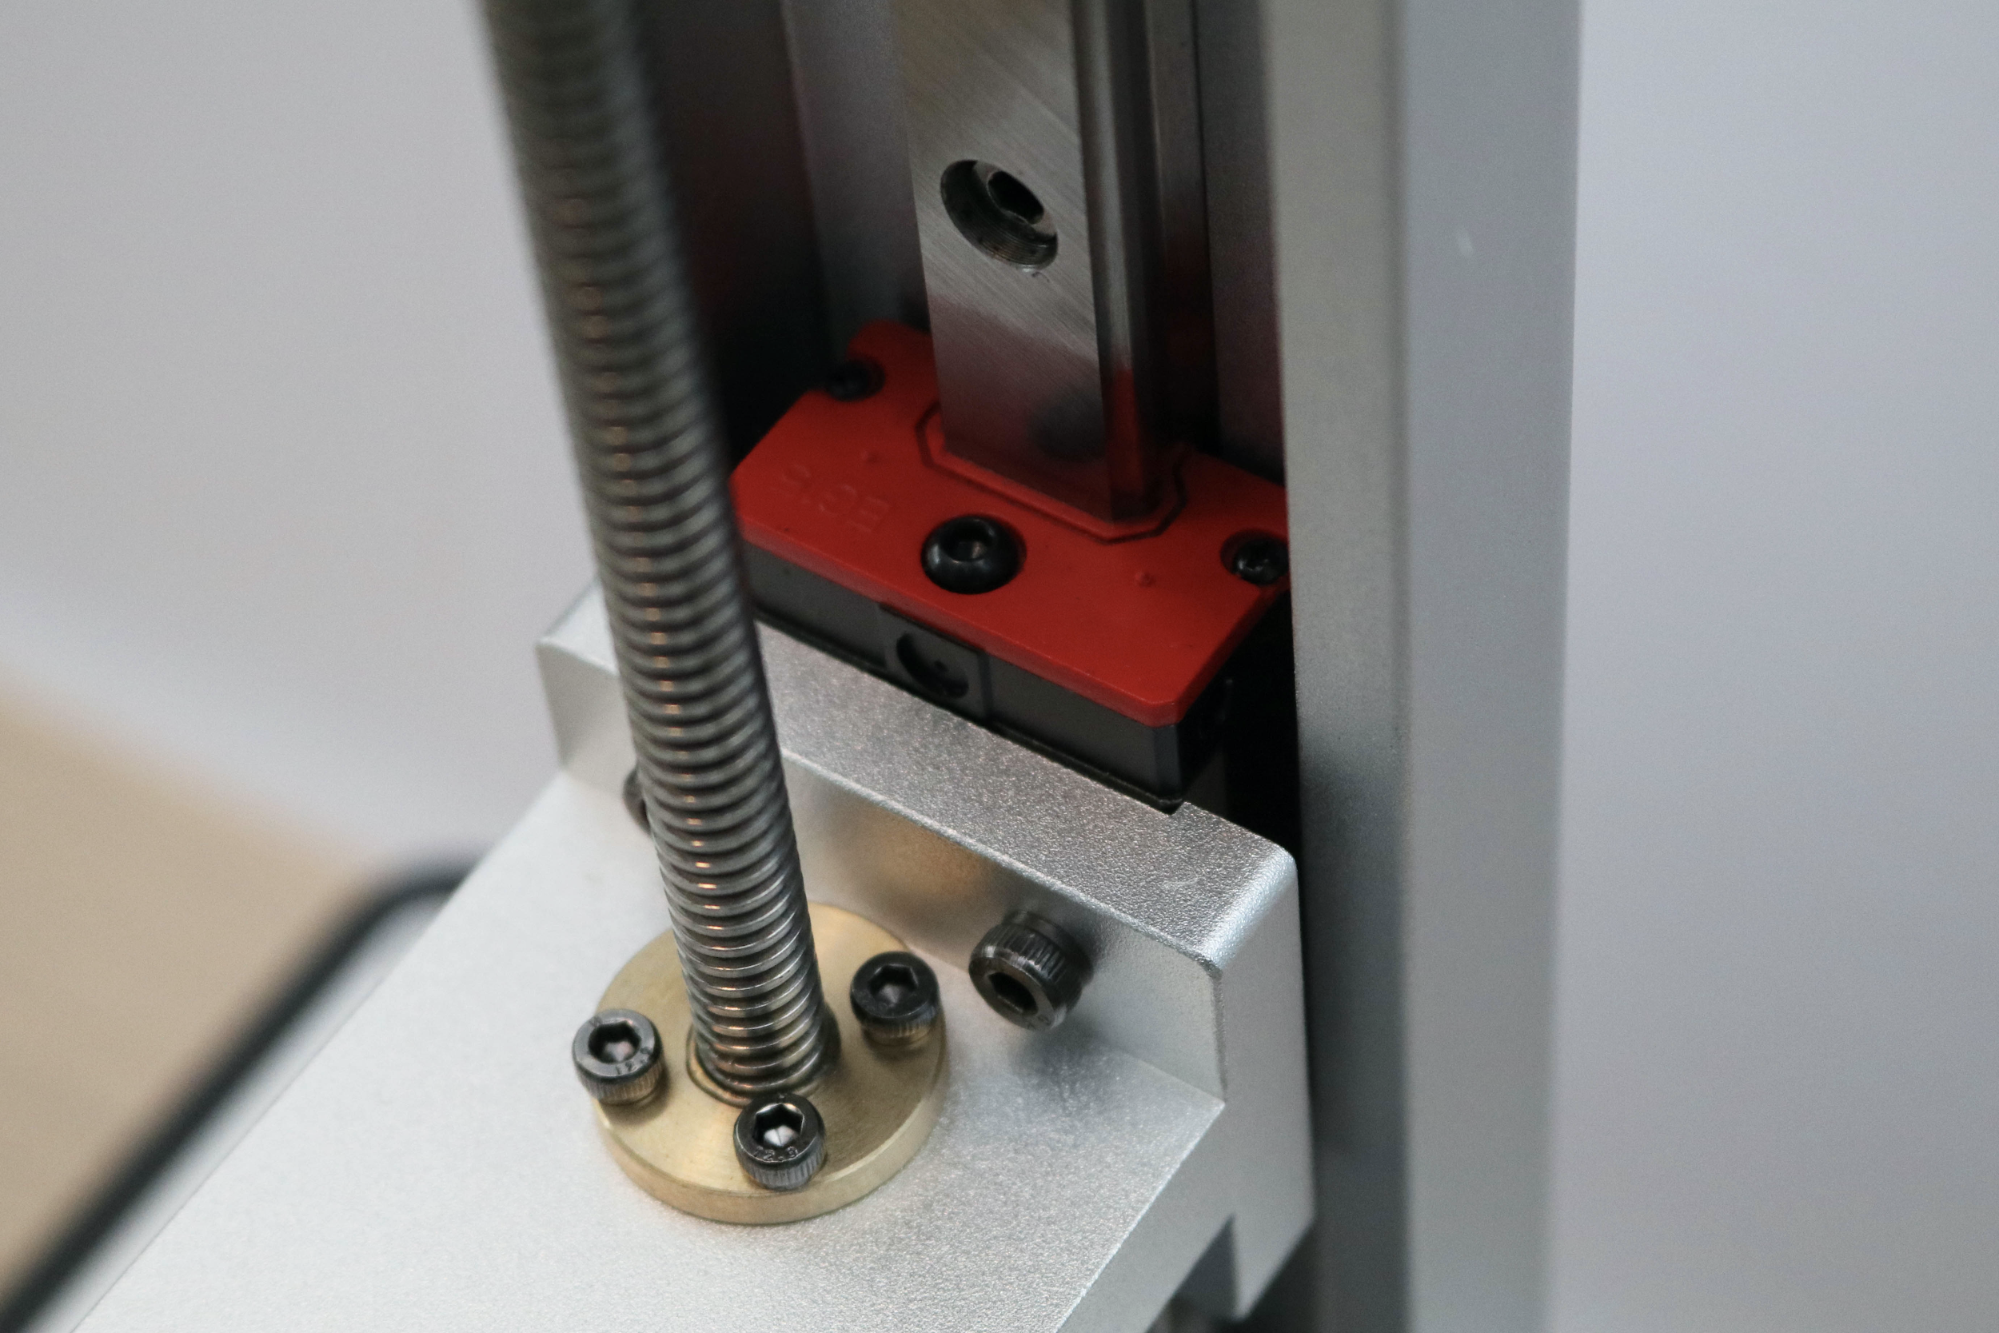
The Z motion is controlled with a threaded rod that is kept rigid with a linear bearing that travels along the Z axis. The build platform is suspended from an arm that appears to be a solid piece of aluminum which feels sturdy and doesn’t have much flex during the printing process. This means the build platform makes a clean separation from the FEP film on the vat after each layer is exposed, which leads to a more reliable printer.
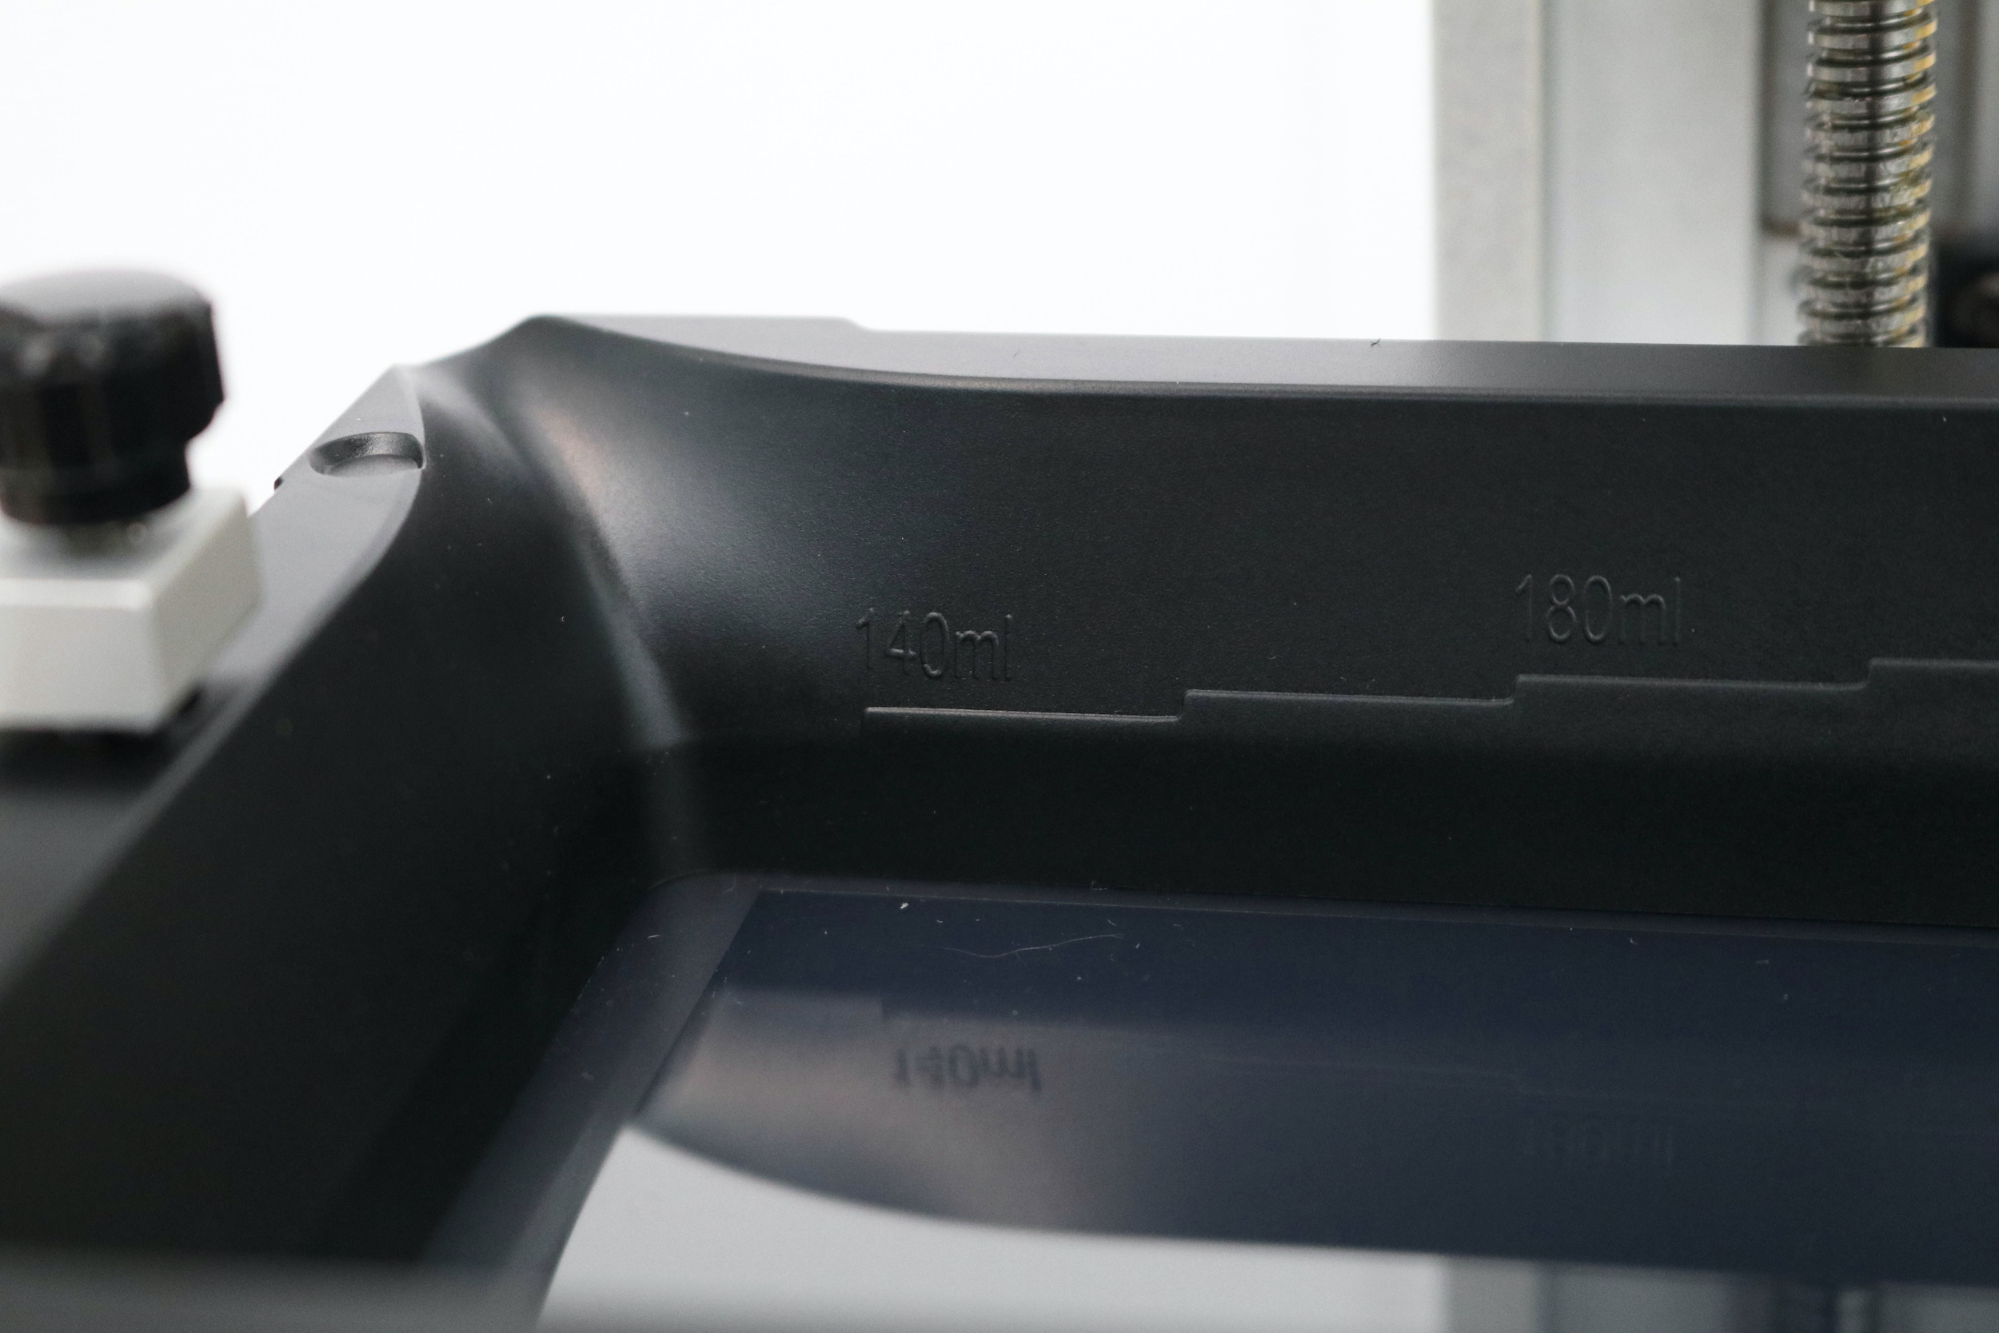
The resin vat itself had a few surprises that caught me off guard, but were welcome changes from the typical featureless rectangular vat that I was expecting. For one, the vat has a graduated volume legend embossed directly onto the walls which lets you determine the rough amount of resin in the container with just a glance. It also has a pour spout (and a lip) on one corner, which means that the process of pouring resin out is a much cleaner operation than with a hard edge which liquid will spill over and get onto the bottom of the FEP film.
Unlike other resin 3D printers such as the Elegoo Mars Pro, the FEP film cannot be swapped out with a generic replacement, and requires a proprietary FEP film that is sold by Anycubic as a pair for $11.99. This is a reasonable price for the replacement, but it’s worth noting you may want to keep a few extras on hand if you’re using the machine regularly. And if Anycubic stops making them, your printer could become useless.
Anycubic Photon Mono Setup
The setup process for the Photon Mono is fast, simple and beginner-friendly. The included power supply plugs into the rear of the unit, the build platform and vat took me well under an hour to calibrate and fill respectively, and the transparent yellow UV-resistant cover sits flush on top of the base. The included user manual is well-written and easy to follow and I had no problem setting up the machine while following along.
Leveling the Build Platform on Anycubic Photon Mono
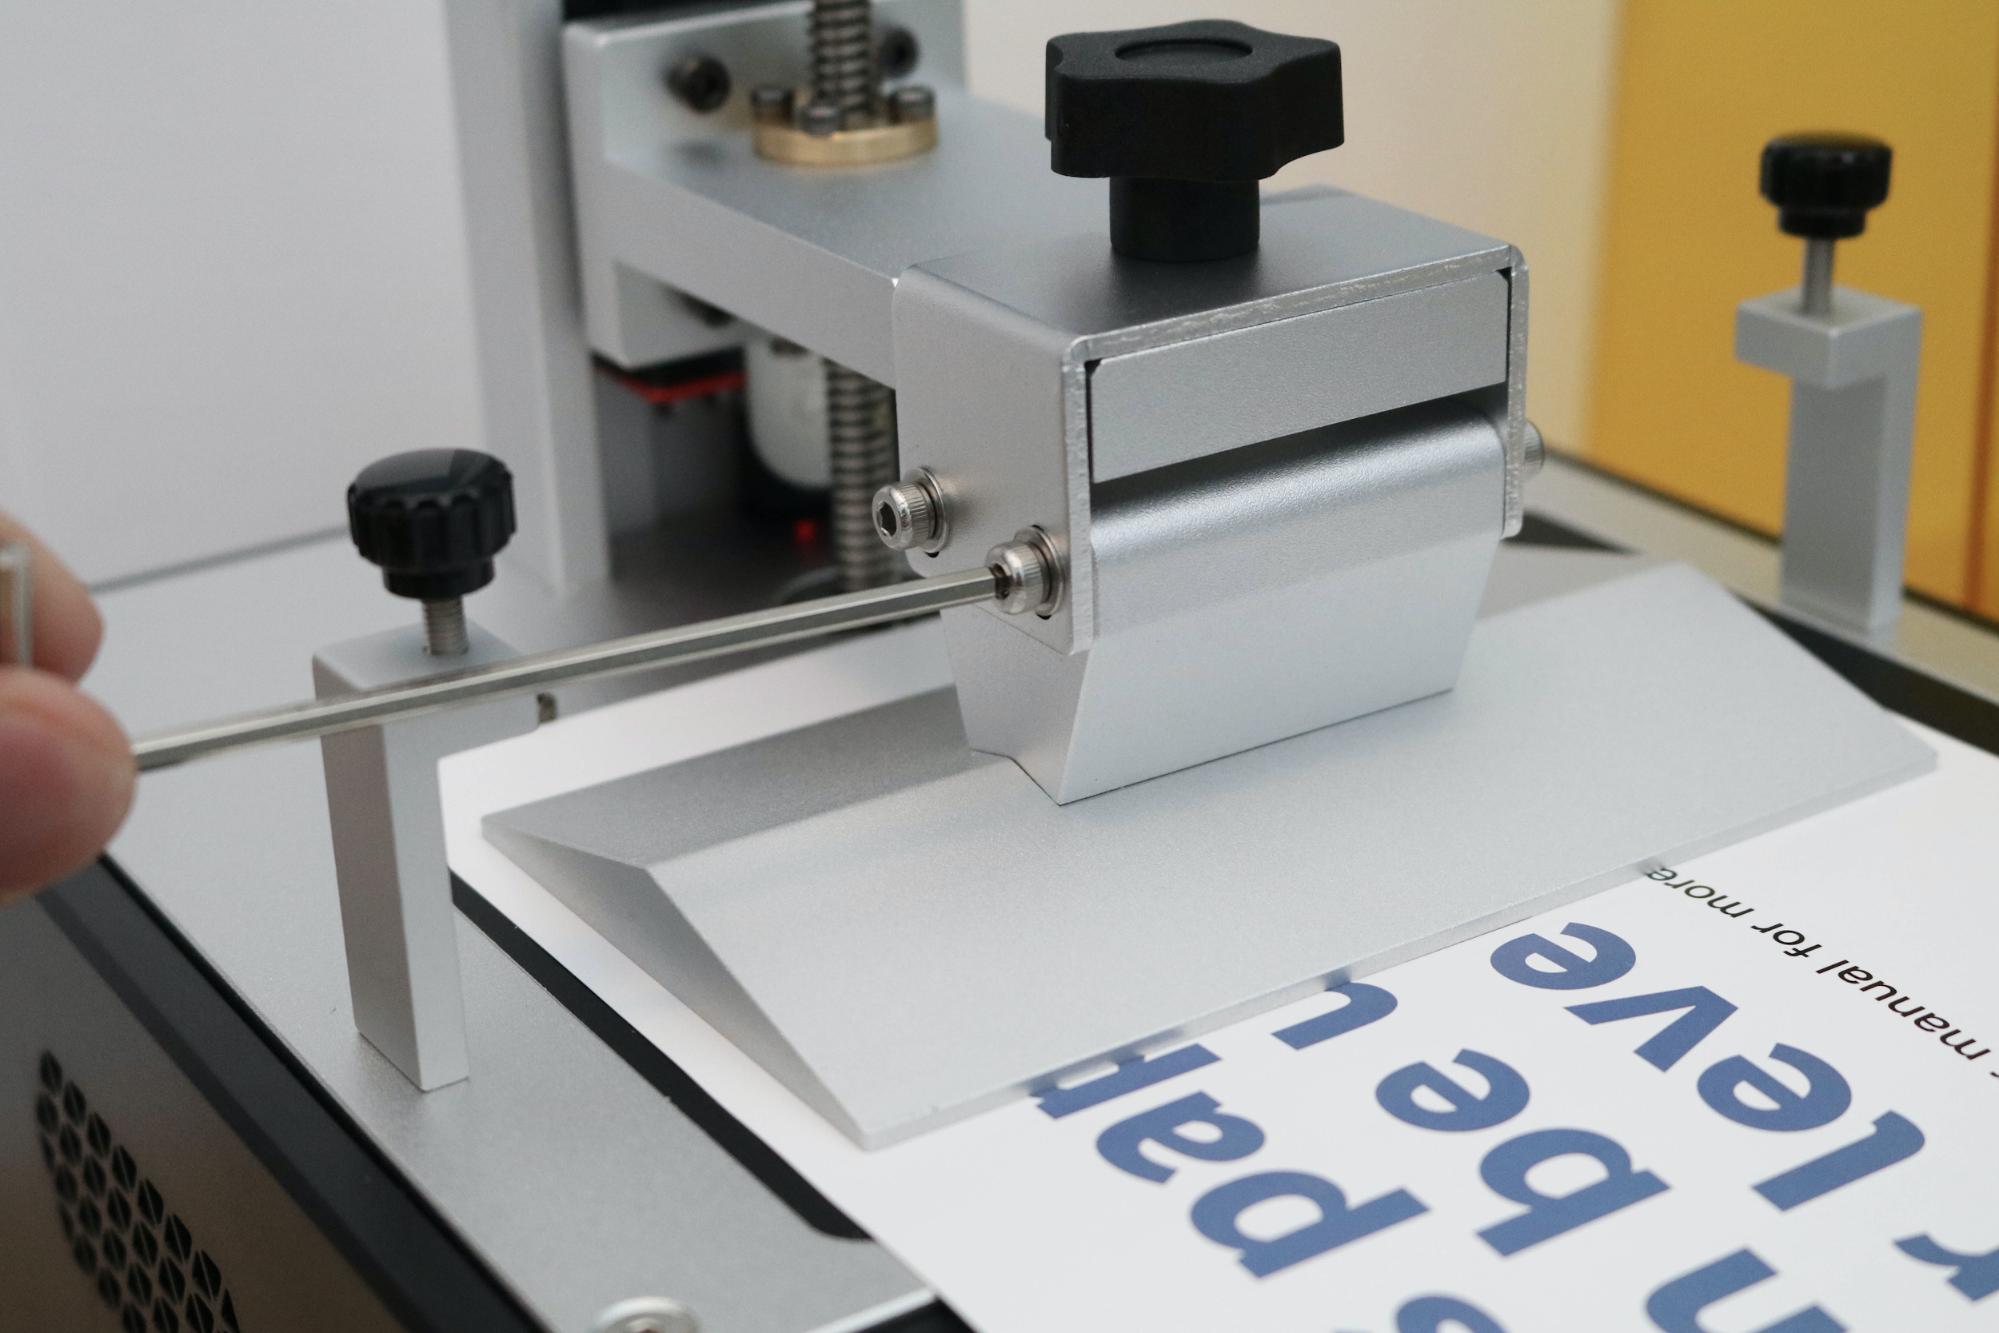
The Anycubic Photon Mono requires you to level the build platform with the masked LCD to make sure the layers are exposed evenly as they are cured. The build platform also requires a very slight offset to compensate for the FEP film at the bottom of the vat which is present during printing. To accomplish both tasks in one step, Anycubic has included a piece of paper with the Photon Mono that can be used to protect the LCD while also creating a slight offset during leveling.
“This paper can be used for leveling” is what the included 210mm x 150mm piece of paper has written on it in two languages, so that’s exactly how I used it. After loosening the four bolts holding the build platform against the bracket, I lowered the Z to 0, tightened the screws, and reset the home. This entire process took me about three minutes, and the calibration was spot-on. I had some issues with the Phrozen Sonic Mini 4K, which uses a similar leveling process but had parts that weren’t quite flush, making the calibration of the Photon Mono a breeze in comparison.
Printing Safety with Anycubic Photon Mono
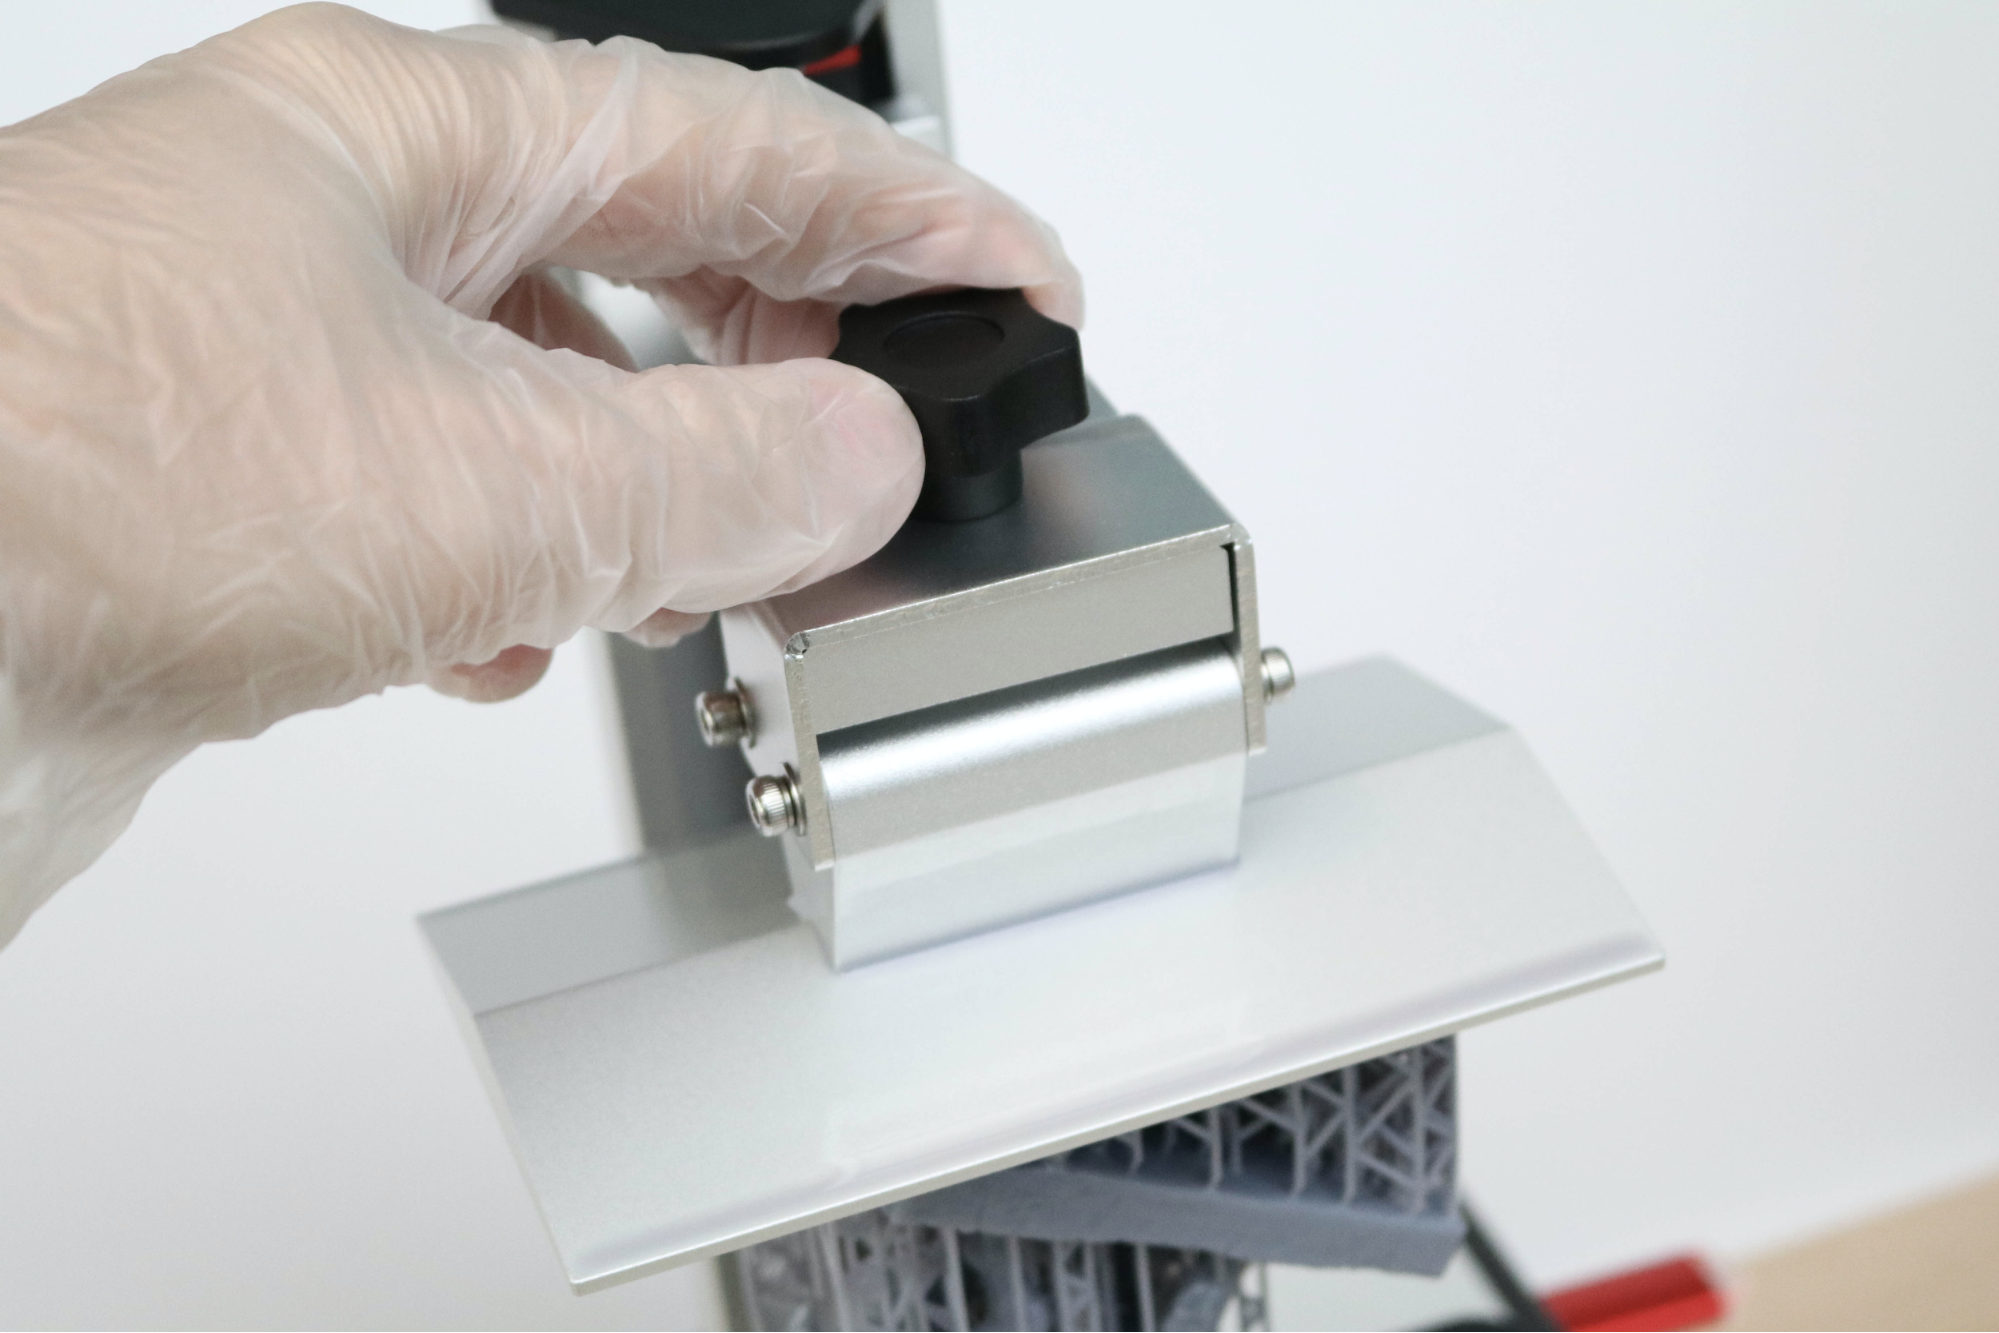
The Photon Mono uses 405nm UV resin, a material that you need to handle safely when in an uncured state to avoid injury. The resin can be harmful when making contact with skin, so make sure to wear gloves when pouring, cleaning up, or handling uncured resin. I also make sure I’m wearing gloves when removing the build platform after a print, as the resin tends to pool on top of the platform and can drip off while the platform is being removed. The build platform on the Photon Mono has a triangular profile, which lets any resin on top slowly drip down during printing.
Make sure you use the Photon Mono in a well-ventilated room to minimize the danger from inhaling fumes. Any spills or uncured resin stuck to a surface should be cleaned using 99% Isopropyl Alcohol and the container for the resin should be kept closed and secured when not actively pouring material.
Printing the Included Test Print on the Anycubic Photon Mono
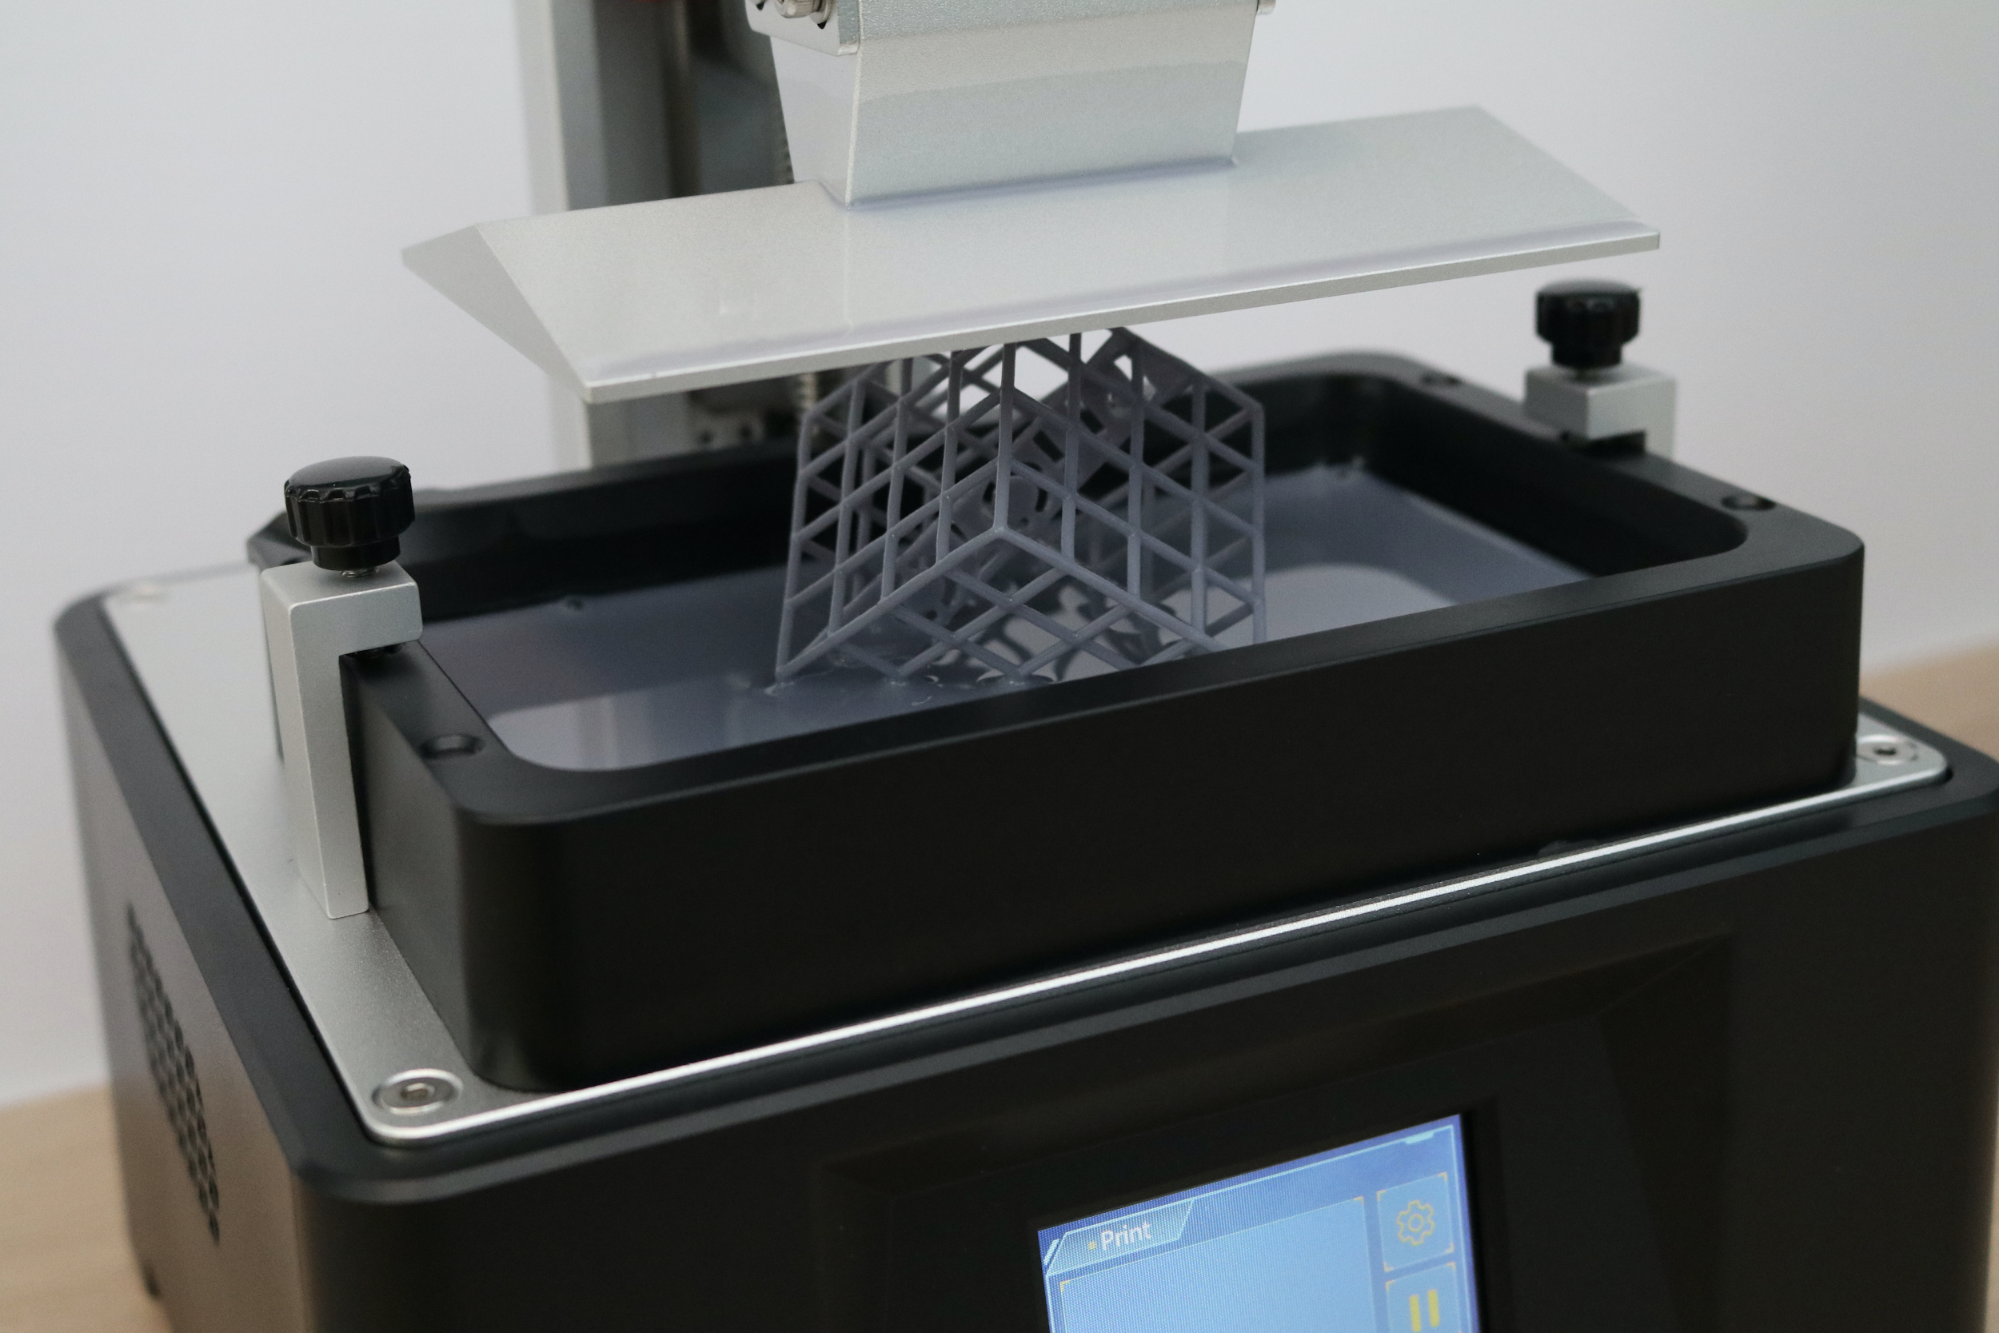
The included USB stick contains a sample test print that has already been prepared for printing on the Photon Mono, and I was impressed with both how ambitious the part was as well as how well the printer performed. I used Elegoo Ceramic Gray Water Washable Resin for all the prints in this review. The sample test print (descriptively named TEST.pwmo) is a lattice structure in the shape of a cube with two floating bars that read ANYCUBIC PHOTON.
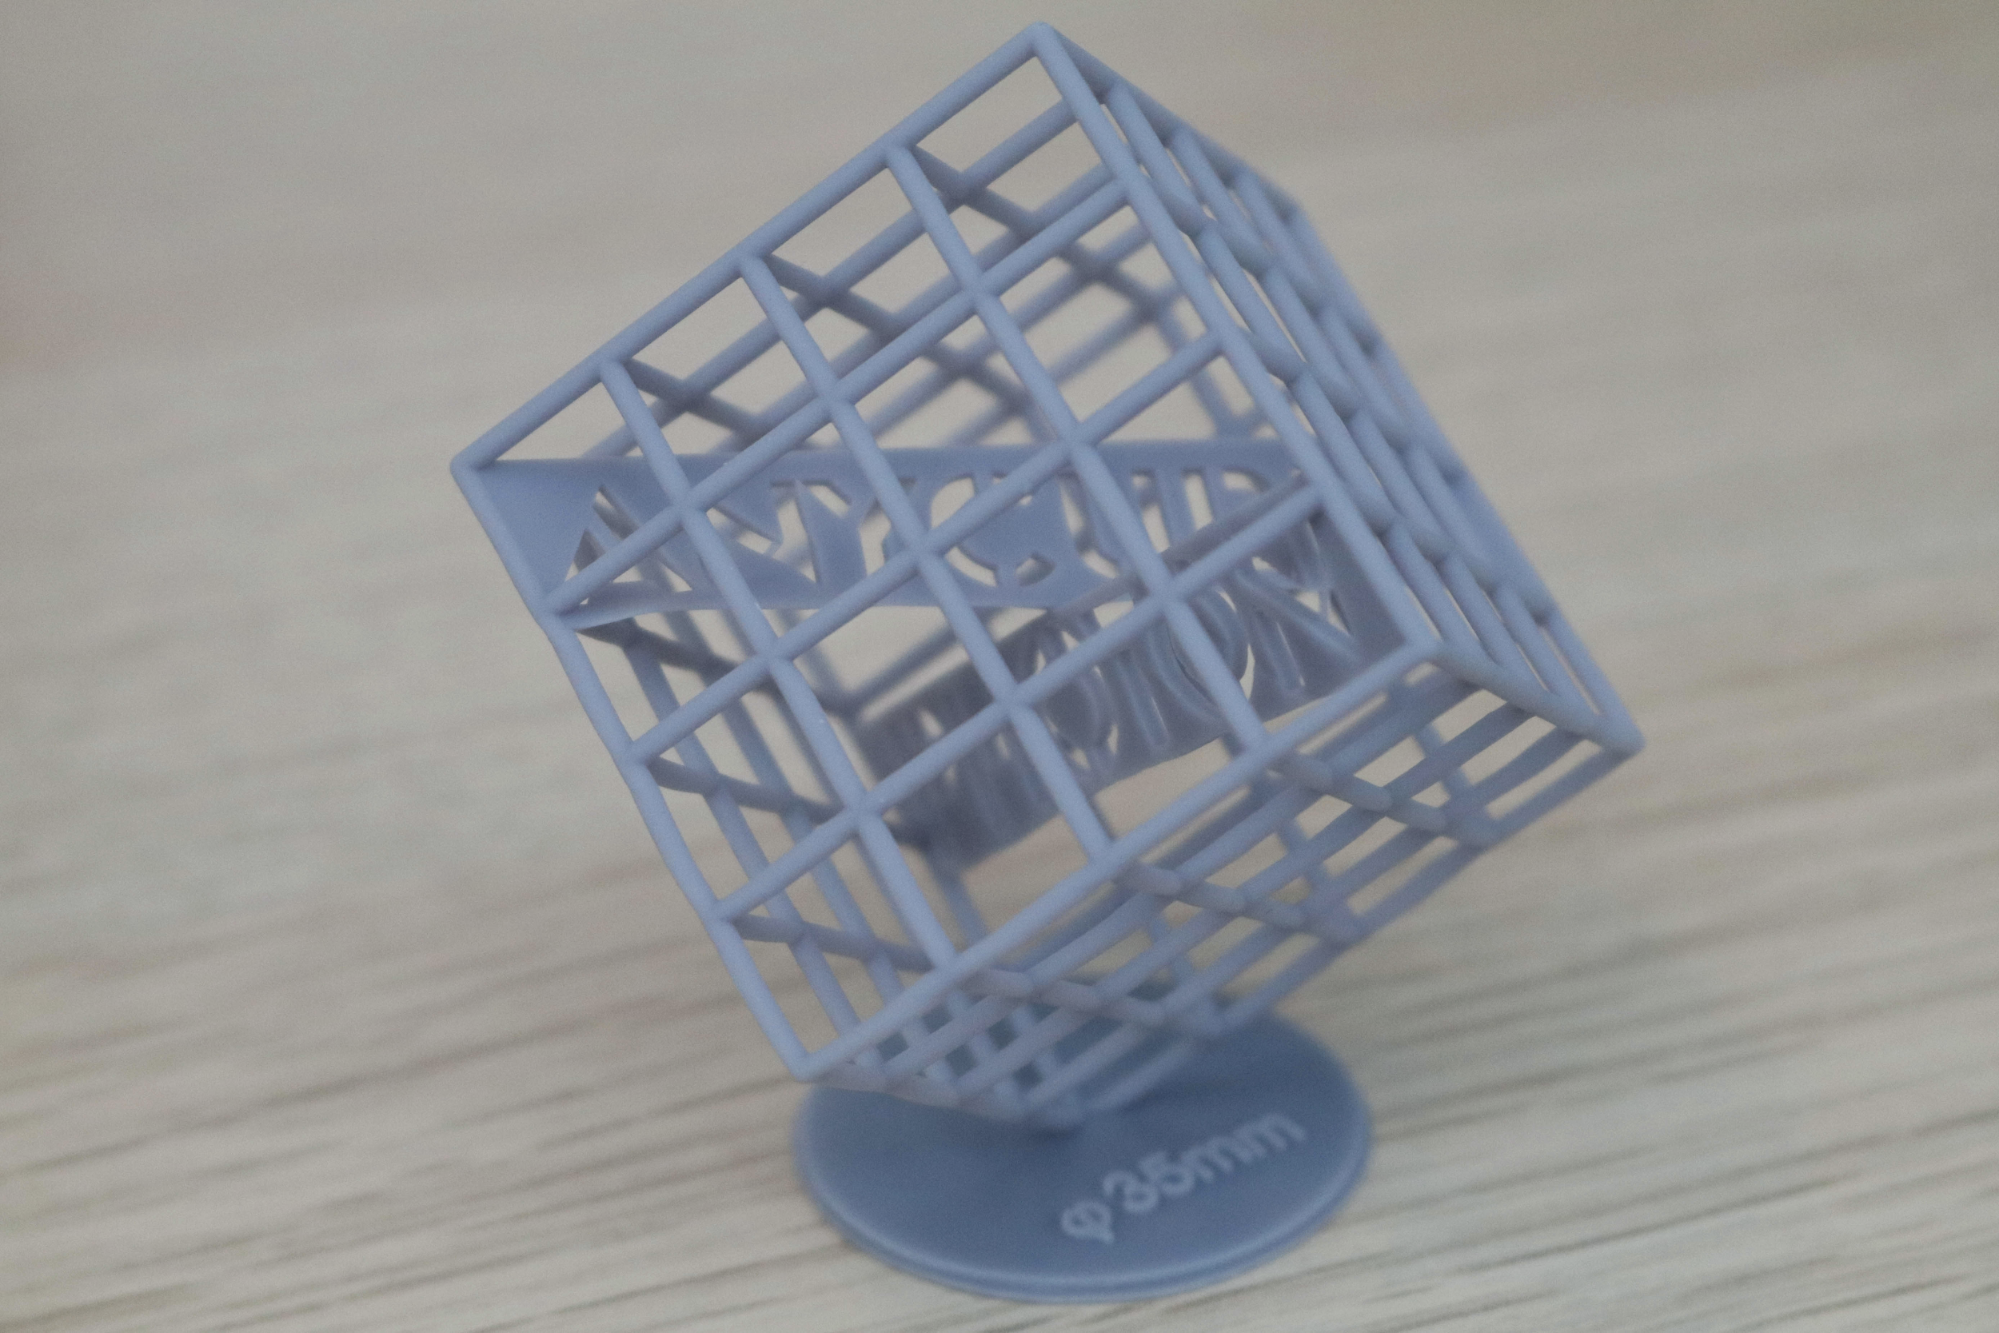
This cube highlights the ability of the Photon Mono to print complex parts due to the rigidity of the machine. The build platform is suspended from a gantry that is made from a solid piece of aluminum, and the linear rail it travels on offers highly precise and repeatable motion. I didn’t see any bowing, bending or other defects on the test part, and the overall accuracy of the print was impressive.
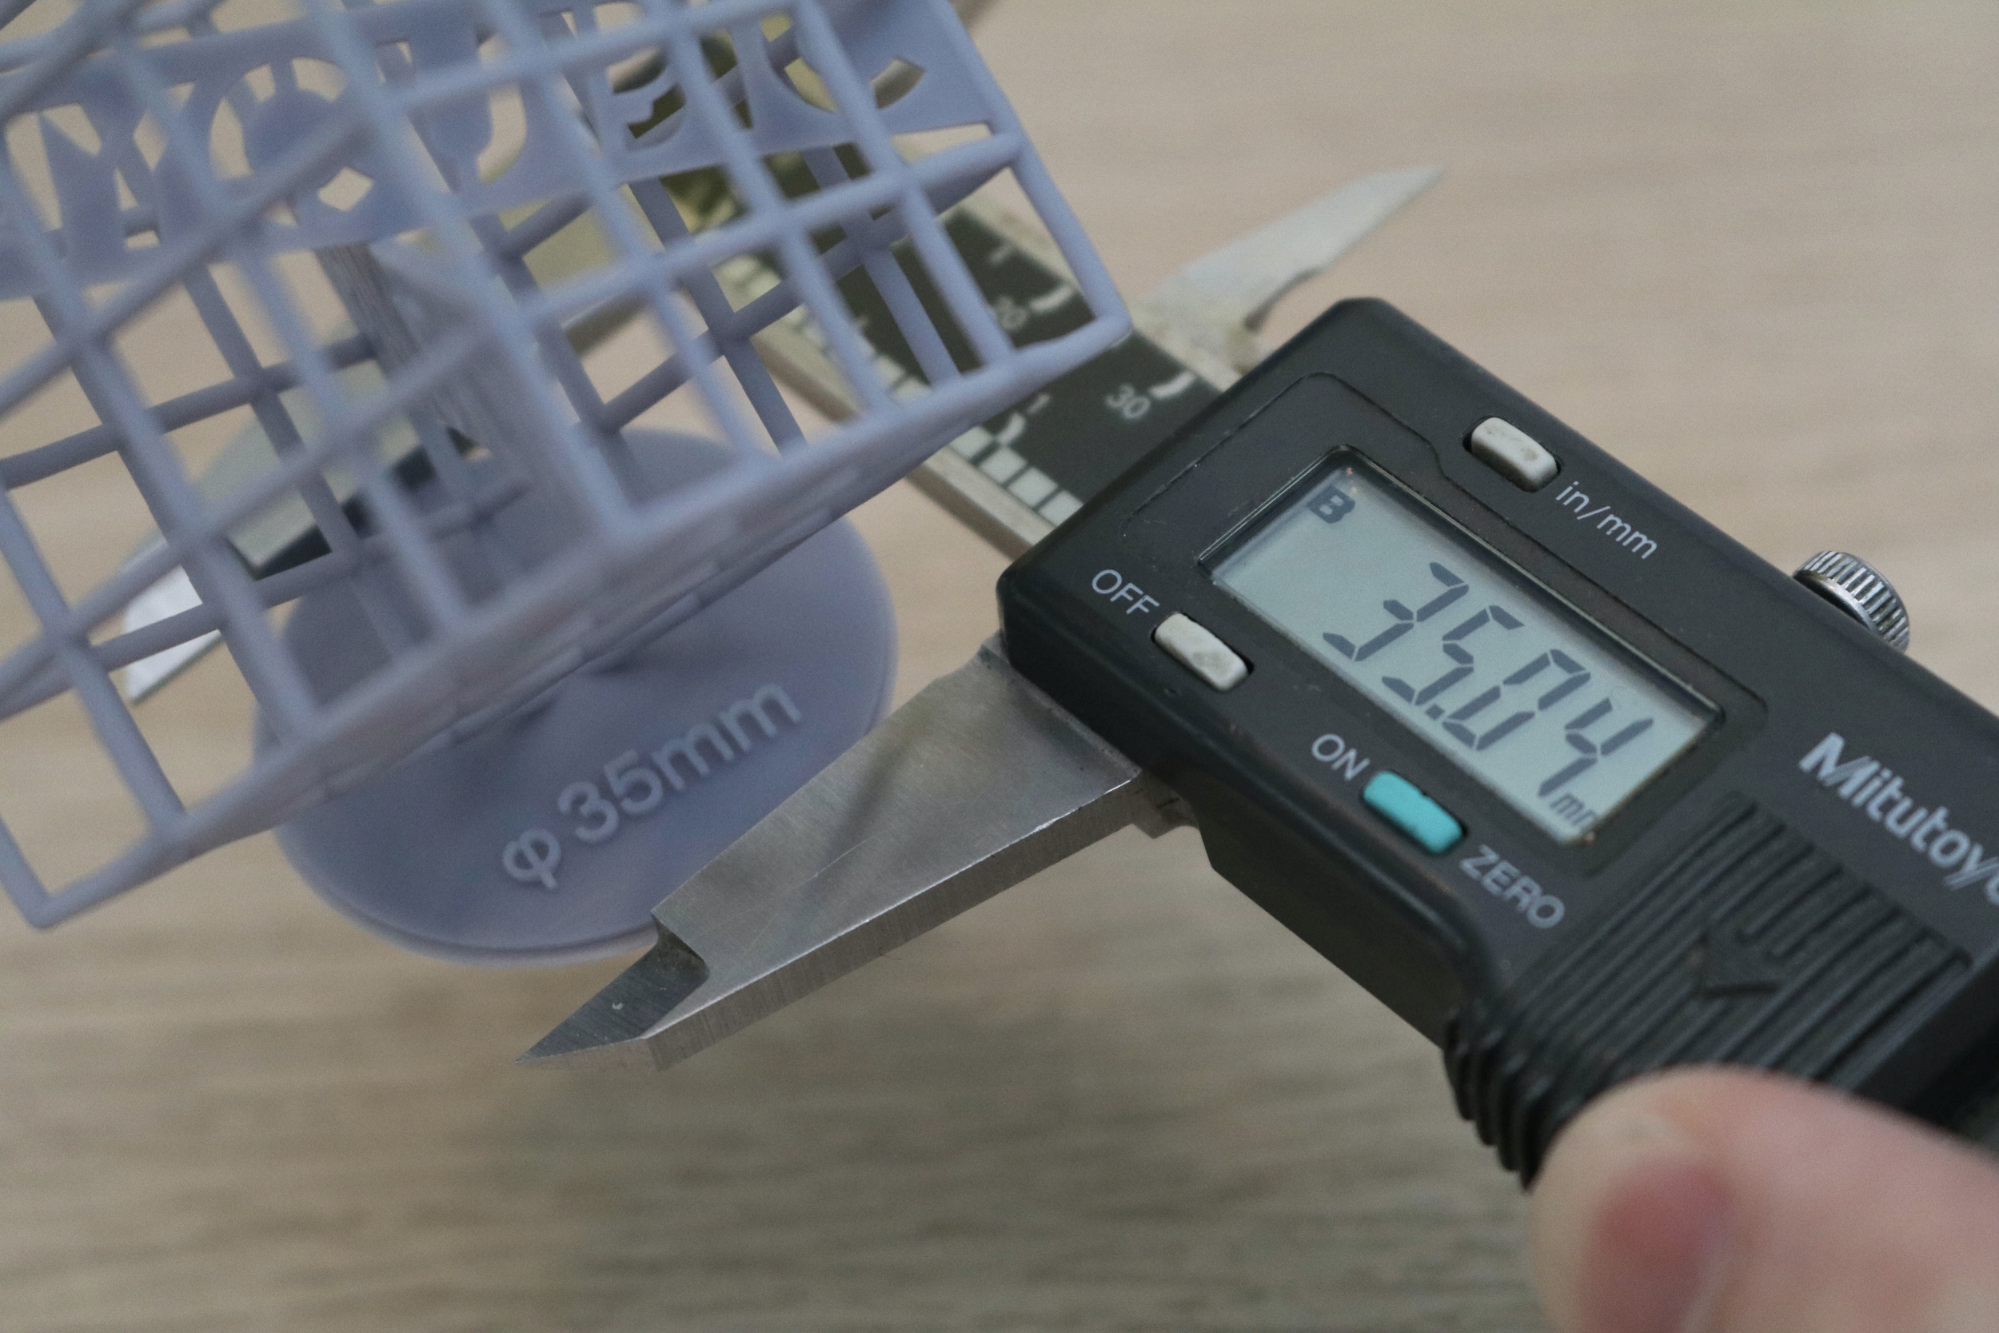
As indicated by the text printed on the base, the average diameter of the circular feature measured right around 35mm, with most measurements being slightly over by about .02mm to .04mm. Anycubic doesn’t have a published XY tolerance for the Photon Mono, but the XY accuracy of the machine is stated as .051mm, which seems reasonable for the measurements taken.
Preparing Files for Printing with Photon Workshop
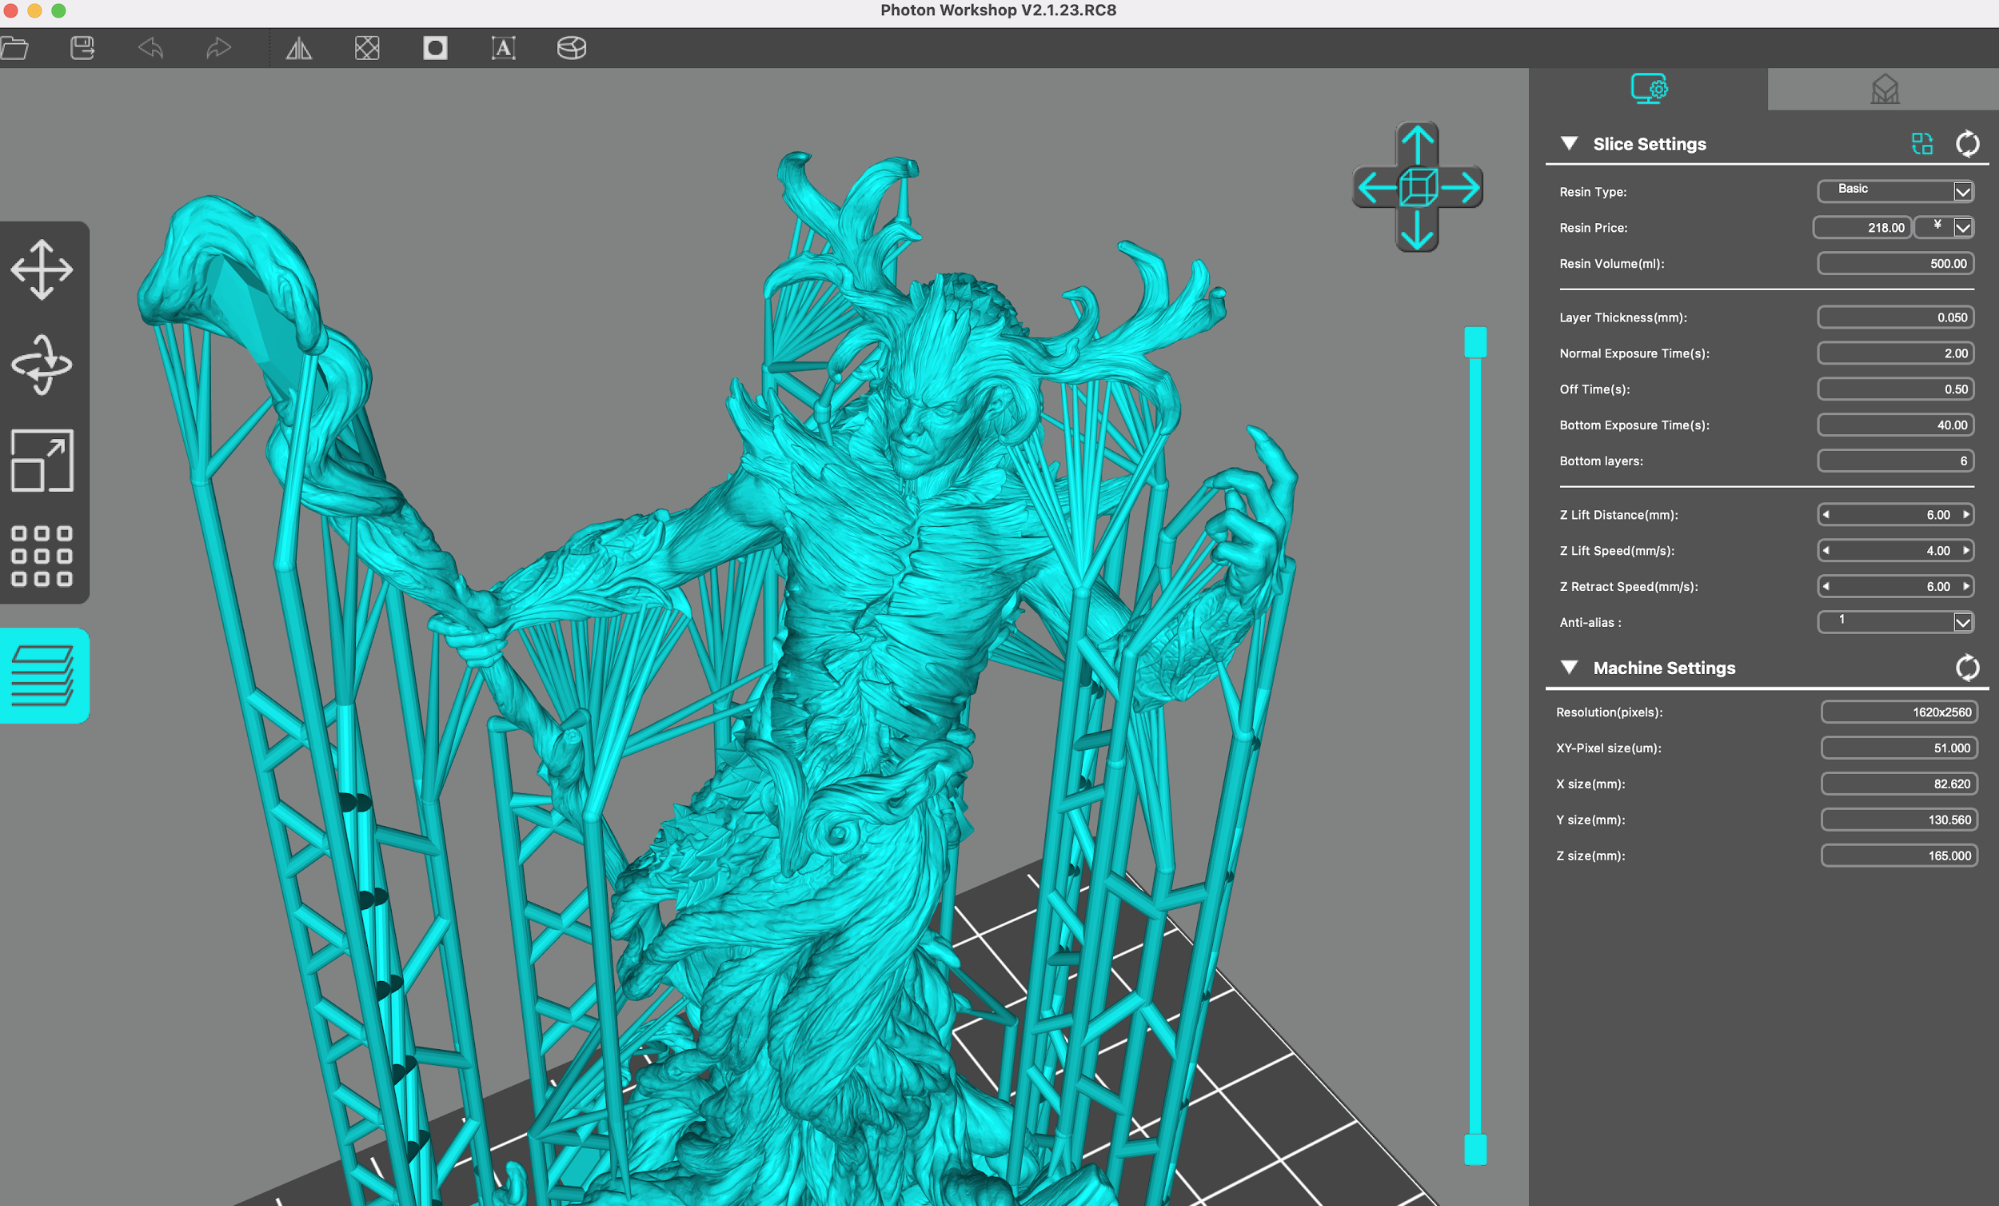
Anycubic includes its Photon Workshop software for preparing .STL files for resin printing with the Photon Mono, Photon Mono X, and other Anycubic MSLA 3D printers. Having the print workflow organized sequentially at the top of the software (import model, hollow, add drain holes) made the file preparation a quick and easy process.
When you select a printer configuration in Photon Workshop, the exposure time and other related settings are automatically adjusted to the defaults for the machine. These settings worked well with the Elegoo Ceramic Gray Water Washable resin, and I didn’t need to make any adjustments to the exposure time.
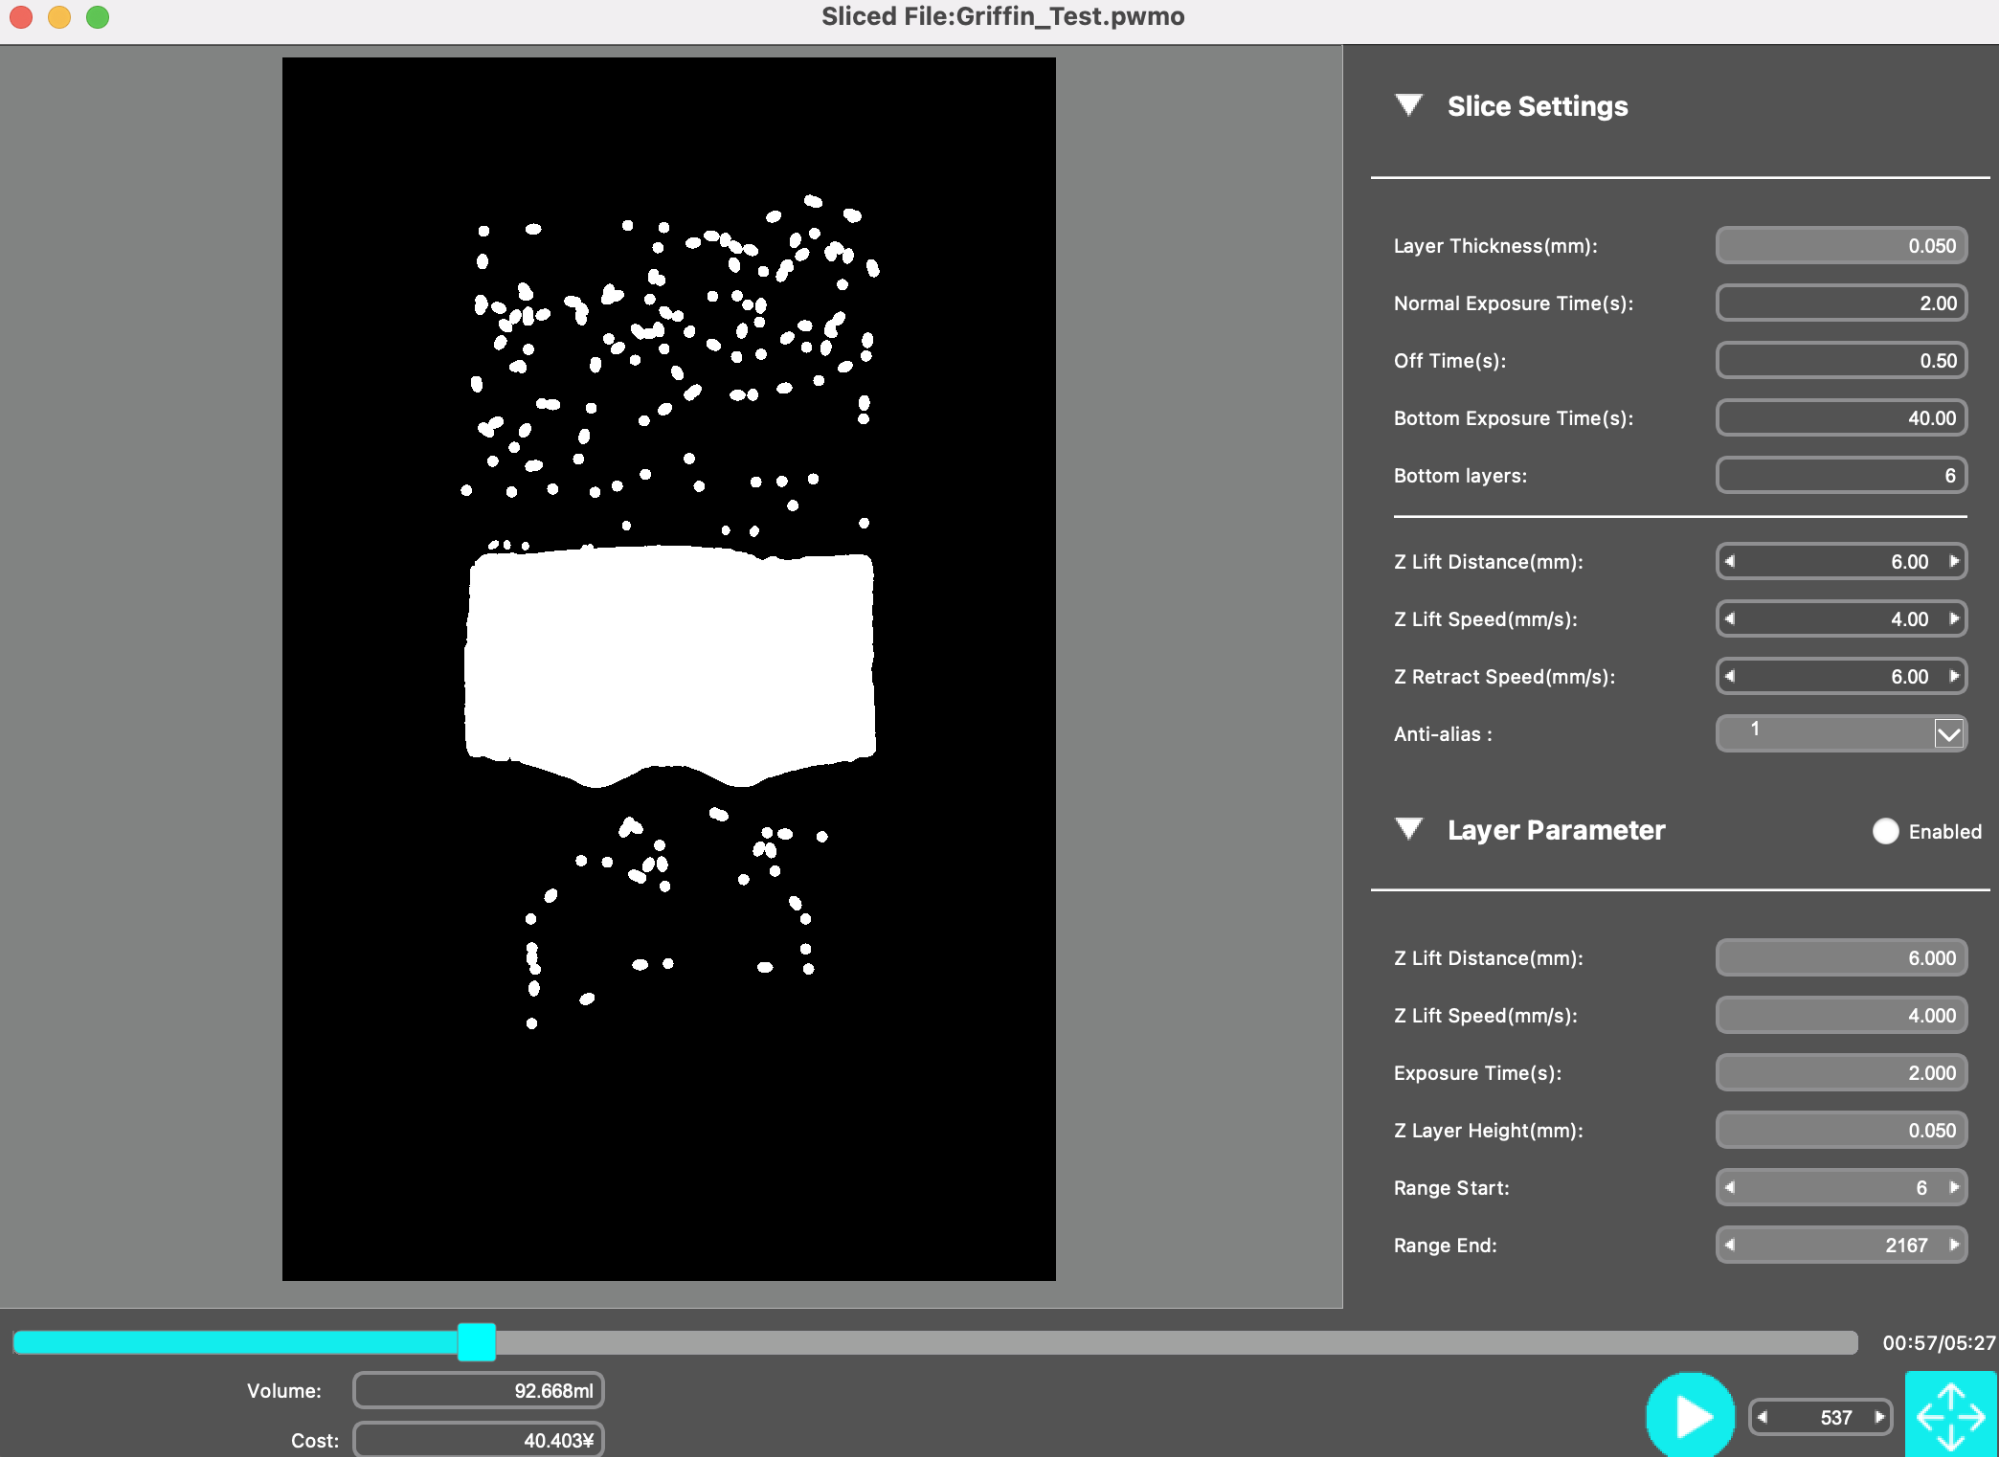
Once a model has been prepared and sliced for printing, Photon Workshop exports a .pwmo file which is readable by both the Photon Mono as well as Photon Workshop. Opening the file presents a preview of the print in a layer-by-layer fashion allowing you to see which pixels will be exposed on the LCD screen. The layer parameters (exposure, Z lift, etc.) are also listed, and can be directly edited in case you want to switch the settings for a different resin. The total amount of resin used is listed at the bottom, so you know how much resin to add if your vat is starting to get low.
I’ve used the slicer Chitubox in the past with the Phrozen Sonic Mini 4K, so this is the stage in the process where I would normally check for islands in the print; small individual or isolated exposures that don’t connect to the main body. These can cause issues by potentially sticking to the FEP or floating away during printing and getting stuck to the print later on. Photon Workshop doesn’t offer a way to easily search for and remove these islands, something that has driven users to a third party software called Photon Validator which can view and edit .pwmo files. Given the usefulness of this feature and its inclusion in the popular slicing app Chitubox, adding it to Photon Workshop would be a big benefit for users looking to streamline their printing process.
Printing with the Photon Mono
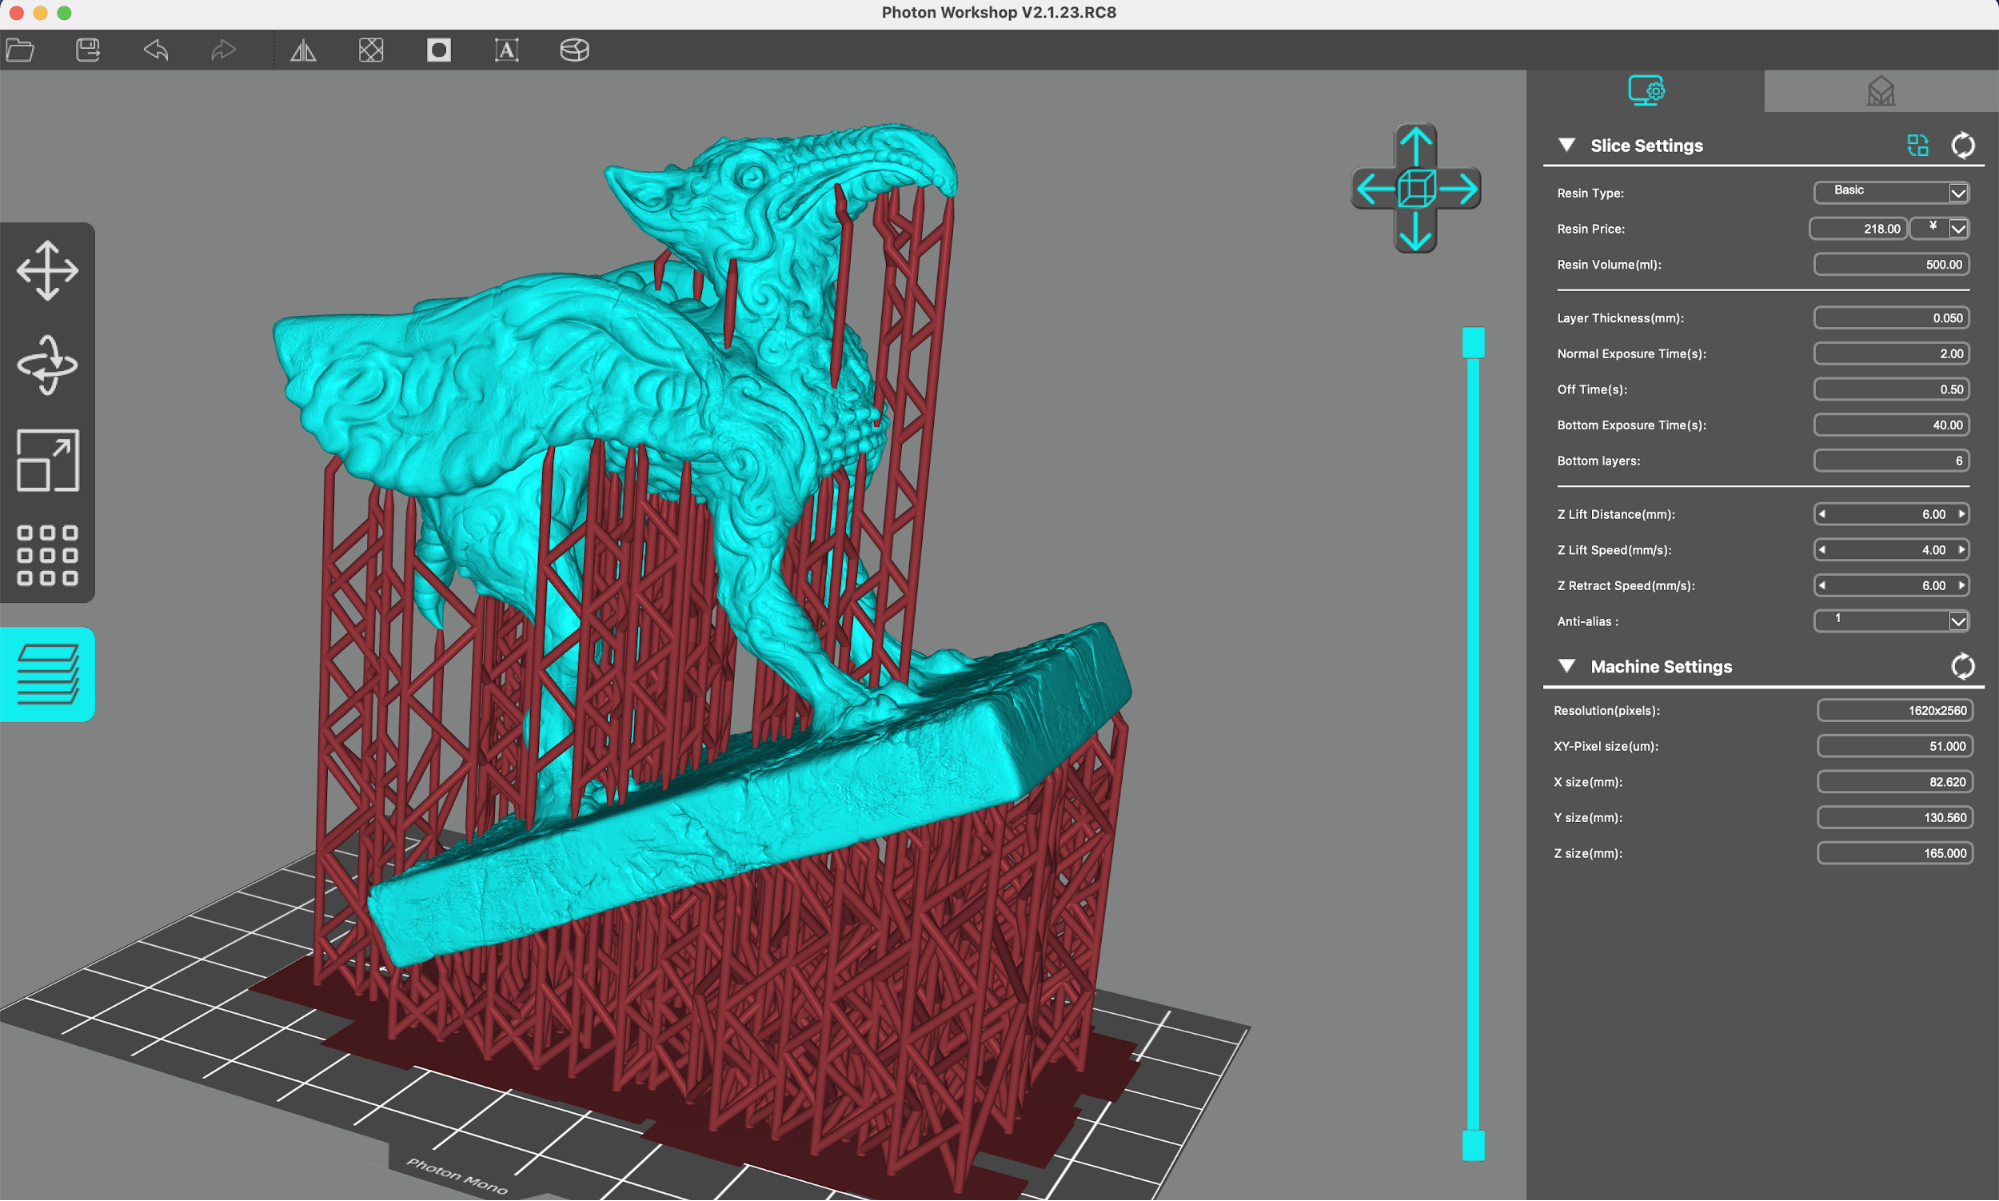
I used the Griffin model by digital artist Sishir Bommakanti as a first test of the Photon Workshop preparation process. The file was easy to process and the supports were generated automatically after adjusting the angle of the file for printing.
This model wasn’t particularly thick, so I didn’t bother to hollow it or add drain holes, and printed it solid. I angled it over the build platform to generate support under the base, and also increased the support density to give the model more anchor points to the build platform. The settings (listed below) are the default for the Photon Mono in Photon Workshop, and as you’ll see, they worked great for this model.
| Layer Height | 0.05 mm |
| Bottom Exposure Time | 40 seconds |
| Exposure Time | 2.0 seconds |
| Bottom Layer Count | 6 |
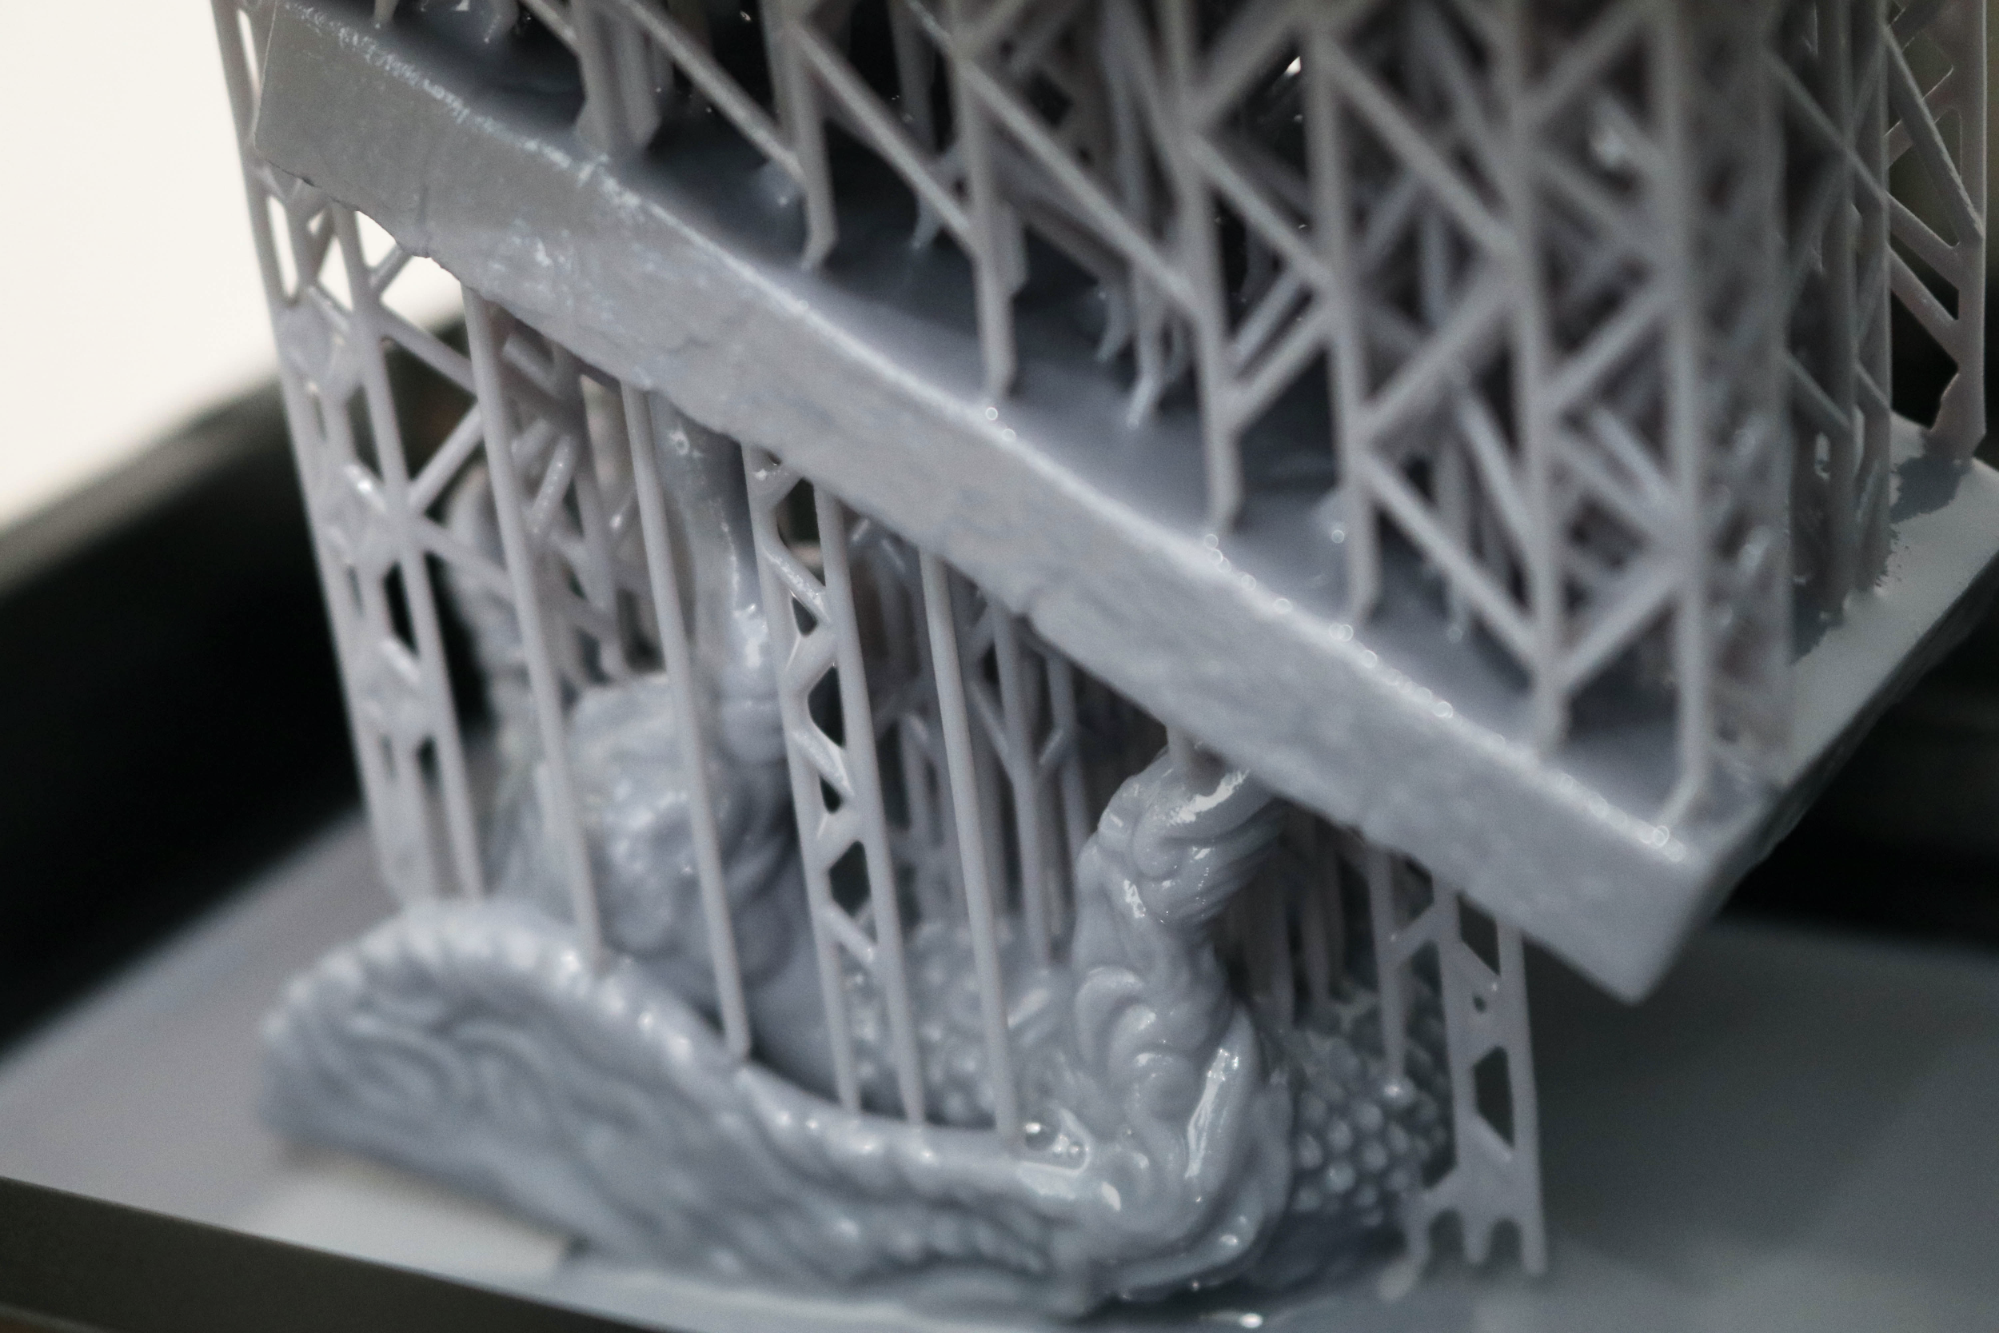
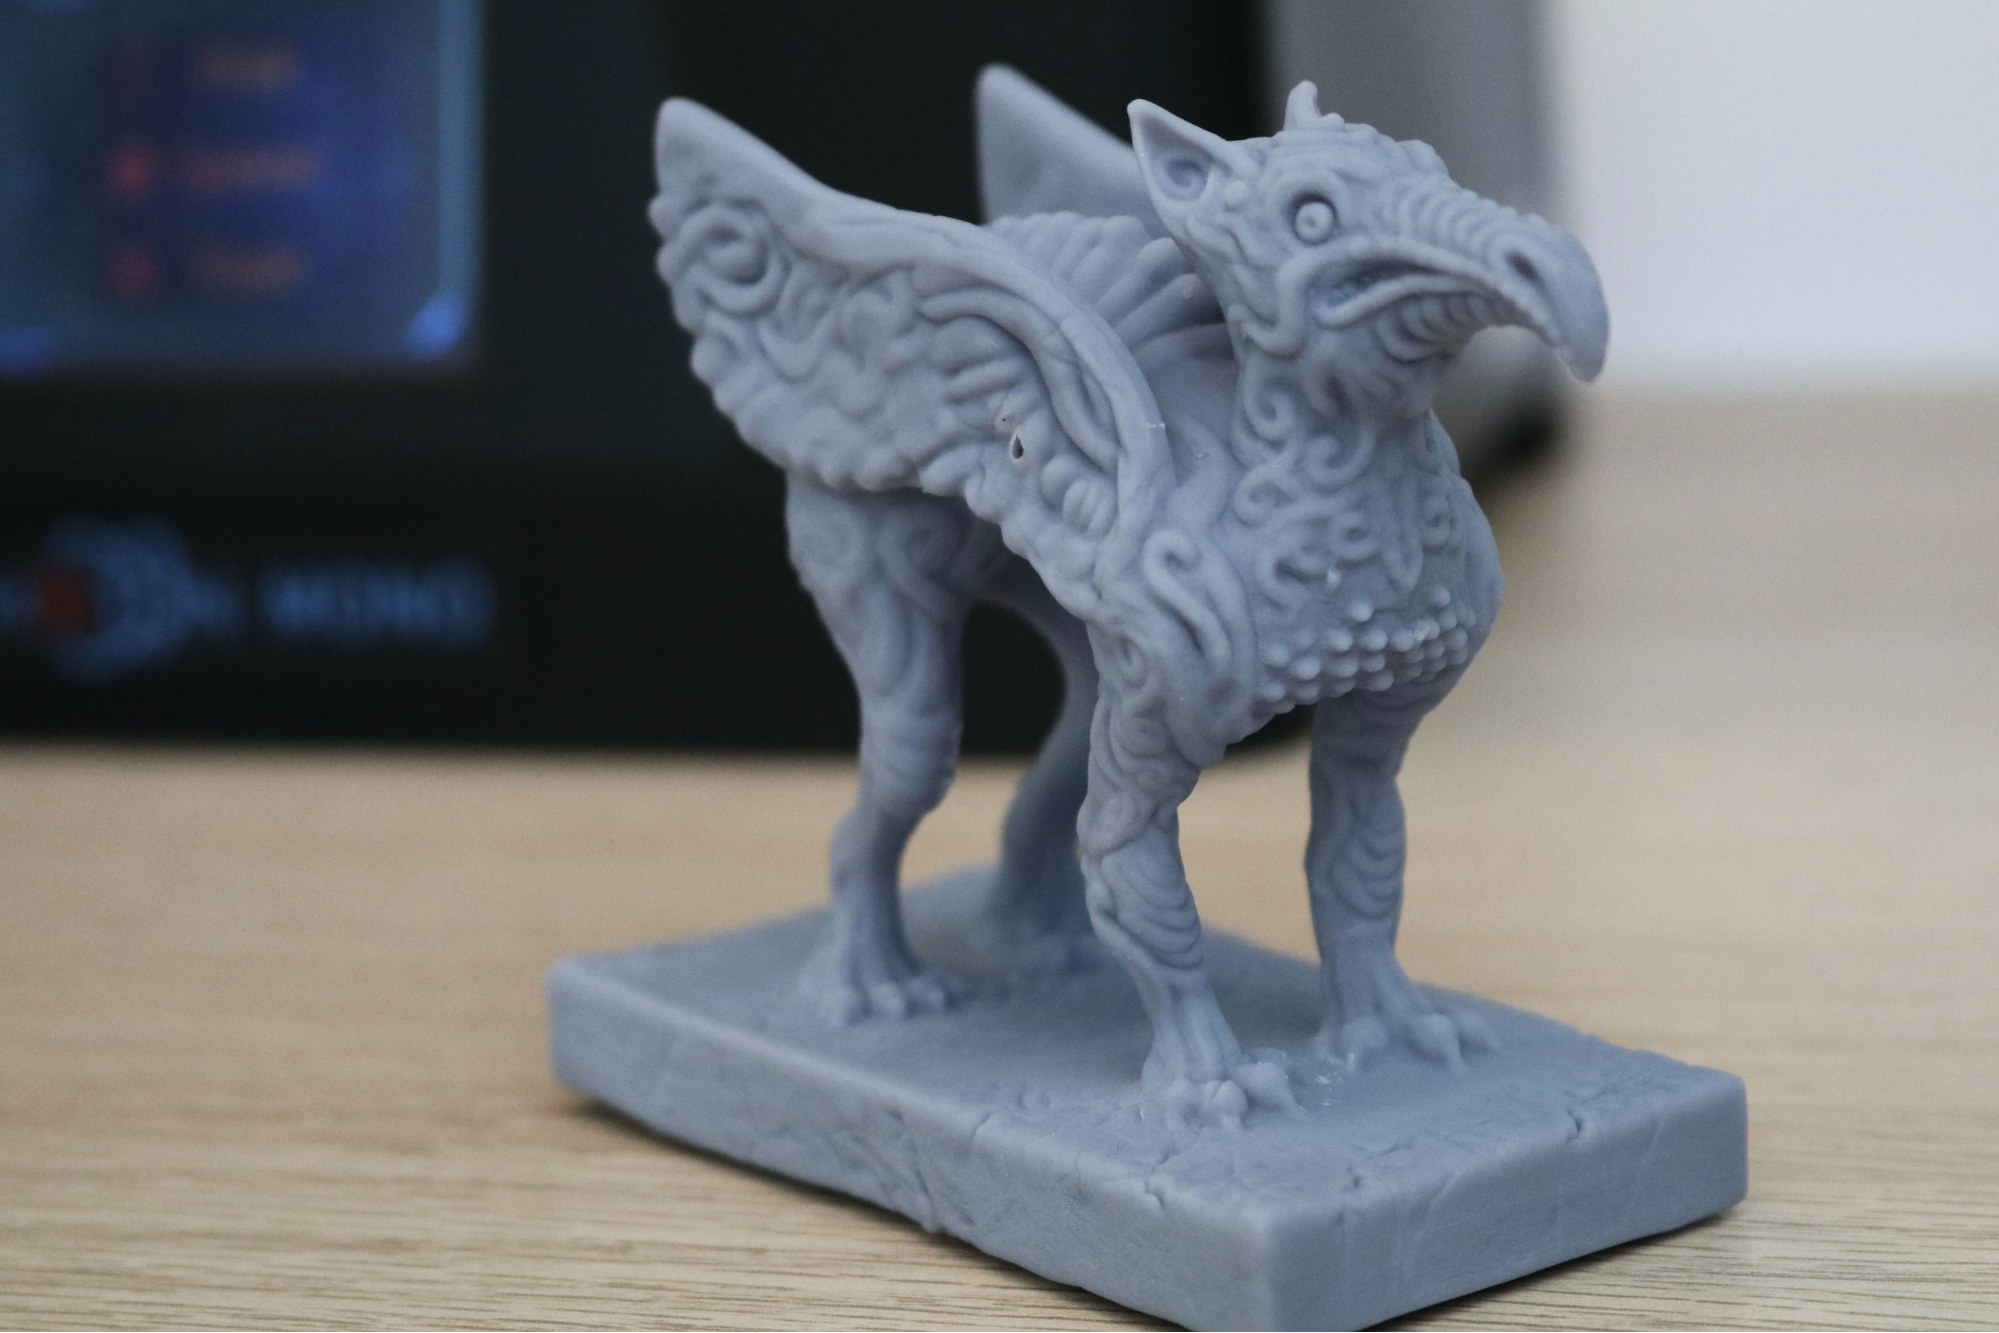
The Griffin model printed in just under five and a half hours and I didn’t run into any surprises during the process. The support structure kept the model anchored down despite the 100ml of resin used in the printing process. After it finished printing , I rinsed the model in warm water and removed the automatically generated support structures, which detached easily and didn’t leave any major marks on the surface. Curing the model was straight-forward as well, and the model didn’t warp or crack during the process.
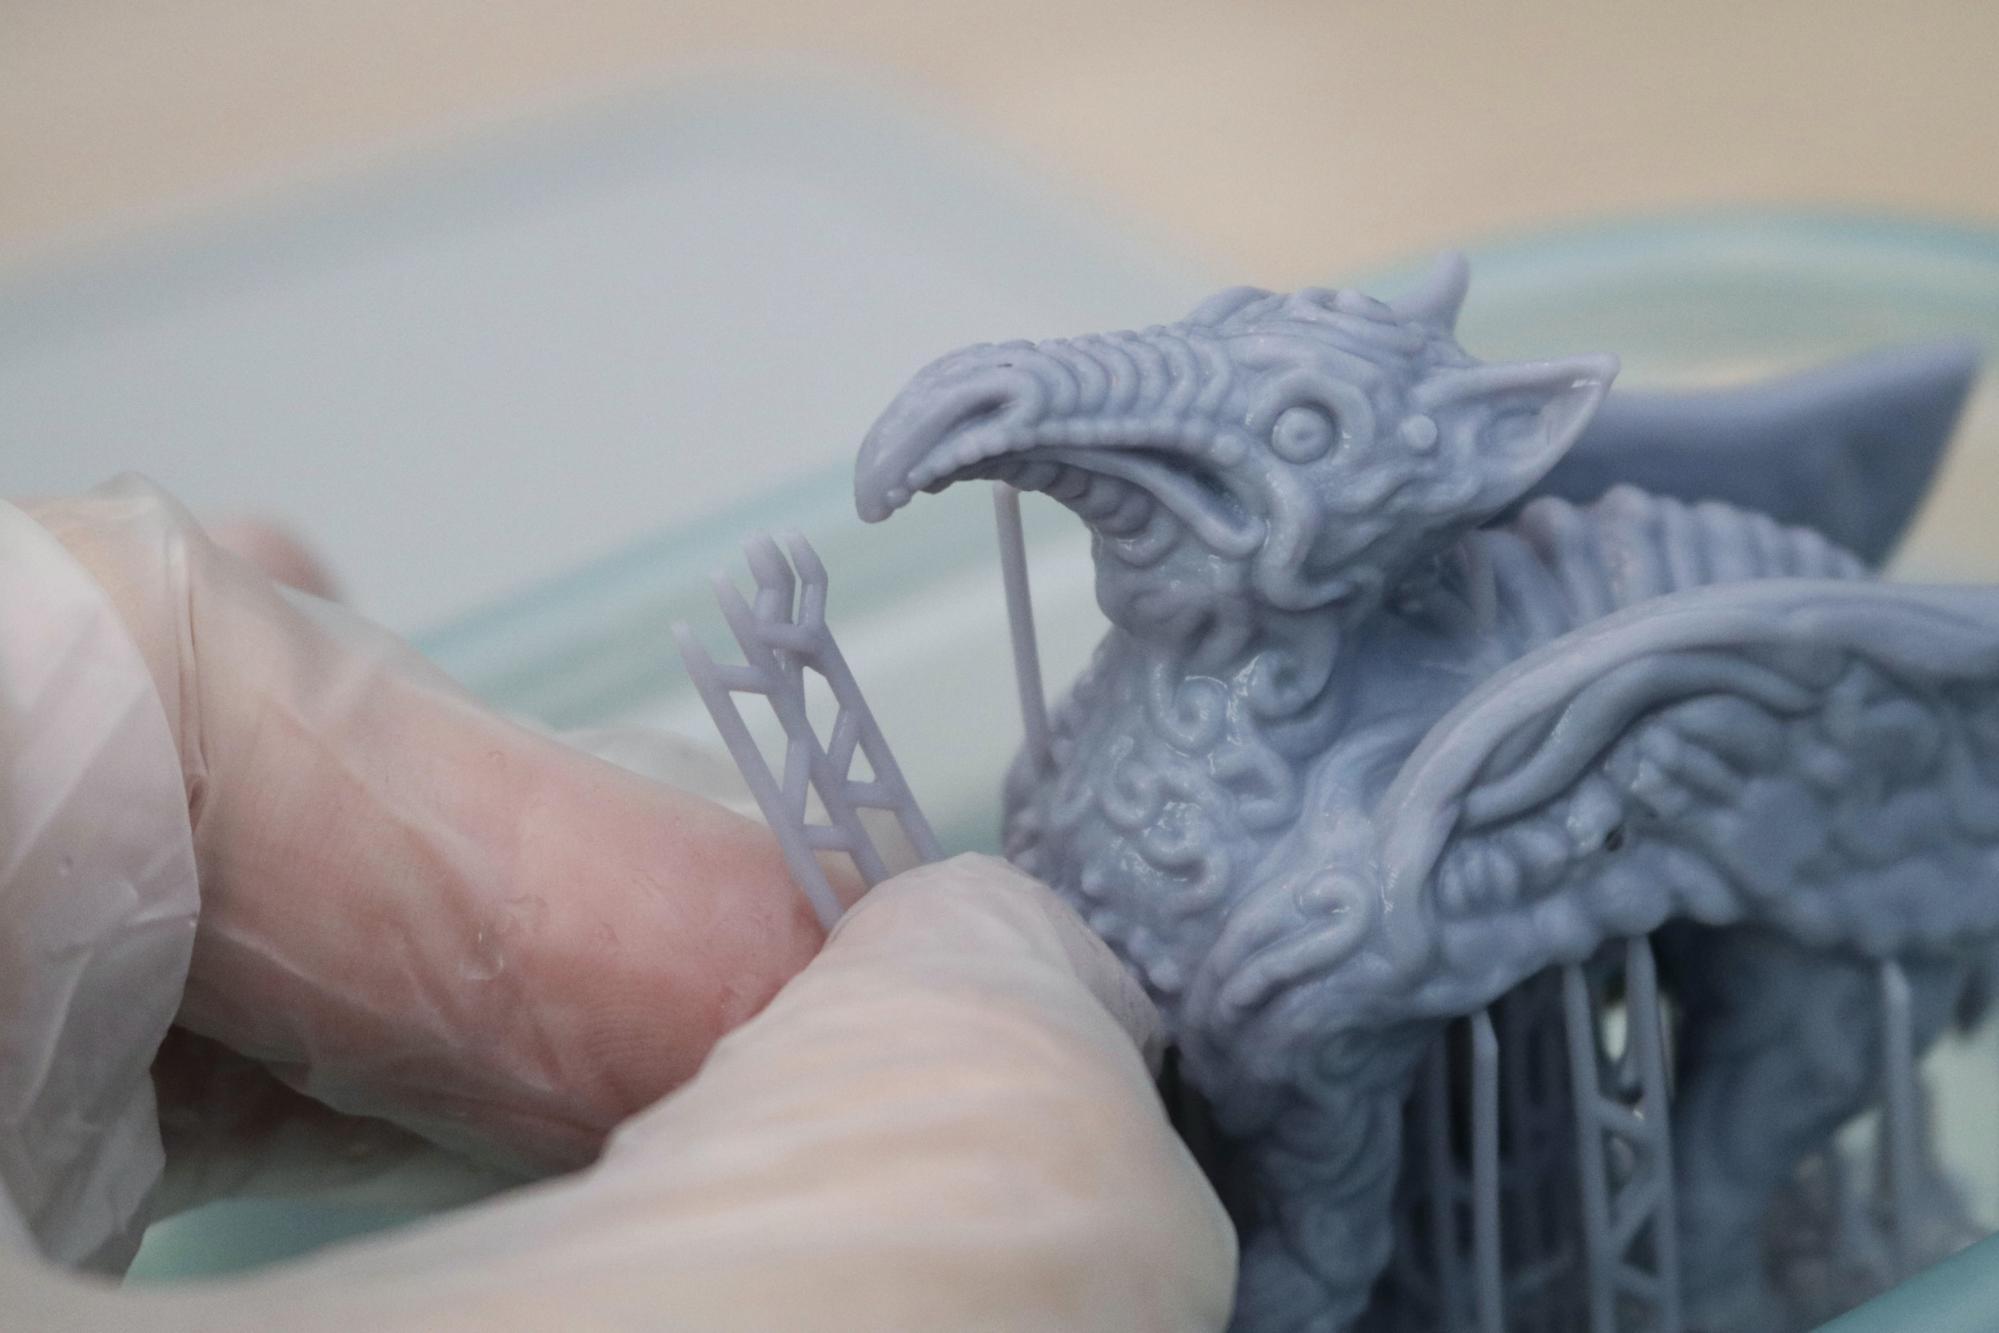
A small hole is present on the wing, a result of the model having a near-zero thickness at certain points. This means that the feature width is below the minimum XY resolution (.051mm), and doesn’t get printed. It’s an interesting defect to see on a resin print, as most FDM 3D printer slicer software can automatically detect thin walls and add thickness to prevent this style of defect. I searched through the Photon Workshop documentation, but didn’t see any ability to resolve this problem.
Printing Finely-Detailed Miniatures on the Photon Mono
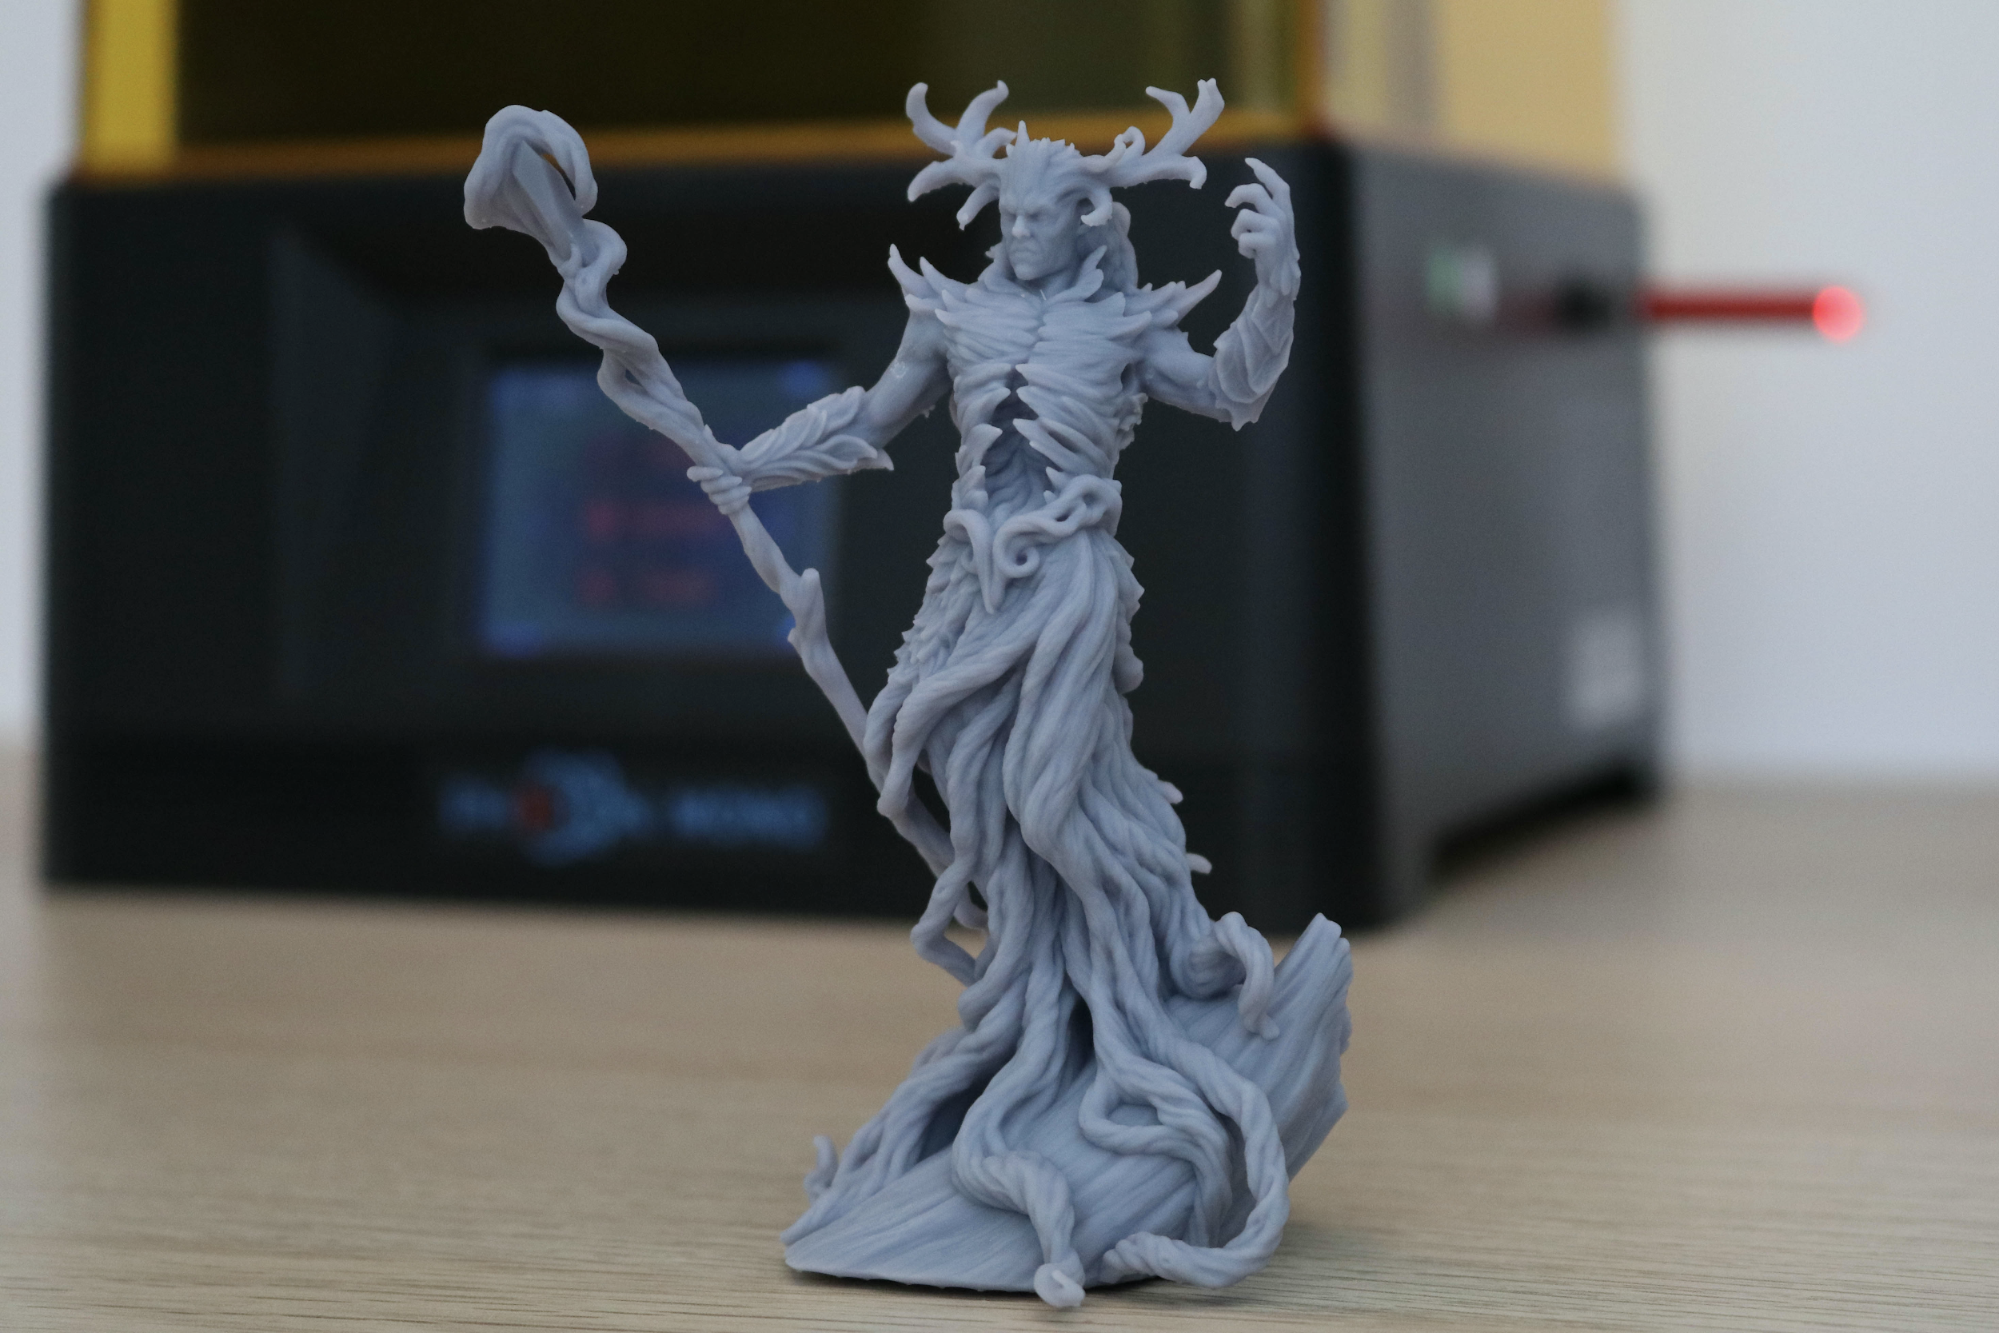
The speed of the Photon Mono is something that I wanted to test out, so I printed the 75mm scale Verdant King mini from Loot Studios. This model has support material already generated from the original artist, and the total height of the model is 118.73mm. This file prints out in about six hours, which works out to a build speed of right around 20mm/hour while printing at a .05mm layer height and two second exposure.
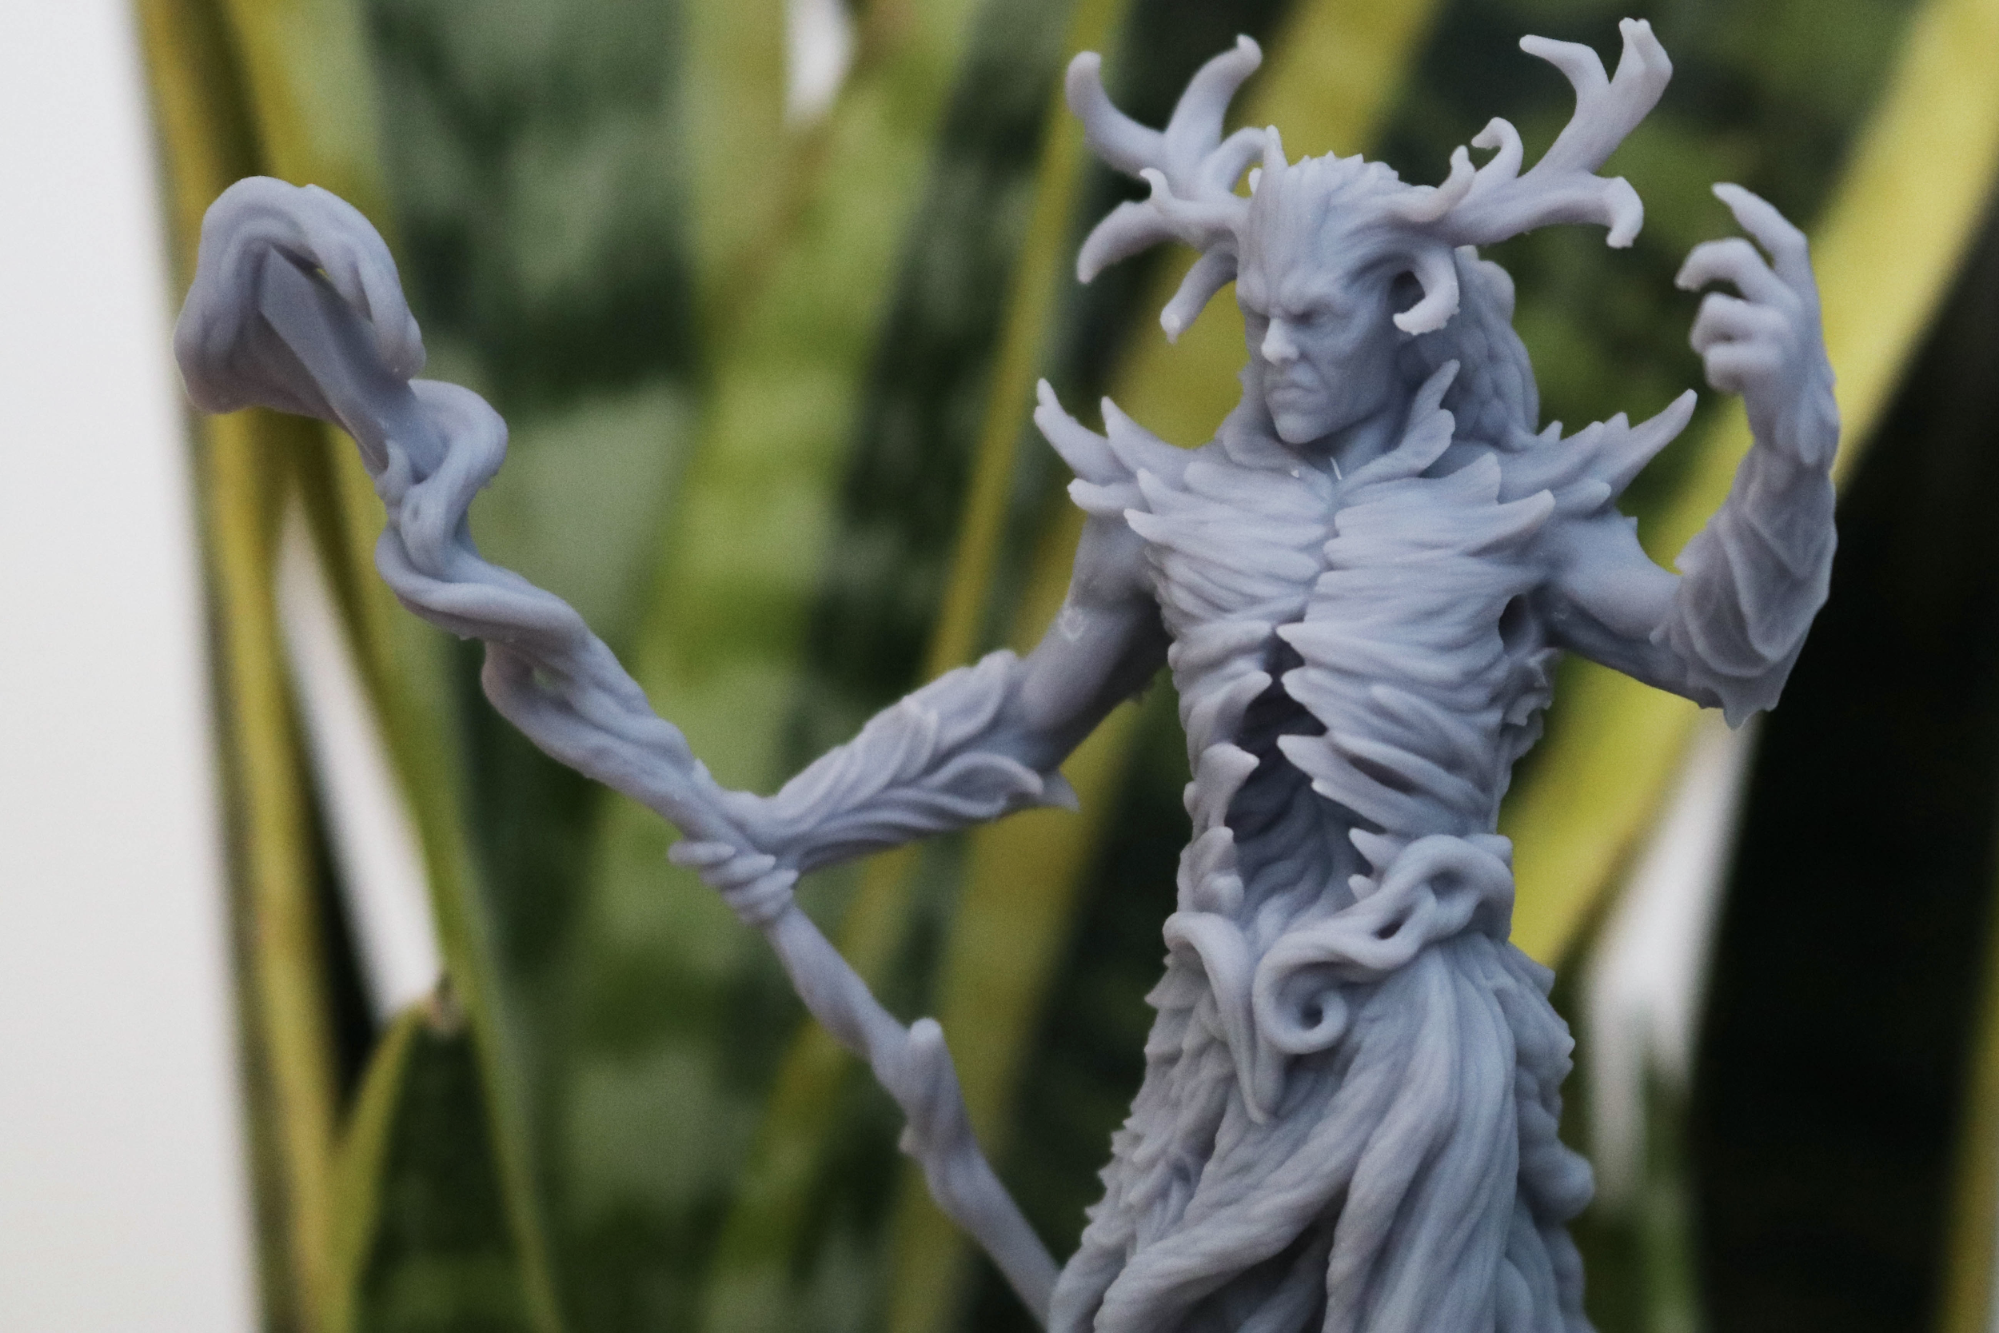
The model showed quite a bit of detail, and I could easily remove the support structure without damaging the thin features on the helmet and fingers. The hollow portion of the rib cage was very impressive due to the amount of internal and external detail that was captured in the print.
Bottom Line
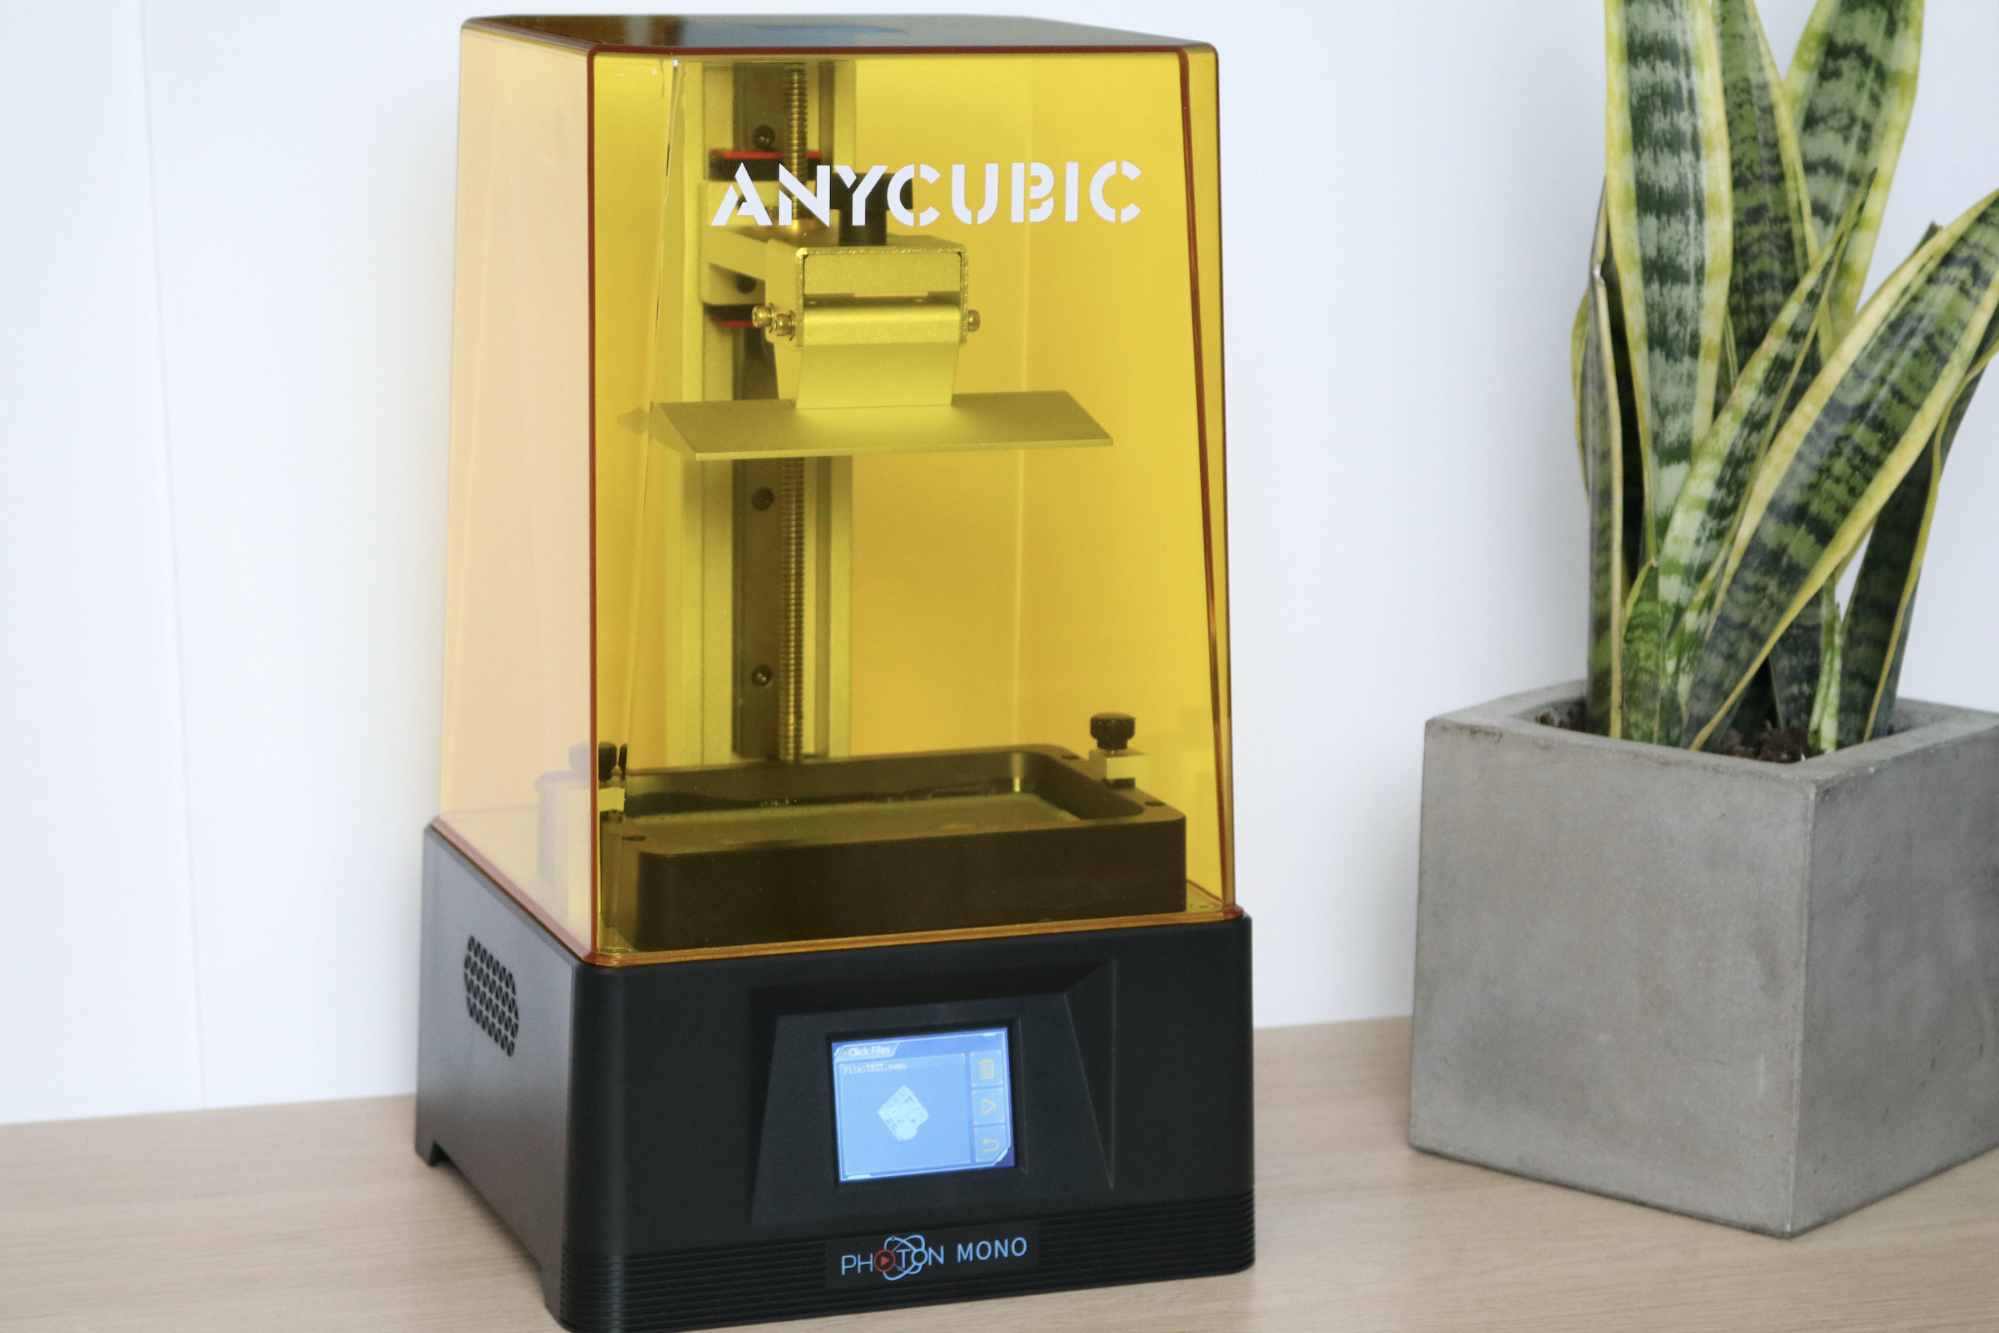
I was impressed with the Anycubic Photon Mono, period. The rock-solid gantry, combined with the thoughtful design touches on the resin vat and build platform are clearly designed to make the printing process as easy as possible. The parts I printed had a very high level of detail and the Photon Mono was able to easily create organic and complex shapes, something an FDM filament printer like the Creality Ender 3 might struggle with.
By including their Photon Workshop software with the Photon Mono, Anycubic has clearly put work into the out-of-the-box experience for new users. However, I did find the software somewhat limiting, and I preferred using the Chitubox software that runs natively with the Elegoo Mars 2 Pro.
I also found myself wishing the USB input was on the front of the printer as with the Elegoo Mars 2 Pro instead of the side, as this means anyone hoping to set machines side-by-side will need to add a buffer between them. These differences may not justify the $100 price difference between the Photon Mono and the Mars 2 Pro for beginners, but if you’re hoping to dive into the more advanced slicer settings offered by Chitubox it might make sense to consider the more expensive Mars 2 Pro.
When you consider the typical retail price of $230, this machine is an absolute bargain and deserves to be included in our list of best budget 3D printers. It's a great option for anyone looking to dive into the world of resin printing while still offering enough features to be attractive to a pro user looking for a small-volume machine.
MORE: Best 3D Printers
MORE: Best Budget 3D Printers
MORE: Best Resin 3D Printers

Andrew Sink first used a 3D printer in 2012, and has been enthusiastically involved in the 3D printing industry ever since. Having printed everything from a scan of his own brain to a peanut butter and jelly sandwich, he continues to dive ever more deeply into the endless applications of additive technology. He is always working on new experiments, designs, and reviews and sharing his results on Tom's Hardware, YouTube, and more.