Cougar Gemini ATX Case Review: Stylish, but Not Cool Enough
Why you can trust Tom's Hardware
Hardware Installation and Test Configuration
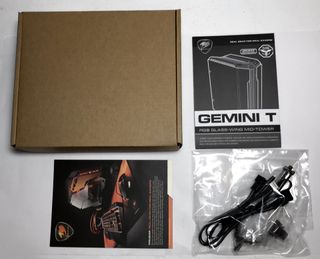
A brown box containing a variety of screws and a dozen or so zip ties comes packed into one of the open 3.5" drive bays. The box also contains a case manual, warranty information and adapter cables for addressable RGB and/or Cougar’s Core Box v2.
Test Configuration
Drivers & Settings
| Chipset | Intel INF 10.1.1.42 |
| CPU | 4GHz (40x 100MHz) @ 1.1V core |
| Motherboard | Firmware 1.10 3/2/2018 |
| RAM | 14-14-14-34 |
| Graphics | Maximum Fan for Thermal Tests | NVIDIA GeForce 398.36 WHQL Game Ready Driver |
Interior
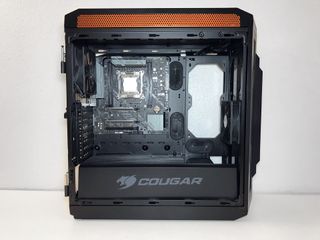
Inside the black interior, four large cable pass-through holes with rubber grommets perforate the motherboard tray (one hidden under the PSU cover), along with a hole in the top of the PSU tunnel. The hole in the upper edge of the motherboard tray is specifically designed for routing the ATX12V/EPS12V power and fan cables.


This chassis can be equipped with coolers as tall as 170mm. A large hole behind the CPU socket area facilitates heat sink changes without removing the motherboard. The Gemini T has a total of nine expansion slots, seven standard and two vertical, and can accommodate multi-GPU setups up to 400mm in length.
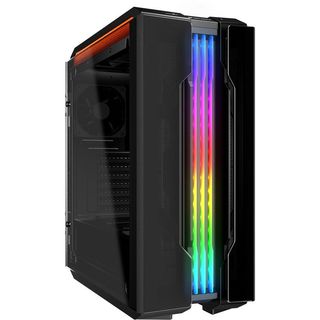
RGB functionality for the Gemini T is controlled via the front-mounted button, motherboard software, or Courgar’s Core Box v2 RGB controller (not included). The RGB button allows for color change and basic RGB effects. For those with ARGB-capable motherboards, the RGB-lit strips on the top and front can be controlled via your motherboard's RGB lighting software via the included adapter cable. The Gemini T is certified for compatibility with Asus Aura Sync, Gigabyte RGB Fusion, MSI Mystic Light Sync, and ASRock Polychrome Sync.


The Gemini T features mounting locations for two 3.5-inch and up to five 2.5-inch (two convertible from 3.5-inch) internal drives. The three stamped-steel 2.5-inch drive caddies are located on the back of the motherboard tray, and the two plastic 3.5 / 2.5 inch drive caddies are mounted under the power supply shroud.
Cooling
There are mounts for up to seven 120mm fans: three in the front, three in the top and one in the rear. The Gemini T also can be outfitted with up to two 140mm fans in the front and top mounting locations. Two 120mm fans can also be installed within holes on the motherboard tray, but doing so prevents the installation of front fans. The chassis ships by default with one 120mm intake fan in the front and a single 120mm exhaust fan in the rear.


As with any chassis that is equipped with a single 120mm intake/exhaust fan, we highly recommend installing a second intake fan or, at the very least, a higher-volume 140mm fan. The two factory-installed fans simply do not provide enough airflow to keep the components in our test system cool. More on that on shortly.
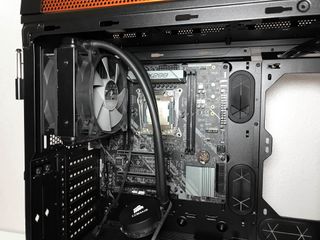
Radiators can be mounted in the rear, top, and front or right side of the chassis. The rear mounting location supports 120mm coolers while the top and front supports radiators up to 240 and 360mm, respectively. The side mount supports radiators up to 240mm, but prevents the use of the front mount. Although a 360mm radiator is an extremely tight fit, installation is possible.


The side mount on the motherboard tray is less than ideal due to the lack of ventilation in the side of the case. If you are going for looks over performance, feel free to mount your all-in-one cooler or radiator in this location. Just expect higher case temperatures as a sacrifice to aesthetics.


Unlike the majority of PSU tunnels we see today, this cover is not a part of the frame and is constructed of plastic. Removing the cover is a simple matter of pushing the side in with your thumbs until the plastic tabs are free of the notches cut into the frame.
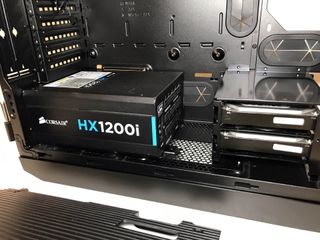
Every power supply we tested, from the smaller EVGA 450 BT, all the way up to larger units like the Corsair HX1200i and the Thermaltake Toughpower 1475W, fit without a problem.
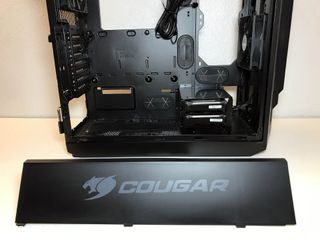
Image Credits: Tom's Hardware
MORE: Best Cases
MORE: All Case Conten
Current page: Hardware Installation and Test Configuration
Prev Page Features and Specifications Next Page Benchmark Results and ConclusionStay On the Cutting Edge: Get the Tom's Hardware Newsletter
Get Tom's Hardware's best news and in-depth reviews, straight to your inbox.