Early Verdict
Excellent build quality and cooling performance with lots of flexibility. One of the best and least expensive ways to get a custom liquid cooling loop.
Pros
- +
Low-cost for a fully customizable liquid cooling loop
- +
Premium copper construction
- +
Excellent CPU socket compatibility
- +
Thinner radiator fits in tighter spaces.
Cons
- -
Pump and radiator limits immediate expandability past a single GPU block
- -
Costlier than a good sealed AIO cooler.
Why you can trust Tom's Hardware
Features & Specifications
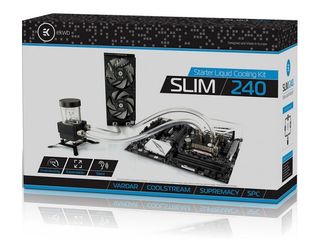
An open loop kit is probably the best way to jump into custom liquid cooling. It means you get everything you need inside one convenient box. No worrying that you forgot one part or another. No fretting that you accidentally got the wrong sized tubing or that your pump won’t work with your reservoir housing. To top it off, kits are usually less expensive than buying all the same parts à la carte.
Last year we saw EK’s Performance line of kits blow away even the best AIO liquid coolers. Today we’re looking at the much cheaper little brother, the Slim 240. At only $200, it’s not much more expensive than a premium AIO and almost half the price of the Performance 280 and 360. If it can keep up with the big boys, we might see our first true value award for liquid cooling.

Specifications
The Slim product line is EK’s lowest-tier kit, offering three different versions based on radiator size. The Slim 240 we're testing uses a dual 120mm radiator. A Slim 120 and Slim 360 are also available. While the Slim kits are the least expensive EK offers, the components inside are the same EK sells individually. These kits use solid copper water blocks and radiators, not cut-rate parts.
Water Block


The Slim kit uses EK’s Supremacy MX water block, the same used in the company's Predator expandable AIO coolers. It features a solid copper cold plate with a mirror polished bottom. The top is clear polymer with a black anodized brushed aluminum cover plate. The two ports up top use the common G1/4 threading for fittings. The manual clearly shows the proper flow direction for the ports, though it’d be better if the block itself were labeled. Instead of the pre-mounted Intel bracket that comes with the Predator and most standalone MX blocks, the Slim 240 includes the EVO’s universal mounting kit, supporting LGA 115X, 2011(-3), 2066, AM3, and AM4 sockets. If you order directly from EK, the company will even throw in additional mounting hardware for AM2 and FM2, or LGA 775 and 1366 for just a penny.
Radiator

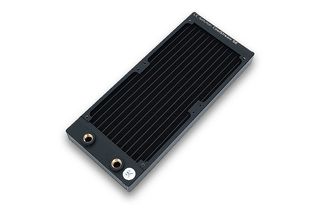
The dual 120mm radiator in the Slim 240 is EK’s SE 240. It uses a solid copper core for both fins and tubes, while the end chambers are brass. The exterior frame is steel and aluminum. Like most loop components available today, it uses G1/4 threads on the two ports at the end. It's worth discussing the radiator’s thickness, or rather thinness. Most basic radiators from other manufacturers are 30mm thick, but the SE 240 is only 25mm thick. While this slightly diminishes the overall surface area for cooling, it does make the radiator a little easier to fit in tight cases. To help make up for this lack of girth, EK stacks the core with 22 fins per inch (FPI).
Fans


You need a capable fan to work with a 22 FPI radiator, and the Vardars included in the Slim 240 kit deliver. These are the F3-120 variant, not the F4-120ER that came with the Predator and Performance kits last year. Both share the same scooped seven-blade design, but the F3 has a lower maximum speed than the F4: 1850 RPM compared to 2200 RPM. It also doesn’t have the extended PWM range that gives the ER variants their name, so the fan can only slow to 50% instead of 25% duty cycle.
Pump


The pump included in the Slim 240 is an SPC 60A with XRES 100 reservoir combo volute. It looks like a DDC variant, and perhaps you can think of it that way. The SPC uses the same basic design as the DDC and the same dimensions. It’s actually compatible with many DDC tops and volutes.
The SPC has two large advantages over the DDC. First, it spins much slower and is therefore much quieter. Second, the slower pump motor draws a maximum of 6W (higher performing DDC and D5 pumps can pull as much as 20W). That means it doesn’t need a direct Molex connector to a power supply. Instead it uses a single 4-pin PWM cable and draws power from the motherboard. Fewer cables in a case is always welcome. Lower power consumption also means lower heat generation, another problem that often plagues DDC pumps.
However, the lower pump speed also means a lower maximum head pressure and flow rate compared to some pumps. The SPC performs roughly on par with slower DDC pumps like the 3.1 series. DDC 3.2 and D5 pumps can produce twice the pressure and flow rate, but only at high speeds where noise becomes a big issue. When run at quieter speeds, these pumps would be closer to 50% more powerful. However, the SPC is practically inaudible even at full speed, meaning you don’t need to choose between performance and quiet operation. If you do want some extra control, the SPC’s PWM range is 20% - 100%.
The XRES 100 reservoir has a volume of 125ml and comes with both an anti-vortex paddle and foam insert. The reservoir tube is acrylic, although the rest of the housing and volute are injection plastic instead of machined POM to save costs. The pump has two G1/4 ports, which are clearly labeled "in" and "out." The kit also comes with a 120mm mounting bracket and vibration dampening feet for the pump.
Tubing & Fittings

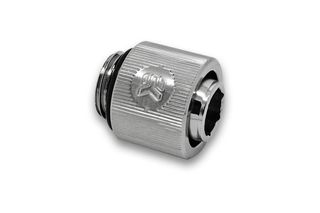
Two meters of EK’s DuraClear 13/10 PVC tubing is included in the kit, all in a single length so you can trim it to your particular needs. Six nickel-plated brass compression fittings are also in the box to secure the lines to the individual components. EK machines their fittings on the inside so a large hex wrench (included) can tighten them in place.
Extras

Apart from the loop components and tubing, EK includes all the other odds and ends you’ll need to quickly and securely set up your cooling loop. A 100 mL bottle of EK's new coolant concentrate, CryoFuel, comes in the box and is enough to mix a full liter of coolant (use only distilled water). You also get a PSU bridge and SATA power adapter for the pump to fill and test your loop without having to power the motherboard and CPU. Two additional cables are also included: a 4-pin splitter cable for the fans and 4-pin extension cable.
Installation
As I wrote in the Performance 360 review, even though kits make it easier to get all the necessary pieces together, it's still far more time consuming to install a custom loop than an AIO. As always, fully rinse out the cooling components with distilled water to remove all traces of the manufacturing process, such as acrylic shavings or loose solder blobs. These can and will get caught in the water block microfins and the radiator tubes, decreasing cooling capacity.
Once everything is clean and reassembled, use the included wrench to firmly affix the fittings to the water block, pump, and radiator, and decide where you want the radiator and pump to be situated in your case. Because the tubing in the kit is a single length, you can cut it to whatever length suits your case the best, allowing you to position the radiator anywhere you want in your case, using the fans as either push, pull, intake, or exhaust. This isn't always an option with AIO coolers.
After you've got the parts arranged, measure and cut the tubing to fit. It's always best to cut the tube a little long and trim again if necessary. Also, don't try to bend the tube too tightly or it will collapse and restrict coolant flow. When ready, slip the fittings' compression rings onto the tube (threads facing the ends) and gently but firmly push the tube lengths onto the fitting barbs on each component. Tighten the compression rings to secure the tube to the components.
MORE: Best CPU Cooling
MORE: How To Choose A CPU Cooler
MORE: All Cooling Content

Google now uses AI to write 25% of its new code — Alphabet CEO Sundar Pichai underlines the company's role in the AI industry amidst strong Q3 24 financials

Chinese mineral restrictions spur Australia to scavenge waste for new sources of chipmaking materials — country turns to mining waste for rare earths

Supermicro's stock plummets 35% in one day as accounting firm resigns — storm brews after DOJ probe into manipulated finances
-
Krazie_Ivan i'm a bit surprised *future maintenance* isn't really noted/considered as a big selling point for these "Kits" or the "Expandable" AIO's.Reply
if a pump goes out on one of the popular closed-loop Asetek units, or you just happen to own it long enough (migrating over to a new platform upgrade) that it needs topped-off... you've got to recycle the whole thing & purchase another $90-$120 unit. whereas the Eisbaer pump is $24 on Amazon, allowing you to keep the majority of your $140-$160 cooling investment.
cars, bikes, homes, PCs... i don't mind working on & fixing stuff, so maybe it's just me? -
10tacle Excellent review. I first heard about EK's products from Frostytech. While they are more expensive than the closed loop AIO coolers, they also out perform them. EK was very smart in targeting the aggressive open loop overclocking target market builder who doesn't want the hassle of designing and customizing a ground up open cooler build buying every single component separately.Reply
20397876 said:i'm a bit surprised *future maintenance* isn't really noted/considered as a big selling point for these "Kits" or the "Expandable" AIO's. if a pump goes out on one of the popular closed-loop Asetek units, or you just happen to own it long enough (migrating over to a new platform upgrade) that it needs topped-off... you've got to recycle the whole thing & purchase another $90-$120 unit.
Honestly, that's the only thing that has kept me away from water cooling as an aggressive overclocker. My Noctua NH-D14s have given me cooling solutions through five different builds in eight years and they never missed a beat and keep on cooling.
-
ddferrari Liquid cooling looks sharp, but I see no reason for me to attempt it for my CPU. I'm still working with an i5-3570K until my next build, overclocked to a decent 4.4Ghz and it rarely cracks 70°C with my Hyper Master 212 ($30). My 1080 Ti, however, could use liquid cooling. I still manage to keep it under 70°C gaming, so even that isn't critical for me.Reply
Even at $200, this seems overpriced to me. Decent fans can be had for $10 each, then they're slapped on a radiator. A plastic-y little pump can't cost much, and then tubing- plus the CPU mount. I see about $40 mfr cost to make the whole kit. They could probably sell this for $99 and still make a good profit after packaging and distribution.
I know liquid cooling systems are 99.9% safe if done correctly, but I still have hesitations about having liquid in my expensive setup. Maybe my next build in a few years... -
photonboy DDFERRARI,Reply
Pascal doesn't even start throttling until into the low 80degC's so it would be POINTLESS to liquid cool your GTX1080Ti. -
ddferrari Thanks, that's what I thought! My case has filters at both the two front intake fans and the side fan, and I make a point to take the case outside every three months and blow all the dust out of it. I think that's the key to holding temps in check. Liquid cooling does look cool, but I'm not really going around showing off my system anyway.Reply
I've got the Gigabyte Aorus 1080 Ti Xtreme (man that's a mouthful) and they have always done well with their Windforce coolers.
