How To Enable Bluetooth in Windows 10
In today’s world of connectivity and IoT, Bluetooth plays an important role in attaching to those devices without cumbersome and limiting cables. Devices such as your smartphone, speakers and wireless headphones all connect through Bluetooth. Connecting to such devices is typically easy and starts by pressing a button to pair the devices. In a best-case scenario, your device pairs and voila, the magic begins!
However, sometimes, you run into trouble. While procedures for troubleshooting devices that won’t connect vary by product, a basic requirement for all of these items is to have Bluetooth enabled in the first place. This article covers two easy ways to enable Bluetooth on your PC when using Windows 10 (Version 1809, OS build 17763.437).
But before we get into how to enable it in Windows, you need working Bluetooth hardware. If you don't have built-in Bluetooth, you'll need to attach a USB dongle.

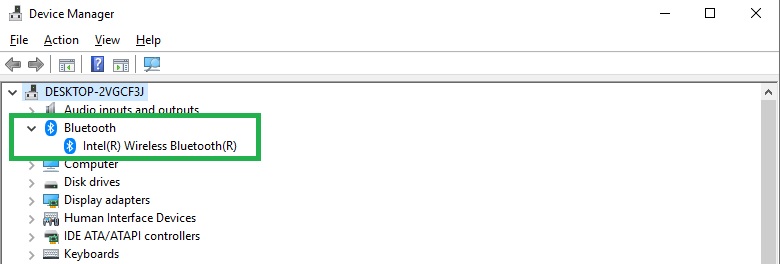
However, If your computer has a Bluetooth radio built-in, it needs to be turned on in the BIOS as well as in the device manager. Once it is enabled in the BIOS, Windows will be able to manipulate your Bluetooth features and any paired devices. Below is a screenshot (see how to take screenshots in Windows) of an Asus X299 UEFI showing Bluetooth enabled as well as what it looks like enabled in the device manager. These should be enabled by default, but that’s not always the case.
Action Center
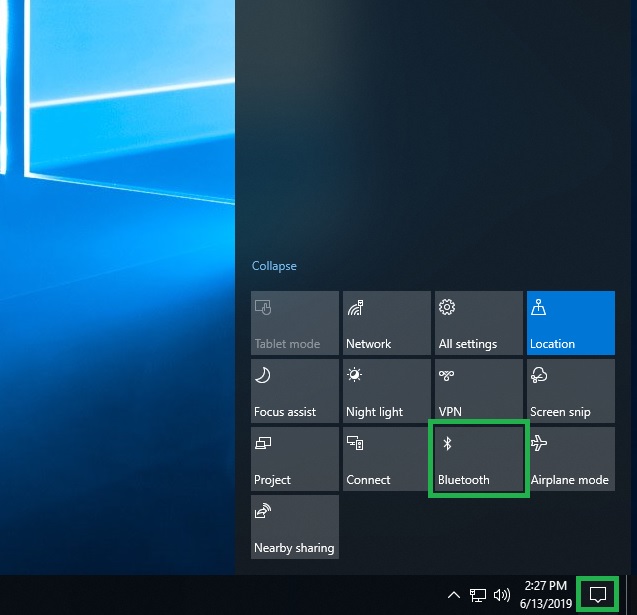
The first, and arguably the easiest method of switching on Bluetooth, is to use the Action Center. If you do not know what that is, look for the message icon in the bottom right corner of your screen.
1. Open the Access Center by hovering over the message icon and clicking once. A menu should slide out from the right side of the screen and look similar to what you see below, although you may have to also hit Expand to get the Bluetooth button to show up. In this image, Bluetooth is off and the box grey. If Bluetooth isn’t pictured here, be sure it was enabled in the BIOS and the list below expanded to see all the tiles.
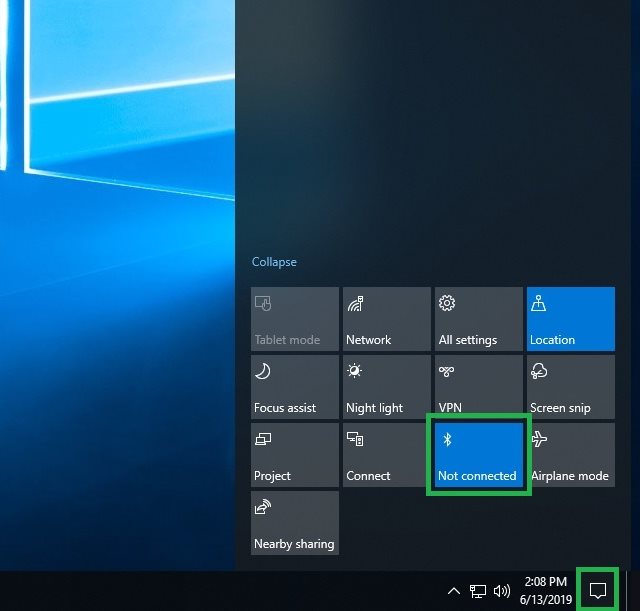
2. Click the Bluetooth tile and it should turn blue when it is enabled (it also says “On” but returns to the symbol quickly). The “Not connected” message in the tile is letting us know a device is not connected.
Stay On the Cutting Edge: Get the Tom's Hardware Newsletter
Get Tom's Hardware's best news and in-depth reviews, straight to your inbox.
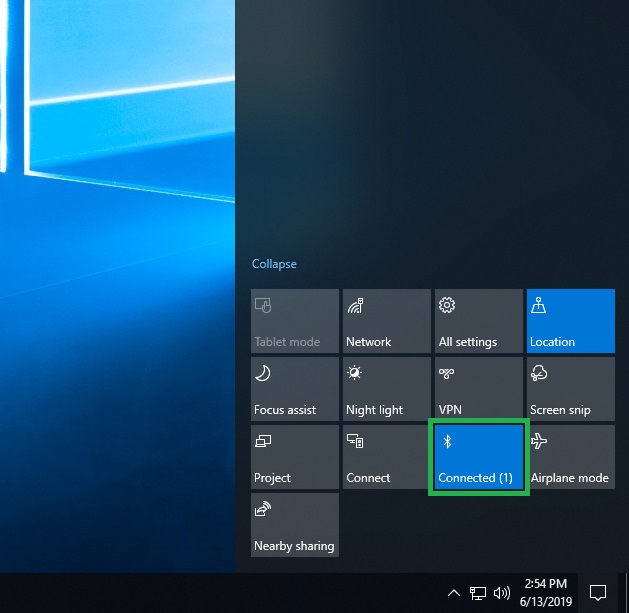
Once a device is paired with the PC, the bottom of the tile displays Connected (1) where the number in parenthesis is the total number of devices connected.
Enable Bluetooth Using Settings
Another way to enable Bluetooth is via the Windows settings menu. The difference here is simply taking a couple more steps. But the Bluetooth screen here has more information and is one location where you are able to pair devices.
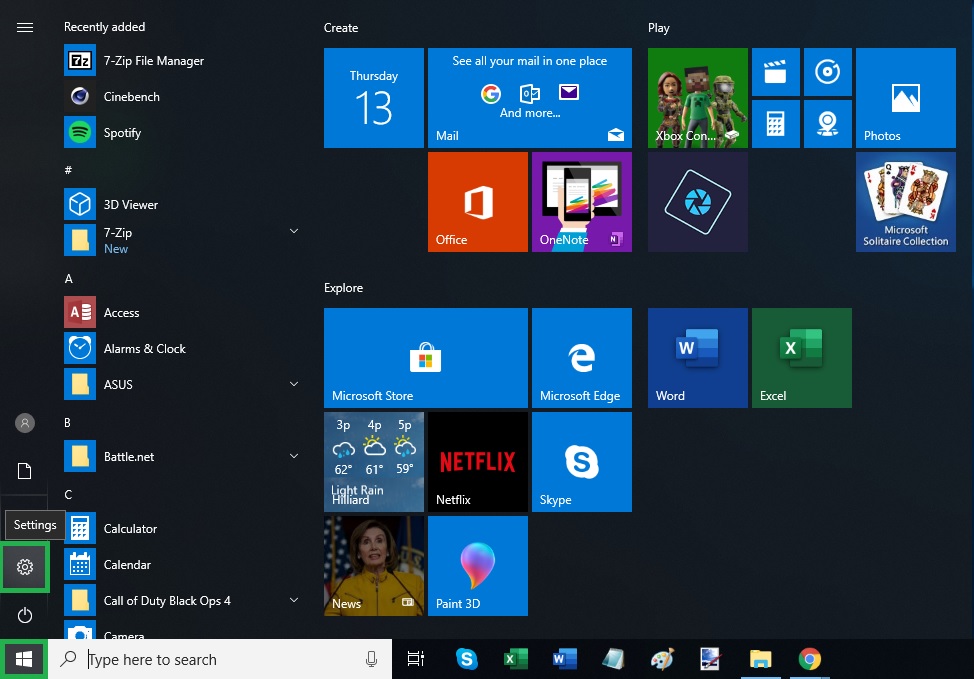
1. Navigate to settings. You can get there by clicking the gear icon in the Start menu.
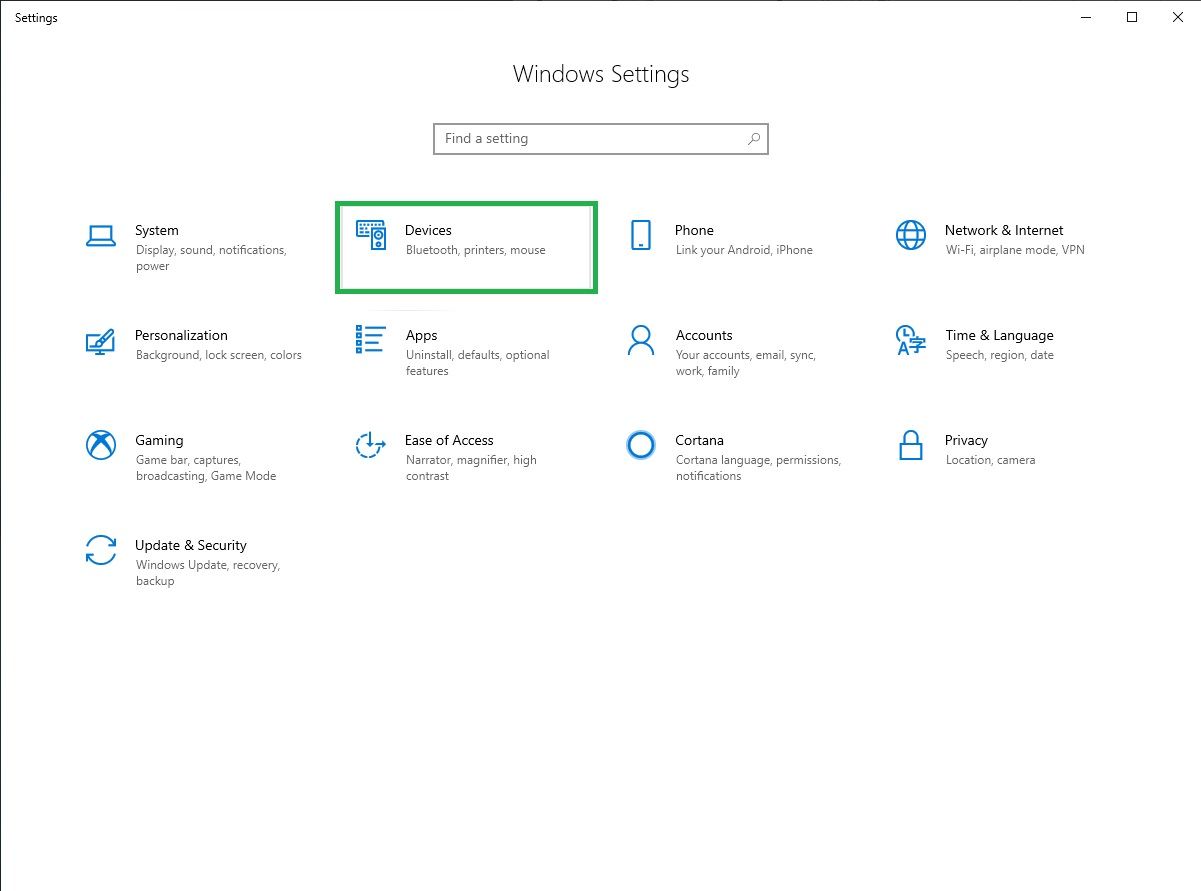
2. Click on Devices.
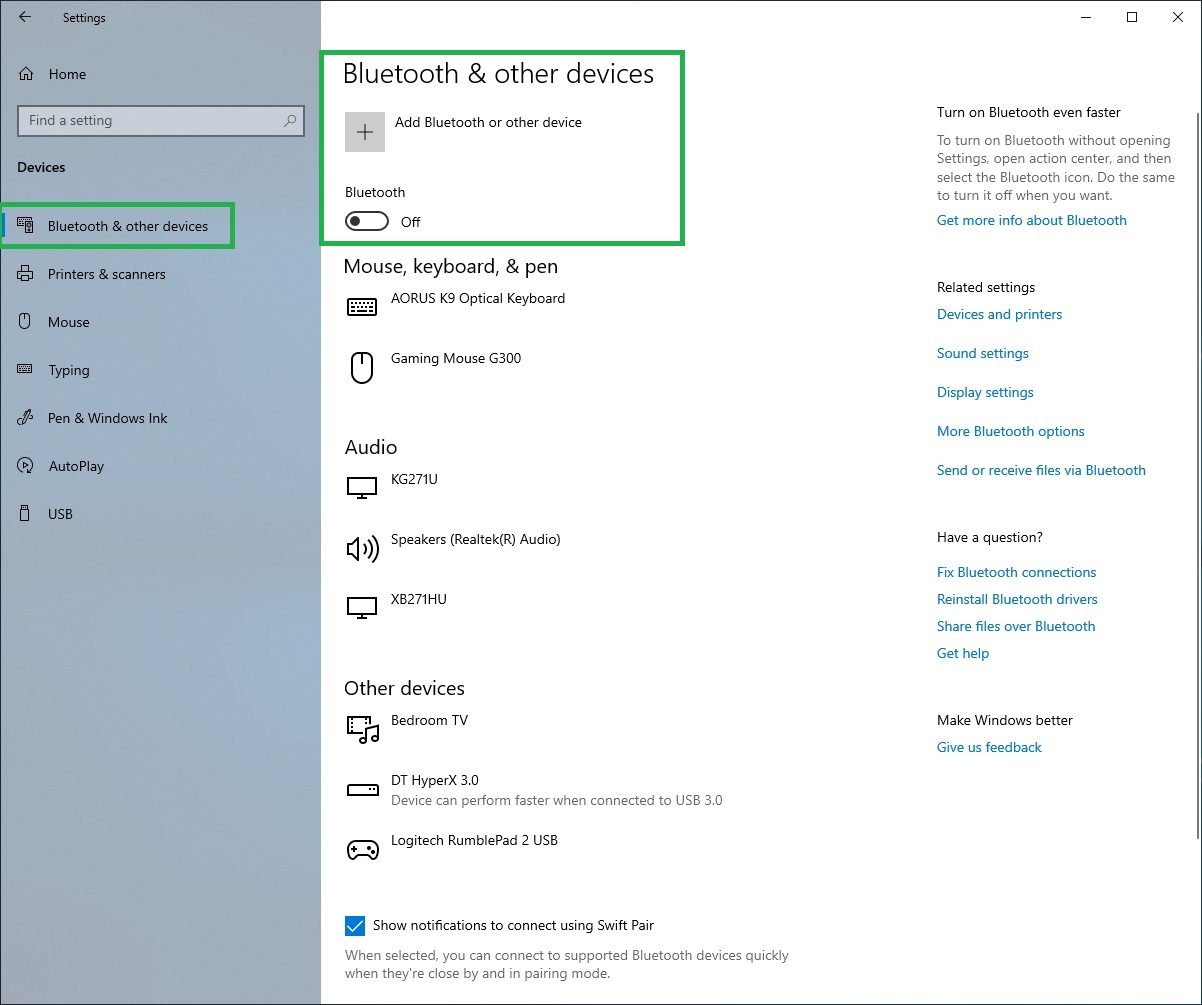
3. Select “Bluetooth & other devices” if you don't already see it selected.
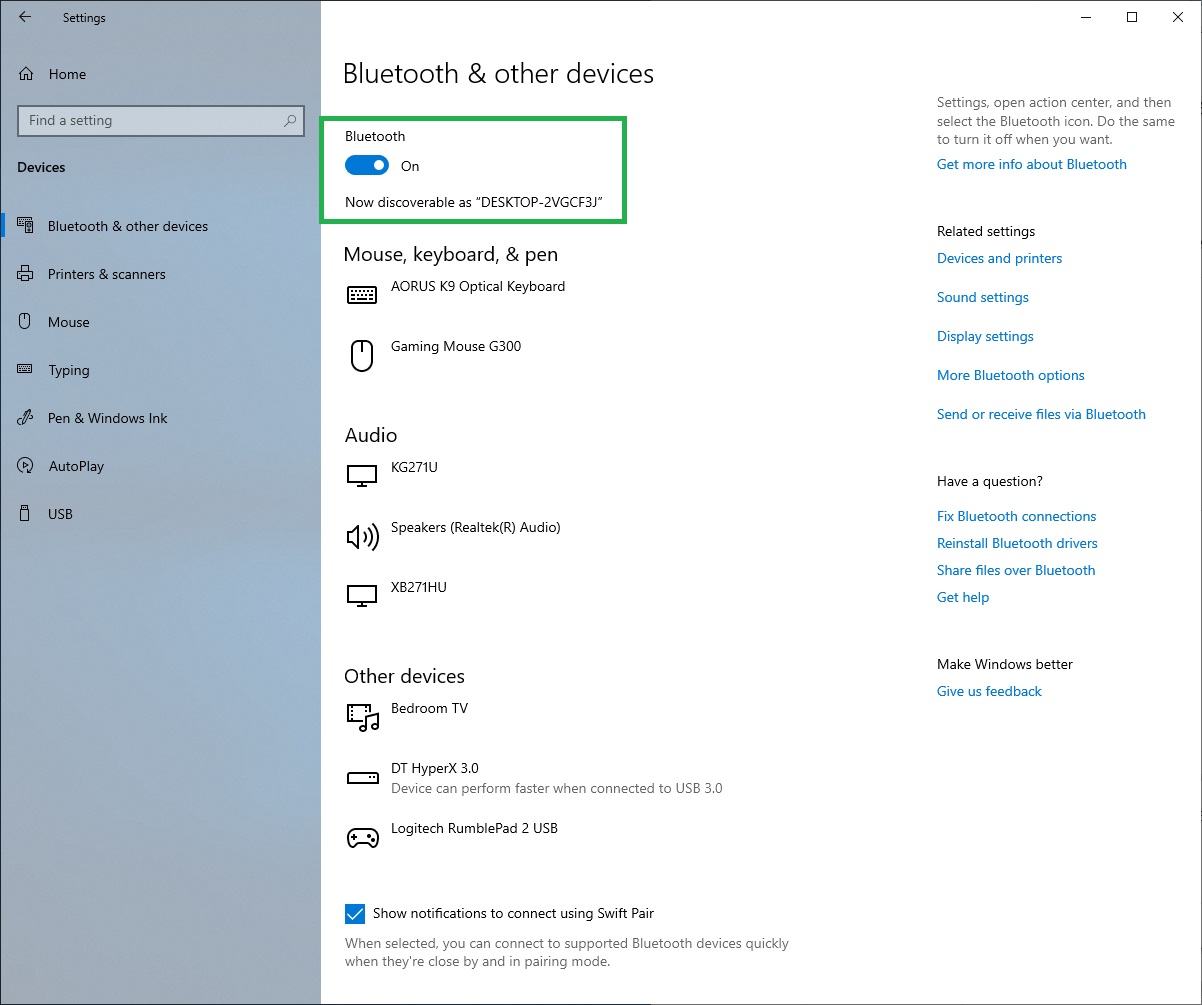
4. Toggle on Bluetooth. Once enabled, your desktop should now be discoverable and list the desktop name.
As for which method is better, the answer depends on what you are trying to do. If your devices are already set up and paired, turning it on through the Action Center seems prudent and would save some time versus the other method.
That said, if you need to pair a new device, you may want to go the Bluetooth settings, although you can get to the same settings menu via the first method, simply by right-clicking on the Bluetooth tile once it’s enabled and selecting “Go to Settings.”
Image Credits: Tom's Hardware

Joe Shields is a Freelance writer for Tom’s Hardware US. He reviews motherboards.