Tom's Hardware Verdict
An Ender competitor that’s easy to set up, but needs to focus on quality control first.
Pros
- +
Easy to assemble
- +
Small footprint
- +
Direct Drive
- +
Touch Screen
- +
Silent stepper motors
Cons
- -
Manual leveling
- -
Quality control issues
- -
Menu is repetitive and unorganized
- -
Noisy Fan
Why you can trust Tom's Hardware
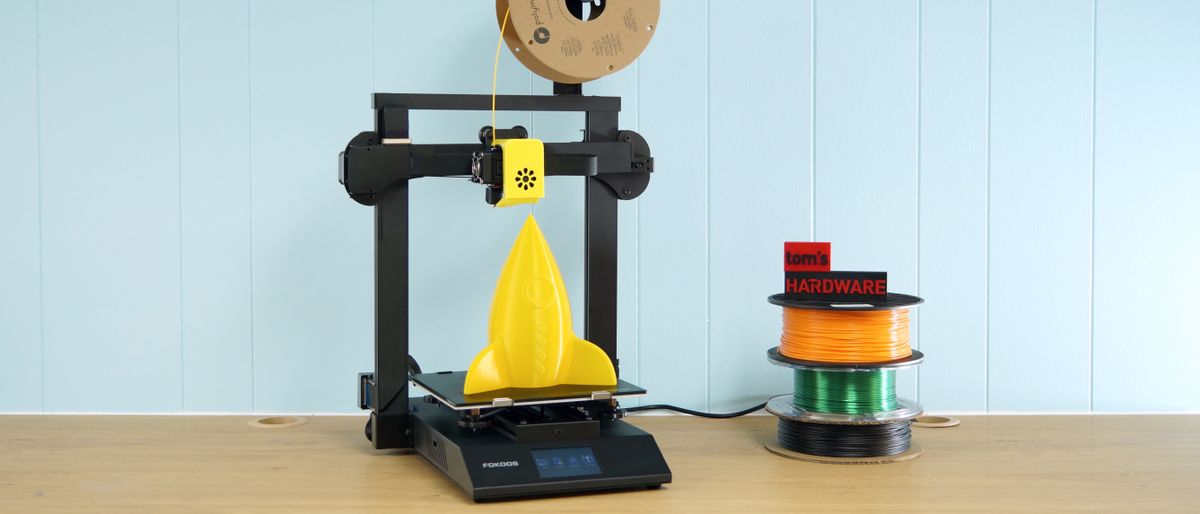
The Fokoos Odin 5 got an early reputation as “that folding printer” as it made its way around the usual YouTube influencers. And it does indeed fold, but more for ease of assembly than portability. It’s a flashy machine aimed at new users and comes with a direct drive, volcano style hotend and coated glass bed that grabs when hot and releases when cool.
Retailing around $350 (currently on sale for $290 at the Fokoos website), the Fokoos Odin 5’s best feature is its painless assembly. You simply slide it out of the box, unfold and tighten a few screws.
The printer is clearly an Ender 3 competitor, but without full auto bed leveling, it lands somewhere shy of the Ender 3 S1 in terms of features. It also lacks the Creality ecosystem, which means further upgrades to this printer may be limited.
The Fokoos Odin 5 is the first, and currently only, 3D printer created by Fokoos. The company also makes a laser engraver, and there are rumors of a larger Fokoos coming in the near future. The company’s inexperience may explain some quality control issues that keep it from competing with the best 3D printers, but its enthusiasm to help customers is honestly refreshing.
I ran into a couple issues reviewing the Fokoos Odin 5. First, the machine arrived damaged, with three of its V-Slot wheels in pieces. Whether this was shipping damage or poor assembly is impossible to know. The second issue is a spool holder that’s way too narrow, and the third involves a nozzle stuck on so tight it felt welded. All the issues were fixed during testing, and we’ll go over the details later on.
Specifications: Fokoos Odin 5
| Machine Footprint | 410 x 421 x 450mm (16 x 16.5 x 17.75 inches) |
| Build Volume | 235 x 235 x 250mm (9.25 9.25 x 9.84 inches) |
| Material | PLA/PETG/TPU/ABS |
| Extruder Type | Direct Drive |
| Nozzle | .4mm (Interchangeable) |
| Build Platform | Coated Glass on a heated bed |
| Filament Runout Sensor | yes |
| Bed Leveling | Manual, assisted |
| Connectivity | Micro SD, USB 2.0 |
| Interface | Touch screen |
Fokoos Odin 5: Included in the box
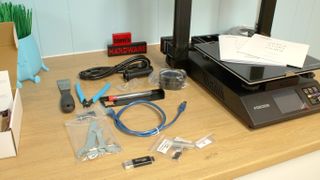
The Fokoos Odin 5 comes with everything you need to get your printer set up. You get tools to build and maintain the printer, side cutters, a metal scraper, a nozzle cleaner, two spare nozzles, a USB cord, and a microSD card with a USB adapter. There’s also a small spool of white PLA to print your first model, a PDF copy of the manual, a copy of Fokoos Slicer and models in both .gcode and .stl format.
Design of the Fokoos Odin 5
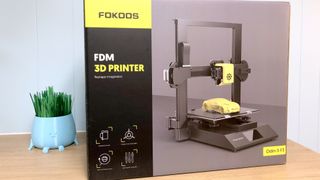
Any discussion on the Fokoos Odin 5’s design has to start with the box. It comes in colorful packaging that would look at home at Target next to the robot vacuum cleaners. The machine inside is equally slick, with a smooth all metal build and ribbon cables for wiring.
If you don’t like the bright yellow fan cover, the microSD card comes preloaded with a different one you can print.
The printer has dual Z rods for extra stability, and a direct drive with a filament runout sensor. Loading and unloading the filament is best handled through the touch screen – there is a tension release button for manual loading, but it is difficult to press. It’s not even mentioned in the manual, and I would have missed it entirely if not for a helpful Facebook user.
The coated glass bed is held down with four slender clips and does a wonderful job of gripping when hot and releasing with just a nudge when cool.
The full color touch screen controls look very nice, but are not intuitive. For example, there are three places where you can advance the filament: Autoload on the Home screen, plus Extrusion and Filament on the Tool screen. Autoload and Extrusion functions only work if the machine is pre-heated – you can actually hear the gears grinding as they try to push cold filament. The Filament function is programmed to preheat the plastic first, and it’s baffling that this step was overlooked on the other two, nearly identical functions.
A temperature gauge is only available on the Preheat menu and while you’re printing – it’s not located on the Home screen, so you can’t tell at a glance if the machine is warmed up yet.
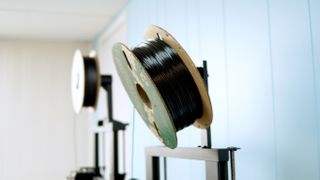
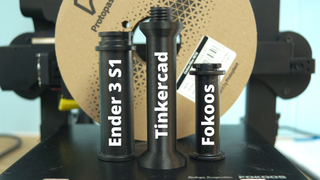
One serious flaw is the spool holder, which is too narrow to hold most of the filament in my stash. Even 500g cardboard spools from Protopasta fit too tightly, and many other brands of filament hang precariously over the print bed. Of course, this is a problem you can fix by printing a new spool holder, which I did after modifying a design I found on Thingiverse. I uploaded my version to Printables.com if you would like to print your own for free.
Quality control seems to be an issue with Fokoos. My printer arrived with three damaged V-Slot wheels completely separated from their bearings. The machine was DOA. Customer support is very helpful, but with the time zone difference it took two days to explain that the wheels were indeed unusable, and another eight to receive replacements.
It’s hard to say if the wheels were bad from the factory or damaged in shipping, but I did find another Fokoos user on Facebook who suffered a similar problem.
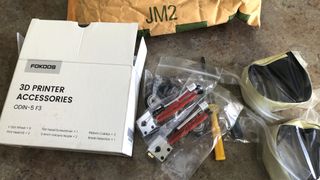
Fokoos doesn’t sell individual replacement parts, but instead offers an “accessories” kit full of parts that see wear over the life of a printer. The kit is only $30, and it’s advisable for any new Fokoos customer to order it before they need it. The kit contains 6 wheels, 2 ribbon cables, 1 run out sensor and 2 Print Head Kits. The print head kit is the complete hotend including a pre-installed nozzle.
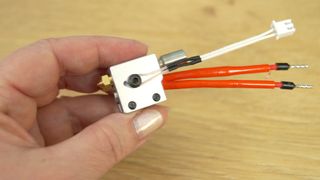
I’m glad that I had the accessories kit, because after a few weeks of printing various materials, the Fokoos Odin 5 got a clog I wasn’t able to flush out with cleaning filament. Changing the nozzle is a reliable clog fix, however this nozzle was quite firmly stuck. After a lot of heat and a lot of swearing, the nozzle broke free. Then I couldn’t get the spare nozzle screwed in all the way – I suspect the heat block is poorly threaded. Since I had two complete print head kits, I went ahead and used one. The print head kit is amazingly easy to install – just one screw and three leads to plug in.
I checked with the Fokoos Facebook group and found that many other users had the same problem with their first nozzle change, making us wonder if the factory used thread lock on the nozzles. No one reported problems after installing a Fokoos replacement printhead kit.
Assembling the Fokoos Odin 5
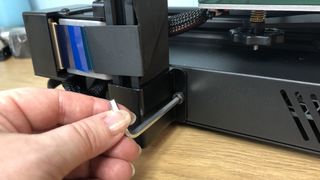
The Fokoos Odin 5 is 99% pre-assembled and only needs four screws to complete, plus two more to attach the spool holder. Simply unfold the printer, put the gantry at a 90-degree angle to the base and tighten the screws.
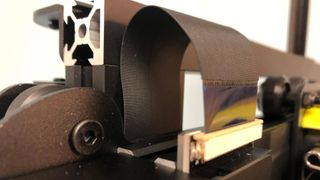
There are two ribbon cables to connect for the electronics.
Finally, check for loose wheels and belts. Instead of knobs to adjust the belts, there are screws, which is a much cleaner look. The wheels on the X and Y axis have wheels that can be adjusted with eccentric nuts, however the Z axis is not adjustable.
Leveling the Fokoos Odin 5
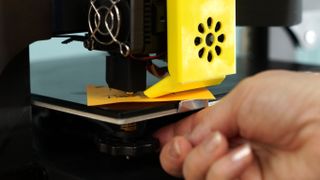
The Fokoos Odin 5 has assisted manual leveling, which means the printer will move the print head around the bed while you turn the adjustment knobs.
To level (or tram) the print surface, press the Home button to reset the machine’s zero point. Then select the Leveling button on the home screen. Select any of the four corner points to begin. Slide a piece of ordinary paper between the nozzle and the bed and adjust the knobs until the paper just catches on the nozzle.
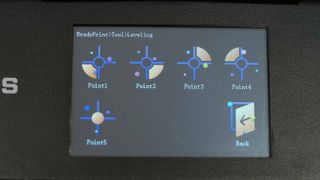
Select the center point last. If it is too close or too far you’ll need to make adjustments at the corner points. See our article on how to manually level a 3D printer bed for more details.
Preparing Files / Software for Fokoos Odin 5
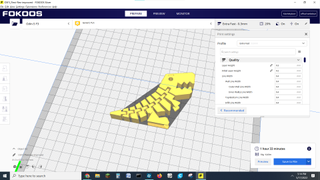
The Fokoos Odin 5 comes with a copy of Fokoos Slicer. You can also use Cura and PrusaSlicer, which are both popular programs available for free download.
Neither Cura nor PrusaSlicer have a profile for the Fokoos Odin 5 yet. However, I’ve found it works perfectly using an Ender 3 profile.
If you want to generate thumbnails of your prints, you’ll need to install an extension from the Cura Marketplace. Fokoos Slicer has Cura under the hood, so this is needed for both slicers. PrusaSlicer doesn’t have the ability to add extensions.
Go to Marketplace in the upper right corner of Cura or Fokoos Slicer. Click Community Plugins. Select MKS Wifi Plugin. Sadly, this doesn’t give your printer WiFi without buying another piece of hardware. Reboot Cura, then select Manage Printers and enable the MKS plugin. Under preview, select Enable Previews. Use “default” for the printer, set Simage to 100 and Gimage to 200.
Printing on the Fokoos Odin 5
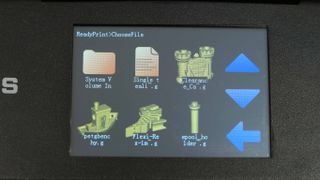
The Fokoos Odin 5 comes with a few familiar sample prints on the microSD card: a lucky cat, a few owls, Pikachu and a Benchy. I printed the Benchy with the sample roll and it turned out perfect.
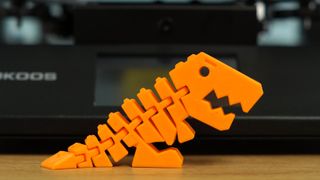
Next is a Flexi Rex in Printerior Orange PLA at a .2mm layer height. The top is a tiny bit rough, but his joints are strong.
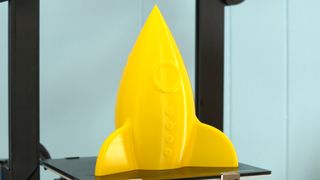
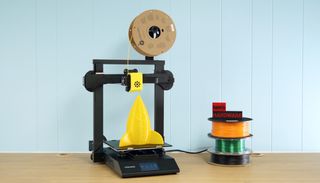
This huge vase mode rocket by De Jennes is printed in Polymaker PolyLite yellow PLA. By increasing the line width to .64mm and decreasing the layer height to .16mm there are no gaps in the print.
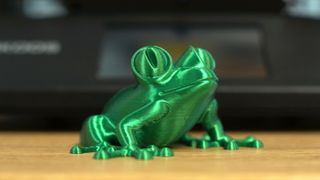
I was impressed by the clean lines on this no support frog, printed at .2mm layer height with Polyalchemy Elixir green silk PLA.
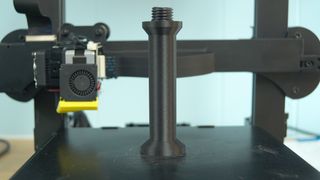
It handled PETG like a champ when I printed a replacement spool holder. Printed in Protopasta Carbon Fiber PETG, with a .2mm layer height. File by Denise Bertacchi.
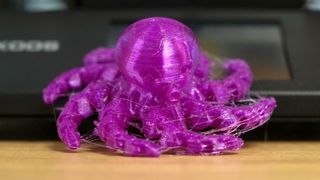
TPU was a bit stringy, but it has been rather humid around here. The strings will definitely clean up. Matterhackers Build TPU in translucence purple, printed at .2mm layer height. Cute Octopus by McGybeer.
Bottom Line
Fokoos Odin 5 has a lot of potential as a starter 3D printer, but falls a bit short. The direct drive and coated glass bed surface makes printing easy, and the folding assembly solves a huge pain point for novice makers. The print quality on this machine is definitely good, but I did have problems getting some materials to stick.
The Odin 5 would be better if it also included full auto bed leveling, something that’s becoming more common in hobby printers. The too-narrow spool holder and over tightened nozzle are problems that engineers should have spotted before the machines left the building. And perhaps the engineers are aware of it, since the replacement hotends are unaffected.
If you're interested in a great printer for beginners, I’d recommend the Anycubic Kobra, which has direct drive, auto bed leveling and an easy to use flex plate for a few bucks less. If you’re looking for a reliable starter machine for half the price, check out the Ender 2 Pro.

Denise Bertacchi is a Contributing Writer for Tom’s Hardware US, covering 3D printing. Denise has been crafting with PCs since she discovered Print Shop had clip art on her Apple IIe. She’s been a freelance newspaper reporter, online columnist and craft blogger with an eye for kid’s STEM activities. She got hooked on 3D printing after her son made a tiny Tinkercad Jeep for a school science project. Excited to learn more, she got a Creality CR10s and hasn’t looked back. She loves reviewing 3D printers because she can mix all her passions: printing, photography and writing. When she’s not modding her Ender 3 Pro or stirring glitter into a batch of resin, you’ll find her at the latest superhero movie with her husband and two sons.
CrystalMark Retro 2.0.0 brings retro benchmarking to systems from Windows 95 to Windows 11
Gigabyte GS27QXA 27-inch 240 Hz QHD IPS gaming monitor review: Serious value and high performance
Game developers urge Nvidia RTX 30 and 40 series owners rollback to December 2024 driver after recent RTX 50-centric release issues
