Tom's Hardware Verdict
This premium, portable laser can cut and engrave most materials thanks to its dual Diode and IR lasers, but it's limited by its small size and gaps in the protective shield.
Pros
- +
Both IR and Diode lasers
- +
Live Preview
- +
Fast
- +
Portable
Cons
- -
Limited cutting area
- -
Air assist unavailable
- -
Gap in the protective shield
Why you can trust Tom's Hardware
The LaserPecker LP4 is a small laser cutter and engraver that works on nearly any material, but really shines as an all-purpose engraver for etching wood, stone and metal. The machine is advertised as portable, but a gap in the protective shielding means anyone in the viewing area must wear safety glasses, therefore it cannot be operated in public spaces. If you want to use the LaserPecker at craft fairs or around family and pets, you’ll need to buy the optional full enclosure that currently goes for $159.
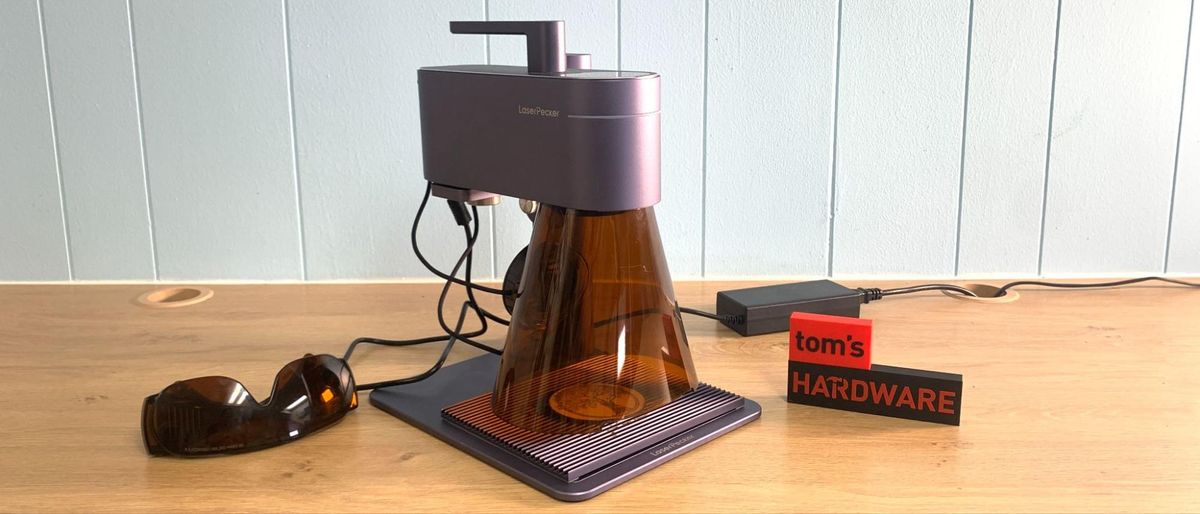
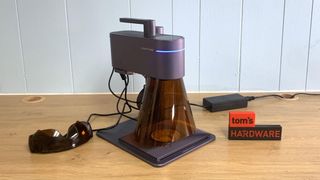
The laser has an interesting appearance, like a piece of lab equipment wearing a pet’s orange cone of shame. But in this case, the cone is your main eye protection. The cone is fitted with a case fan to blow smoke and fumes away from the working area, but still into the room. The vent does a great job blowing the odor away from the user, but you’ll still want to provide your own additional ventilation.
The LaserPecker LP4 is equipped with both a 2-watt Infrared laser for engraving metal and plastic, and a 10 watt blue Diode laser to cut soft woods up to 8mm thick and dark acrylic up to 5mm. Swapping between the two lasers is done in the software, so there’s no machinery to dismantle between projects. Unlike larger open frame lasers, the LaserPecker’s head remains in one place and the beam is directed around your project with fast moving mirrors.
The software provided by LaserPecker is missing presets for cutting through materials, so you’ll need to run your own tests. Presets for engraving are spot on and once you get to know the laser, the results are quite good.
Retailing at $1999, and currently on sale for $1559, the LaserPecker LP4 costs more than many larger open frame lasers. But is paying for portability worth the cost?
Specifications: LaserPecker LP4
| Machine Footprint | 260.5 x 218 x 283.5 mm (10.25 x8.6 x 11.1inches) |
| Engraving Size | 120 x 160mm (4.72 x 6.3 inches) |
| Material | Cardboard, wood, leather, stone, metal, acrylic, plastic |
| Laser Type | Blue Diode and Infrared |
| Laser Power | 10w and 2w |
| Laser Wave Length | 450 nm Diode and 1064nm Infrared |
| Engraving Accuracy | .003 mm |
| Cutting Platform | Included (flat and grid) |
| Connectivity | USB, Wireless Bluetooth, Mobile |
| Interface | Touch Screen |
LaserPecker LP4 : Included in the Box
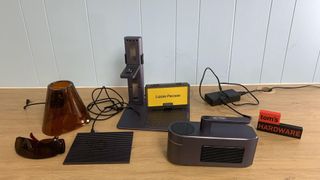
The LaserPecker LP4 comes with everything you need to assemble the laser, a pair of laser safety glasses and a shield. You also get a few small samples of wood and metal business cards.
Design of the LaserPecker LP4
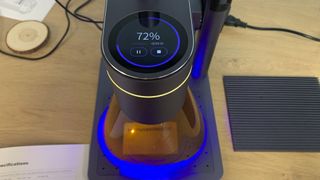
The LaserPecker LP4 is a compact, portable laser that looks like a sophisticated laboratory tool. It has a premium feel to it, with brushed metal surfaces and tangle free cords wrapped in fabric.
Unlike large flatbed machines, the LaserPecker is a Galvo laser, where the laser stays in one spot and the beam is moved across the work surface rapidly with a set of mirrors. This is the same motion system seen in laser light shows.
The LaserPecker LP4 has both computer software and a mobile app to operate it, and both are free to download. The mobile app duplicates all the functions of the computer software, so you don’t need to be tethered to a laptop if you have the app installed. An optional Bluetooth dongle is available for remote operation from a computer.
The LaserPecker has a touch screen display on the top of the machine. This allows you to turn the machine on and off, select preloaded files from memory, select diode or IR laser, focus the laser and turn on the preview, all without a computer or mobile device. It also provides feedback, so you know when it’s receiving files from your phone or computer, and displays a handy count-down timer.
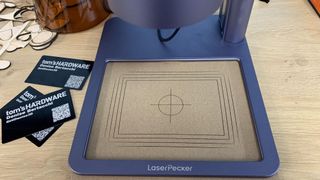
The flat baseplate has holes for screw mounted material holders – these holes go completely through the plate & should not be used for cutting. A grill with a solid bottom is provided for cutting, which provides much needed air flow for cleaner edges. The bottom plate is also removable, so you can place the laser on a large object for engraving.
The laser module can tilt on the stand to engrave large objects placed next to it. It can also be completely removed from the stand and used freehand.
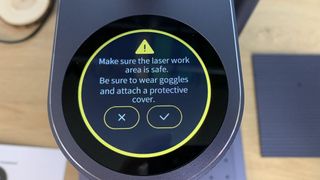
The laser is hooded with a detachable cone for safety, but there’s a gap at the bottom, so you’ll still want to wear the safety goggles provided.
Focusing the laser is very easy. When you click “preview,” in the design software, you’ll get two red dots from the laser. Position your material under the dots and raise or lower the laser until the red dots combine into one. There’s also a “live preview” box that projects a blue rectangle that represents the artwork to help get everything in the right spot.
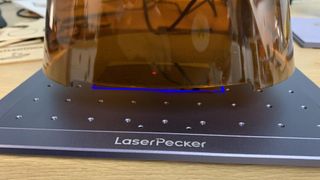
The cone proved to be quite frustrating. When it’s attached to the laser, there’s not enough space for your fingers to get under it – but more than enough gap for harmful laser light to escape. Also, there’s not enough clearance to slide the cone in place when materials are on the work plate.
To top it off, the color of the cone completely blocks the blue light used to preview designs, so you can’t even see it when the cone is on. This means you need to place your material on the work surface, lower the head until the laser is focused, adjust the live preview, raise the laser head, put the cone on, then lower the head until it’s focused again. The red dots are visible through the cone, but somewhat distorted. As you still need to wear safety glasses due to that small gap, I found myself leaving the hood off and trusting my overhead room ventilation to do its job.
Assembling the LaserPecker LP4
I assembled the LaserPecker 4 in under 10 minutes – it's just a matter of a few screws and USB cords.
Safety Precautions for the LaserPecker LP4
The LaserPecker LP4 is a Class 4 laser that can damage your eyes and burn skin. It also produces smoke and fumes while engraving or cutting materials. You must take precautions to operate the machine safely. Use this and any other laser at your own risk.
The machine is equipped with a safety cone over the laser module that covers the working surface. An emergency panic button on the top of the machine will halt operation. You can set the machine to turn off when the cover is removed, but this is not on by default. Another sensor detects high temperatures and can shut off the laser to avoid fires. An exhaust fan removes smoke from the laser area to improve performance and the environment. A tilt detector will shut off the laser if it tilts during operation.
There is a slight gap between the shield and the material. Because of this gap, you must always wear safety glasses for extra protection. A pair is provided with the machine.
The optional enclosure is well worth the extra cost, as it completely seals the laser from view. It also helps control smoke emitted from the materials that you’re burning.
Prevent pets and other people from observing the laser while in use. Since the laser is literally burning material, never allow it to operate unattended and have a fire extinguisher handy just in case.
This is a portable laser, which means you can use it freehand if you take appropriate care.
Some materials should not be burned with a laser due to their chemical makeup – they could melt, catch fire or produce toxic fumes. Dallas Maker Space has published a list of safe and hazardous materials to use with their laser. The list of no-nos includes plastics, fiberglass and certain foams.
The laser lens can get dirty from smoke and fumes. You will need to wipe it clean – while unplugged – before each laser session. If it’s allowed to become dirty, the laser will lose some of its capability.
Software for LaserPecker LP4
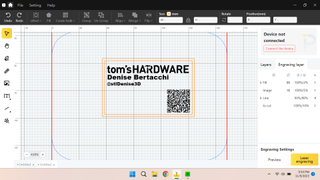
LaserPecker has its own software suite and a mobile app called LaserPecker Design Space. It’s also compatible with premium LightBurn software.
Design Space is very complete and a good starting point for learning how to use the laser. Directions are sparse, so you may need to search YouTube for help on using both Design Space and the laser.
The computer and mobile app are independent of each other – in fact, the laser can only talk to one at a time. I had to unplug the USB cord from the laptop in order to test out the mobile app. Directions for both are limited to information on setting up the software and how to draw with it. There’s very little guidance when it comes to using the laser, and no explanation of how to actually cut materials. You will need to carry out your own experiments on scrap materials, then write those settings down in a note because there’s no way to save them in the software.
Otherwise, the default settings for engraving are very good and the software can handle a lot of basic design work. I was able to pull in clip art, draw shapes, use a wide range of fonts and curve text. While using the mobile app I was able to snap a photo and immediately turn it into an engraving.
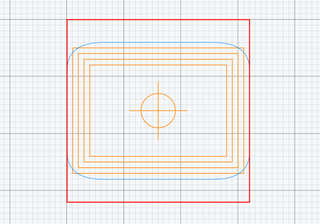
My only real issue with LaserPecker’s Design Space is the grid, which is not aligned with the machine. I could find no way to adjust the grid to have it make sense. For example, these boxes are centered on the work surface. Anyone with OCD will have a hard time using this software.
I used LaserPecker Design Space and the provided clip art for testing.
Engraving / Cutting with the LaserPecker LP4
The ability to cut or engrave materials is determined by the speed and power settings of the laser. The LaserPecker LP4 has a medium power, 10-watt diode laser that can cut through thin wood up to 8mm according to the manufacturer. I found that it struggled cutting 3mm wood without charring it to bits. This machine’s best use is for engraving.

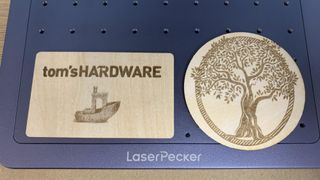
The diode laser did a great job of engraving, including this screen grab of the Tom’s Hardware logo and a photograph of a Benchy. All editing was done in LaserPecker’s Design Space. The tree graphic was from a collection of clip art that comes with the laser. These were done with the laser’s default setting for Beech and look very crisp and even.
The rectangle was a precut sample, but the circle was cut by the LaserPecker from a larger sheet of 2mm plywood. There are no directions for how to slice through material, so it took some experimentation. This cut was made with four passes at 90% power and a depth of 40%.
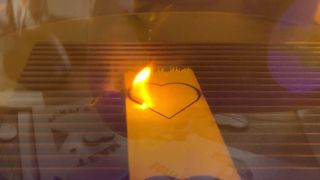
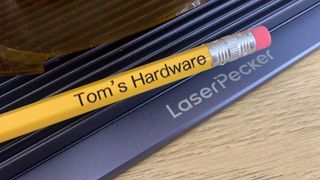
The live preview makes it easy to put the laser exactly where you need it. I was able to etch this pencil using the mobile app using the diode laser on the default Beech setting. It only took about 15 seconds.
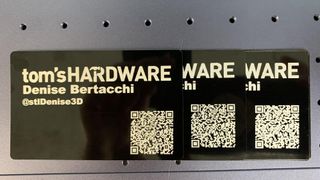
The LaserPecker came with five aluminum alloy business cards for testing. I used a screen grab of the Tom’s Hardware logo and LaserPecker’s design suite for the text and QR code. This is where the 1K to 8K settings are needed.
At 1K, the infrared laser barely etched the metal and the QR code was unusable. 2K produced perfect text and a workable QR code in just 2 minutes and 35 seconds. 4K and 8K only showed improvements in the QR code, but took more time: twice as long for 4k and over 8 minutes for 8K.
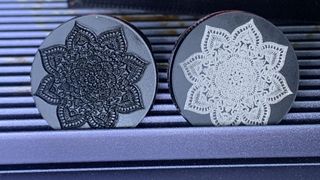
The LaserPecker handled black acrylic without problems. Again, I had to make several tests before discovering that cutting this 5mm acrylic needed 4 passes at 100% power and 15% depth. The etching was done with default settings. The dark image used the diode laser and the light image used the infrared laser. These circles are about the size of a quarter. The art work is very crisp, but there’s so much detail you need to squint to see it all.
Bottom Line
The LaserPecker LP4 is a very fast and versatile Galvo laser that can engrave just about anything thanks to its dual Diode and IR lasers. On paper, it can cut thin planks of wood up to 8mm, but because there are no presets for cutting, you will need a lot of trial and charred error to get it right. The $1,999 retail price tag is a bit steep for what you’re getting – a small, portable laser that still requires safety glasses, or an additional enclosure, to use.
It’s much better at engraving, and here it shines. The LaserPecker Design Space has plenty of creative tools and the ability to import photos or clip art to transform into lasered art. The program has abundant settings for engraving and automatically switches from Diode to IR depending on the materials you select.
I was very happy with the included software, which can handle a variety of creative projects with ease. Advanced users may want to splurge on Lightburn, but it's definitely not required. The mobile app was also one of the best I’ve seen and capable of doing everything the desktop version offers.
Focusing the laser is simple and the live preview is very helpful. However, the safety cone just gets in the way, and I ended up leaving it off and just working with the glasses. This unwieldy safety feature, hefty price tag and lack of cutting ability keeps the LaserPecker off our list of best laser cutters.
If you want a dual diode and IR laser that’s truly safe and portable, check out the xTool F1, currently available for $1519. If you want more room for lasering large items on budget, the 10 watt Creality CR-Laser Falcon is a much better starting point at $439. And if you’re looking for a full feature diode laser to kick off your Etsy shop ambitions, you should check out the simple to use Xtool D1 Pro for $1399, a 20-watt laser with excellent support.
MORE: Best Laser Cutters
MORE: Best 3D Printers
MORE: Best Budget 3D Printers

Denise Bertacchi is a Contributing Writer for Tom’s Hardware US, covering 3D printing. Denise has been crafting with PCs since she discovered Print Shop had clip art on her Apple IIe. She’s been a freelance newspaper reporter, online columnist and craft blogger with an eye for kid’s STEM activities. She got hooked on 3D printing after her son made a tiny Tinkercad Jeep for a school science project. Excited to learn more, she got a Creality CR10s and hasn’t looked back. She loves reviewing 3D printers because she can mix all her passions: printing, photography and writing. When she’s not modding her Ender 3 Pro or stirring glitter into a batch of resin, you’ll find her at the latest superhero movie with her husband and two sons.
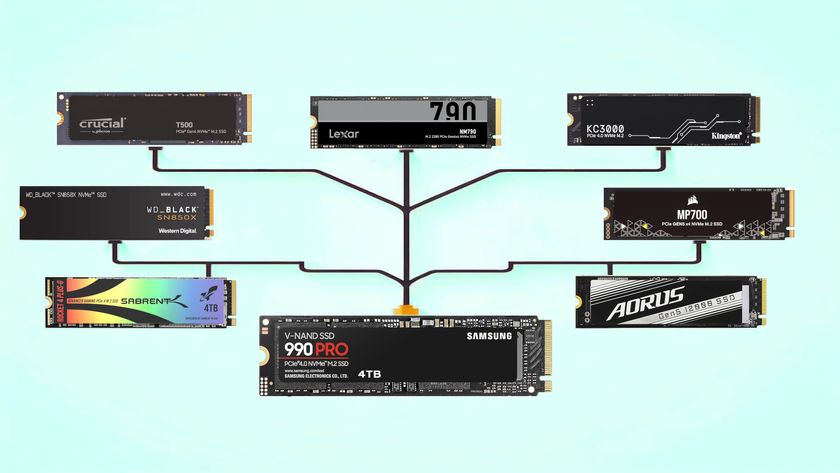
SSD Benchmarks Hierarchy 2025: We've tested over 100 different SSDs over the past few years, and here's how they stack up.
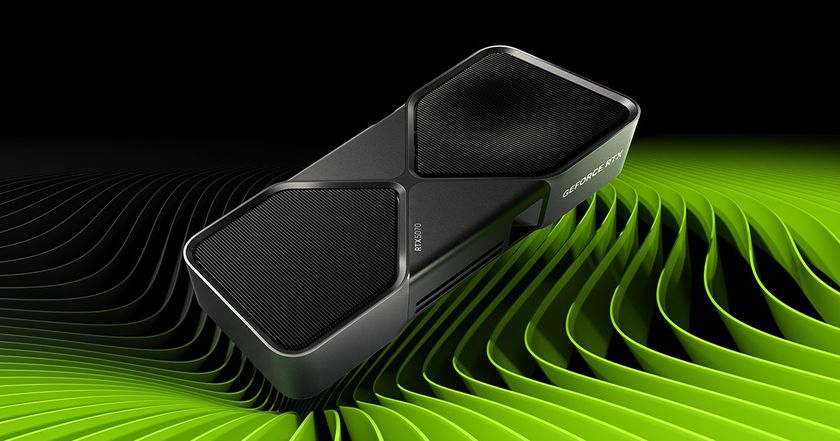
Pre-built PCs with unreleased RTX 5060 Ti and RTX 5060 GPUs crop up at online retailers
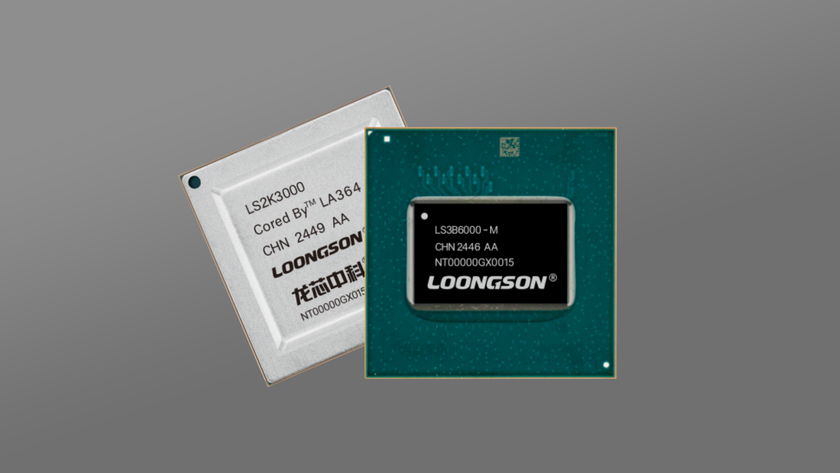
Chinese chipmaker Loongson's new laptop and industrial chips have higher core counts, better GPU
