How to run FreeDOS, an open-source version of DOS, on any PC
Yes it runs Doom
I remember using MS-DOS 6.22 on my first PC, a 486 DX 33 with a “massive” 4MB of RAM. It was quite the culture shock, upgrading from a Commodore Amiga 500, and its Workbench graphical operating system, to the text based MS-DOS. I quickly learnt how MS-DOS worked, and because I wanted sound when playing Star Wars: X-Wing, I learnt how to tweak my configuration.
MS-DOS is (sadly) long gone, but if you want to relive the old days, or if you have applications that refuse to work with a modern Windows OS, then FreeDOS is for you.
FreeDOS is an open source operating system that is largely compatible with MS-DOS and behaves just like it. If you dream of flying through space to defeat an empire, or you have an old DOS application that you want to use again, then it’s for you. In this how-to, we’ll go through how to install FreeDOS inside of a virtual machine, and on to real hardware.
FreeDOS comes in multiple versions, depending on how you want to tailor your retro experience.
- An image for use with virtual machines (FreeDOS for everyone).
- A live CD image for use with modern hardware.
- A legacy CD image for older hardware.
- A floppy disk edition for classic hardware.
For the virtual machine, legacy and floppy versions there are additional “bonus” disk images that contain extra applications. These applications are bundled into the full USB version for modern hardware.
How to install FreeDOS on a virtual machine and real hardware
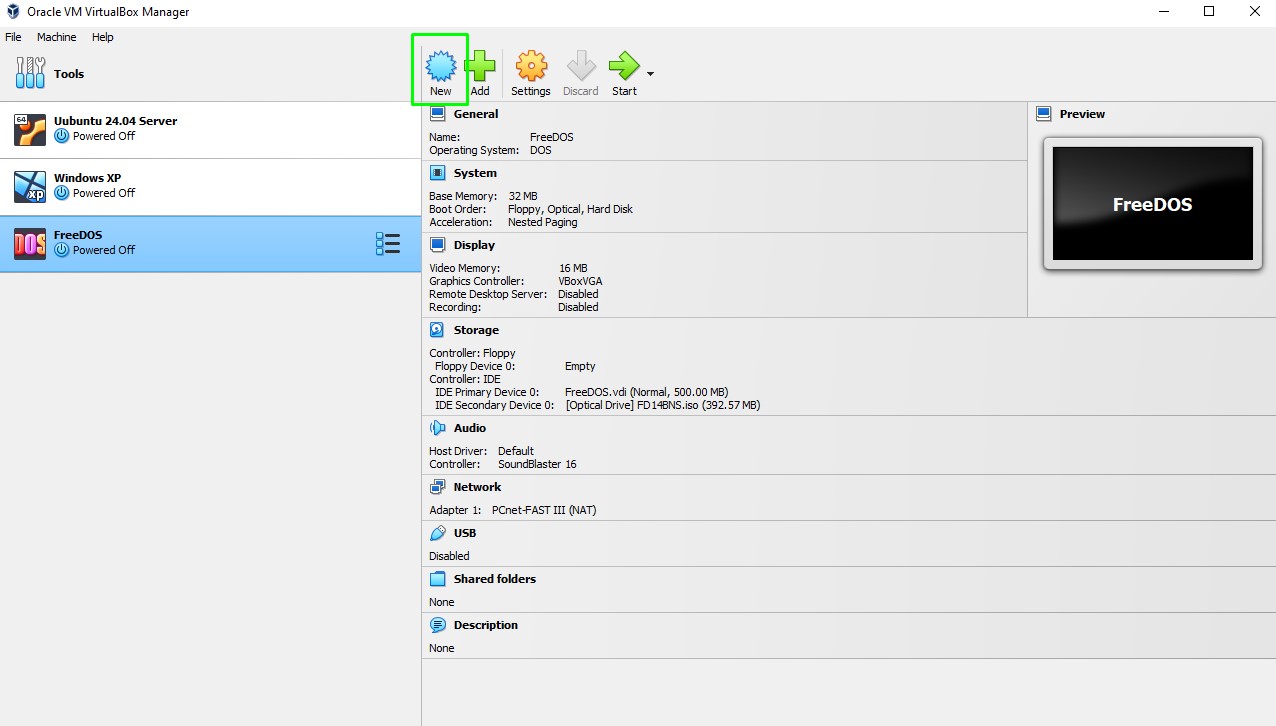
To manage our virtual machine (VM), we used Oracle’s VirtualBox. This easy to use application manages multiple VMs and best of all it is completely free.
1. Download and install VirtualBox for your operating system. There is a version of VirtualBox for Windows, macOS, Linux and even Solaris.
Stay On the Cutting Edge: Get the Tom's Hardware Newsletter
Get Tom's Hardware's best news and in-depth reviews, straight to your inbox.
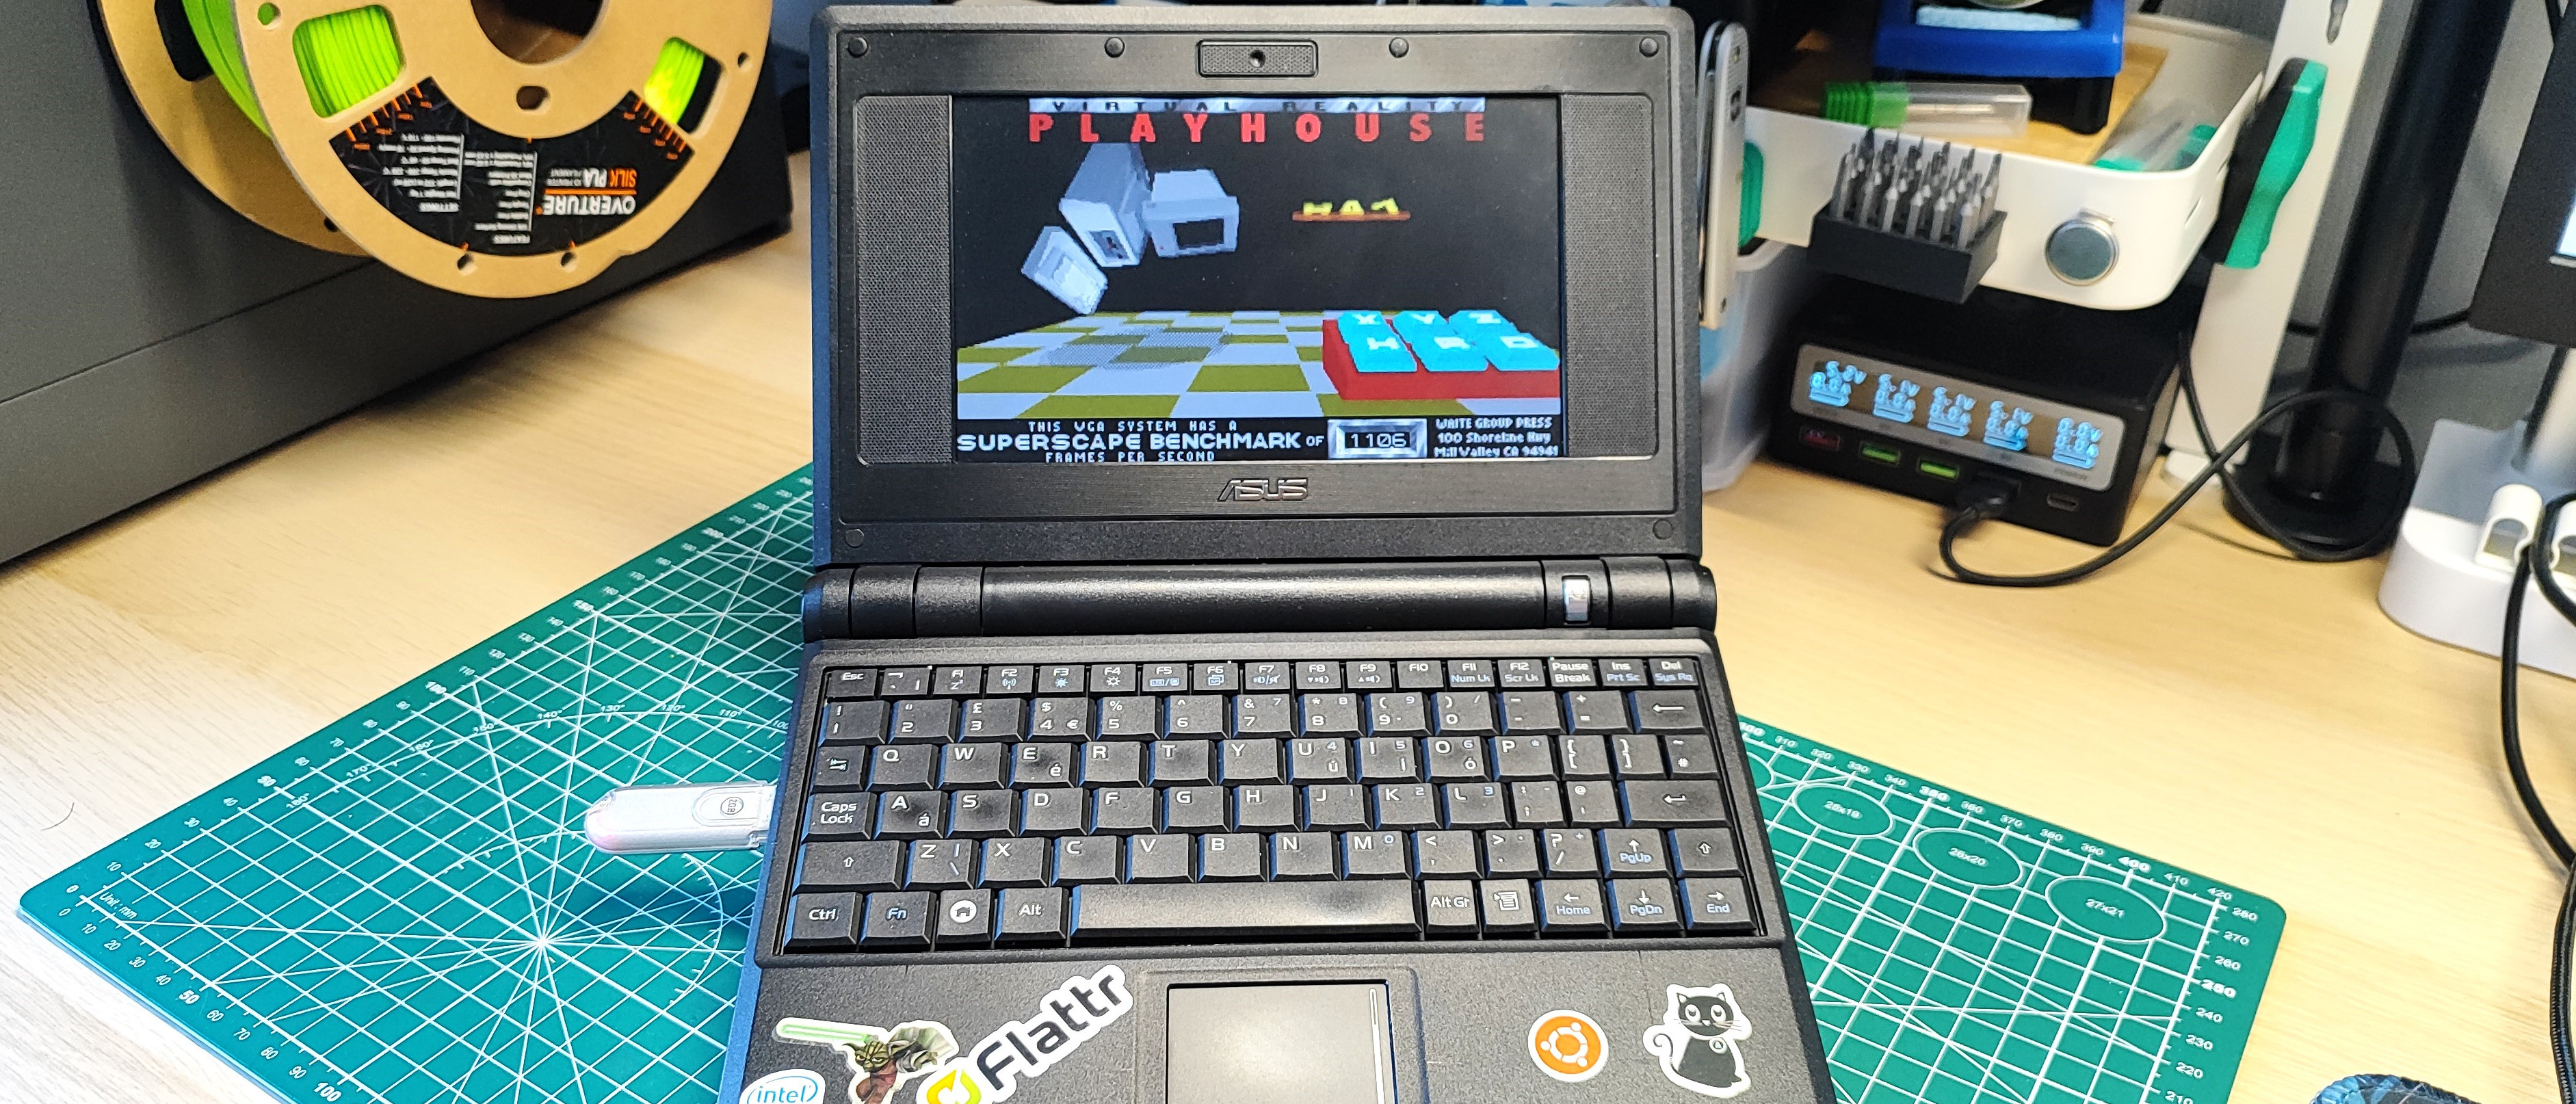
2. Download FreeDOS for everyone, and extract the ZIP archive to a directory. If you are installing to real hardware, download the appropriate live CD or floppy image for your target system. On an Asus eeePC 701 we used the live CD for modern hardware.
3. Open VirtualBox and click on New to create a new VM.
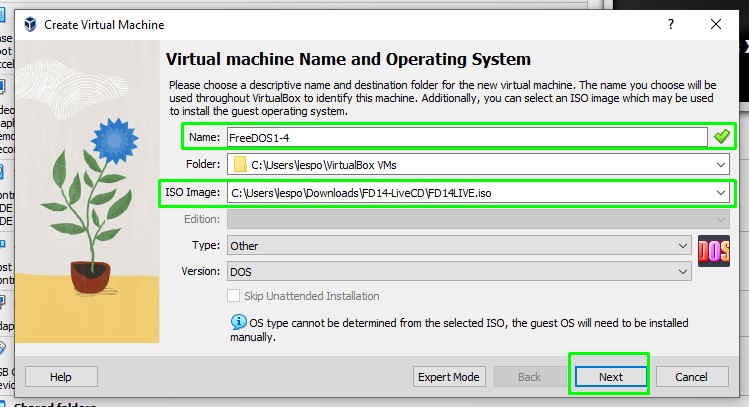
4. Call the VM FreeDOS1-4 and use the FD14LIVE disc image that was previously extracted. Click Next.
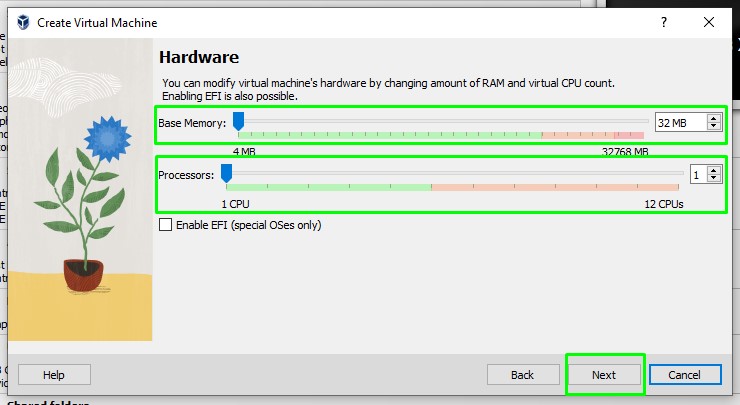
5. Set the RAM and processors for the VM and then click Next. As this is a typical DOS machine, 32MB is considered an immensely powerful system. You could easily use 8/16MB instead.
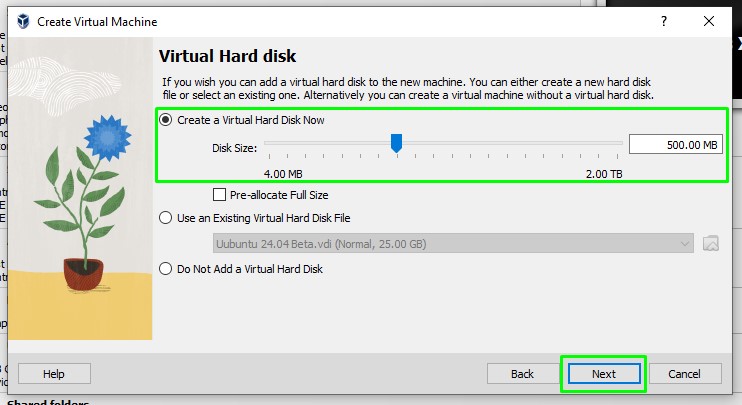
6. Create a Virtual Hard Disk of around 500MB and click Next. Our first PC had “just” a 120MB hard drive. Enough to store our MS-DOS, Windows 3.1 and plenty of games.
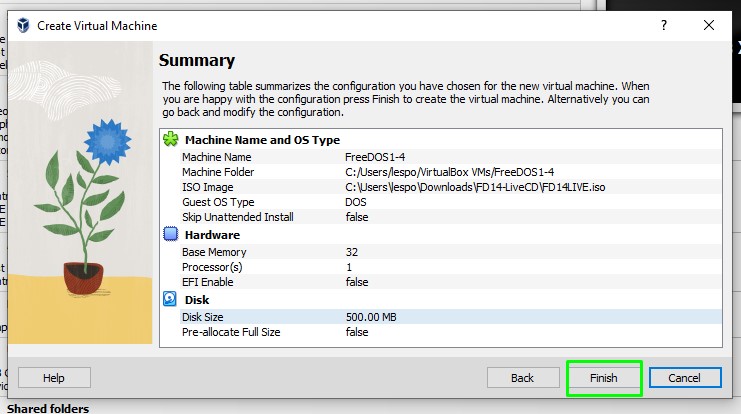
7. Check the summary page, and click Finish to create the VM. If you need to change anything, just click Back until you reach the correct section.
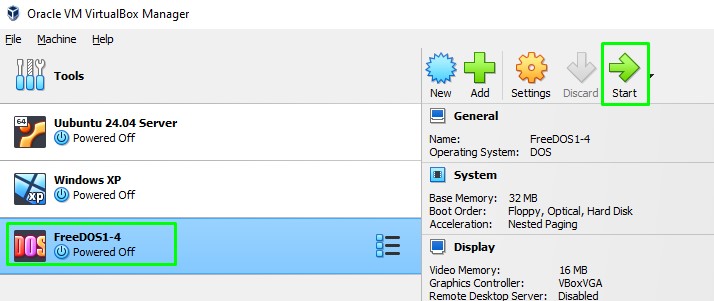
8. Select the VM from the list and click Start to power on the VM. We are essentially powering on a virtual computer.
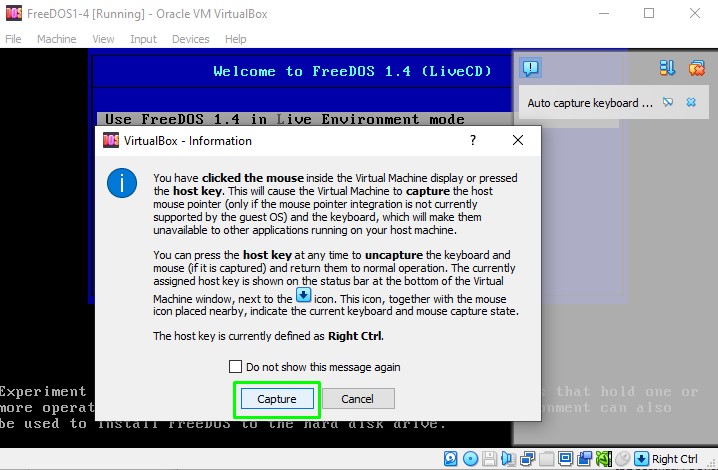
9. Click the mouse inside of the VM window to trigger mouse capture. This ensures that input is captured in the VM and not the host OS. This can be turned off at any time by pressing the right CTRL key. Clicking back in the VM window will capture the mouse again.
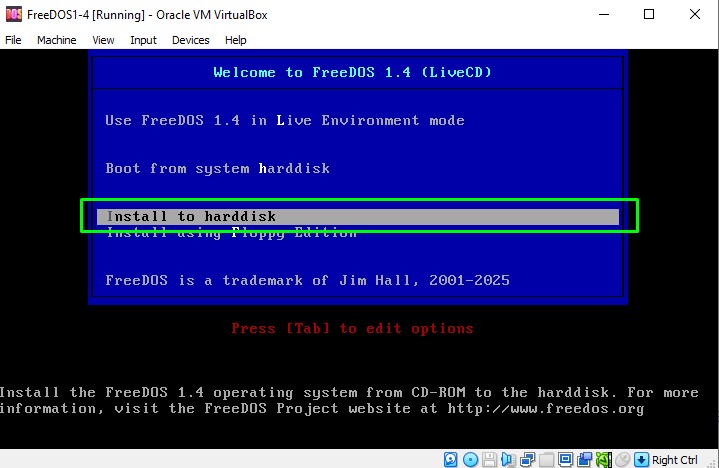
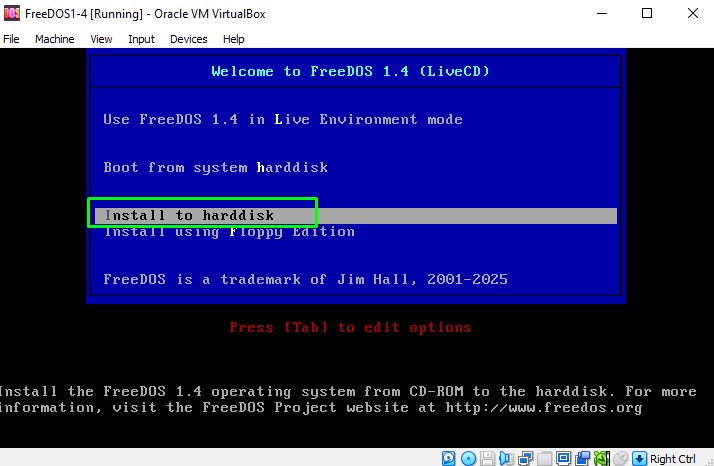
10. From the menu, select Install to harddisk and press Enter. This will start the FreeDOS installation process.
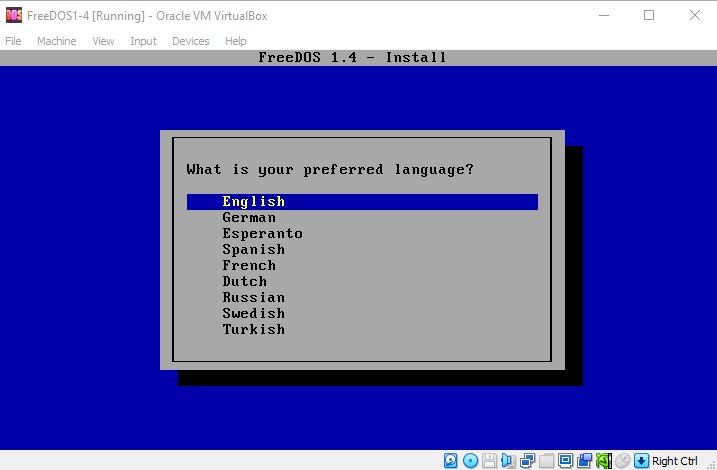
11. Set your preferred language for the installer.
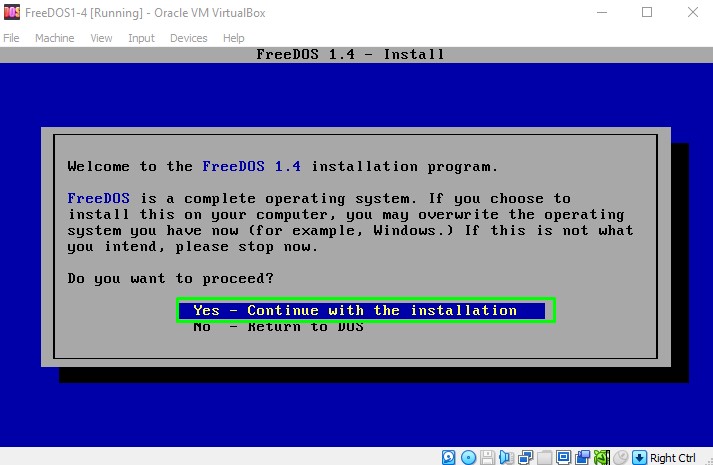
12. Confirm that you wish to perform the installation and press Enter.
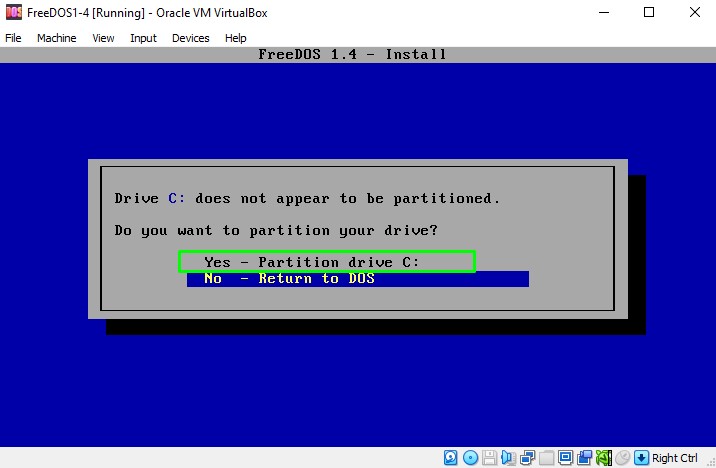
13. Select Yes to partition the drive. Our virtual hard disk is blank, and needs a partition and format before it can be used.
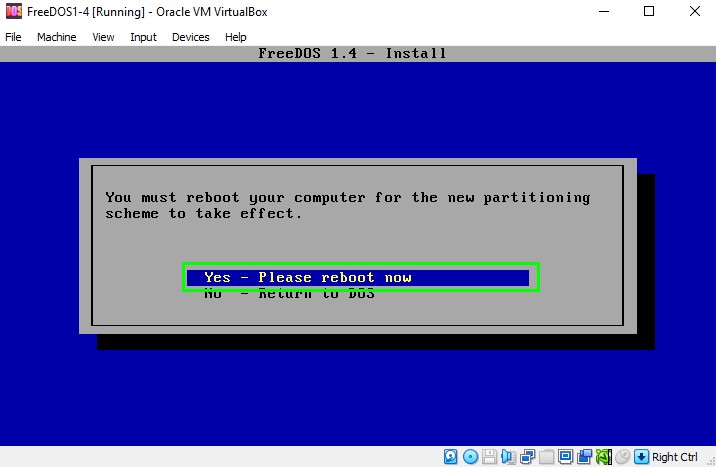
14. Reboot the VM for the changes to take effect.
15. From the menu, select Install to harddisk and press Enter, again. Yes we have to go through the language selection and confirm the installation again.
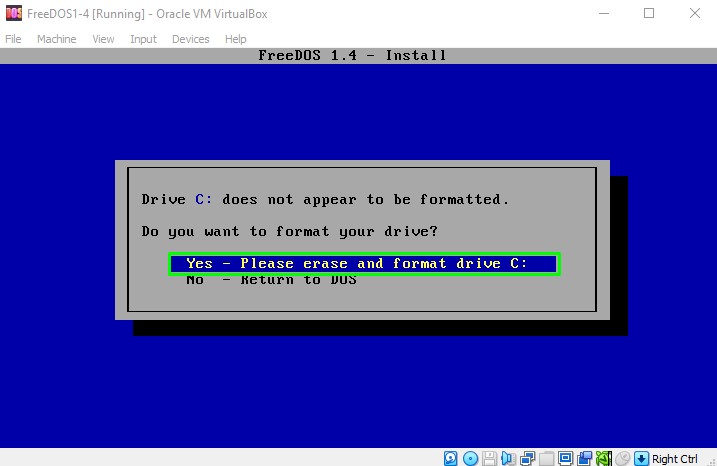
16. Format drive C: so that it can be used for the installation.
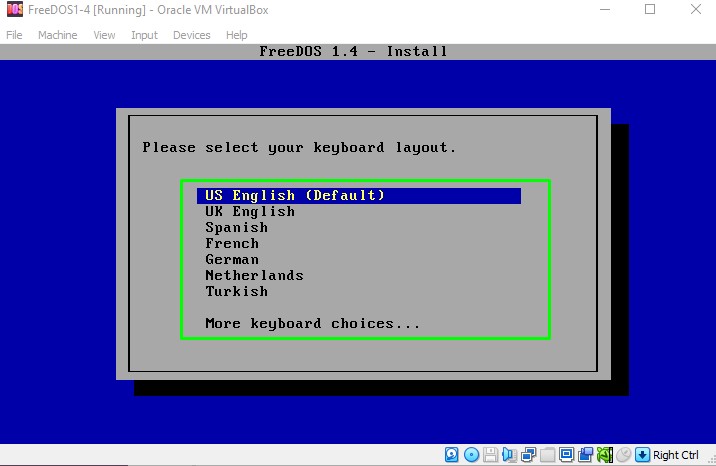
17. Select your keyboard layout and press Enter. There are more keyboard layout choices via the More option.
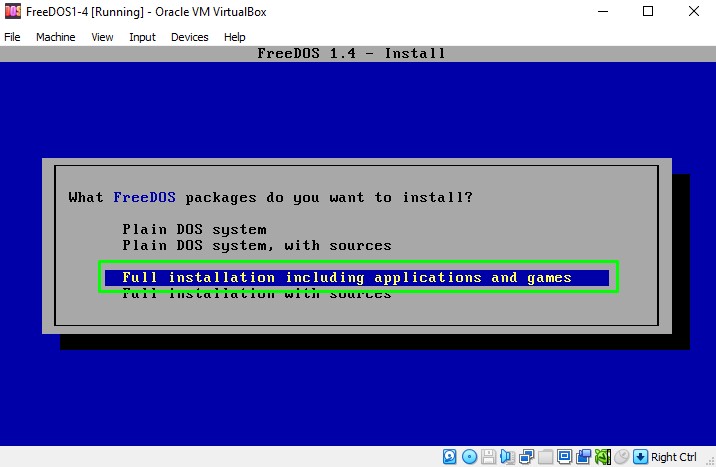
18. Select Full installation including applications and games and press Enter. This installs every part of FreeDOS, including a selection of games and demos.
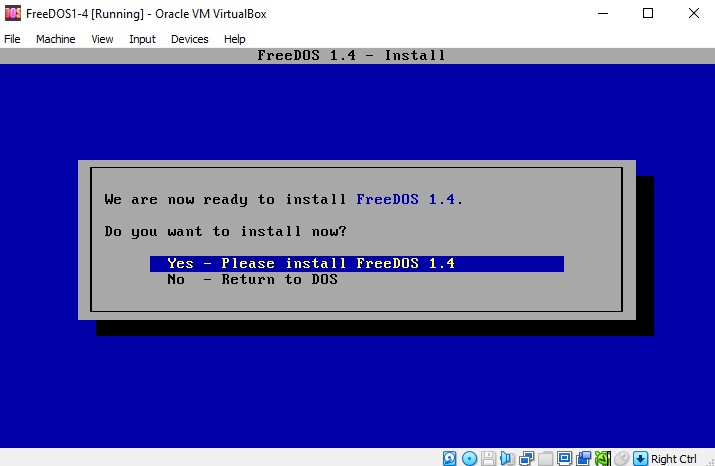
19. Select Yes and press Enter to install FreeDOS to your virtual machine.
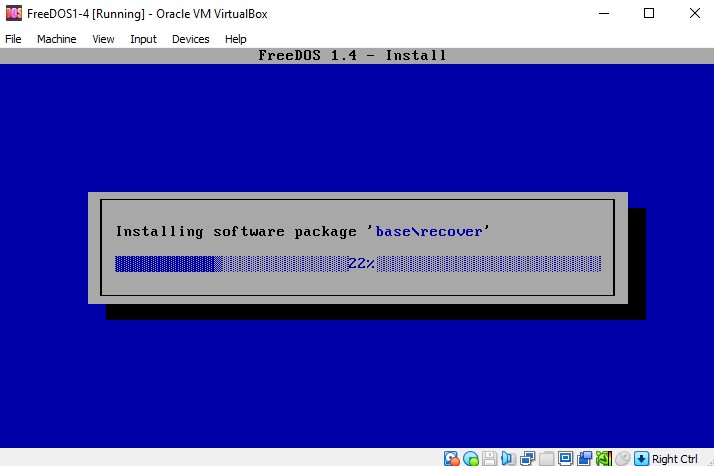
20. Leave the installation until prompted to take action.
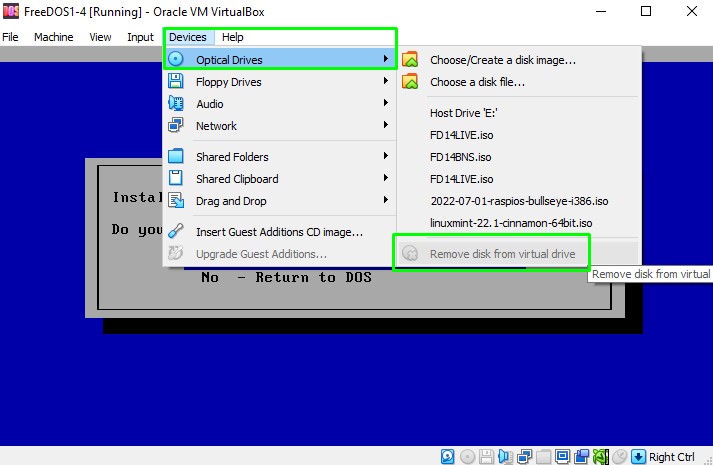
21. Press right CTRL and then click on Devices >> Optical Drives and then Remove disk from virtual drive to “eject” the virtual CD image.
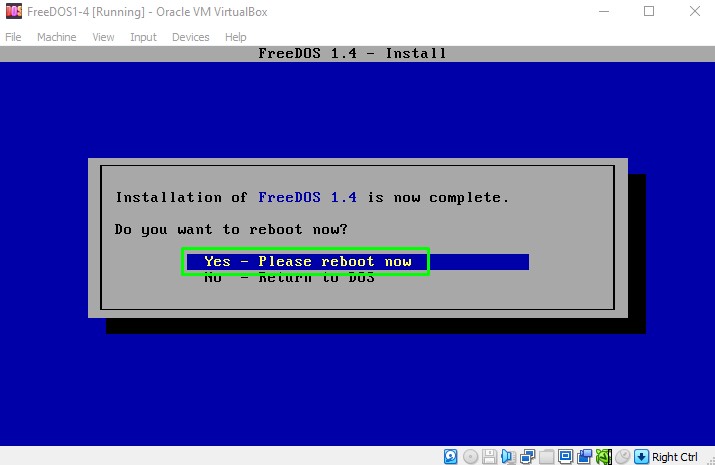
22. Back in the VM, select Yes and press Enter, to reboot the VM and boot from the FreeDOS install.
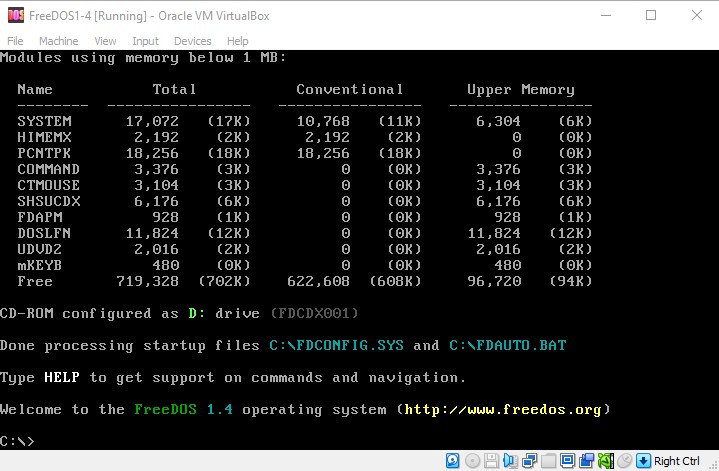
23. The VM will now boot into FreeDOS directly from the virtual harddisk.
With FreeDOS installed, we have a series of directories full of applications, games and tools that we can use to get started with FreeDOS.
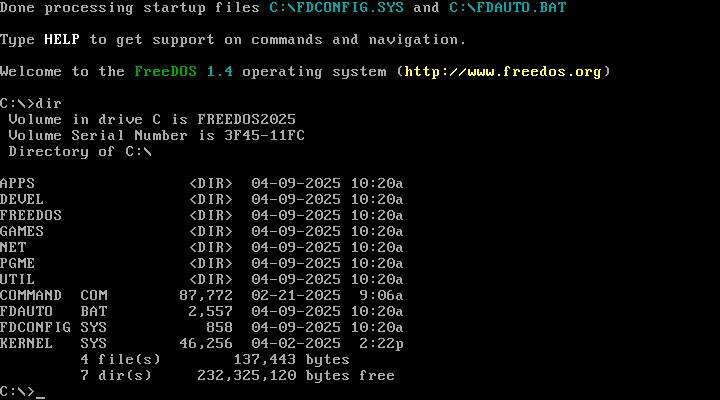
Directory Name | Example Applications |
|---|---|
Apps | Applications for audio playback such as LAME, Blade Encoder, MIDI playback. |
Devel | Developer demo files for interacting with the Logger device driver. |
FreeDOS | FreeDOS specific configuration files for the OS. |
Games | Doom clones, Boom and FreeDoom. FlappyBird, Tetris, Sudoku. |
Net | Networking and Internet browsers such as Lynx. |
PGME | Program and Game Manager application. |
Util | Utilities to work with archives. |
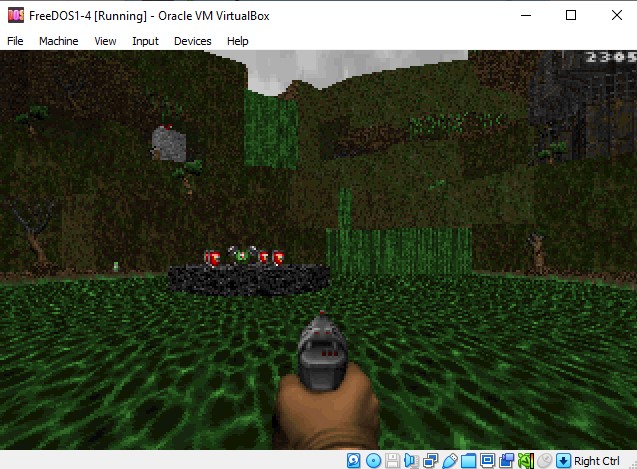
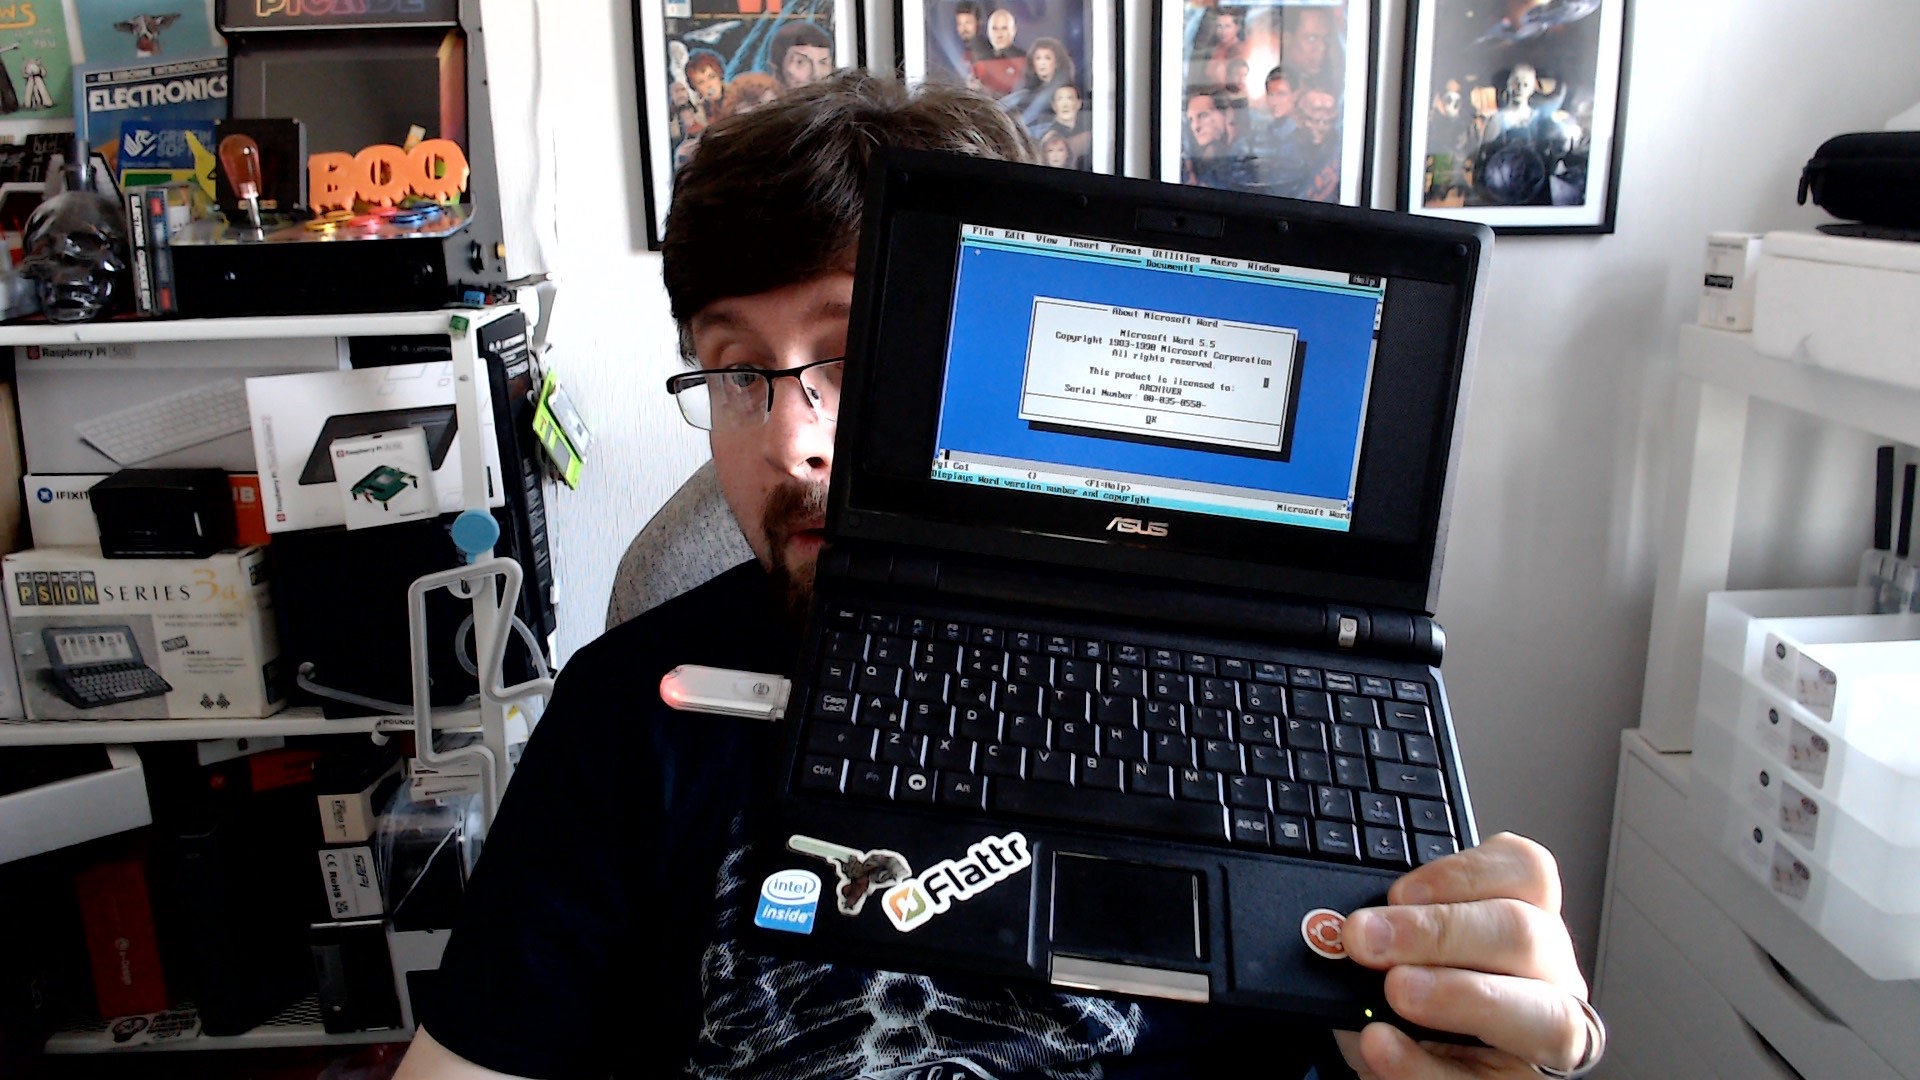
We “tested” the Games folder and found FreeDoom to be very playable, even with the quirky arrow keys for movement setup. There is plenty of fun to be had with these games. We even found Vertigo, a full flight simulator! It's very hard to play with a keyboard!
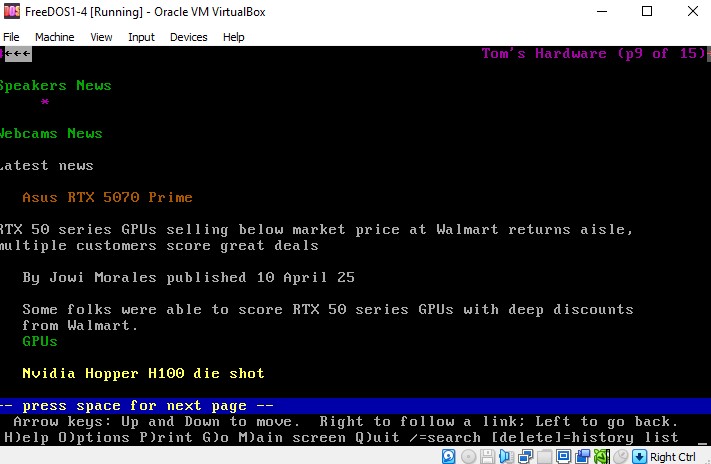
If you need to make a connection to the outside world, then the Net folder contains applications to browse the web (slowly) and to make SSH (Secure Shell) connections to remote devices. On real hardware you need to make sure that your Ethernet device is supported, on a virtual machine it just works.
Sharing Files with FreeDOS
Sharing files / folders with FreeDOS differs between virtual and real hardware. On virtual hardware we need to share using CD ROM or floppy drive images of our legally owned software.
Real hardware users can plug in a CD ROM drive, or a USB drive into their machine and work as normal. A quick note though: The USB drive must be attached when the system is powered on. You cannot insert it after as the OS will not detect the drive. Drive detection is performed on boot. Once you learn this quirk, you’ll see adapt and have files to and from your FreeDOS install.
Les Pounder is an associate editor at Tom's Hardware. He is a creative technologist and for seven years has created projects to educate and inspire minds both young and old. He has worked with the Raspberry Pi Foundation to write and deliver their teacher training program "Picademy".
